Polar Loop In-Depth Review

The Polar Loop is the very first daily activity tracker on the market that not only counts steps, but also connects to a separate heart rate strap – providing you with heart-rate based calorie information for activities. This changes the landscape a bit from existing activity trackers where the units provided a complete guesstimate for calorie burn while you were out exercising. But does it provide that perfect nirvana of the two types of monitors? Over the past few months, I set out to find out.
Because I want to be transparent about my reviews – Polar provided both beta and final production Polar Loops, with this review being written on the basis of the final production hardware + software. As always, in the next little bit I’ll be sending them back to Polar and then going out and getting my own (to be able to support y’all in the comments section down the road). Simple as that. Sorta like hiking in wilderness trails – leave only footprints. If you find my review useful, you can use any of the Amazon or Clever Training links from this page to help support future reviews.
Lastly, at the end of the day keep in mind I’m just like any other regular athlete out there. I write these reviews because I’m inherently a curious person with a technology background, and thus I try and be as complete as I can. But, if I’ve missed something or if you spot something that doesn’t quite jive – just let me know and I’ll be happy to get it all sorted out. Also, because the technology world constantly changes, I try and go back and update these reviews as new features and functionality are added – or if bugs are fixed.
So – with that intro, let’s get into things.
Unboxing:
The Polar Loop is the only activity tracker I’ve unboxed yet that actually has a box appropriate to the size of the unit. The rest have boxes that make the unit look like a cow pie on a cow field. The Loop on the other hand fits in a box that’s about the right size of 2-3 (appropriately sized) cookies.


Inside, you’ll find four things, three of which are pictured here (the fourth I’ll get to in a second). These three things include the Loop itself, the Loop charger, and a piece of stiffer paper that’s actually really important – DON’T throw it away!

As for that 4th piece, well, I discovered that a bit later. Turns out the little baggie below got stuck inside the box and I didn’t realize it. Like the paper card, this little piece is critical to making the installation happen. The tool will be used to pop out the pins, as well as add-in replacement pins.

Taking a quick look at the unit itself, here’s what you’ve got. This would be the ‘front’ side, with that little roundish dot – a button that we’ll cover later.

Here’s the back clasp, another area we’ll dive into as we take it apart a short time from now.

Behind the front side is the charging port, which uses a special charging connector that ultimately connects to your USB port on your computer (or spare charging block).

Speaking of the cable, here it is. You can see it kinda reminds me of the old-school S-Video cables from years past.

And here’s how it connects to the Loop. It has a small magnet in it to help keep it in place. In the beta hardware I had some issues with it, but that was resolved in the production variant – so very happy with it.

Finally, here’s that card I was talking about. The card turns into a ruler and instruction set. Eventually it’ll end up being two cards – one part ruler, one part instructions. So be sure not to throw it away until you’re finished with the arts and crafts project section.

With that, let’s dive into how it compares to other units on the market today.
Initial Setup and Configuration (Hardware):
I initially posted this setup as part of my ‘First Look’ Review, and decided to keep it in whole without changing it any. The reason being that I felt it most reflected my thinking at the time since I wrote it immediately after doing the following arts and crafts activity.
Given I lack small children at the moment, I don’t get too spend too much time with scissors and rulers. Or flavored glue sticks. But today that would change. See, the Loop comes with a default size that’s large enough to affix the unit to Squatch (yes, I’m from Seattle).

So, you’ve got to fix that. While most other players in the market solve this via some sort of clever lego-block style system (Nike), or just different SKU’s (Jawbone) – Polar went in the direction of simply requiring you to get out your scissors. Since The Girl doesn’t let me use her nice scissors, I have a $1 pair from Ikea that’s all mine!

First you’ll grab that card from the package. The card is actually your ruler. So go ahead and separate it:

Then, wrap it around your wrist to measure yourself. I assure you, doing this and taking a photo of it is one of the more difficult photos I’ve taken during a product review. Especially when you’re too tired to setup a tripod:

The numbers you see represent how many ‘chunks’ you’re going to cut off from each side of the strap.
To do that, we’ll go grab that metal doohickey in the box and poke out the pins of the strap clasp:


Next, the moment of truth: Measure twice…and cut twice:

You’ll cut the band on both sides to be shorter:

Ok, then grab the metal thingamajig and put the pins back in place:

Presto, the right size!

Ok, it actually took me two tries as it was still a bit loose after taking off the initial chunk. But, nonetheless, mission accomplished!
Now that we’ve got the physical pieces all taken care of, we’ll dive into the software pairing next.
Size Placement and Comparisons:

With so many devices on the market these days, I figured it’s probably worthwhile showing a bit of a comparison of where things stand. Ultimately, virtually all on-market devices today fall into one of two camps: Wrist based or belt/clip based. First up, the belt/clip based units.
Today, the most common units in this category (clip-on) would be the variety of FitBit units (Ultra, One, Zip), as well as the Withings Pulse, and then a small collection of units from Sportline as well:

Then, we have those that are wrist-worn, including the Polar Loop. These must be worn on your wrist in order to get accurate measurement. You can see the Loop in the photo below on top of the Nike Fuelband, and then the FitBit Flex below it.


If we look at placement on one’s arm, here’s a shot of me, and my wrists:

Now of course, if we were to size a unit for someone else, you’d have to change the wrist strap (cutting it). Hence why I don’t have a shot of The Girl using it.
Initial Setup and Configuration (Software):
Now it’s time to get everything all setup and configured. The first step will be downloading some software to your computer (PC or Mac). This is required to get things started.

The software, called Polar FlowSync is designed to allow you to sync your activities to the web, as well as update the firmware on the unit. You can also sync via the phone, but for now you’ll need to start with your desktop/laptop.

Once you’ve installed the FlowSync software, it’ll go ahead and ask you to connect your Loop via the provided USB cable.

Once you’ve done this it’ll find the device and likely prompt you to update it:


Now that you’ve completed the desktop connectivity steps, the software can be used for both updating the unit in the future, as well as synchronizing activity data. You can see below that as I plug it in, it’ll upload the data automatically:


Then, it’ll give me a summary page:

So with that, let’s get onto using the Loop.
Day to Day Use & Recording of Activity:
Using the Loop is really as simple as just wearing it. Like most activity monitors on the market, it only has a single button for control. The button can be found to the right of the display (assuming the Polar logo is the correct orientation while wearing).

The button simply iterates through the different display fields. It’ll always show you the last display field you viewed, first. In my case, that last field was ‘Steps’. So when I tap it, I’m presented steps:


Next, there’s ‘Time’. It’ll show the time of day, relative to whatever you’ve set on your computer or your phone. This is automatically kept in sync as soon as you synchronize data – handy if you travel and cross time zones.

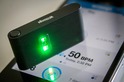
Then there’s the ‘ACTV’ field, which shows you activity level. The display is basically a long bar that fills up as you make progress towards your daily goal:

It’ll give me another field then displayed as ‘TO GO’, which means how much more activity till completion of my goal. It presents a few options like walking or jogging, and the amount of time required for that activity. Though while it says ‘Walk’, that basically translates to low-intensity activity. Versus ‘Jog’ means high-intensity activity. If you see the words ‘Up’, it just means to get off your lazy butt and do something. Anything. The manual suggests starting by playing darts.


Lastly, there’s the display for calories, which is shown as ‘CAL’. This includes your baseline basic metabolic calorie burn that you’d have just for being alive. So basically it’s giving you the total calorie ‘allowance’ for eating ice cream for that day. At least, that’s how I look at it.

Now, there’s a few other display messages you’ll get – generally around battery usage. Also, you can flip the unit into flight mode (turns off Bluetooth) by holding down the button for 10-seconds.
It’s also worthy of note that in the app you can change which wrist you wear the unit on, which can in turn flip the display orientation. Polar recommends wearing it on your non-dominant hand. Basically, if you’re right handed wear it on your left wrist, and vice versa. We’ll get to the app in a bit, hang tight.
Heart Rate Strap Pairing to the Polar Loop:

Next comes likely the most appealing aspect of the Loop – the ability to pair to a Bluetooth Smart heart rate (HR) strap. Any Bluetooth Smart heart rate strap will work (note: not old-school Bluetooth, must say Bluetooth Smart). I’ve tried it against a handful of straps I have around me, including the Polar H7, the 4iiii’s Viiiiva, and the TomTom Bluetooth Smart strap. In theory, all straps follow the same device profile specification for interoperability, and should work without issue.

In order to pair the Loop to your HR strap you’ll need to be wearing the HR strap, or otherwise fake wearing it (just rub the contacts for a few seconds). Once that’s done, go ahead and bring the Loop close to your heart rate strap and then give the button a tap. This will initiate the pairing process. While the device should be using proximity pairing to increase the chance it’ll connect to that particular HR strap, you’ll generally want to pair the device at a location where you’re the only one wearing a Bluetooth Smart HR strap. In other words, don’t do it in the starting corral of a running race. Once paired, you’re good to go with that unit.

Note that Bluetooth Smart doesn’t allow multiple devices to connect to the HR strap at once. This means that if you have a phone app that’s otherwise using the strap you’ll need to disconnect that app from using the strap. The inverse is true as well if you want to use it with your phone, you’ll need to disconnect it from the Loop. That’s a bit more tricky. So it’s easiest to simply go toss the Loop in the room next door, and then let the app pair and secure/hold the Bluetooth Smart channel.
At any rate, as for using it, it’s really rather simple – it just records your HR data from that point forward. Unlike most sports devices, the Loop is indiscriminate and doesn’t know of a given starting point or ending point. It just knows you’re wearing a strap and records the data from it.
I’ve had no issues in connectivity between the strap and the Loop while wearing it, including under multiple layers of clothing.
The real benefit here is for activities like cycling. In this case, most traditional activity trackers (FitBit, Nike Fuelband, etc…) all would basically be blissfully unaware of the effort you’re putting out. That means in the case of the ride below, I was able to get actual calorie information because it was using the HR data instead of just no-step data.

The unit will also display two variations of what it thinks your effort is, in two categories: “Fat burning” or “Fitness” mode. Basically in fat burning mode it implies that your HR is within a zone that burns fat. In my testing, I’ve found that zone roughly corresponds to any HR that isn’t in the ‘Fitness’ zone. In other words, if you’re alive, you’re in fat burning mode. Unless you’re at the top end, in which case it’s fitness mode.
Now the funny part here is that the unit doesn’t actually display “Fat Burning”, instead, it just calls me “Fat”:

I see how you work Mr. Loop! Clever little thing.
Now, once you complete an ‘activity’ there’s no way to stop the activity (like when you get off your bike), so instead you’ll need to disconnect the HR strap. At which point the unit just goes back to doing it’s normal thing.
Post-work once you’ve uploaded the data to the site, you’ll see your “session”. That’s what Polar calls the time from when it first started receiving HR data, until the HR strap was disconnected:

Now, the trick here is that this session includes a lot of extra junk. In my case it includes finishing getting changed (HR strap was many layers below), then getting outside, then my ride, then post-ride photos of a bunch of devices, then getting back to the house and jumping straight on a conference call for an hour or so. In this case, the ride was only a whopping 30 minute easy recovery ride. But there’s otherwise hours of ‘garbage’ data.

The cool part though is that Polar has predicted this little situation. So you’ll notice on the session the option to slice off the beginning and ending chunks, thus giving you just the actual activity portion:

Now you’ll see the correct duration as well as the average HR during that activity. The only catch here is that I can’t actually ‘save’ this chunk. Rather, it’s just a temporary filtered view until I change my view.
If I look at a running activity, I can do the same thing. In this case it also gave me HR zone information because I crossed into the magical ‘Fitness’ (FIT) category:

Of course, the key here being that during these time periods it utilized my heart rate to determine calorie burn, rather than just pure steps. That’s important because in the case of cycling – I’d have no steps. And in the case of running, there were some portions of that run that were harder efforts, which can result in increased calorie burn.
Uploading the data onto your phone:
The Polar Loop supports synchronizing your activity data directly with your phone, which in turn synchronizes it with the Polar Flow website (where you can view the data). Additionally, you can view some basic data on your phone as well.
Polar does this via the ‘Polar Flow’ app, which is what you’ll search for in the stores. This app is your connection point to uploading data to the Polar Flow website. Polar Flow is Polar’s new website that all the Polar Loop data gets sent to. Additionally, all data recorded on the Polar Beat app (which is Polar’s GPS tracking app with heart rate/footpod sensor support) gets sent there as well. I reviewed the app a bit ago. Going forward, all new fitness devices will use the Polar Flow site instead of the older Polar Personal Trainer site.
After you install the free Polar Flow app and get it all paired up, you’ll simply need to tap the button on the unit to trigger a Bluetooth Smart download. When you do that you’ll first see the unit synchronize the data with the phone, and then it’ll upload the data to the site:


At this point, the data is viewable on the phone. You’ll see two different variants of any given day’s view. The first is this 360* view showing how much time spent in each ‘zone’, whereby the zones are colors, and darker is better. Along the bottom you’ll see little icons indicating what it thinks you were doing. The second view is a clock view of the day, shown as a single 24hr loop. Honestly, I find this view really confusing compared to bar-charts that most other fitness trackers do. In part because this 24hr clock has the hours of the day all mis-aligned as a single 24hr day, rather than a typical 12hr clock.


Here you can see the different zones as well as a summary at the bottom of me hitting my goal for that day:


The sleep value that it quotes is actually reasonably accurate based on what I actually slept that night. Sleep is automatically determined, and no buttons must be pressed or otherwise triggered. It simply looks at movement to determine when you fell asleep.
In the event I haven’t yet completed enough activity for the day, it’ll give you a bunch of options for how to accomplish that goal. Some of them are actually pretty funny:


Looking at the summary information, I can change the view to either Weekly or Monthly views as well:


If I tap the little three lines on the upper left, I can get a drop-down menu to access other portions of the app. in this case, I’ll go ahead and switch to the training summary view:


Within this view I can view the session I did with a heart rate strap. I can tap on the session and then get a little HR chart, as well as detail about it if I slide lower in the app:


Next, going back to the menu I can access the ‘Info’ section to basically read the manual:


And finally, in the settings I can change my account details (profile pic, date, etc..), as well as change which wrist the unit is worn on:


I can also change the unit display (Imperial or Metric), as well as modify notifications. Notifications are supposed to occur when I’m inactive longer than 1hr. But in reality, I’ve never seen a notification alert…ever. Perhaps I’m just too active (unlikely), or perhaps it just isn’t working for me. It does require the phone app be running in the background (which mine is). I’ve checked with another friend using a Loop, and no notification love their either.

With that, I’ve covered everything you can tap on in the app, so let’s move on. Note, the Android app is not yet available at this time, and Polar is targeting a March/April 2014 timeframe for availability there.
Uploading the data onto your computer:
While I’ve already covered this a bit, just for clarity, you can upload data from your computer using the PC or Mac app. To do so, you’ll use that nifty black and red USB cable that came with the Loop and you’ll plug it into the computer.

The Polar FlowSync software (that’s what it’s called on the PC), will automatically detect the connection and start communicating with the unit.

Upon the completion of the synchronization, it’ll provide you with a summary of your upload. In general, this only takes about 30 seconds or so (and, is sometimes a fair bit quicker than via Bluetooth).

With upload complete, let’s head on to the data provided by the unit to the web service: Polar Flow
Polar Flow: Data provided via Web/Phone Apps:
Now that we’ve got the data to the website (via phone or USB), let’s look at that side of things briefly. When you login, you’ll be presented with a dashboard view of various activities in various places by various people that you don’t know.

Now, if you click on some random person, you’ll see detail about the activity in a little musical mash-up. All of these activities at present are coming from the Polar Beat app, since they have location information with them (the Polar Flow activity monitor does not include said location information). It even shows you the exact Google Streetview locale of the start of the route and random points along the way.

It’s actually pretty cool in that respect. You can’t pick the exact point from the ‘Relive’ option, but you can watch the pre-canned video pick various points.


You can choose to follow someone, potentially a friend, or just someone you want to stalk. When you do that, they’ll show up in your ‘Feed’ which is accessed along the top:

Don’t worry, you can change the privacy settings. By default, everything was locked down for me. Here’s the settings after I changed them so I have to approve new followers, but once approved, they can see my activities:

Next, I can go into the Diary view, which shows how much activity I’ve accomplished each day. Some days, like this past Friday and Saturday, I didn’t wear it skiing – so there’s less activity there.

If I scroll down, I can get summary information about that day/week/month:

The only thing I don’t like is the wording around ‘active time tracked’, which is basically telling you ‘more active time’, rather than just time tracked. I find it confusing. Given I wore the device nonstop for nearly the entire month of November, it’s sorta weird that it only shows 4 days and 5 hours. I’d prefer it just tell me how much I actually wore it for.
I can dive down into a given day and look at the view of that day from an activity standpoint. In this upper view though, it really only shows the actual session on that day (with the HR strap).

It’s not until you scroll down further that you get the same view you see on the phone:


If I had clicked on the activity, I’d be brought to the activity session view that I discussed earlier in the heart rate strap section.
The last header at the top is the ‘Progress’ reports one. But this is really only for sport activities with the HR strap, or with the Polar Beat app. It doesn’t really apply for calories burned just day to day while walking around.

Finally, last but not least, there’s a bunch of settings options. Within here you can modify your profile as well as tweak display settings.

The one thing that’s missing though is a data export option. That’s concerning as there’s no way to export your data from the Polar Loop site, either in CSV format or anything else. Ideally I’d like to see activity data exported via both simple CSV file, as well as API’s for other apps/platforms to connect to. While the Polar Loop platform is really only a month old, every other platform for activity trackers on the market has an API.
Polar says that an API is in the works, and that it should be available as early as the end of the month for Polar Loop data. They noted that companies are already using it today (like MapMyFitness) for other portions of the Polar platform, and that the expansion there will enable these partners to access the Loop/Flow data.
On the heart rate side, it’d be nice to see the ability to snip the given workout chunk, and then export that file out to other services (like Training Peaks or similar).
Data Accuracy:
Step counter accuracy is always a test I do, though, it’s not the easiest (or greatest) test to work from. First, I start off with a simple 100-step test just to understand how things correlate. This is flat great and easy to follow. Except, one problem. The Loop doesn’t appear to calculate steps instantly, like every other tracker. Instead, there’s a delay. Roughly seems to be between 30 and 60 seconds delay. Except no matter how many times I tried doing my walk test, nothing ever quite lined up – was usually off by half or more. Making me think there may be a greater delay there.
Thus, I gave up and moved onto looking at longer term full-day tests. In all these scenarios I did NOT include any sort of running or other workouts. If I did ride a bike share bike around town (errands), I just left as-is, since that seems like a very reasonable task for many people to do.
Day 1: FitBit Zip: 6,417 Polar Loop: 6,479
Day 2: FitBit Zip: 3,241 Polar Loop: 3,890
Day 3: FitBit Zip: 8,128 Polar Loop: 8,542
Day 4: FitBit Zip: 6,819 Polar Loop: 7,845
Day 5: FitBit Zip: 7,111 Polar Loop: 7,545
As you can see, it’s generally in line with other units, and, in general there’s strong correlation with being just slightly higher than the FitBit Zip.
You’ll rarely ever see things be exact on these, as various conditions such as steps, quick turns, etc… can be measured differently by different devices. That’s generally what I see across the board with activity trackers. Instead, you’ll want to focus on them being more of a gauge of distance than an exact measurement. Still, I think the value is there for getting healthier, or determining whether you really did have a ‘very active’ day, or a ‘very passive’ day.
Water Resistance:

Perhaps my second favorite feature of the Loop is that it’s ‘properly’ waterproofed to 20 meters deep (that’s 60+ feet). Now, it’s unlikely that you’d routinely be wearing it down 60ft below the surface, but, the point is that it’s truly waterproofed. Most activity trackers are barely even rain proof, let alone the lame IPX7 standard (which is 1 meter for 30 minutes). In my case, I was happy to test this out. So, I went into the ocean and did a bunch of swimming for numerous hours.

And, I dove down as deep as I could…repeatedly. Which, admittedly, probably wasn’t all that deep. But the point being that days of salt-water on end, and daily showers with it hasn’t killed either device I’ve had since September.
I’d hope that others in the future follow this particular waterproofing standard. It’d save me from having to replace my FitBits every 6 or so months when they fall in the toilet or washing machine…
Bugs and Miscellaneous:

In recent reviews I’ve been adding a bugs section to cover things that I stumbled upon. Because I’ve had the activity tracker for a bit now, I’m really only focusing on bugs that I’ve seen on the final firmware. Remember a ‘bug’ is different than ‘by design’. For example, the lack of a feature is something I highlight within a given section is considered ‘by design’, whereas something not really working right is listed below.
– The touch button doesn’t always respond: Sometimes I press the button and nothing happens. Or, I press it a lot and nothing happens. There appears to be some sort of timeout, likely to save battery, but it’s kinda annoying.
– Background sync doesn’t seem to sync: The unit is supposed to sync in the background every once in a while to the phone via Bluetooth, but I’ve never had it sync the data without me telling it to.
– No notifications: This may just be a me thing (or a me + one friend thing), but, nonetheless, it’s an issue I’m seeing.
Now, this doesn’t mean this is all the bugs out there. This is just the ones I saw during my running and/or use. As a single person I can’t possible test every possible feature in every possible combination to reproduce every possible scenario. Sure, I’d love to – but companies have entire teams of testers and they still miss things. So I do the best I can to note what I’ve seen above.
Pros/Cons:
As always, if you’re looking at this device, there’s a lot to consider (as evidenced by all the black text above). I’ve tried to distill it all down to just a few short bullets below, but keep in mind there’s a ton of detail above that might help you with your decision:
Pros:
– Can pair to a heart rate strap
– Just works factor, easy to use
– Uploads via both Bluetooth Smart (phone) as well as USB (PC/Mac)
– Polar Flow site is pretty impressive for just being launched
Cons:
– No Android app yet (March/April 2014 timeframe)
– Can’t easily snip and then save HR sections of workout sessions on site
– No data export option
Comparison Tables:
There’s a lot of activity trackers on the market these days. The most popular brands being FitBit, Nike, Basis, BodyMedia, and now more recently, Withings and Polar. In an effort to help you navigate that landscape a bit I’ve put together this comparison chart which talks specifically to units that I’ve tried and tested (and felt worthwhile to actually mention). It doesn’t talk to units I haven’t tried and tested. That’s the way all my comparison charts work: I require real-world access to the product to make the database. I simply find that PR/marketing blurbs twist the truth a bit, so this gives you an independent place to get that data.
With that out of the way, here’s how things stand up (note you can mix and match other units beyond this pre-selected list here):
Copyright DC Rainmaker – Updated May 29th, 2017 @ 9:08 amNew Window
Price$55$139$129$79$149
Body PlacementWristWristWristWristWrist
Data Transfer TypeBluetooth Smart & USBBluetooth Smart, USBBluetooth Smart/USBBluetooth Smart/ANT+Bluetooth Smart
Bluetooth to PhoneYesYesYesYesYes
Has GPS built-inNoNoNoNoNo (can use phone’s GPS though)
Waterproofing20 meters50mIPX7 (1 meter for 30 minutes)50 MetersSplash only
Battery Life5-7 daysUp to 5 daysUp to 5 days1 YearUp to 5 days
Battery TypeUSB RechargeableUSB RechargeableUSB RechargeableCR1632USB Rechargeable
Changeable Bands/StrapsNoNoYesYes
Phone Music ControlYesYesNoNo
Displays timeYesYesYesYEsYes
Has time alarmsNoYEsYEsYesYes
Has smart sleep alarmsNoNoNoNo
Smartphone NotificationsNoYesYesChoresYes (Text/Phone/Calendar only)
Workout guidance/coachingNoNoNoNoInterval workouts
Step CounterYesYesYesYesYes
Stairs ClimbedNoYEsNoNoYEs
Distance WalkedApp Only (Added in update)YesYesYesYEs
Calories BurnedYesYesYesYEsYEs
Sleep MetricsYesYesYesYesYes
24×7 HR MetricsYesYesNoYes
Skin TemperatureNoNoNoNoNo
Heart RateYes (with HR Strap)yesYesNoYes
Optical Heart RateYesYesNoYes
Can re-broadcast Heart Rate dataNoYesNoNoNo
Skin PerspirationNoNoNoNoNo
Cycling SensorsNoNoNoNoNo
Action Camera ControlNoYesNoNoNo
Web ApplicationYesYesYesYesYes
PC ApplicationYesYEsYesYesYes
Mac ApplicationYesYEsYesYesYes
Phone AppsiOS/AndroidiOS/Android/Windows PhoneiOS/AndroidiOS/Android/Windows PhoneiOS/Android/Windows Phone
Ability to export/sync settings from computer/phoneYesYesN/AN/AYes
3rd parties can access data via APIYesYesNoYesYEs
Ability to export your data out of platformYesYesYesYesYEs
Amazon LinkLinkLinkLinkLinkLink
Clever Training – Save a bunch with Clever Training VIP programLinkLinkLinkLinkLink
Review LinkLinkLinkLinkLink
The tables are updated dynamically and thus if/when things change that’s represented automatically in this section.
Final Thoughts:

Overall I really like the direction Polar is going here, both with the hardware (Loop), and software (Flow). It clearly shows the company is rethinking their entire strategy away from devices that look (physically) and feel (online) like they’re from the 1990’s, and instead these devices feel current and in-line with other competitive offerings.
With the Loop’s heart rate strap connectivity, they’ve jumped ahead of other competitors into an area that nobody else is offering a solution for today. Only two other devices offer heart rate, and neither really fit the bill here. In the case of the Basis B1 watch, that doesn’t work for exercise (the optical sensor doesn’t), and in the case of the Withings Pulse, it’s just designed for resting heart rate (also no exercise). By bridging the gap, Polar is able to put together a holistic solution that meets the needs of many people who don’t want a full-on sports GPS watch.
I’m eager to see the platform expand. It’s new, and is pretty solid for something only a month old, but it still has a lot of catching up to do if they want to use it for sports devices going into the future. Still, for activity monitor tracking it does well even if it lacks some of the social encouragement features of platforms like Nike or Fitbit. The next piece will be adding in the connectivity to 3rd party platforms for Loop data, which will come as early as later this month according to Polar.
Nonetheless, if you’re looking at an activity tracker, I’d definitely take a close look at the Loop, especially considering its price point at $99US, versus many units being quite a bit more for the same amount of detail.
Found this review useful? Or just wanna save a bunch?
Hopefully you found this review useful. At the end of the day, I’m an athlete just like you looking for the most detail possible on a new purchase – so my review is written from the standpoint of how I used the device. The reviews generally take a lot of hours to put together, so it’s a fair bit of work (and labor of love). As you probably noticed by looking below, I also take time to answer all the questions posted in the comments – and there’s quite a bit of detail in there as well.

I’ve partnered with Clever Training to offer all DC Rainmaker readers an exclusive 10% discount across the board on all products (except clearance items). You can pickup the Loop below (as well as the Bluetooth Smart HR straps). Then receive 10% off of everything in your cart by adding code DCR10BTF at checkout. By doing so, you not only support the site (and all the work I do here) – but you also get a sweet discount. And, since this item is more than $75, you get free US shipping as well.
Polar Loop Activity Monitor (select drop-down for version with HR monitor)
Polar H6 Bluetooth Smart Strap
Polar H7 Bluetooth Smart Strap
Additionally, you can also use Amazon to purchase the unit or accessories (though, no discount). Or, anything else you pickup on Amazon helps support the site as well (socks, laundry detergent, cowbells). If you’re outside the US, I’ve got links to all of the major individual country Amazon stores on the sidebar towards the top. Though, Clever Training also ships there too and you get the 10% discount.
As you’ve seen throughout the review there are numerous compatible accessories for the unit. I’ve consolidated them all into the below chart, with additional information (full posts) available on some of the accessories to the far right. Also, everything here is verified by me – so if it’s on the list, you’ll know it’ll work. And as you can see, I mix and match accessories based on compatibility – so if a compatible accessory is available at a lower price below, you can grab that instead.
Copyright DC Rainmaker – Updated December 1st, 2014 @ 10:33 am
Polar H6 Heart Rate Strap (Bluetooth Smart Only)Polar$58.00LinkLinkLink
Polar H7 Heart Rate Strap (Gym equipment + Bluetooth Smart)Polar$60.00LinkLinkLink
Thanks for reading! And as always, feel free to post comments or questions in the comments section below, I’ll be happy to try and answer them as quickly as possible. And lastly, if you felt this review was useful – I always appreciate feedback in the comments below. Thanks!
Finally, I’ve written up a ton of helpful guides around using most of the major fitness devices, which you may find useful in getting started with the devices. These guides are all listed on this page here.