Withings Pulse In-Depth Review

Almost a year ago Withings announced the Withings Pulse activity tracker at CES 2013. However, it wasn’t made available until this past summer, when I started testing it. Like most activity trackers it did all the usual items – steps, calories, time, sleep, etc… But unlike most activity trackers it also measured your pulse optically. But does this add anything to it? And, more importantly, how does the unit shape up in whole? Well, I set out to find out.
In the case of the Withings Pulse, I went out and purchased it myself. But, that’s in addition to the one they sent over to try out…that I managed to kill in the laundry machine a few months ago. Once I’m done with this review I’ll send them back the laundry machine one, and keep the functioning one I paid for. Which, is how I always do it – products go back to the companies after I’m done with them (dead…or alive).
Lastly, at the end of the day keep in mind I’m just like any other regular athlete out there. I write these reviews because I’m inherently a curious person with a technology background, and thus I try and be as complete as I can. But, if I’ve missed something or if you spot something that doesn’t quite jive – just let me know and I’ll be happy to get it all sorted out. Also, because the technology world constantly changes, I try and go back and update these reviews as new features and functionality are added – or if bugs are fixed.
So – with that intro, let’s get into things.
Unboxing:
The Withings Pulse is wrapped within an outer box to protect the inner box. So you’ll want to remove that first.

Inside you’ll find the inner box with the Pulse proudly displayed there in the center. Like it seems with most activity trackers, the box far outsizes the actual tracking device.

On the back they include a few suggestions on placement as well as a look at the app and functionality.

Removing everything from the box you’ll see all the contents. On the left we have the arm band and micro-USB charger, then in the middle there’s the belt clip and the unit itself (hanging out in its little plastic holder from packaging). And finally on the right we’ve got some paper. Supposedly you’ll read that.

The unit comes in a little plastic stand of sorts that’s used in the packaging. Ultimately you’ll remove it. You’ll see that it uses a standard micro-USB connector (like non-Apple phones) to charge itself.

Before you get stated you’ll want to remove the little paper cover. It’s just there to help you imagine what the unit looks like when it’s turned on.

Flipping it over you can see the pulse sensor, which you place up against your finger to get a resting heart rate reading. Don’t worry, I’ll cover this in more depth later on. And to the side we’ve got the little USB charger.

Now there’s two ways of holding onto the Pulse. The first (and my preferred) is the little belt clip. This protective rubber casing holds the unit inside and has a bit of a window to see the numbers. The only problem with it is that if you want to take your pulse or charge the unit you have to remove it from the casing.

The next option is an armband – used for either day to day activity or sleeping.

In this case the unit does allow you to get your pulse from it without removing it, but at the same time it won’t actually take your pulse from your arm. That requires the finger.

Lastly, as for that paper stuff – it just walks you through setting up the Pulse and getting the apps installed.

With that, let’s take a look at how it compares size-wise to a few other units out there.
Size and Location Comparisons:

With so many devices on the market these days, I figured it’s probably worthwhile showing a bit of a comparison of where things stand. Ultimately, virtually all on-market devices today fall into one of two camps: Wrist based or belt/clip based. First up, the belt/clip based units.
Today, the most common units in this category (clip-on) would be the variety of FitBit units (Ultra, One, Zip), as well as the Withings Pulse, and then a small collection of units from Sportline as well:

As you can see, the Pulse (second from left, front row) is slightly chunkier than others (width), but, also a bit shorter (length).
You’ll note that both the Pulse and the newer FitBit’s user rubber cases. This is important as it keeps the unit from slipping out and falling into the toilet (trust me, been there, done that). It provides that tiny bit of traction that’s required.
Next, while not covered in this review are some of the wrist based units. Below you can se the FitBit Flex (bottom), Nike Fuelband (middle), and newly released Polar Loop (top):


I didn’t include the below Basis B1 in this shot, merely because it’s a full-on watch as well, and has far more metrics it’s recording (such as sweat and skin temperature). And, while it too does pulse, it does it 24×7 optically through your skin, versus the Withings Pulse which does it only on demand after you remove it and apply it to your finger. So it’s sorta like comparing an aircraft carrier to a fishing boat.

Note, there are some units out there (such as BodyMedia) that attach to your upper arm. I’m not including them here for two reasons. First is that I find most of these cumbersome to wear. But second is that they aren’t actually in the exact same market as the units above. Most of the units above are more concerned with measuring simple day to day activity such as walking. Whereas some of the more advanced (which, may be a stretch of that term) upper-arm based units measure sweat and/or heart rate in the drive to get more detailed information about calorie burn.
Initial Setup and Configuration:

Next, we’ll go ahead and get everything configured. It only takes a moment. First, you’ll start out by turning on the device. That’s accomplished via the little button. In the event that the device has no battery juice left, you may need to charge it first. The standard micro-USB cable (same as for most non-Apple phones), is only used for charging, and never for data sync.
Once that’s done, you’ll need to download either the iPhone or Android app from those respective stores. You’re looking for the Withings Health Mate app, which is their new/updated/refreshed app.

With that complete, you’ll need to go ahead and pair the Pulse via Bluetooth to your phone. To do that (in the case of the iPhone), you’ll dive into your Bluetooth settings area and pair it there. On the Pulse, you’ll first hold down the button for three seconds to trigger connectivity on Bluetooth. You’ll do this anytime you need for it to talk to the phone.

Once that’s done go ahead and crack open the app. Once signed in (you’ll need to create an account if you haven’t yet done so) you’ll be ready to walk through getting the Pulse all paired up to the app itself.

The pairing process only takes a few seconds, and then it’s good to go.

In the event that you need to update the firmware (likely), it’ll trigger that as well:

Once that’s completed the device will show as enabled in your account and be ready to use.
Day to Day Use & Recording of Activity:
First up is putting the device on. In my case I just slip it below my belt on my waist-band. It sits slightly higher than the FitBit Zip does, but it’s honestly not noticeable after about 1.8 seconds.

Next, comes usage. Or rather, lack of usage.
See, here’s the thing – for using it, you don’t do anything. You just walk like you normally do, and do whatever else that it is that you do. It simply tracks it behind the scenes like just about any other activity tracker on the market.
Now, if you want to check out where you are during the day you can pull it out (or, depending on how you have it attached, not pull it out), and then tap the button.
The unit contains both a single button (little round thing), as well as a touch-sensitive screen. The screen recognizes press-force for selecting an option, as well as swiping gestures side to side. First up though, let’s quickly iterate through what it shows.

The primary screen is your step-count for the day. It shows total steps, along with your goal steps (that you defined). It also shows a little progress bar based on your progress that day.

Next, we’ve got elevation gained. This is based on going up and down stairs, which I’ll talk a bit about later.

Then we’ve got estimated distance for the day This is mostly based on steps and a wild-ass guess on how far you’ve gone. Sometimes I see this as semi-close, but in general I think it overestimates this a bit.

Lastly on the data screen, there’s calories.

Now, the next screen it shows gives us a choice. In this case we can select to go into either ‘Pulse’ mode (heart rate measurement), or ‘Sleep’ mode (for measuring sleep).

If we go ahead and press the HR icon with our finger it’ll light up the green light on the back of the unit, which is where we place our finger to capture our pulse:


The process takes about 5-15 seconds, depending on how much it likes you that day:

Once it’s done, it’ll spit out a number, which is then saved and later uploaded:

Finally, we’ve got the option to enable a sleep mode. In this case, we go ahead and press that little moon symbol we saw earlier but then we have to swipe to the left to turn it on:


The unit will give us goodnight wishes, and then starts a counter:

At this point we’ll want to slip it into the little wrist band for sleeping:

You just leave it on your wrist and it’ll automatically figure out when you went to sleep versus when you initially said you were going to sleep. In my experience it’s actually fairly darn close. In this mode it’s not going to measure heart rate, though, the fabric case does have a small window in it so you can do it after you’ve slid it in there:

When you’ve woken up some number of hours later you’ll want to tap it to change it back from sleep mode to walking mode. If you forget to do this, the unit will unfortunately stay in sleep mode and not track activity.

Last but not least, you can also tap one more time on that button to get to the time of day display:

Ok, now that we’ve been collecting data, let’s talk about getting it somewhere beyond the 1” screen.
Uploading the data onto your phone:
The device has two different methods that it uses to upload data to your phone (and thus, the interwebs). First, is the manual method, which requires you press the button on the Pulse for three seconds, triggering the upload process.

This process using Bluetooth isn’t terribly fast (in general, low-power protocols like Bluetooth Smart and ANT+ aren’t great for transferring data of any quantity). So, it’ll take anywhere from 15 seconds to a minute or two depending on how long since last sync.

The second process is a background sync that occurs automagically every 6 hours. Or at least, it’s supposed to. My app routinely tells me it needs to restart to complete the background sync. And best I can tell, no matter how many times I’ve restarted the app – it’s never completed a background sync.
Nonetheless, the manual sync process does work for me, so I’m relatively content there and assume at some point the app will get background sync fully working (it wasn’t rolled out initially).
Once the data has been uploaded, it’ll then be available on the site as well as your phone app for a deeper dive, which I’ll cover in the next section.
There are a few miscellaneous items I did want to call out though on the phone sync. First is that the Pulse will automatically set your time zone information to your phone’s time zone. This is important if you travel a bit like me, in that I know that as long as I sync once upon landing it’ll ensure all data is recorded in the right time zone.
Second is that you can check settings such as the battery and firmware level on the unit through the device settings:

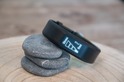
Within that same area you can specify how the unit displays metrics – such as in pounds or kilograms, or those funky rocks (stones). You can also change language here as well.


With the settings covered, let’s talk about the data side in the next section.
Data provided via Web/Phone Apps:
There’s two places to access the data from your Pulse, the first is the phone app and the second being the online site. We’ll start with the phone app and then cover the online site (obviously, the backend data is the same source).
When you open up the app you’ll find yourself in the Dashboard view. This view allows you to scroll up and down through the different metrics recorded by the Pulse, or, by other Withings devices (i.e., the scale). If you’re like me and have multiple users on the same household account (for the weight scale), you can tap the fly-out panel from the left to change users:


At the top of the dashboard is the butterfly looking logo. Each one of those quadrants represents different areas that Withings captures data from (either manually, or technologically through one of their products). The bigger the glowing blob inside that wing, the more data you’ve been collecting on it. In this case, since I’ve been travelling the last week I have little data for the ‘Weight’ side, whereas I have a lot more data for the ‘Activity’ side. As for sleep, I don’t terribly like wearing the Pulse for capturing sleep metrics, hence I only have a little bit of that.


Next, heading back to the dashboard we’ll pick one of the metrics – in this case activity, and look at it more deeply. We do that by tapping it. You can see it breaks down active calories, total calories (including simply being alive), as well as my total distance and step count for the day.


I can scroll left or right to see previous days. In the case of yesterday, you see a run I did, which is shown along the bottom with the unit automatically determining that was a run. I’ll dive into that a bit more in a later section.


We can continue down the dashboard, and look at other metrics – for example sleep and BPM (beats per minute: Heart Rate). And just like above, we can tap them to get a deeper look. Below, one of my nights of sleep (sigh…before having to catch a plane). You can see it breaks down the sleep based on awake/light/deep, as well as when I fell asleep and then when I was awoke but hadn’t yet switched the unit to being in ‘daytime’ mode.


Here’s another example with a wee bit more sleep (woot for Saturday!). And then one more example to the right. Except, in this case I hadn’t synced the device yet after travelling – so it was still on Paris time as opposed to being on Mexico City time, thus everything was skewed.


The app also covers metrics like weight and those metrics from the WS-50 scale such as CO2 and heart rate. But I’ll dig into that in a bit.
In the event you lack those devices, you can always just manually enter in the data. You can also configure reminders to enter that data in as well.


Last but not least in the app, you can also configure sharing partners (3rd party apps) and how your data might be shared out through social networking sites.


Now that we’ve covered the mobile app side of things, let’s move over to the website. Here, you’ll find pretty much the same story, except with the ability to dive into a bit more detail.
When you first sign in, you’ll be presented with your main dashboard. This shows you your activity and sleeping patterns over the past 7 days. You can change the timeline to other weeks if you’d like.

I can then scroll down and dive through different widgets for different metrics that Withings records (either through the Pulse or otherwise) – such as HR, today’s steps, and below that – air quality (through the scale).

I can click the little “+” button to expand out the graph and get a slightly different view of it:

If I look at sleep data, it’s largely the same charts I saw above within the iPhone app:

Within the settings area I can dive into my connected devices and look at when they last synchronized as well as the current firmware version.

The site supports multiple users in a household, and, you can also split off a user down the road into an independent account – which is pretty cool.
Finally, the site supports exporting out data through a number of different ways. First, I can pick a random metric – such as weight or heart rate, and then go into the measurement table and download a CSV file straight from the site:

I can also go into the legacy dashboard and access a full download of my data there as well. However, none of the pre-configured download options allow me to download my step data. Their API however does support this, so it’s not fully islanded.
Step & Stair Counter Data Accuracy:
Step counter accuracy is always a test I do, though, it’s not the easiest (or greatest) test to work from. First, I start off with a simple 100-step test just to understand how things correlate. This is flat great and easy to follow. I do it twice, just because:
First test (100 steps): 96 recorded
Second test (100 steps): 99 recorded
Next, I looked at some longer term full-day tests. I did this in two different chunks, one earlier this summer, and then again more recently. In these cases I used multiple devices to track my totals for the day. In all these scenarios I did NOT include any sort of running or other workouts. If I did ride a bike share bike around town (errands), I just left as-is, since that seems like a very reasonable task for many people to do.
First three days, with the Basis on my left wrist:

Next six days, with the Basis on my right wrist:

(Note: I have no idea why the Fitbit Zip seems to have such oddly high numbers for Tuesday)
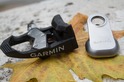
Then, there’s running, how does it work then? Well, it depends. In some cases it did surprisingly well. For example, I did a run a few nights ago and the unit was near perfectly spot on. To the left, the Withings Pulse data, and to the right, the Garmin FR620 GPS data:


Then, in other runs I did it overestimated a bit (by about 20% in one case). Though, I’d suspect the overlap between people who run 20 miles and people who use the Withings Pulse to track said data is approximately 0%.

Next, when looking at stairs it gets a wee bit trickier. That’s because the unit doesn’t count stairs straight up, but rather elevation gained in feet using an internal barometric altimeter. It correlates this against whether or not you were walking. Thus, if you just rode up/down the elevator it won’t do anything. Instead, you’ve got to actually both walk and go up at the same time (such as stairs).
At any rate, I’m ‘lucky’ in that my building has plenty of stairs to work from. Thus, up and down I went.

What I find is that for each flight I climb 20 stairs (me counted), and the unit ‘gives’ me 10ft of vertical elevation. This is roughly in line with the actual elevation gain, perhaps a tiny bit low (probably closer to 12-13ft). More interesting though is that there’s a definite delay between when I climb the stairs and when the unit ‘gives’ me the climbed amount. In my case, I find a delay of about 45-75 seconds before it shows up on the unit.
A brief look at the Withings Scale options:
In addition to their activity tracker, they also have a handful of WiFi & Bluetooth connected scale options. Withings was the first to offer WiFi connected scales a few years back, before the likes of FitBit joined the scale party. During that timeframe I’ve long-since used both the Withings and FitBit scales.
Withings most recent scale is their WS-50 model, which does traditional Weight + Body Fat, as well as measures heart rate and household CO2 & Temperature levels. I’ve been poking at it for a little bit, so I thought I’d give some quick thoughts.

In order to use the scale you’ll tie it to your Withings account that you use for the Pulse tracker. In the event you don’t get a Pulse tracker, then you’ll simply create a Withings account for the scale. Unlike past WiFi scales, this one doesn’t require a USB cable for initial setup. Rather, it leverages Bluetooth to your phone to configure your WiFi network information:

Once that’s done, you can go ahead and place it in the location of your choice. The bathroom generally makes the most sense, since you typically want to take measurements sans-clothes and at a semi-repeatable time each day.

Once you’re ready to weigh yourself you’ll simply step on the scale and a second or two later it’ll show your weight. Note that you can have a number of people assigned to the scale and it automatically knows who you are based on your weight. If two people are close in weight, it’ll give a mini-menu that you can alter based on pushing on one side of the scale or the other.

That’s followed by a guesstimate for body fat (see my scale accuracy posts for more info on how accurate that guesstimate is):

Then, comes the two unique features of the WS-50 scale over previous scales: heart rate and environmental conditions (CO2/Temperature). For heart rate you’ll continue standing there about 5-8 seconds longer.


The heart rate value it provides is interesting to look at, but hardly very useful – especially when compared to Pulse HR metric. In the case of the scale, this implies I’ve had to walk and remain standing to get there – both activities elevate ones HR for a brief period. So the numbers seen here are always high – and not predictably so.
For example, in one case I stood on the scale and received the 90bpm shown above, then I sat down and received a 50bpm from the Pulse. The 50 was accurate (I validated it against another unit). But, at the same time – the 90 was accurate too. It’s just that while the scale is measuring HR, it’s not doing it in a practical manner from a data usefulness standpoint.
Next, we’ve got temperature and CO2, which the unit measures every 30 minutes throughout the day. After it’s done giving you your HR data, it’ll spit out a little graph of the current temperature and CO2 data:

This data is then uploaded every three hours to your account and available online or through the app:

The theory behind the CO2 measurements is that, according to Withings:
“High carbon dioxide concentration indicates your home is not ventilated enough, which results in the likely presence of air contaminants. At very high level, carbon dioxide may deteriorate sleep quality, cause headaches and even more serious health issue.”
However, in real-life, I see little value in it beyond a marketing sticker. Ultimately, short of moving out of your current residence, there’s not much you’re going to do to change it. And further, it’s hardly a case of safe vs non-safe, such as a traditional alarm. In the case of temperature, it’s a fun thing to look at, but ultimately it’s something I control via a thermostat. So it’s sorta just tracking the temperature of my house – which again, I’m not sure what value I have of that in a scale.
Looking at my data, outside of a completely weird jump that I saw yesterday, everything is pretty ‘boring’ and stable.


And, in this case, I’ve got no idea why there was a sudden jump in CO2 in the middle of the night. It’s rather odd.
Ultimately though, outside of my questioning the usefulness of these metrics, I do really like the Withings WiFi scale. It partners with a ton of sites and companies – which makes getting your data wherever you want it easy (i.e. to partner sites such as Jawbone, TrainingPeaks, and RunKeeper). My feedback regarding whether to get the Withings WiFi scale or the FitBit WiFi scale remains the same as when I talked about it a few weeks ago within the FitBit Zip review.
Bugs and Miscellaneous:

In recent reviews I’ve been adding a bugs section to cover things that I stumbled upon. Because I’ve had the watch for a bit now, I’m really only focusing on bugs that I’ve seen on the final firmware. Remember a ‘bug’ is different than ‘by design’. For example, the lack of a feature is something I highlight within a given section is considered ‘by design’, whereas something not really working right is listed below.
– The Background Sync doesn’t seem to sync much in the background
– The iPhone app seems well updated for the Blood Pressure monitor product of Withings, but not as well integrated for the Pulse-specific features (for example, you can’t set a reminder to get your BPM, only Blood Pressure)
Now, this doesn’t mean this is all the bugs out there. This is just the ones I saw during my running and/or use. As a single person I can’t possible test every possible feature in every possible combination to reproduce every possible scenario. Sure, I’d love to – but companies have entire teams of testers and they still miss things. So I do the best I can to note what I’ve seen above.
Pros/Cons:
While there’s a lot of text here that covers a lot of fairly important details, here’s the super-duper slimmed down version of that:
Pros:
– Has the ‘just works’ factor
– Can record resting heart rate quickly and easily
– Display is clear and easy to understand
– Good battery life
– Good ability to connect to 3rd party platforms/sites
Cons:
– The unit is a bit chubbier than some others
– Doesn’t track heart rate 24×7, only on demand
– Doesn’t automatically go from sleeping mode to non-sleeping, must switch over manually
Comparison Tables:
There’s a lot of activity trackers on the market these days. The most popular brands being FitBit, Nike, Basis, BodyMedia, and now more recently, Withings and Polar. In an effort to help you navigate that landscape a bit I’ve put together this comparison chart which talks specifically to units that I’ve tried and tested (and felt worthwhile to actually mention). It doesn’t talk to units I haven’t tried and tested. That’s the way all my comparison charts work: I require real-world access to the product to make the database. I simply find that PR/marketing blurbs twist the truth a bit, so this gives you an independent place to get that data.
With that out of the way, here’s how things stand up (note you can mix and match other units beyond this pre-selected list here):
Copyright DC Rainmaker – Updated May 29th, 2017 @ 9:08 amNew Window
Price$99$139$129$79$149
Body PlacementWaist/Clip-On (+Wrist strap available)WristWristWristWrist
Data Transfer TypeBluetooth SmartBluetooth Smart, USBBluetooth Smart/USBBluetooth Smart/ANT+Bluetooth Smart
Bluetooth to PhoneYesYesYesYesYes
Has GPS built-inNoNoNoNoNo (can use phone’s GPS though)
WaterproofingNot really50mIPX7 (1 meter for 30 minutes)50 MetersSplash only
Battery Life2 WeeksUp to 5 daysUp to 5 days1 YearUp to 5 days
Battery TypeUSB RechargeableUSB RechargeableUSB RechargeableCR1632USB Rechargeable
Changeable Bands/StrapsNoNoYesYes
Phone Music ControlYesYesNoNo
Displays timeYesYesYesYEsYes
Has time alarmsNoYEsYEsYesYes
Has smart sleep alarmsNoNoNoNo
Smartphone NotificationsNoYesYesChoresYes (Text/Phone/Calendar only)
Workout guidance/coachingNoNoNoNoInterval workouts
Step CounterYesYesYesYesYes
Stairs ClimbedTotal ascent, not stairsYEsNoNoYEs
Distance WalkedYesYesYesYesYEs
Calories BurnedYesYesYesYEsYEs
Sleep MetricsYesYesYesYesYes
24×7 HR MetricsYesYesNoYes
Skin TemperatureNoNoNoNoNo
Heart RateYesyesYesNoYes
Optical Heart RateYesYesNoYes
Can re-broadcast Heart Rate dataNoYesNoNoNo
Skin PerspirationNoNoNoNoNo
Cycling SensorsNoNoNoNoNo
Action Camera ControlNoYesNoNoNo
Web ApplicationYesYesYesYesYes
PC ApplicationNoYEsYesYesYes
Mac ApplicationNoYEsYesYesYes
Phone AppsAndroid/iOSiOS/Android/Windows PhoneiOS/AndroidiOS/Android/Windows PhoneiOS/Android/Windows Phone
Ability to export/sync settings from computer/phoneYesYesN/AN/AYes
3rd parties can access data via APIYesYesNoYesYEs
Ability to export your data out of platformYesYesYesYesYEs
Amazon LinkLinkLinkLinkLinkLink
Clever Training – Save a bunch with Clever Training VIP programLinkLinkLinkLinkLink
Review LinkLinkLinkLinkLink
The tables are updated dynamically and thus if/when things change that’s represented automatically in this section.
Final Thoughts:

When I first got the Pulse, I wouldn’t say I had the highest of hopes for it. It felt like the device itself needed to go on a slight diet, and I was somewhat dubious of the heart rate sensor. However, after using them since July, I’ve found that the unit simply blends in behind my belt and I don’t notice the more chubby aspect of it. I find the display quite clear, and the fact that it actually uses a barometric altimeter to measure elevation is pretty cool.
As for the heart rate sensor – it’s implementation leaves a little bit to be desired, primarily since I have to remove it from the case to gather pulse information. However, for gathering resting HR information it works well, and is in line with other sensors I’ve worn at the same time to ensure accuracy. And, the fact that it’s tiny and doesn’t require a HR strap means that tracking resting heart rate (a good indicator of fatigue) is quick and simple.
I like the phone integration, even if the background sync doesn’t work for me – and the phone app is clean and easy to use. No problems there. Their updated site is looking good (in beta), but still lacks some of the functionality of their older dashboard.
Lastly, when it comes to battery, I’m getting pretty much in line with their claims of two weeks. I get perhaps a day or two less, but I’m hardly having to charge the unit compared to some of the wrist based units out these days. And charging is simple with a micro-USB.
Overall, I’d have no problems recommending the Pulse to anyone looking to track their day to day activity.
Found this review useful? Or just want to save 10%? Read on…
Hopefully you found this review useful. At the end of the day, I’m an athlete just like you looking for the most detail possible on a new purchase – so my review is written from the standpoint of how I used the device. The reviews generally take a lot of hours to put together (especially this one, probably the longest and most detailed I’ve ever done), so it’s a fair bit of work (and labor of love). As you probably noticed by looking below, I also take time to answer all the questions posted in the comments – and there’s quite a bit of detail in there as well.

I’ve partnered with Clever Training to offer all DC Rainmaker readers an exclusive 10% discount across the board on all products (except clearance items). You can pickup the Withings Pulse (or the scale) from Clever Training. Then receive 10% off of everything in your cart by adding code DCR10BTF at checkout. By doing so, you not only support the site (and all the work I do here) – but you also get a sweet discount. While this item is less than $75, if you did add something to your cart to bring it over $75, you’d get free shipping as well.
Withings Pulse
Withings WS-30 Scale
Withings WS-50 Scale
Withings Wireless Blood Pressure Monitor (Note: Not reviewed)
Additionally, you can also use Amazon to purchase the unit (all colors shown after clicking through to the left) or accessories (though, no discount on Amazon). Or, anything else you pickup on Amazon helps support the site as well (socks, laundry detergent, cowbells). If you’re outside the US, I’ve got links to all of the major individual country Amazon stores on the sidebar towards the top. Though, Clever Training also ships there too and you get the 10% discount.
Thanks for reading! And as always, feel free to post comments or questions in the comments section below, I’ll be happy to try and answer them as quickly as possible. And lastly, if you felt this review was useful – I always appreciate feedback in the comments below. Thanks!
Finally, I’ve written up a ton of helpful guides around using most of the major fitness devices, which you may find useful in getting started with the devices. These guides are all listed on this page here.