PowerTap C1 Chainring Power Meter In-Depth Review
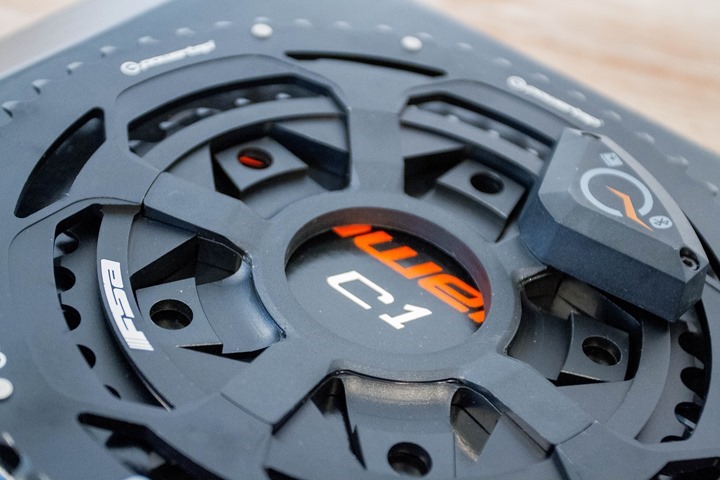
This past spring, as part of a bunch of announcements, PowerTap announced their C1 chainring power meter. This announcement was coupled with that of the PowerTap P1 pedals, all of which complement their existing PowerTap G3 hub based power meter. You may remember I released my P1 review this past August, as those units started shipping in June.
Whereas the C1 started shipping in late September/early October, and thus I’m now ready to release that review. In my case, I’ve used two different PowerTap C1 units. The first was a prototype unit that I used on my bike the majority of the summer. The second was a final production unit that’s been on my bike since early October. As is normal here, for the purposes of this review, I’ll be using data from the production unit. Said unit will as usual go back to PowerTap in the next few weeks.
With that, let’s dive into things.
Unboxing:

As a super-basic introduction, you’ll need to know that the chainrings are the sharp pointed things that are bolted onto your crank set (where the cranks are that connect to the pedals). The chain in turn connects to the chainring to help propel you forward. You’ll note the plural use of ‘rings’ as part of ‘chainrings’, as there are two rings, a smaller and larger one. The rings are differentiated by the number of teeth on them, and are typically expressed such as 53/39T (53 teeth on the larger one, 39 teeth on the smaller one). The below diagram helps clarify all this, as it’s somewhat important to understand these nuances going forward.

For quick reference, here’s where the main players in this region in the bike are:
Crank Spider: Quarq/SRAM, Power2Max, SRM
Chainrings: PowerTap C1
Crank Arms: Rotor dual-system, Stages, Pioneer, 4iiii, WatTeam
Pedals: Garmin, PowerTap P1, Polar/Look combo, bePRO, Xpedo
Cleats: Brim Brothers
Rear Wheel: PowerTap G3
Bottom Bracket: Ashton Instruments, Dyno Velo, ROTOR INpower
Non-direct Force Power Meters: PowerPod, LEO, iBike
As of right now, PowerTap is currently shipping units in one of three chainring configurations, though they expect that to expand as they catch-up on production and judge where best to apply resources for new products.
When you receive the C1, it’ll come in a relatively slim box – sorta like a cigar box that someone stepped on.

Inside this box you’ll find your chainrings, along with the PowerTap C1 pod attached:
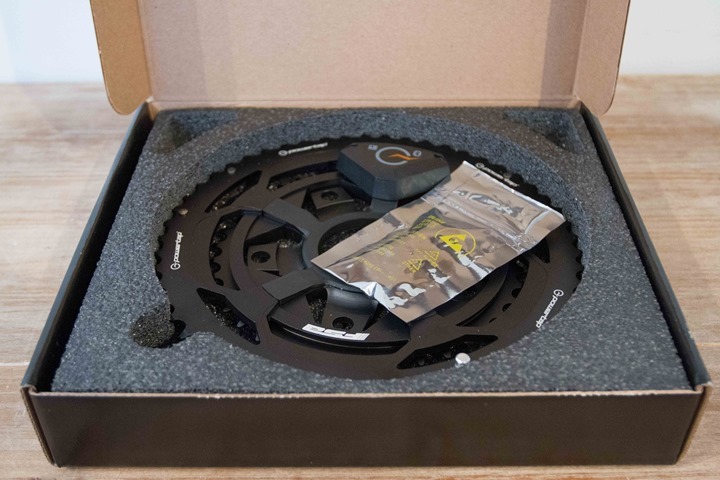
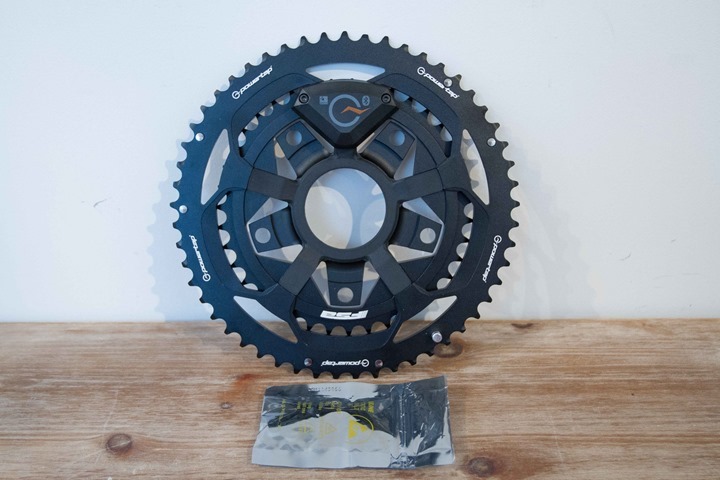
For those familiar with crank spider based products, like a Quarq power meter, the slight nuanced difference on where each unit attaches is more visible above. With the PowerTap C1, the attachment point is on the chainrings.
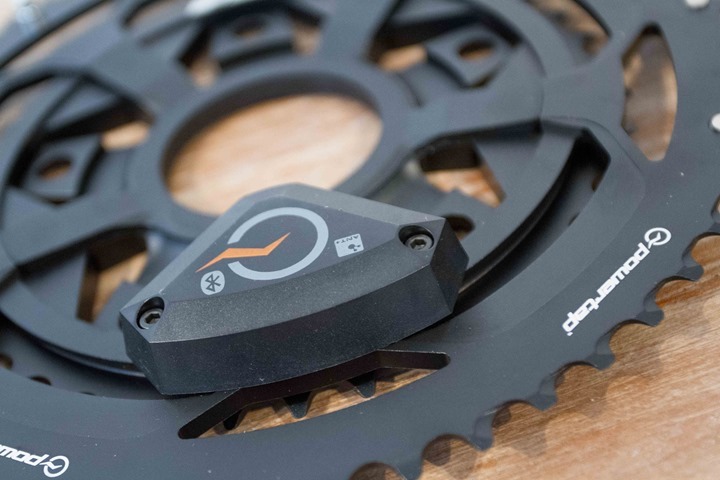
Versus with a Quarq, it’s onto the crank spider itself. Each product has pros and cons in terms of compatibility, which we’ll get to in a moment. Technically though, they’re delivering nearly identical technical specs from a power standpoint.
In addition to the chainrings, you’ll find some bolts that you’ll use to attach your crank set to the chain rings. Today, PowerTap only supports 5-bolt patterns, and not yet 4-bolt patterns. Which does limit compatibility for some folks.
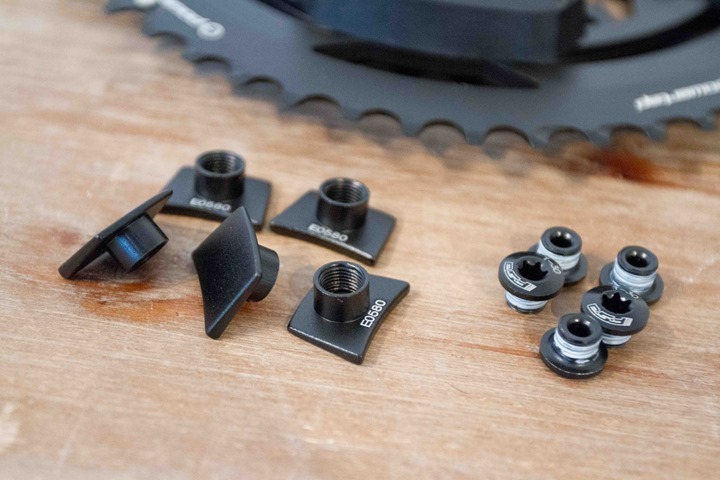
Ultimately, there’s not a ton in the box, and there need not be – it’s a fairly simple product in that respect.
Installation/Configuration:
Now that we’ve got the parts out, we’ll need to get it installed on your bike. Anytime you start talking bike components, you’ve got potential compatibility things to take into account. In this case, that’d be aspects such as bolt pattern and clearance/compatibility. PowerTap has done a solid job of putting together a huge PDF with validated/compatible units.
In my case, I took an existing crank set that I was testing (for 4iiii Precision Crank Power Meter) and decided to apply the PowerTap C1 to that setup. So first up was removing the chainrings off that config. Of course, that did require taking my crank arm off the bike. Depending on your crank arm type, this could be as easy as a hex wrench, or a wee bit more tools required.
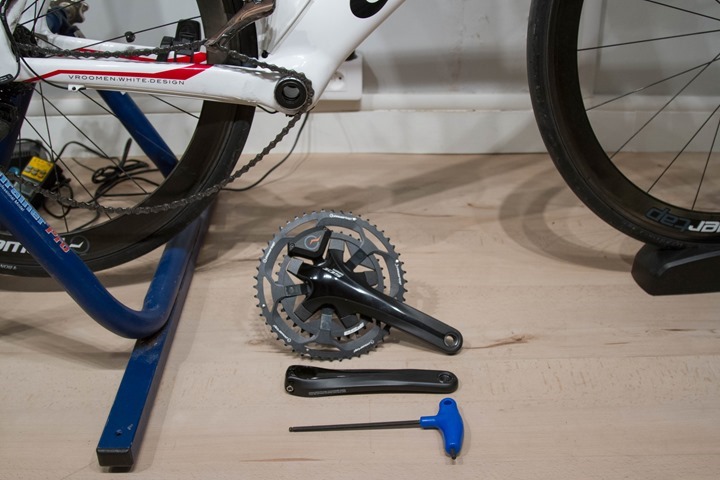
Once that was done, I was up to installing the new chainrings on the unit. This takes perhaps 3 minutes to complete. As is usually the case, I like to work around the bolts in a bit of a star pattern, tightening more and more as I go so that I’m tightening them all somewhat evenly.
For whatever reason, I don’t have many pictures of this process. Perhaps I’ll take it all off and put it on again and insert a gallery here just for completeness.
Once that’s done, it’s merely a case of plopping the unit back on your bike using whatever tools you leveraged to remove it.
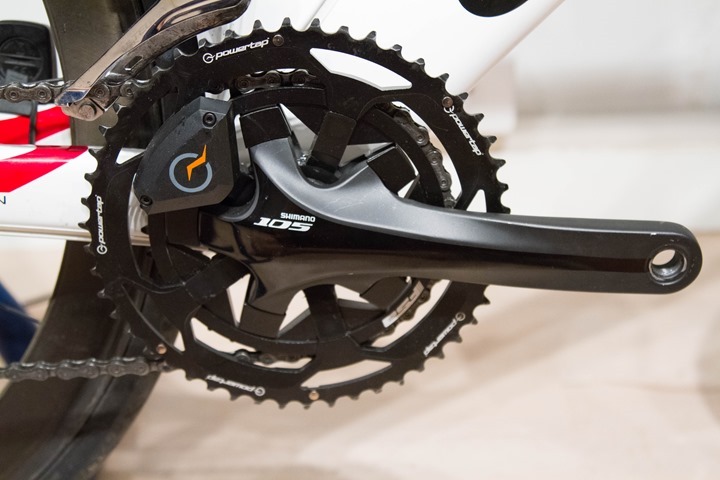
Now, in my case I did have some minor clearance issues with the bolts included in the box, and my Cervelo P3C frame. About 1mm of clearance on a single bolt (no idea why just one, but it was). I ended up finding a different bolt around my place and then was good to go.
At this point, things are essentially done on the installation front, though, you’ll want to complete a single calibration (zero off-set) after getting it all installed. Additionally, I found that there seemed to be a 1-2 ride ‘settling’ period on the bolts where accuracy may be slightly off. This is something that’s also common on the Quarq power meters too. You can help minimize and mitigate this a bit by doing some harder sprints on a trainer and then re-zeroing, but even with that I found it still took about 1-1.5 rides for things to find their happy state. No big deal, but just something to be aware of for your first ride.

Should you down the road need to replace the chainrings, you can do so yourself, assuming you have both a torque wrench and a T-30 Torx bit. That will allow you to remove the pod and place it on other chainrings.
Finally, for lack of anywhere else to place the data – the extra weight of the pod is 150g.
General Use Overview:
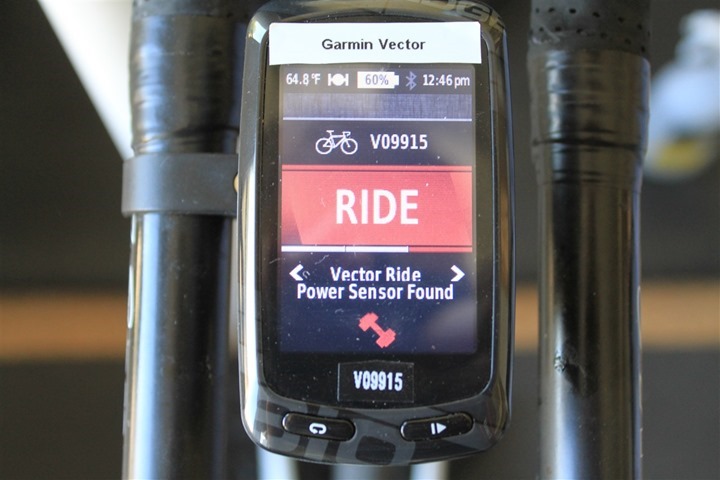
When it comes to general use of the PowerTap C1, it’s about as simple as you’ll get. The unit will automatically wake up anytime you spin the cranks (and go back to sleep later after you stop moving). There’s no lights on the exterior of the unit, but your head unit will usually display notification as soon as the wireless transmission starts. While all head units can simply search and find your ANT+ ID (that’s like your power meter’s phone number), you can also manually input it.
While the C1 pod is physically on the right side of your bike, it accurately measures power from both legs (total leg power), which is unlike some left-crank arm solutions (i.e. Stages, Vector S/2S, 4iiii Precision), which only measure your left leg power and double it. It does this because all power (specifically strain) is measured at the point of the chain rings, as opposed to an individual crank arm.
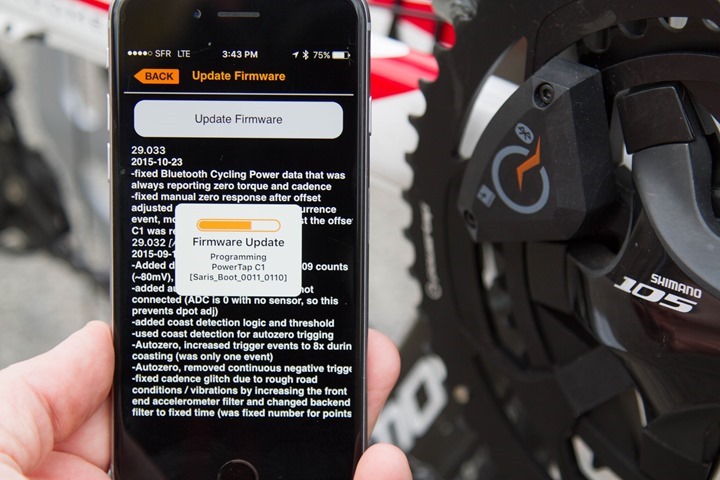
The unit then transmits power information over two protocols concurrently: ANT+ & Bluetooth Smart. It does this by using its dual-capable chipset, which can also receive firmware updates over the air via the PowerTap Mobile app (should those be needed).
The unit will transmit a few core metrics: Total power and cadence. Additionally, it’ll transmit an estimated power balance figure (left/right balance). You can configure most power meter capable head units on the ANT+ side to display these metrics; though on the Bluetooth Smart side the head units are mixed on their ability to display such metrics (for example, Polar can, but Suunto can’t).
In my case, the vast majority of my time was spent riding the PowerTap C1 with an Edge 520, along with a few cases of the Edge 1000 and Edge 810.
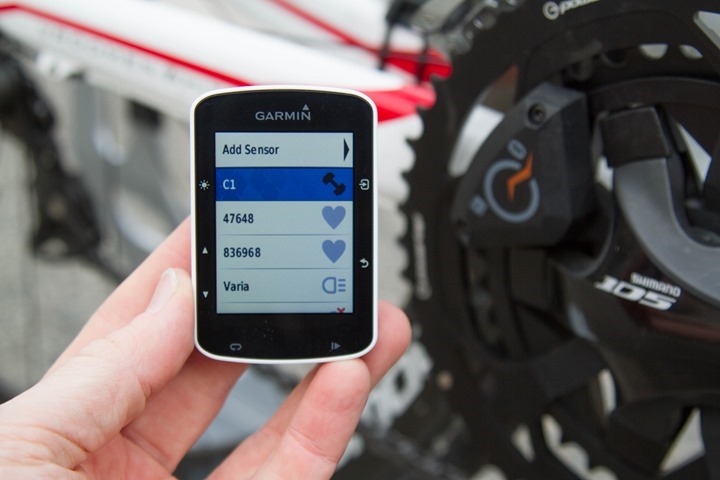
However, I also did a Bluetooth Smart test ride with the Polar M450. Keep in mind with today’s Bluetooth Smart bike computers you are limited to a single concurrent head unit connected to the power meter. While this isn’t usually an issue for road cyclists, it can be an issue for some triathletes or coached athletes that may be concurrently displaying data onto a secondary device (i.e. a watch on their wrist, a coaches computer, etc…).
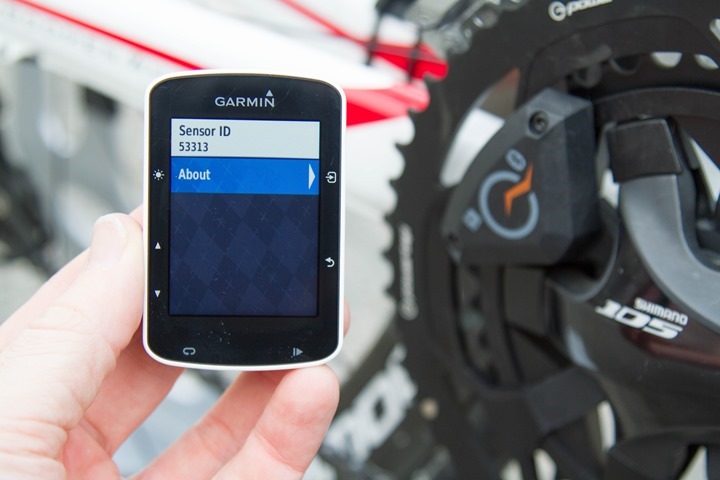
As an interesting bit of trivia, even though Bluetooth Smart doesn’t have ANT+ ID’s (they have BLE GUID’s that are super-long), when the C1 advertises itself to BLE devices, it actually just puts the ANT+ ID into the BLE name, seen below (my ANT+ ID of this C1 unit is 53313).
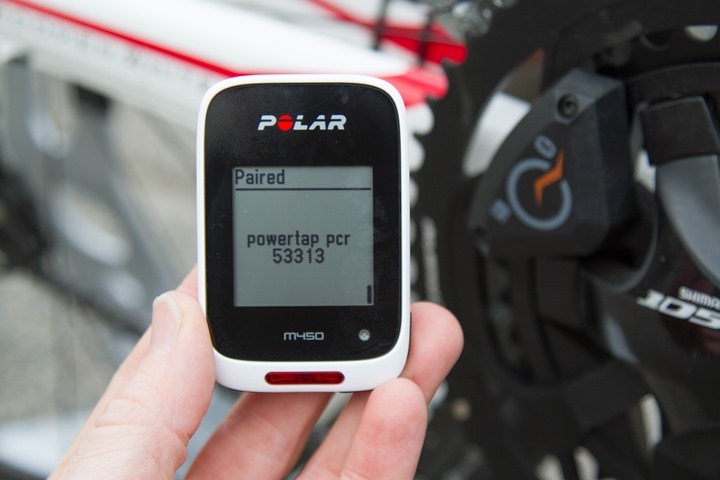
Here’s what that looks like on the M450 using the power channel. A subsequent firmware update added the cadence channel (which I’ve validated after updating the firmware). Both show correctly using an M450.

PowerTap has stated that for Bluetooth Smart connectivity they support the Polar V800, and I’ve validated it personally against the Polar M450 (seen above).
Back on the ANT+ side, all of these metrics are recorded to both the PowerTap units and Garmin units, and can be easily shown after the fact on platforms like Garmin Connect and PowerTap’s power suite (PowerAgent).

When looking at ‘power balance’, you have to keep in mind that in the case of the C1 (like Quarq and Power2Max units), this is an estimation. It actually is taking the upper portion of your stroke and the lower portion of your stroke, and ‘assigning’ it to one leg or the other. So basically it assumes no ‘pull’ in your stroke. Obviously this doesn’t tend to be super-accurate, but for whatever reason consumers have demanded this information from manufacturers (as misleading as it may be), so companies grudgingly put it in.

Next, the unit uses CR2032 batteries for a manufacturer claimed battery life of 200 hours. I’ve yet to hit 200 hours on the production unit, but I’ve also yet to hit the end of the battery either. So that’s good. The CR2032’s are great because you can find them pretty much anywhere on the planet should the need arise.
The battery is located beneath the little pod cap, which can be located by some handy work with a hex wrench.
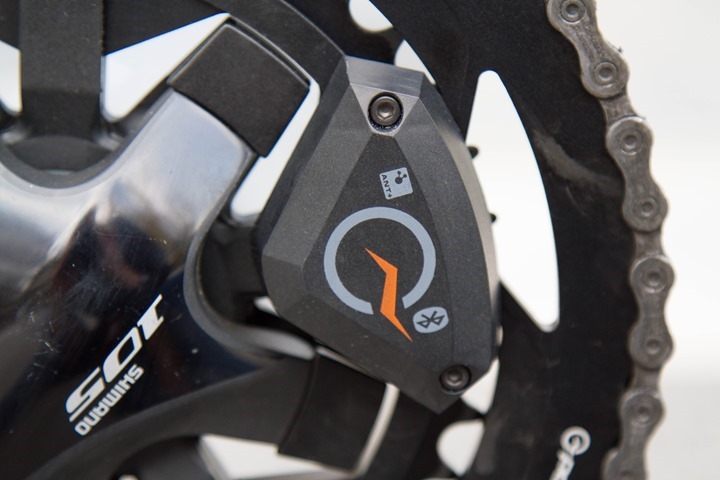
The PowerTap C1 does auto-zero automatically during a ride (just like the P1). Most head units allow you to enable/disable this, which you can do with the C1.
Last but not least is calibration, or more specifically, setting the zero offsets. With the PowerTap C1, PowerTap recommends that you perform a zero offset at a semi-regular occasion, or anytime you complete installation. To do this, you simply load up your head unit and then dive into the power meter calibration settings, where you can then press the calibrate button.
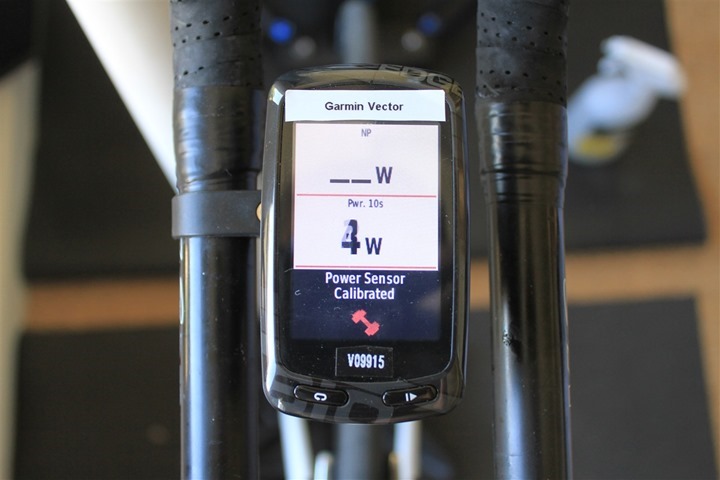
When you do the offset, you’ll return a value, as seen below. You’ll also be given the option to measure the torque, such as to manually validate the calibration.

With that value, you can keep an eye on for any drift. Like many power meters, the exact value it returns doesn’t matter – but rather, just that it’s not drifting a bunch each ride. The manual speaks to this a little bit as well:

Note, you can also set and get the value using the app too:
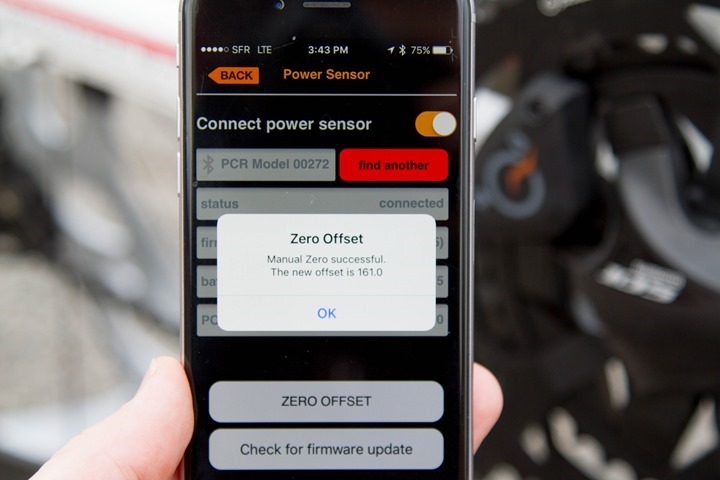
Same value, no matter how you get it.
Power Meter Accuracy Results:
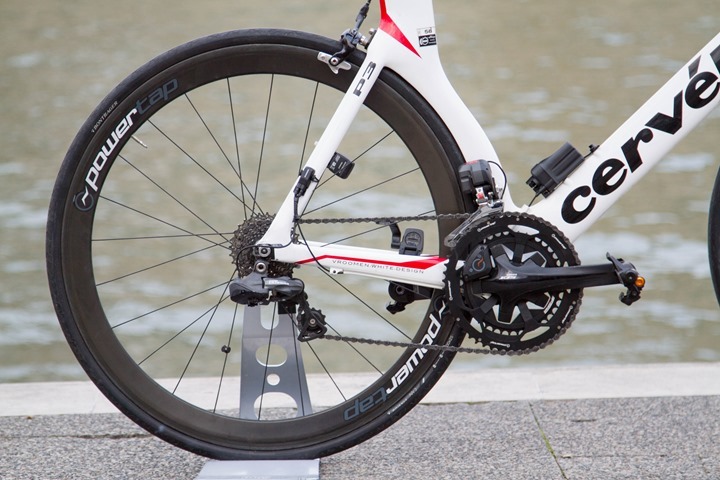
For my testing period, I used two different PowerTap C1 units (one prototype, and one final production), both of which were installed on my triathlon bike, a Cervelo P3C. Though, all my bikes are configured somewhat similar in terms of testing/validation units, normally with 3-4 power meters in total.
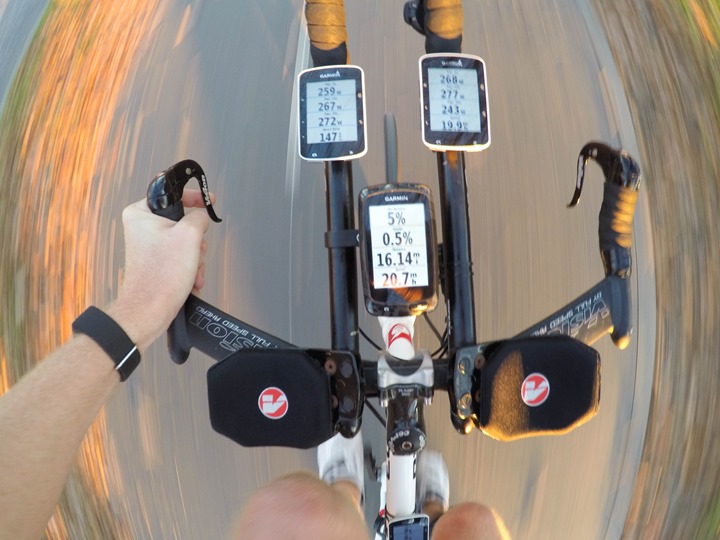
In the case of these tests, the following configuration was used:
A) PowerTap C1 chainring unit
B) PowerTap G3 wheel hub
C) PowerTap P1 pedals
D) 4iiii Precision crank-based (left-arm only)
For indoor tests, I’d usually place it onto a trainer that supported rear wheel usage (generally the CompuTrainer, so I could keep the PowerTap hub on the bike).
From a data collection standpoint, virtually all of the data used in the analysis was collected using Garmin Edge 520/810/1000 units, as well as the PowerTap Joule GPS+ (with limited M450 usage). I also recorded some data with NPE WASP units, as well as other applications. Data analysis is largely done in a custom toolset I use to ferret out differences, while also using more widely available tools like Golden Cheetah, Excel and Training Peaks to validate the results.
With that, let’s dive into things. I’m going to pick a few random rides that talk to specific conditions (i.e. temperature changes), sprints, stable power, trainer, etc… The goal being to ferret out any oddities that I might see. You can download all the ride data used in this review at the end of this section (plus a bunch of other random data I tossed in there not shown here in graphs).
We’ll start off with a relatively straightforward evening ride. This one I crossed the city and then did loops around a local park that’s a few kilometers each in length. The loops allow for uninterrupted cycling (including a nice hill), while the cross-city portions enable some varied road conditions like cobbles, and how the unit reacts to starting and stopping.
To begin we’ll start with the overview, at 1-second smoothing. I always show this first in my reviews, merely to point out how impossible it is to get anything from 1-second smoothed data at this level. Power meter data is by nature rather variable, so it’s not as simple as having a number display exactly 250w for 10 seconds in a row. Instead, it’ll look more like: 238w, 261w, 243w, 250w, 248w, 256w, etc… Which makes graphs look like this:

(Note: You’ll find a little ‘legend’ in the upper right corner. The power values displayed in all legends are merely the exact second I’ve placed my mouse over. They are NOT the averages for the ride.)
Now that I’ve demonstrated that, I’ve added a 30-second smoothing factor, which allows us to more easily pick out any differences.

In the above, you can see all four units generally track quite well. You’ll see slight variations when it comes to the Precision data, because that’s left only (more on that, within that review). I can actually overlay though the left leg of the Precision with the PowerTap P1 left pedal to help validate those numbers. Keeping in mind that a left-only configuration is often more variable, due to lack of symmetry for most riders across every intensity identically.
In any case, looking at the above, there were a few cases (seconds worth) where one or more power meters briefly strayed – for reasons that are hard to fully quantify. It can be as innocuous as just not being clipped in on one side (which can impact P1 & 4iiii especially). Or also just ANT+ drops.
Still, let’s pick out one part that’s usually quite challenging – a short sprint. In this case, you can see leading into things that all four power meters track very closely (left-leg power variances aside). Remember this data is the 30-second rolling average.

Let’s then dive into a 5-second rolling average to poke into the max power section there. You can see that as I reduce the average time length, you’ll see some of the peaks/valleys grow a bit. You’ll also notice how close 3 out of 4 power meters are within a 10w spread at ~710w, which is impressively close.

Now above you see the 4iiii Precision is a bit higher, but again – that’s just measuring left leg power and doubling – so it can indeed be spot-on accurate in terms of measurement (yet be wrong since it doesn’t account for right leg power). To demonstrate that, here’s the left channel of the fully left/right capable P1, compared to the left side of the 4iiii precision. As you can see – just a couple of watts away and matching beautifully:

Ok, let’s move onto another ride. This time an indoor trainer ride. This one is fun for a lot of reasons, but let’s walk through it slowly. First an overview smoothed at 20s:

(Administrivia: The first 10ish minutes lack the PowerTap G3 recording, due to a disconnect between my brain and the button on the Edge unit. Next, I’ve sliced the last 10 minutes off of this recording, because three out of four head units had wireless interference from my laptop – so that made things too messy. Also, in order to simplify things I removed the Elite Digital Qubo B+ channel, because I was trying to ‘trick’ that trainer accuracy-wise on this ride and don’t want to muddy the waters too much in this review.)
For this ride, I did a warm-up, and then increased power a bit till the 23 minute marker. Nothing special really. If you look at the variation, the C1 trends a bit higher than the others (~8w more than the P1 @ 180w), so a tiny bit higher than I’d want – but it’s hard to pinpoint who might be a couple watts off. They do seem to diverge slightly more at higher cadence (~120RPM), and then get tighter when I lower my cadence down to the ~60RPM range. We’re not talking major splits here, but it’s worth noting. Speaking of cadence, it does look good here. You’ll see that tiny little blip about 3-mins in on above/below graphs. That has the tell-tale sign of an ANT+ interference drop since it dropped out on both channels.

But it’s at the 23 minute marker I transitioned into doing one-leg drills, which is why you see things get all funky. But, it’s actually a good funky, because it validates data.
See two things happen when you do this. First, the 4iiii Precision can’t measure data from my right leg, so you see it drop-out when I use my right leg. Logical. But then it gets really fun when I go left leg-only, it actually doubles, as you’d expect – because that’s what it always does. So that’s when you see the big spike up. Meanwhile, the PowerTap G3 and C1 just chill in the middle aligned to a few watts. The P1 loses the plot during one-legged pedaling on the left side, due to it not yet receiving an update scheduled for the next firmware release, which allows tracking of one-legged data.
Next, I did 30/30’s. For below, I’ve reduced the smoothing rate to 5-seconds. First, you can see about 5-seconds of WiFi interference at the 7th interval, causing one of the PM’s to drop out.
Next, you’ll see all track very closely, though they slightly disagree on the high/low points here. About 20w of total difference between the highest and lowest values at the peak. At 400w, that’s 5%, but – a typical PM has a +/-2% accuracy range (so combined across two PM’s would be 4%). Further, that doesn’t account for power reading position (i.e. PT hub would be lowest, P1’s in theory highest). In this case, the C1 was reading the highest on most intervals – so it might have been a bit offset here. That said, we’re really talking everything within a couple percent – there aren’t major outliers.

Next, let’s move along to one more set. Again, another cross-town ride to do loops around Longchamp, but this time I did sprints up the hill portion. Or, at least what’ll pass for a sprint from my legs.
First, we’ll start with a 30s smoothed image – just to show that basically everyone was super-happy the entire ride. Beautiful alignment between all four power meters. Seriously, super-pretty.

Next, let’s focus on those five spikes in the middle, since those are the sprints. I’m going to pull back the smoothing to 3s – here you can see everyone matches very slowly throughout.

Next, let’s pick the last sprint and dig into it more closely. Picking the peak power – all four units are within a 9w spread at 650w (645.67w to 654.67w) – that’s a 1.37% spread. Damn impressive.

You’ll see slight differences in terms of the ascent/descent of the power lines, simply because of transmission/recording differences.
Next, if we take that same ride and slap a mean/max curve onto it, we’ll see all units agree nicely. And we also see perfectly ‘proper’ ordering: Pedal based P1’s the highest, then chainring based C1 (and Precision), and then finally the wheel hub based G3.

As you can see, I’m just not seeing any outliers here that are of any concern with respect to accuracy of the C1. Things track really nicely across a wide range of considerations. Some of these rides were in the rain, while others were on cold days. Yet others inside on warm days. All of which doesn’t even include the months of data from this summer with the prototype C1 on my bike too.
For those interested, here’s a zip file full of my data from the production unit.
Power Meter Recommendations:
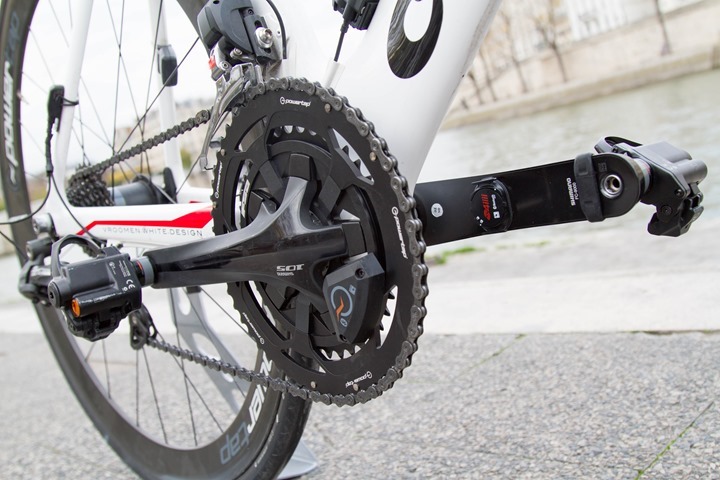
Note that while this is a power meter review, I tend not to put purchasing recommendations/comparisons to the rest of the market in these. The reason being simply that I’ve created an entire post dedicated to that – with boat loads of information about all the options available on the market.
Of course, many will draw similarities between the PowerTap C1, Quarq offerings, and Power2Max units. They’re all fairly similar in price, and bike-component wise they’re in a fairly similar area of the bike. In a nutshell, all three are rather accurate power meters that all measure near identically the same things/features. The key differences you’re probably looking at in terms of a decision tree really just come down to bike compatibility. For example – are there specific chain rings, crank arms, or bike frame integration aspects that would remove one or more units from contention – based on your bike? That’d be the main driver in my opinion. I’d have no problem using any of these three units on any of my bikes as my power meter.
So grab a cup of your favorite caffeinated beverage and swing on over to that guide for more than you ever wanted to know.
Summary:
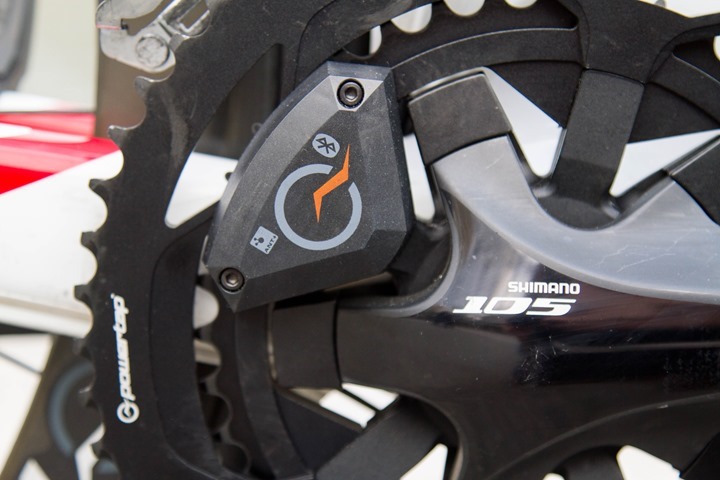
While the PowerTap C1 may not be as sexy visually or component-wise as some power meters (such as the P1), it’s just as capable when it comes to measuring accurate power. The unit rounds out PowerTap’s stable of power meter offerings pretty nicely, giving you three very strong and viable options from the company – all consistently accurate.
About the only downside to the C1 is really just in the compatibility aspect with respect to chainrings and crank arms. Right now they only support the chainrings they brand, though others have reported it working fine on 3rd party chainrings. You can indeed replace your chainrings should you need to down the road due to wear (removing the pod isn’t hard), so that piece is a non-factor. Still, some might find today’s C1 options limited. As PowerTap said way back in the spring at launch – they do plan on expanding compatibility once they got the unit launched into the market. So given it’s only been out a few months, I’d suspect we’ll see increased compatibility as we ride into next year.
In the meantime, if your bike and components are compatible – then there’s no reason not to choose the PowerTap C1. It works, is reliably accurate, and is easy to use.
Found this review useful? Or just wanna save 10%? Read on!

Hopefully you found this review useful. At the end of the day, I’m an athlete just like you looking for the most detail possible on a new purchase – so my review is written from the standpoint of how I used the device. The reviews generally take a lot of hours to put together, so it’s a fair bit of work (and labor of love). As you probably noticed by looking below, I also take time to answer all the questions posted in the comments – and there’s quite a bit of detail in there as well.
I’ve partnered with Clever Training to offer all DC Rainmaker readers an exclusive 10% discount across the board on all products (except clearance items). You can pickup the PowerTap C1 from Clever Training. Then receive 10% off of everything in your cart by adding code DCR10BTF at checkout. By doing so, you not only support the site (and all the work I do here) – but you also get a sweet discount. And, since this item is more than $75, you get free US shipping as well.
PowerTap C1 Chainring Power Meter (select drop-down for specific rings)
Thanks for reading! And as always, feel free to post comments or questions in the comments section below, I’ll be happy to try and answer them as quickly as possible. And lastly, if you felt this review was useful – I always appreciate feedback in the comments below. Thanks!


