CycleOps Virtual Training In-Depth Review
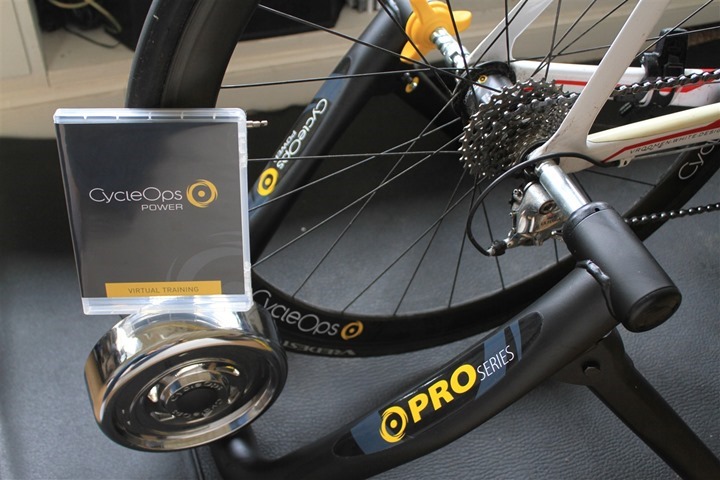
While the CycleOps PowerBeam Pro has been around a while, their entertainment and training software – Virtual Training – just came out late last year. I’ve been using beta versions on and off since last spring, and with the final version released, it seemed time to take it for a spin and share my final thoughts. Starting with – is it worth the cost? And how does it close the gap against other trainer platforms, especially newer ones? Well, I set out to find out.
In doing so, I’ve got a pretty good grasp on how the unit works, as well as all the inside and out details. Because I want to be transparent about my reviews, once my evaluation period with the PowerBeam + software has elapsed, I send it back to them in Madison, Wisconsin (in fact, it’s already with me here and boxed up and ready to drop-off at UPS tomorrow). Simple as that. Sorta like hiking in wilderness trails – leave only footprints.
Now one quick note – I’ve already reviewed the PowerBeam Prolast year. While there have been some minor changes to the unit itself, there isn’t enough to justify a full review of the same unit again. I’ve covered those difference between the old and new unit below (and the changes coming there). So, if you’re interested in ‘the full solution’, just look at it as twice as much information!
Lastly, at the end of the day keep in mind I’m just like any other regular triathlete out there. I write these reviews because I’m inherently a curious person with a technology background (my day job), and thus I try and be as complete as I can. But, if I’ve missed something or if you spot something that doesn’t quite jive – just let me know and I’ll be happy to get it all sorted out. Also, because the technology world constantly changes, I try and go back and update these reviews as new features and functionality are added – or if bugs are fixed.
Initial Setup and Configuration:
Installing the application is pretty easy and straight forward. You’ll download the most current version of the Virtual Training software from the site. In fact, you can download a ‘trial’ version if you’d like (simply an inactivated full version).
The app installer also enables 3rd party integration scenarios, such as downloading from devices (for creating courses). You can just check/install what you need. I would install the K-Lite Codec pack as some of the videos may require it. A codec pack enables your computer to view different video file formats, sorta like understanding different languages.
For those computer geeks in the crowd, you may be surprised to see the K-Lite pack included in a production/paid product (as it’s freeware). Historically K-Lite has often ‘lifted’ paid codecs from other companies, and redistributed them without permission. My understanding is that practice has ended as of last spring. Fwiw.

At any rate, the installer will bumble along. It doesn’t take too long, even on a slow computer.

It may go ahead and install Google Virtual Earth (it will, unless you already have install it). You’ll need that for the mapping components.
Once everything is done and installed, you’ll be here. This allows you to change the language, as well as change from Statue (Miles/MPH) to Metric (Kilometers/KPH).

Before you go any further, go ahead and plug-in that CycleOps USB ANT+ stick:

Now we’ll go ahead and select our device type – in our case, the PowerBeam Pro. Note that if you have a power meter (such as the PowerTap), you can actually use that instead of the Power Beam (if you don’t have this trainer at all), and the software will still work from a riding standpoint. Obviously it won’t magically provide resistance control, but video playback will work.

Then, it’s time to activate the product. You’ll just type in the nice long product key inside the CD case that you got.

It takes about 30 seconds to activate:

With that set, you’ll notice the title bar (top window bar) no longer says ‘DEMO’, and you’re good to go!
Now you’ll create a new user, or download an existing user. Either way, it only takes a second.

In my case, I downloaded my existing account. This is handy in the event you need to move between computers (you can de-activate and then re-activate easily between computers if you need to).

With that, you’re signed in and good to go!

Lastly, if you want to tweak any settings – there’s a handful you can change that we haven’t already covered. Those are mostly Google Earth layer settings.

Ok, let’s get the accessories all paired up.
Pairing to PowerBeam and ANT+ Accessories:
Now that we’ve got everything installed, we’ll need to pair it to the PowerBeam, and any other ANT+ accessories (i.e. Heart Rate strap).
I’m going to assume you’ve got that USB stick plugged in, otherwise you’ll get this:
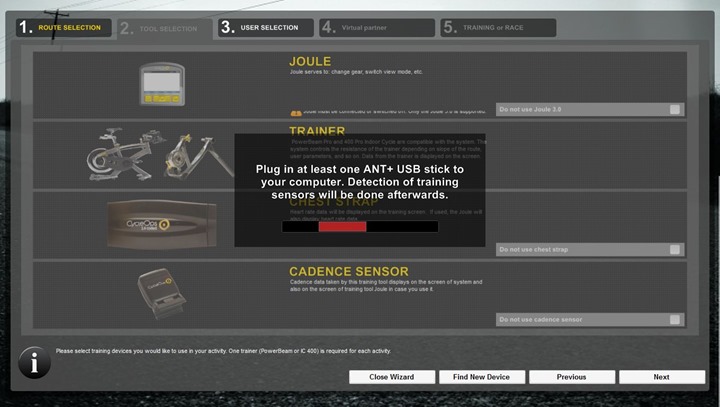
Once that’s done, this screen will illuminate. You can see the different types of sensors that you can pair. In my case, I’ve paired the PowerBeam Pro and a cadence sensor, but haven’t paired a heart rate strap.
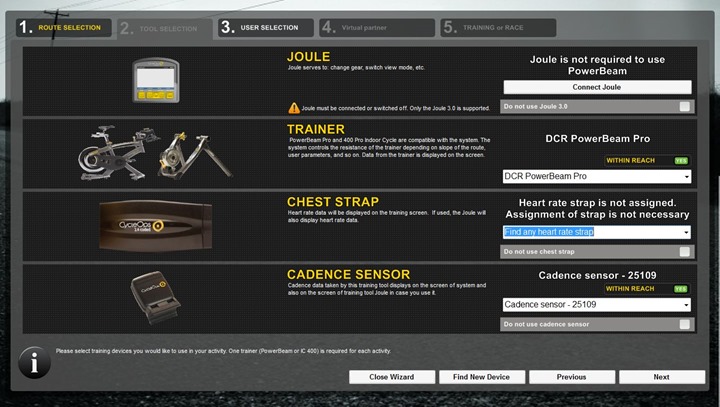
So I can click on ‘Find New Device’, and go ahead and walk through the new device wizard:
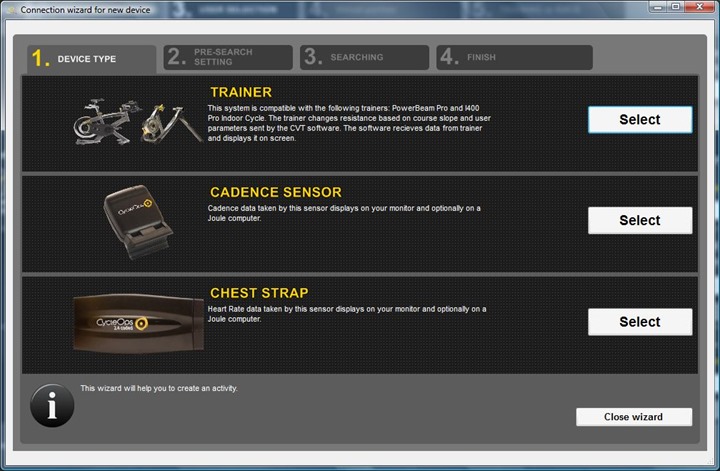
In this case, a different cadence sensor:
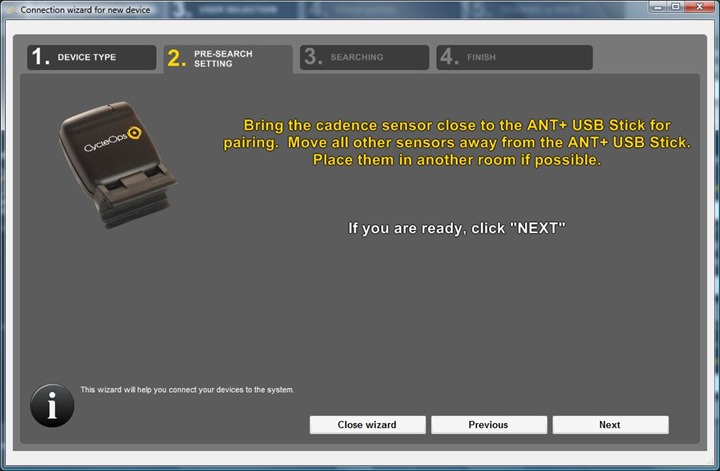
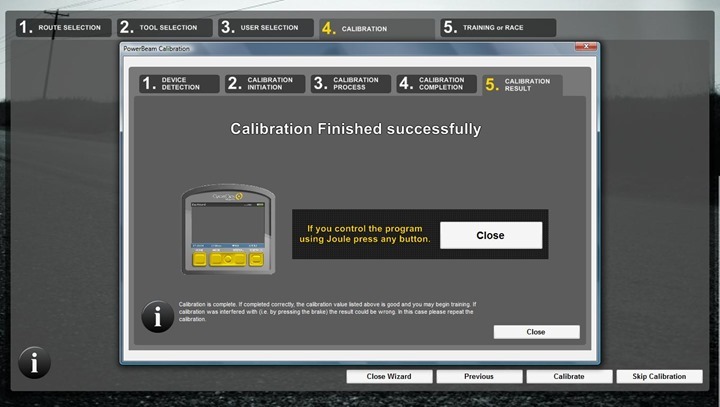
Once you’ve got all your accessories paired up, then it’s time to calibrate the PowerBeam, which takes about two minutes to complete:
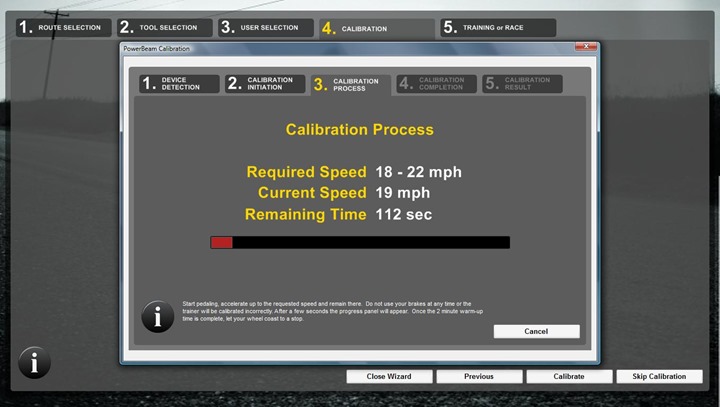
You need only pedal at 18-20MPH (fear not, the resistance isn’t hard), and then at the end it’ll have you stop pedaling and record how long it takes to spindown.
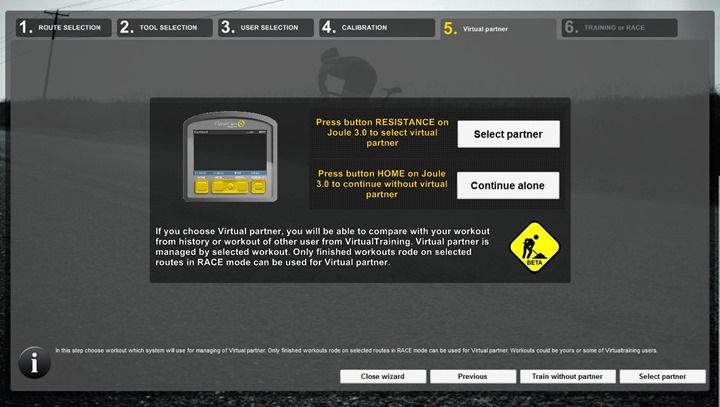
Finally, unrelated to initial setup, you’ll be able to select a Virtual Partner on a given course , which is essentially racing against someone else (either from your own history, or from online).
Now that I’ve covered the setup – I’m going to talk about the core ways you use the actual product.
Riding Video Routes:
Video routes are those routes that include a video (shot somewhere in the world) shown on your screen, alongside a GPS file that controls the resistance of the trainer – just as if you were riding it outside.
Now before you can ride a route, you’ll need to search out the route from the online repository and download it. Sorta like Netflix. You can download as many routes as you’d like, and ‘keep them’ for as long as you like. Storage space is really your only limiter. There’s a ‘good’ selection of videos. Not great, but good.
Below is the search screen for finding new routes to download. You can filter them by location or other parameters, but the key checkbox you’ll need is the one I’ve circled/yellowed – which is the ‘video’ checkbox:

Once that’s done you can select a route that sparks your interest. Routes are added all the time, and I’ll show you in a bit how you can create (and add) your own routes.
If you click on a route you can look at a bit more information on the route, and then go ahead and start the download process.

Before you download it’ll let you know how big the download will be. In most cases, I’ve found most videos to be about 500MB (.5GB) to 2GB, with most routes being about an hour in length. Though there are some rides where you can piece together multiple segments.

Once started the download progress will display on a screen that you can hide away. The progress bar is also seen in the upper right corner of the application.
In my experience (across multiple internet providers and locations), the download speeds aren’t quite as fast as your home network probably is. Meaning, budget a bit of time (30-60 minutes) to complete a download of (for example) a 1GB file. In other words, do it the night before.

As noted previously, you can see the status in the upper-right corner, as well as in the ‘local routes’ section, which shows things you’ve downloaded.

Now comes time to ride the route.
You’ll go into the Local Routes area and double-click on a route. Local Routes simply means “Things on your computer” whereas Internet Routes means “Things you can download to your computer”. There’s a lot of little wording things throughout the application that don’t quite jive in native English.
Much of it being because the application wasn’t developed by CycleOps, but rather licensed from a company called Univet, which also provides the software for other companies in a rebranded format. This is both good and bad. It’s good in that it’s a bit more stable that some training applications out there because they’ve been doing it longer. But on the bad side, there’s some language issues as it wasn’t previously in English. None of the language items are show-stoppers, but they rough up a bit of the ‘polish’ so to speak.
At any rate….
We’ve double-clicked on the route. At which point it’ll go ahead and validate your ANT+ accessories and connectivity to the trainer. Then you’ll be given the option to calibrate the trainer, as well as select/change the user.
Once all that’s done, you’ll be brought to the starting screen.
It’s here that you can go ahead and start your activity. Within the activity, you’ll generally be in a screen like the below (taken from a different video I rode):
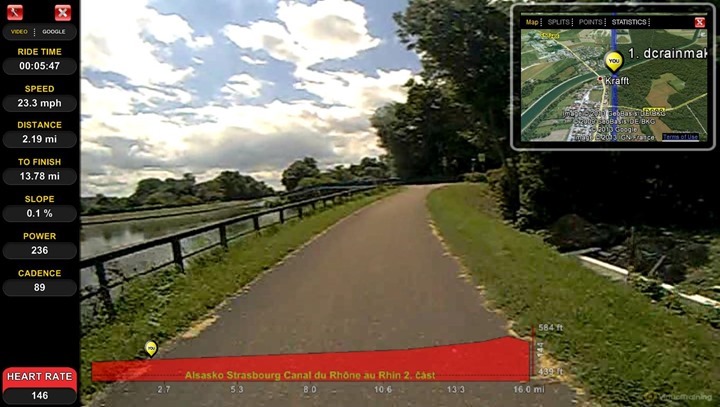
This screen shows you along the left side your current metrics. Some of this is dependent on ANT+ sensors (Heart Rate & Cadence), while others is based on data from the PowerBeam (Power/Distance/Speed), and finally, some of it is based on data from the video (Slope).
In the upper right, you’ve got the Google Earth aerial view of where you are on the route. You can change that window to show other details like splits and stats instead. And, you can swap the view such that instead of showing the video in the big window, you can show it in the small window.
As you ride through the video, the trainer will automatically adjust the resistance and slope based on the data recorded in the GPS file – which is in turn synchronized with that from the video. Thus as you climb a hill in the video, you’ll also climb a hill from a resistance standpoint.
The video playback speed is based on your speed. So at certain speeds above/below ‘normal’ (the recorded speed), other aspects of the environment may look out of skew. For example, if on this path I slowed down to 4MPH – then things would be pretty ‘slow-motion’ feeling with respect to other cyclists or cars I might see. Make sense?
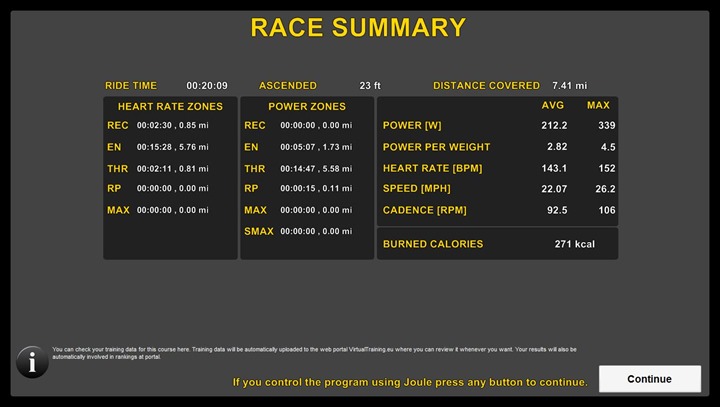
Once you’ve completed the ride, it’ll give you a ‘Race Summary’. I took the below from a shorter ride I did, showing some of the stats:
Let’s look at GPS routes (without video), and then building your own routes.
Riding GPS routes:
In addition to riding video routes, you can also just ride Virtual Earth versions of routes. These are routes where someone (or yourself) is re-riding a given GPS course. The course is then overlaid onto Google Earth, enabling you to simulate the ride a bit better.
When you search for routes, you’ll simply ensure the ‘Video’ option is unchecked’, so that it returns all routes:

There’s a fair bit more routes without video than with video, so you’re more likely to find something you like here. And if you don’t, you can go grab/steal/borrow a GPS/GPX file from any number of online sources such as MapMyRide.com/Garmin Connect and others. I talk more about how to do that later.
In the results, you’ll see which ones include videos and which ones don’t:

In this case, I’m actually going to ride a route of my own that I created. Once I’ve loaded it up, you’ll see the view is simply the map screen. In this case – at a very high level.
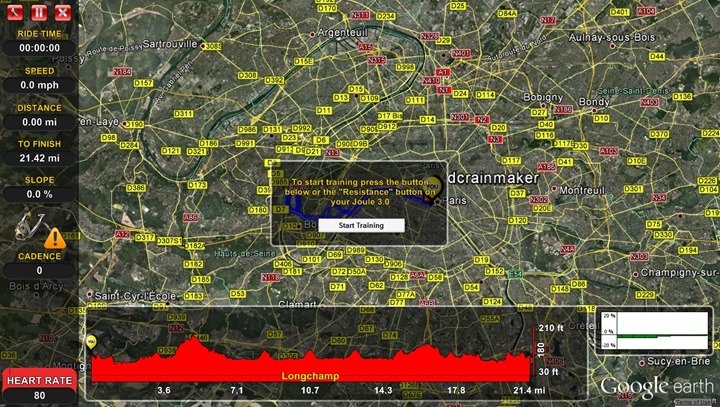
Along the bottom of the ride is the elevation profile that I’ll be riding, and in the lower-right is the slope.
As I start the ride, I can go ahead and get zoomed in a bit more and view exactly where I am along the route. Just like in the video mode, the trainer will automatically adjust the resistance to simulate hills. In the below screenshot you can see that I’m just about 32 seconds from the start of the course, headed along the river.
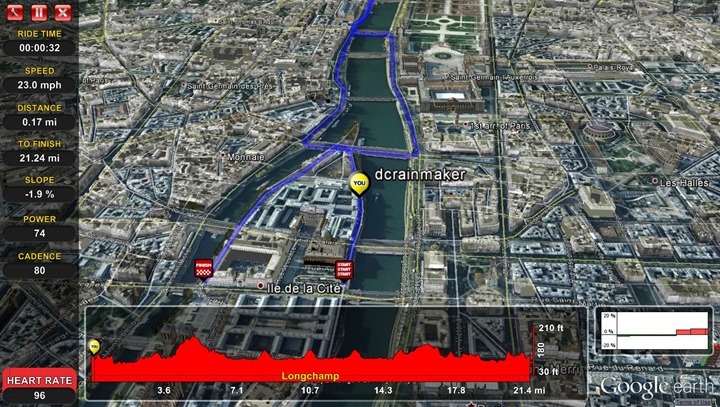
Within this mode, the unit is using the Google Earth graphics engine to pull building imagery and 3D model information. How much imagery depends on the settings we talked about earlier, as well as your computers processing capabilities. In my case, I actually put this on an older computer – one that the newer Tacx TTS suite (a competitor) won’t even run on (in Google Earth mode). Yet here, it ran just fine.
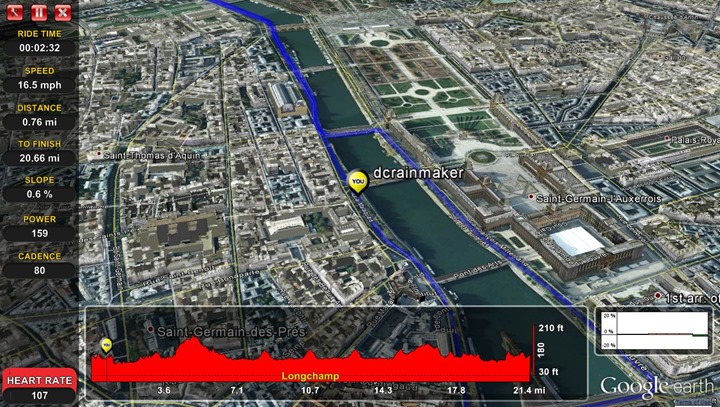
You can see below the Louvre just to the right of my little ‘dcrainmaker’ yellow dot.
And again, just another screenshot – this time adding in the current ride stats window in the right corner.
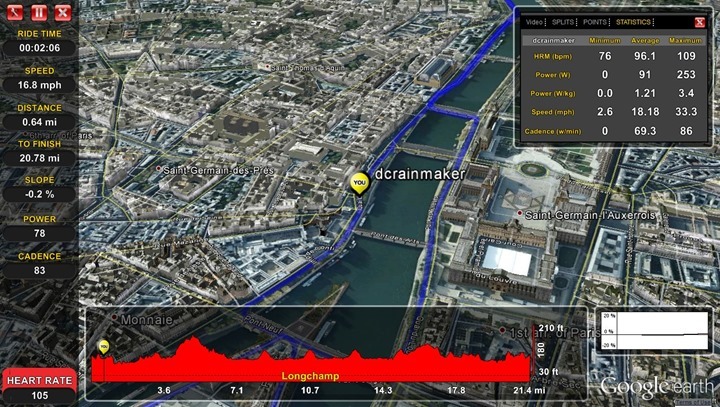
Beyond that, everything else is the same as video mode (except the video of course).
Creating your own GPS (and Video) routes:
In addition to riding the routes that are available ‘in the cloud’, you can also create your own GPS routes, as well as video routes. By creating your own routes you can ride those courses in Google Earth. For example, you could go pre-ride a course for an upcoming race or event. Or, you could simply ride an outdoor course indoors when it’s raining and cold (my preference).
Creating GPS routes is pretty simple. You’ve got two options, first, you can import a GPS file (in a few different formats) into the application. From a format standpoint it supports most of the major devices out there on the market today, either directly or indirectly. When I say indirectly, I mean that it doesn’t for example list the Magellan Switch, but that unit spits out files in the formats it does support (.FIT for example). Given what I know about devices, if you have a device, it’s got about a 95% chance of working with the below file types.
And noted above, if you don’t have those files just go and download it from MapMyRide.com or Garmin Connect. If that route exists as a race/event/ride, then I can guarantee you that someone on this planet has ridden it and uploaded it to one of those two services.
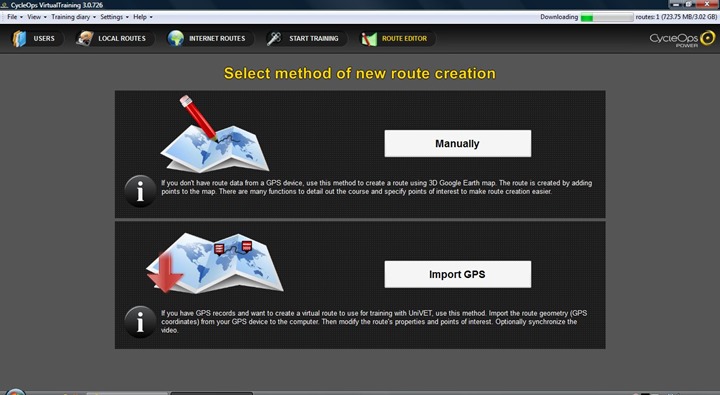
To import a course, you can use just about any file format known to mankind:
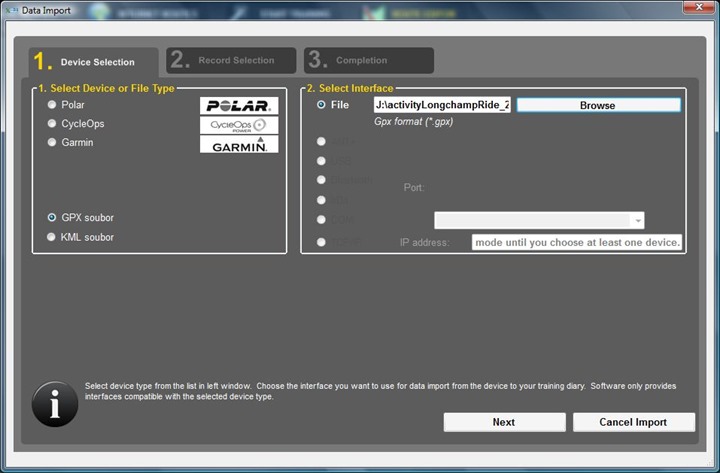
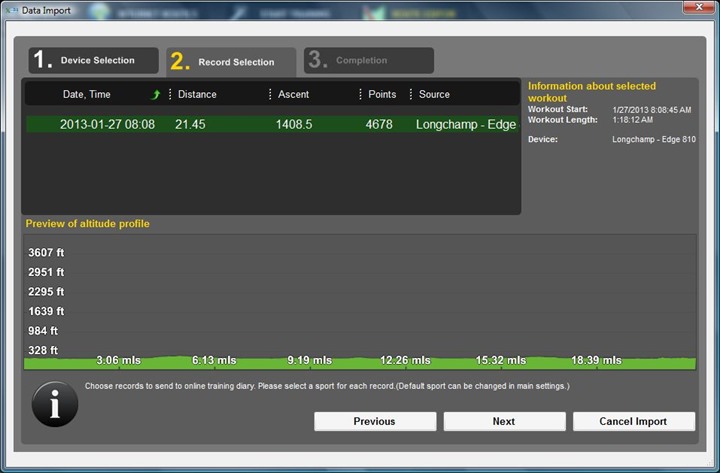
Once you import it in, you’ll see a elevation profile along the bottom, and the total data points/distance/ascent from the file:
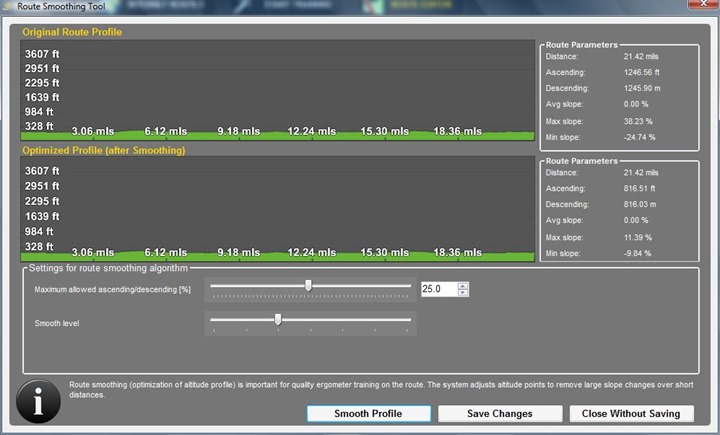
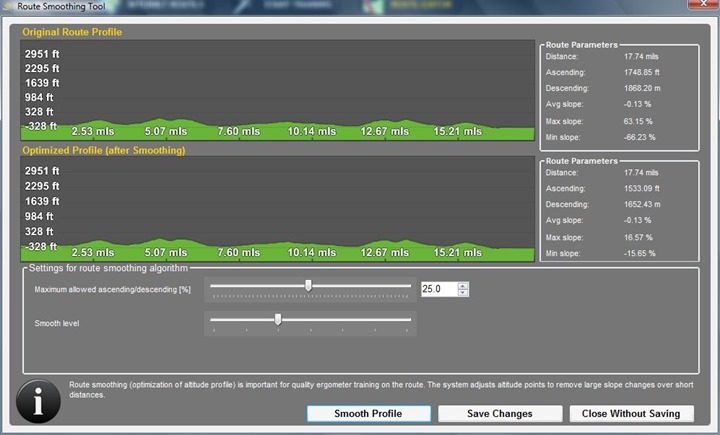
Next you’ll be able to smooth the profile to remove any GPS issues. This is important. Note for example the max slope listed before/after in the two items. Quite frankly – THIS is the special sauce here that many might overlook. Without this smoothing you’ll get moments where the PowerBeam would apply significant resistance in an attempt to ‘recreate’ that unattainable 38% slope. But by having this smoothing you see that at the worst point, it’s 11% (which is still pretty steep), but certainly attainable.
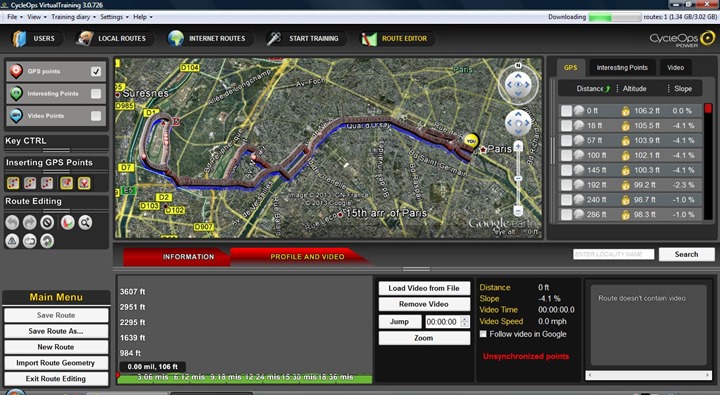
After you finish importing, you’ll see it available within the route editor to go ahead and tweak. For example, you could remove points (shorten), change the route, or even add points (lengthen).
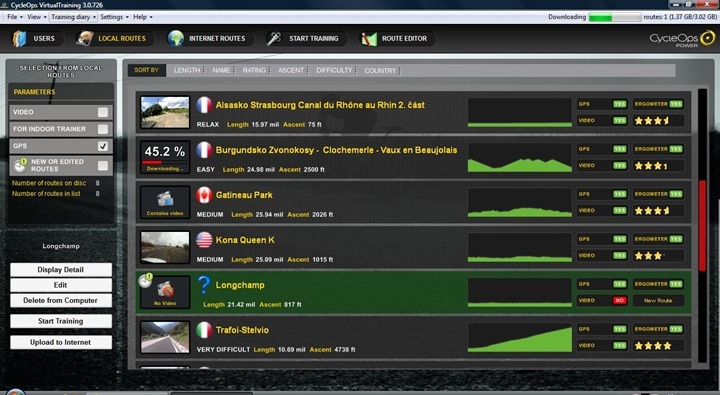
Then, upon saving you’ll find it within the Local Routes area. If you select to upload this to the site, then others can ride it as well. Note that in the below, you’ll see it doesn’t have a video, so the icon doesn’t show a video preview clip.
When it comes to riding these routes, it works identically to those that you imported in from the ‘Internet Routes’ section. In fact, if you look at the previous section, the route that I used there was one I created above. Cool, huh?
In addition to importing in routes, you can simply create your own routes. You’ll effectively play connect the dots to put the route together. Now, while it’s straight forward, it does take a few minutes to get the hang of, primarily due to some weird wording things.
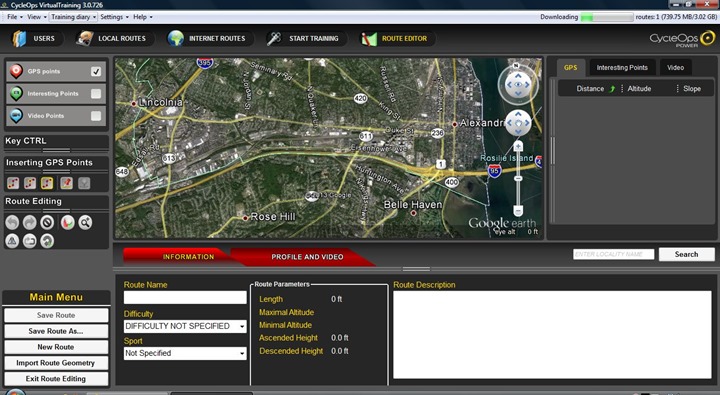
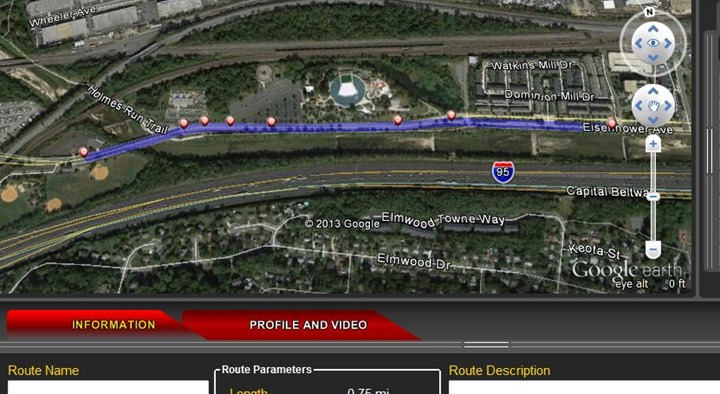
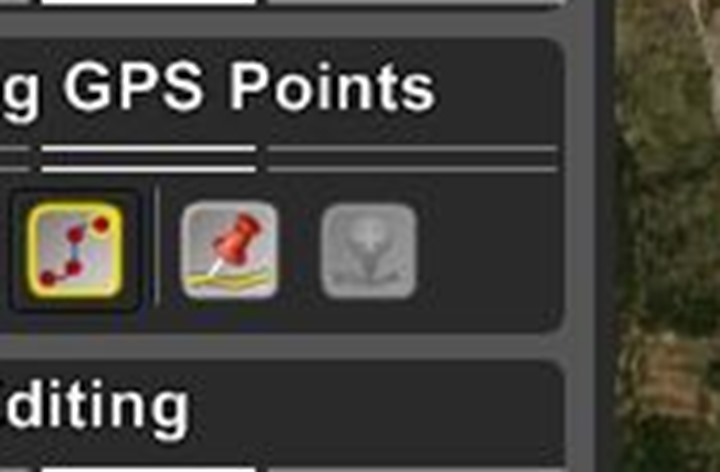
To start off though, you’ll want to check two buttons. First is the button that locks new route points to the road. And second is the button that locks your route to the road. Otherwise, it’ll do this:
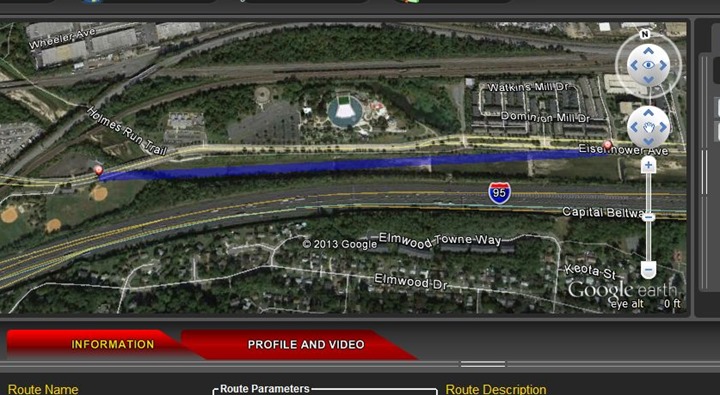
When in reality, you actually want this. The key difference being one follows the road, while one tries to make an illegal crossing over a river and a baseball field. Foul ball!
Those two buttons are here:
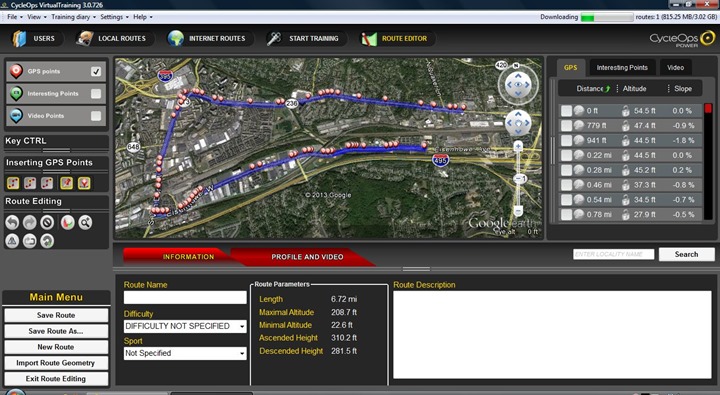
Next comes creating new route points. You’ll just right click on where you want the route point to be created, and then select either ‘At beginning of route’, ‘In middle of route’, or ‘At end of route’. While I think the intention here is to make it so you can make more complex routes and add points later on, it makes it a bit confusing. In short – just always click ‘At end of route’ and life will work out.
If you select a point sufficiently far away, it’ll try and find the right routing between those points. Sometimes this works out fine (close destinations), and sometimes it’ll send you up on a highway at 70MPH+, as in the case below:
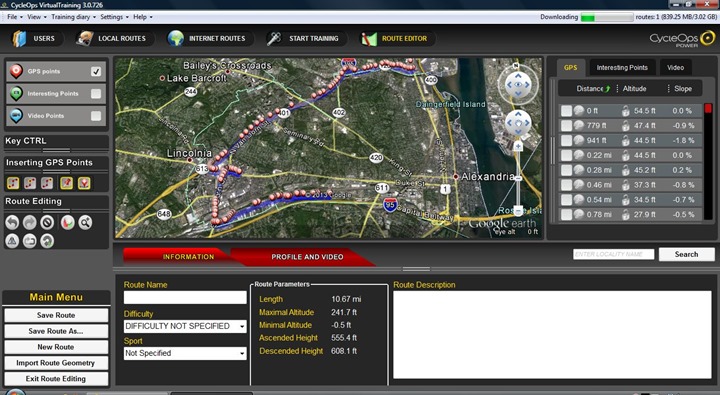
I also found that if I selected a point too far away, it would just sorta give up and not display and error message.
But in general, it works fine. And in most cases, since you’re actually specifying a route to ride, you’re usually pretty specific on what that route should look like. Thus you’re probably down at a pretty close level.
Overall though, it’s still fairly straight forward to create GPS routes.
Creating Videos to Ride:
Now comes the more interesting part – creating courses with your own GoPro videos (or, whatever video camera you’d like). First, you’ll need to have both a GPS file and a video file. Ideally, those are time sync’d together. Of course, if from a race this can get a bit tricky.
I have a number of video files with GPS tracks that I’ve taken over the years, but most aren’t super-well sync’d together. So I decided to aim for the stars and pull up the course last June with a FR910XT exported GPS file. Since the GoPro file was split into two pieces, it seemed like I may be in for some trouble. Honestly, going into it I had about 20% confidence this would work. But I set out trying.
(Side note: Because most longer GoPro footage will be spliced into multiple files, you’ll need to put it together into a single file in order for the CycleOps software to utilize it – otherwise it’ll try and speed up the GPS file to match the shortened video. You’ll need to grab some freeware (or paid) program to tie them together. Note, try and ensure that the the file length is almost EXACTLY the same as the GPS length. If there are differences, it’s really difficult to align everything because even though you can do a starting offset, you can’t do an ending offset, which means it’ll ‘scale’ things instead of just playing from the offset.)
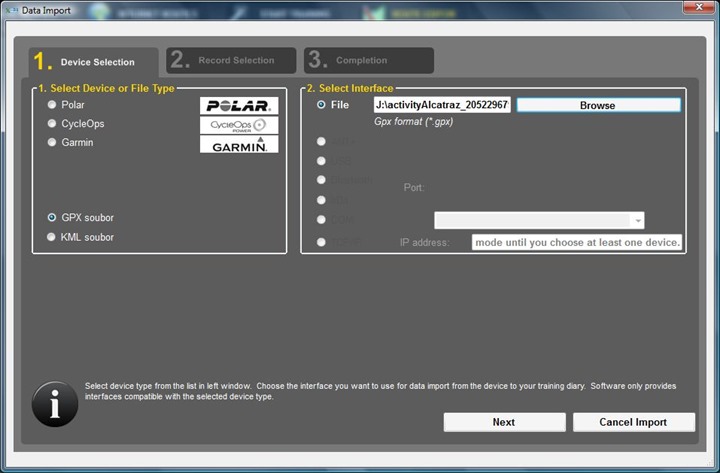
After getting the files copied over, I went ahead and created a new route based on the GPS file as above. First, importing in the file:
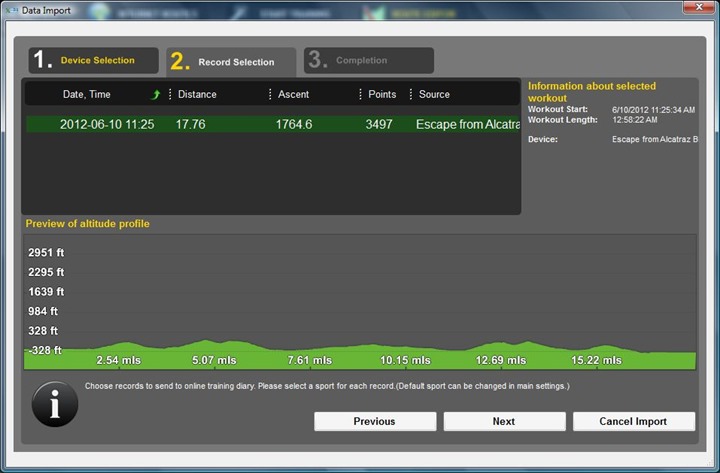
Then comes smoothing things out. Again like above, note how important it is to apply the smoothing – specifically look at those Max Slope numbers along the right.
Once the GPS file is pulled in, you’ll see the overview of the raw course on the map. In this case, my Alcatraz ride:
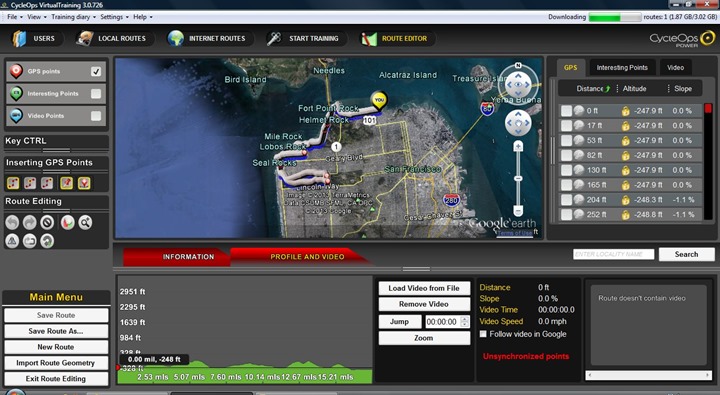
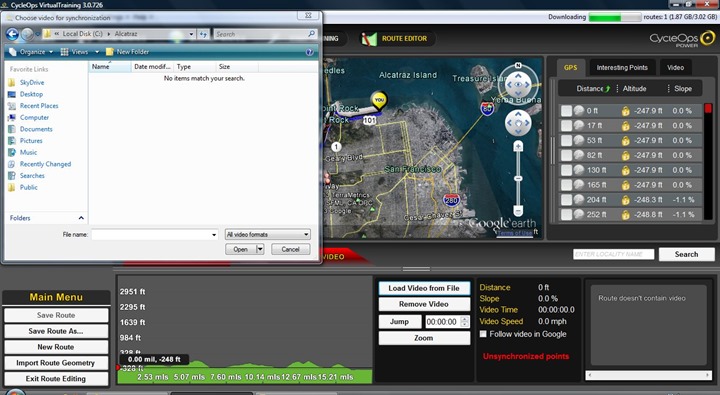
Next comes adding the video. You’ll do so by clicking the ‘Load Video from File’ button. Note that you’ll likely have to change the dropdown within the box to ‘All files’ instead of ‘All Video formats’, otherwise you’ll just see an empty box like below:
Once you’ve imported it in, you’ll see the preview in the lower right corner. At this point, it assumes that your video starts at exactly the same point as your GPS file. In my case, that’s a flawed assumption. My video starts in the transition area some 22 seconds prior, while my GPS file starts at the exit to transition.
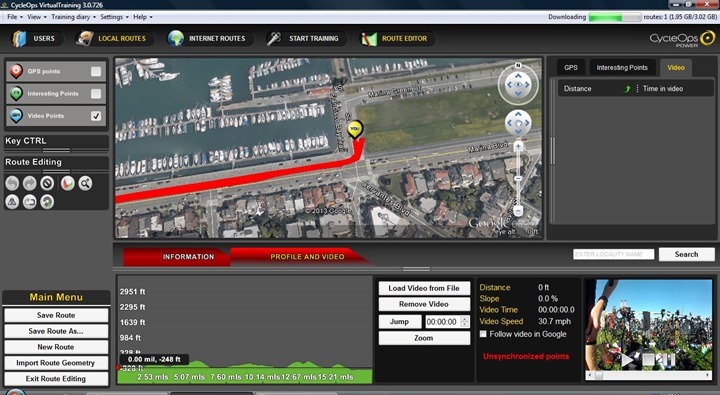
So you’ll have to finagle a bit to get the video to lineup precisely to the GPS start point. Otherwise, things will look out of whack.
This will take a while. The tools are a bit funky here in terms of aligning points. Reading the help file will leave you more confused (I think it went through Google Translate a few times too many). The most important tip I can give is simply right click where you want the video to start on the track file in the map window, and then set the offset there. I know that sounds simple and maybe even obvious – but I assure you, it’s really not.
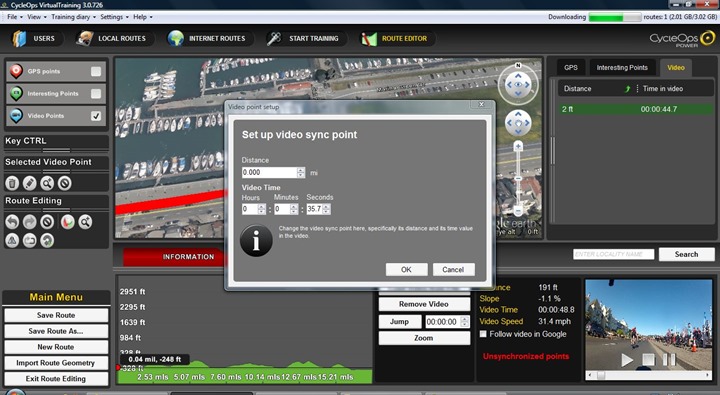
Once that’s done, you’ll see the offset displayed. So in this case, it’ll start the video from the 22 second marker instead.
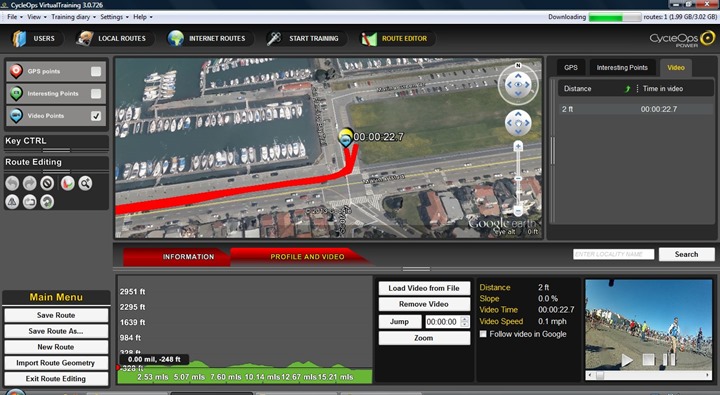
So, once that’s all done, just save everything up (locally). This takes a bit of time. Like, a long bit of time.
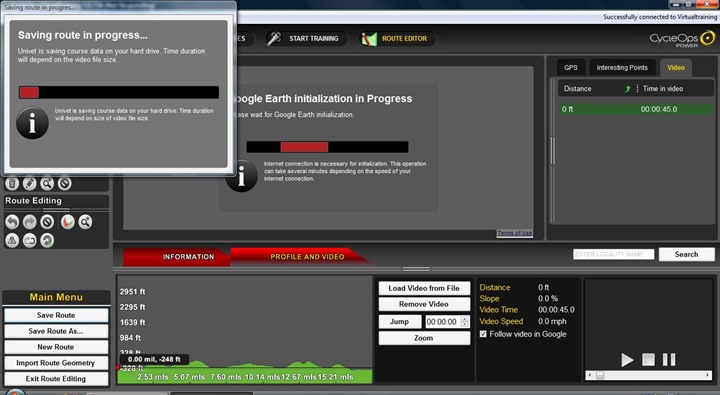
Eventually it’ll finish, and upon doing that you can actually upload it to the service. This means that as I go on cool rides around the world, I could share them easily with you.
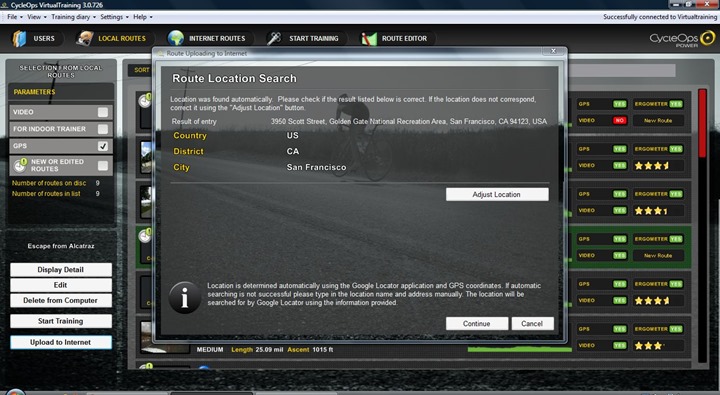
To do so, you’ll click ‘Upload to Internet’ in the lower left corner. Upon doing that, it’ll go ahead and finalize the official listing location, in this case – San Francisco.
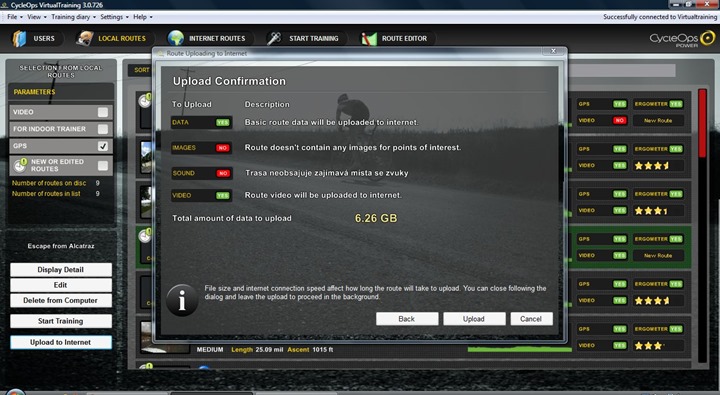
Then it’ll confirm everything – including the video sizes. Eek that’s big!
Then you can click ‘Upload’, and wait forever. in my case, some two days was the quick back of the napkin math. I assure you, not because of my connectivity. I cancelled it prior to finishing, but I may try again in the future.
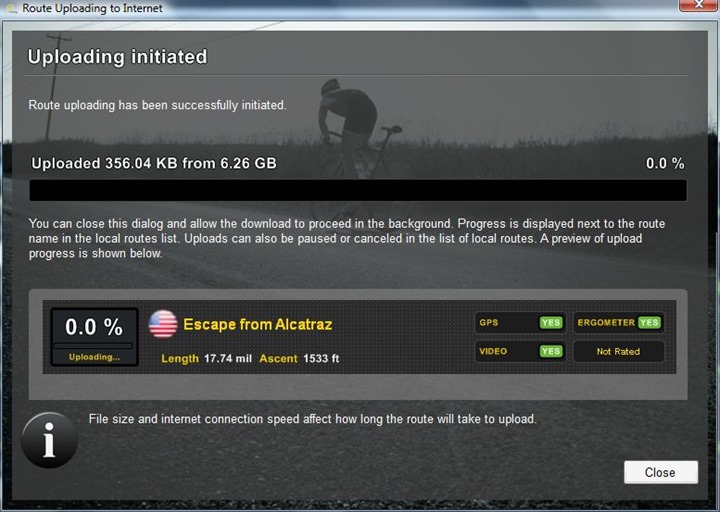
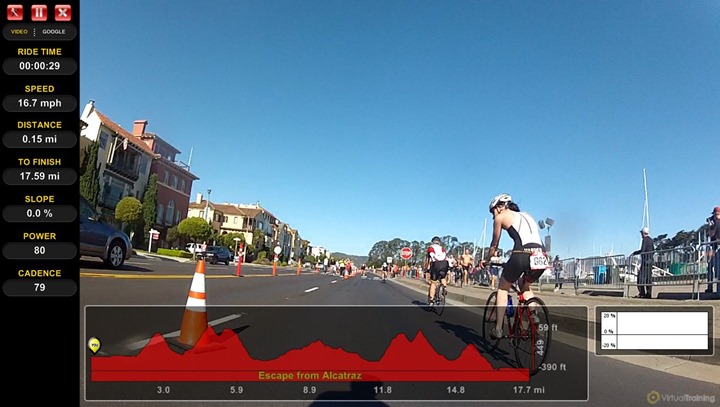
Of course, for me, riding it myself is more interesting. Here, I’m able to ride it just like any other video course I could download. Here you can see my view during last years Escape from Alcatraz just after the mount-line.
And then a bit later:
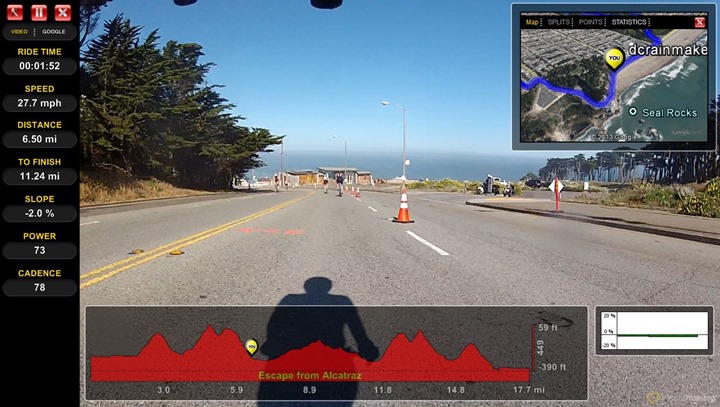
Again, pretty cool stuff – and lots of potential.
Notes about Fall 2012 changes to PowerBeam Pro Trainer:
I just wanted to very briefly touch on some minor changes to the PowerBeam Pro that have occurred in the last few months, and what those mean since my original review. As you’ll read below, any (negative) changes should largely be eradicated here in the coming weeks. Thankfully, the positive changes won’t disappear however.
Lack of ANT+ power broadcasting…or not?
Up until the end of last summer, the PowerBeam Pro trainers that were being sold included the ability to broadcast the power being outputted into ANT+ as a stream that any power meter compatible head unit could pickup freely (such as an Edge 500). The idea being folks could record their workouts on the head unit of their choice, since sometimes folks already had workflows around training data.
However, around August the retail/distribution channel of PowerBeam Pro units came to a bit of a halt as CycleOps had a new updated version coming out. When it came out a month or so later, it lacked the ANT+ power broadcasting. Gonezo!
This wasn’t published and ended up leading to some confusion (well, a lot of confusion).
I talked with CycleOps about this a week or two ago, and they confirmed that starting later this month (February), all new PowerBeam units will again include automatic broadcasting of the ANT+ power stream. The reason it was pulled was that in order to improve some of the electronic aspects of the trainer, specifically around communication, they removed all non-essential communication and rebuild the pod from the ground up. In doing so, they pulled the ANT+ power broadcasting, not thinking that too many folks were really using it. As they went to market with the updated device, that component never made it back in.
Since release, they’ve received feedback, and as such the final testing is underway to add that back in. For those who bought trainers between then and now, CycleOps will update your firmware for you. However, that will take some cross-shipping back to them, as it’s not an end-user serviceable item. They’re working the details out on that.
Either way, it’s good news to see a change there.
TrainerRoad Integration
One item definitely worth noting is the just announced last week integration of Trainer Road (TR) with both the new and old models of the PowerBeam Pro. This is the first time that the CycleOps trainer has been integrated (above board) with a 3rd party software solution. Historically, Saris/CycleOps has been fairly closed in allowing other developers to connect to the unit.
But the TR guys and and the CycleOps folks apparently had a chat and got it all worked out, and now TR can control the resistance on the unit. Joining the two other trainers at current they control, the CompuTrainer and KICKR.
While the TR software update isn’t public just quite yet, I had a chance to run a beta version. Setting it up is essentially just as simple as connecting to the KICKR (and quite a bit easier/cleaner than connecting to the CompuTrainer).
Once you’ve got it paired, then all you need do is start the workout like normal with them. They don’t have a specific timeline for the change/update, they did publically announce it, and it’s in private beta versions – so I suspect it’ll pop –up soon.
A more open platform?
Given these two changes, I have to believe this might signal the start of a more open platform for the PowerBeam Pro. While it’s no doubt that opening up the platform may reduce sales of the Virtual Training software, I think CycleOps realizes that the Virtual Training software is somewhat limited in functionality compared to what other platforms (namely Tacx with TTS) are doing at half the price.
For example, in comparison to those suites, the Virtual Training suite lacks many features such as street view riding, predefined workouts (though, that’s coming), 3D computer generated courses.
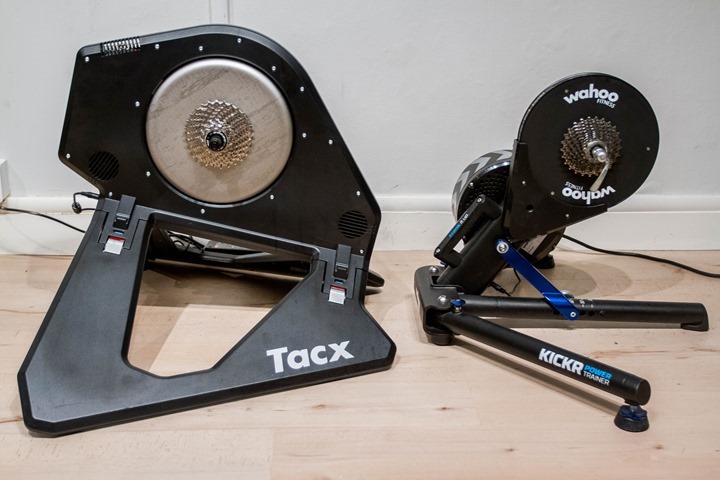
By opening up the platform they could allow others to fill those gaps. More importantly however, it ‘levels’ the playing field between them and the Wahoo KICKR, which is priced just a tiny bit lower at $1,099 (compared to $1,179 for the PowerBeam). From a pure hardware perspective, it’s relatively close to a wash. Yes, the KICKR has Bluetooth Smart – but ultimately as long as CycleOps allowed control of the PowerBeam, the end-resultant is pretty similar. And, some folks prefer not to have to remove their rear wheel each time as you’d do on the KICKR.
Essentially, it would allow consumers to pick whichever hardware platform made the most sense. Now again, they haven’t fully opened up things today, but I’ve gotta believe that doing so would really help keep them in the game going forward over the next 12-18 months as more apps start to show up in the marketplace for trainers.
Comparison Tables:
You can utilize the below comparison table that’s dynamically updated over time (so as features change via firmware) to compare the different trainers that I’ve reviewed. Note the key part being ‘I’ve reviewed’. There are no doubt many other great trainers on the market, it’s just that if I haven’t reviewed it, I don’t feel right including it based on some marketing fluff.
Also, as you’ll probably notice, these are higher end trainers. If you’re looking for lower-end options, see my general trainer recommendations post.
Copyright DC Rainmaker – Updated November 22nd, 2016 @ 3:02 pmNew Window
Price for trainer$799$1,199$1,340$1,629
Attachment TypeWheel-onDirect Drive (no wheel)Wheel-onWheel-on
Available today (for sale)YesYesAvailable todayYes
Availability regionsGlobalGlobalGlobalGlobal
Connects to computerYesYesYesYes
Uses mouse/keyboard as control unitYesYEs (with apps)YesYes
Uses phone/tablet as control unit (handlebar)YesYes (with apps)No3rd party apps/hardware required
Wired or Wireless data transmission/controlWirelessWirelessWirelessWired/Soon WiFi
Power cord requiredYesYesYesYes
Flywheel weight12.5lbs/5.7kgs
Can electronically control resistance (i.e. 200w)YesYesYesYes
Includes motor to drive speed (simulate downhill)NoNoYesNo
Maximum wattage capability1,000w+2500W @ 30mph-1,500w
Maximum simulated hill incline15%
Ability to update unit firmwareNoYesYesNo
Measures/Estimates Left/Right PowerNoNoNoYes
Can directionally steer trainer (left/right)NoNoYesNo
Can simulate road patterns/shaking (i.e. cobblestones)NoNo
Includes temperature compensation-Yes–
Support rolldown procedure (for wheel based)YesYesYesYes
Supported accuracy level+/- 5%+/- 3%-+/- 2.5%
Allows 3rd party trainer controlYesYesNoYes
Supports ANT+ FE-C (Trainer Control Standard)NoYesNoNo
Supports Bluetooth Smart control for 3rd partiesYes (depends on version)YesNoNo
Can re-broadcast power data as open ANT+Yes and No (see review notes)YesNo3rd Party Required
Can re-broadcast data as open Bluetooth SmartNoYesNoNo
Amazon LinkLinkLinkLinkN/A
Clever Training Link (Save 10% with DCR10BTF)LinkLinkLinkN/A
Clever Training EuropeLinkN/A
Review LinkLinkLinkLinkLink
Remember to click the ‘Expand Results’ button as it’ll show a gazillion more rows than the quick preview above.
Summary:
The Virtual Training software is cool, no doubt. Despite some of the polish issues, the underlying functionality does work well. And the Netflix style of all you can eat videos is hugely appealing to me. While the quality of the videos may not be as high as those that you pay $100 a video for (i.e. CompuTrainer Real Course Videos or Tacx Videos), I personally care more about variety than HD quality. Now, that may sound strange coming from me (someone who loves HD programming and spends a lot of time on high-quality photography), but ultimately, when I’m working hard on a trainer, I’m not realistically appreciating the super-high quality imagery as much as I would sitting there watching the Discovery Channel HD on my couch later at night.
The singular concern I have about Virtual Training is the price. That’s it. It’s just really darn expensive ($315US) [Updated note, the pricing mode has shifted, now it’s $10/month for desktop and $5/month for tablets]. Note that if you buy the trainer, then the software is included, which makes it quite reasonable. It’s buying it separately that’s pricey. When you look at competitive suites (such as the Tacx TTS suite), they include exponentially more functionality than the Virtual Training suite…and at significantly less cost. Of course, it doesn’t include videos, but does include way more other components.
Then there’s the less tangible things to compare. And this is where comparisons get tricky. From a stability standpoint, I’ve had no issues with the Virtual Training. Whereas I have (and hear from many others) issues with the Tacx suite from a bugs standpoint. It also requires a beefier computer (TTS suite). And then from a customer service perspective, I’ve never heard a bad thing about the CycelOps customer service folks. They just ‘make it right by the customer’. I can’t say that about others. In fact, I get complaints weekly from folks begging for help dealing with support requests with other companies.
All that said, I like the Virtual Training software, and I like the fact that it’s relatively easy to create and upload my own videos. And now that I know the tricks to doing so (well, only one trick: align everything perfectly), it’s really tempting to do more ride videos for folks.
Pros:
– Easy to use, simple interface
– It just works factor, not buggy
– Netflix-style ‘All you can eat’ on videos
– Ability to easily create my own GPS routes from just about any file type
– Ability to create my own video routes rocks
Cons:
– Expensive…really expensive
– Some English language issues
– Video quality can vary
– No workout feature (i.e. specified power levels) in software, requires Joule
– Doesn’t work natively on Macs
Found this review useful? Here’s how you can help support future reviews with just a single click! Read on…
Hopefully you found this review useful. At the end of the day, I’m an athlete just like you looking for the most detail possible on a new purchase – so my review is written from the standpoint of how I used the device. The reviews generally take a lot of hours to put together, so it’s a fair bit of work (and labor of love). As you probably noticed by looking below, I also take time to answer all the questions posted in the comments – and there’s quite a bit of detail in there as well.

I’ve partnered with Clever Training to offer all DC Rainmaker readers an exclusive 10% discount across the board on all products (except clearance items). You can pickup the PowerBeam Pro (and software) below. Then receive 10% off of everything in your cart by adding code DCR10BTF at checkout. By doing so, you not only support the site (and all the work I do here) – but you also get a sweet discount. And, since this item is more than $75, you get free US shipping as well.
– Virtual Training Software (standalone)
– PowerBeam Pro Trainer with Virtual Training software
Additionally, you can also use Amazon to purchase the unit or accessories (though, no discount on either from Amazon). Or, anything else you pickup on Amazon helps support the site as well (socks, laundry detergent, cowbells). If you’re outside the US, I’ve got links to all of the major individual country Amazon stores on the sidebar towards the top. Though, Clever Training also ships most places too and you get the 10% discount. Thanks for reading!
And as always, feel free to post comments or questions in the comments section below, I’ll be happy to try and answer them as quickly as possible. And lastly, if you felt this review was useful – I always appreciate feedback in the comments below. Thanks! Finally, I’ve written up a ton of helpful guides around using most of the major fitness devices, which you may find useful in getting started with the devices. These guides are all listed on this page here.


