Garmin VIRB VIRB Elite In-Depth Review

When Garmin announced the VIRB action camera late this past summer, it represented further expansion into the outdoor market, due to it’s significant product tie-ins with other Garmin products. Most notable however, is that they’re squaring off directly against the biggest player in the industry: GoPro. Of course, large companies focusing their attention on the now billion-dollar business of GoPro is nothing new. There’s plenty of others much larger than Garmin, take Sony and JVC for example.
Where Garmin has the potential though to differentiate is the inroads in sports and fitness that primarily audio/video companies lack. Thus, much of this review will be focused on whether or not Garmin has been able to execute on that vision – and thus by extension whether or not they can realistically take any of GoPro’s pie. In the case of this review, I own all the VIRB’s seen here (bought myself).
Garmin had sent me over a VIRB Elite to start testing with until retail availability. That VIRB has already gone back to Garmin. They also sent over a box of mounts to start with until my retail mounts came in. Most of my ordered ones have since come in, and their box of mounts will head back shortly – just like always.
Lastly, at the end of the day keep in mind I’m just like any other regular athlete out there. I write these reviews because I’m inherently a curious person with a technology background, and thus I try and be as complete as I can. But, if I’ve missed something or if you spot something that doesn’t quite jive – just let me know and I’ll be happy to get it all sorted out. Also, because the technology world constantly changes, I try and go back and update these reviews as new features and functionality are added – or if bugs are fixed. So – with that intro, let’s get into things.
Unboxing:
When push comes to shove, the VIRB Elite and VIRB regular contain the exact same components within the box. In fact, externally the only visible difference is the color. 


See that glorious looking color screen below on the box shot? I promise you, it never looks like that. Ever. Perhaps with enough illegal drugs it might, but not by itself.

Once you remove the inner shell from the outer shell, you’ll find the unit hanging out inside:

The VIRB will actually be attached to the box, using one of its own mounts. This is a not so subtle hint to not throw away said mount.

You’ll detach it by simply rotating the top portion of the mount away. This gives you a bit of practice in how the mounts work.


Inside the box, you’ll have an assortment of parts. On the left you see the battery, then the USB charging cable (standard mini-USB), then two adhesive mounts (one flat, one curved), followed to the right by a GoPro compatible adapter, and then a second mounting piece for orientation changes. And then the manuals to the right of that.

First up, the battery. The VIRB’s major claim to fame is it’s longer life battery than the GoPro, largely achieved through simply a longer battery. We’ll dive into that a bit later.

Looking at the mounts, you can see how you’ll twist lock it down first into the base, and then the little ridges (teeth) will lock it in place. 
In addition, to the left we have a GoPro compatible mount, so you can snap it into any GoPro accessory out there. On the right, we have a mount that changes the orientation of the camera 90* (different than the mount seen attached to the camera above).

Next, we’ve got the ever exciting USB cable. This allows you to import in your files afterwards, as well as charge the unit.

Then we’ve got the unit itself. Here’s a few glory shots. Note that the entire thing detaches just above where it says ‘Garmin’. But you’ll see that shortly. 


On the back we’ve got two ports. One is a micro-HDMI, and the other is the mini-USB. The USB port can also be used for a microphone attachment to get external audio into the unit.

Next we’ll take off the mount. Here you can see the actual camera size, versus the mount. The mount really has two pieces. The upper piece is relatively flat against the camera. Everything below that is ‘accessory’, so you can detach and change it around.

If you open up the door, inside you’ll see the battery compartment and a place to stick the MicroSD card.

Here’s the same glamour shots of the VIRB Elite:


Again, like above, you’ll never see the color screen look like that in real life. With that, let’s talk about how it stacks up size-wise with other units on the market.
Weight & Size Comparisons:

When you start to look at size, the VIRB immediately stands out as a bit awkward. It’s longer than most, albeit actually skinnier. Here’s how it compares to the GoPro Hero 3 Black: 

As you can see, it’s a fair bit ‘taller’ than the GoPro is, no matter which way you hold it. But, it’s actually slightly skinner – just barely. Though again, it’s all about where you plan to place it, because angle-wise it’ll matter a fair bit which direction it’s going from a space occupation standpoint.

Weight-wise I broke out my trusty little scale to see how things stacked up:


As you can see, it’s actually closer than you’d think. I could have sworn that the VIRB felt heavier than the GoPro Hero 3 regular (non+), but that’s really only true if you remove the GoPro from its case. Once inside the case (which is more or less mandatory for any action-related stuff where weight would actually matter), it’s identical. Go figure.
General use:

I’m going to walk through all the major functions of the camera, but let’s get some quick basics out of the way first. You’ll power on the unit using one of two options.
The first is to briefly press and hold the power button on the lower right side. The button is nice in that it’s actually flush with the unit, so it doesn’t get turned on inside your bag accidentally (like my GoPro, Sony, and JVC action cams do).

In addition to pressing that button to power on the unit, you can also slide forward the slider on the left side. When you do this it’ll not only immediately power it on, but also start recording video. This is similar to the one-touch operation found on some action cams like the GoPro.

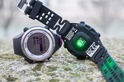
While in standby mode, the light on the top will be green. This means it’s ready to shoot video or photos. If the light is red, it means it’s already shooting something. You can turn the light on/off within the menu settings if you want to.

Along the right side you’ll see four buttons in total. First up is the up/down navigation buttons, which control navigating through the menu system. Then you’ve got the OK/PHOTO button, used for selecting a menu setting, as well as taking photos. And finally, you’ve got the POWER/MODE button (kinda acts as a back button), as well as turning on/off the unit.

The unit features a small display which allows you to see what you’re navigating. In it there are a few menu options. These look identical between the VIRB regular and Elite, with the exception being that in the regular edition you won’t have the dashboard/sensor piece, which is why I’ll cover it separately.

Otherwise, you’ve got the viewfinder, which allows you to see what you’re looking at. It’s not quite as colorful as the marketing fluff makes it appear. In fact, just consider it more chroma-color than anything else. 
While in the main viewfinder mode, if you press up/down you’ll get to a page that displays total stats on the day for number of photos/videos taken, as well as the current modes. 
Going back to the main menu, you’ve got the playback option, allowing you to review both stills and videos:


Then, next to that you’ve got the Dashboard views (Elite Only), which I’ll cover in a short bit:

And finally, you’ve got the settings menu:

Within the menu there are settings for everything from video to photos to system to sensors (if you have the Elite). I’ll cover each of the settings within the following sections. With that, let’s start diving into more detail.
Video Modes:

The VIRB and VIRB Elite share the same video sensor and settings. There are a number of modes available that you can set via the menu system. They are:
1080p: 1920×1080/30p (16:9)
Tall HD: 1280×960/48p (4:3)
Fast HD: 1280×720/60p (16:9)
Economy HD: 1280×720/30p (16:9)
Slow Mo HD: 1280×720/60p (16:9)
Super-Slow Mo: 848×480/120p (16:9)
Time Lapse: 1920×1080, frames variable (16:9)
The first few are fairly common modes, with not too much surprising there. And the later timelapse modes I’ll go into much more detail on in a few sections from now. For the high-speed capture modes, these are generally used in fast-action scenarios, such as someone going off a ski jump where you want to slow down the footage to get the slow-motion effect. By increasing the frames per second (FPS) captured, you can then play then back at a more normal speed later on.

For example, if you shoot at 120FPS, but then use a conventional 24FPS or 30FPS playback speed, that means that the 1 second of video recorded at 120FPS becomes 4+ seconds at 30FPS. Virtually everything you watch today on TV/movies is at either 24FPS or 30FPS. The one item to be aware of here is that like most consumer action cams on the market, as you increase FPS (Frames per Second), you tend to get a decrease in quality (resolution).
In other words, if you shoot your whole video at beautiful 1080p, but then have this wonky slow-mo segment at a lower resolution, it might look kinda out of place – so keep that in mind. One way around that is to use the VIRB Edit tools to slow down some of the resolution instead. It’s a balance though because if you slow it down too much you won’t get the smooth look that you’d get from higher frame rates. So you’ll want to play around with how things look for the given action piece you’re trying to capture.
In addition to the capture frame rates and resolutions, you can also specify the video zoom level. These are as follows:
– Zoom 1
– Zoom 2
– Ultra Zoom
– Wide
In order to demonstrate this, I put together a simple 20” video showing the four modes using 1080p video as the baseline when sitting on a small tripod. I’ve added a caption below so you know which shots were from which modes. Note though that these ‘angles’ are really only relevant for this particular resolution. Each resolution will actually produce slightly different viewable angles.
Yes, that there in the video is the secret of how I fit reviews in – gathering little bits of footage here and there in between flights for work.
When it comes to video quality, many will compare it to the GoPro (logical comparison). Perhaps the biggest gap isn’t so much comparing 1080p footage against each other (as that’s fairly similar), but rather, what happens when you compare 1080p footage from the VIRB, with 2.7K footage from the GoPro (you can do 4K, but the frame-rates are significantly reduced so it’s not terribly useful for video purposes).
To demonstrate this a bit, I took two videos while sitting on a chairlift. One from the VIRB, and stacked right on top of it the GoPro Hero 3 Black, shooting at 2.7K. Some might say it’s unfair to compare higher resolution footage to lower resolution footage. Frankly, that’s crap. The two units cost the same, and thus, are valid comparisons.
Here’s how things look (Remember to change the YouTube quality settings, and also remember that YouTube messes with quality a bit. If there’s interest, I can post the raw video clips as well, which makes it much easier to see).
You can see pretty clearly how sharp the 2.7K footage is on the GoPro compared to the VIRB footage. Now, what is interesting is that in the above the VIRB had image stabilization on, both cameras were literally stacked on top of each other (my ugly finger slightly in the frame of the GoPro footage). Yet, while the VIRB footage isn’t quite as crisp as the GoPro footage, you do see it’s slightly more stable.
That image stabilization option, as well as lens correction option to reduce the wide-angle look on videos from some of the wide-angle modes are found within the settings menu. I generally left the stabilize function on, and in my videos I generally didn’t see any stabilization issues beyond what you might get on any action camera with a lot of movement.

Finally, note that you can flip/invert the video if you mount the camera upside-down. It’s simply a menu option within the unit’s settings.
Photo Modes:

Perhaps one of my favorite features of the VIRB cameras is the fact that it has a dedicated – and separate – photo button.
This is different from any of the other half a dozen action cameras I’m testing in that all of them make you choose between video and photo when it comes to triggering. In the case of the VIRB though, you can simply tap the right side button with the additional pop-out on it (third from top on right side), and it’ll take a photo immediately.

Within photo mode you’ve got two resolution options: 16×9 (12MP), and 4:3 (16MP and 8MP). This results in photos that are either more square looking (4:3), or look more like HDTV (wider, less tall, 16:9).
In addition to the resolution options, you’ve got the same zoom modes that carry over into the photo settings. So whatever zoom modes you set within the video side, they’ll be present in the photo side. As a reminder, they are as follows:
– Zoom 1
– Zoom 2
– Ultra Zoom
– Wide
In addition to setting the resolution, you can also enable burst mode. Burst mode will take 5 photos in a row over a period of about 1-2 seconds. I’ve found this awesome for running and any other sport action situation where getting the exact right shot is difficult.

In addition to burst mode there’s also a self timer mode, useful if you need to take a photo of yourself. The choices are 2/5/10/30/60 seconds. Here’s an example of using the timer mode:

Dashboard View (Elite Only):

Lastly within the unit’s menu system, you’ve got the ability to display a dashboard which has certain gauges on it. These gauges show mostly various sensor data such as speed, heart rate, and g-forces. Though, Sunrise/Sunset time is included as well (pulled from the GPS side of things):


While I’m sure some folks will find these interesting, I didn’t find them terribly useful – likely because I already had another device display most of this. The single field that I did think was useful was the elevation one:

Note that as long as you just leave your VIRB in standby it’ll continue to capture data for this, be it heart rate or elevation. It’s only when you fully turn it off that it resets the counter.
GPS Connectivity (Virb Elite Only):

The VIRB Elite includes a GPS sensor that allows the unit to record your current location, as well as record/display information such as speed and distance. The GPS will then automatically set the correct time for the unit, and keep it set correctly each time it turns on. In general I found GPS reception very quick (almost always under 30 seconds). The little GPS icon will stop blinking once signal is found:

In my tests I found that at higher speeds (cycling and above), the speed/pace data worked well. But I found at lower speeds (running) that the pace data was a bit jumpy. You can see that in some of my videos. It’s unclear though (due to how it’s exposed) if this is caused by the data collection side (VIRB unit itself), or the display side (VIRB Edit software on the computer).
From a track standpoint, I found the tracks perfectly fine for what I was doing. If I look at the tracks as seen when I cycled around town, they aligned to the roads I was on, without any notable deviations.
Sensor Connectivity – ANT+, Barometric Altimeter, G-forces (Virb Elite Only):

The Virb Elite supports connecting directly to certain types of ANT+ sensors. This means that the unit will collect the data from those sensors and record it for later use (as well as display it on the screen of the unit itself).
At present, the VIRB Elite can connect to ANT+ Speed/Cadence Sensors, ANT+ Temperature Sensors (Tempe), and ANT+ Heart Rate Straps. It cannot connect to any other types of heart rate straps or sensors. You’ll pair sensors within the menu, and once paired it’ll remember the sensor forever:

You can easily re-pair sensors if you need to change them later on. Note that rather disappointingly it doesn’t support ANT+ Power Meters. In my opinion that is one of the core markets for the VIRB Elite. The overlap between people who want to get ANT+ sensor data on the bike, and people who have a power meter is likely huge. One only needs to look at how many YouTube videos there are with power data merged into it to see this. (Update: Garmin added support in February 2014 for power meters, I detailed it in this post)
While some might argue that those are the same people that already have a Garmin head unit that records power, I’d respond with: What’s your point? If that’s the line of reasoning, then ultimately why bother with ANT+ sensors at all in the Virb Elite? In my opinion Garmin should be showcasing the pinnacle of what their high-end products can do together, especially now that Vector is out and about in the market. Integration across product teams is what draws consumers in, not silos. As you’ll see later on though, you can get power data by merging it with files from a Garmin Edge device, but it’s not as clean as the built-in options.
In any case, outside of ANT+ sensor data the Elite also includes a barometric altimeter for measuring altitude/elevation and accelerometer for measuring g-forces. There isn’t any way to turn these on or off within the menu, they’re simply just there. You can see some of this data then appear on the dashboards:

And later on, you’ll find options within the VIRB Edit software to display these metrics.
Remote Control of the Virb:

The Virb allows you to control it via ANT+ from other Garmin products. Today, that includes cycling products (Garmin Edge 510/800/810), as well as some of the hiking units (Garmin Fenix, Tactix, and numerous Oregon units), and then some of the other product lines as well (Quatix for marine, and D2 for aviation). I suspect you’ll see more in the future.
In addition to triggering the device from other devices, you can also pair together VIRB’s to trigger one device from another. To exemplify this a bit, I hooked up a couple of VIRB cameras on my bike. In the front I had the VIRB Elite, and in the back I had another VIRB Elite (but I also did some with a VIRB regular). Though, it doesn’t really matter which models you have:


Within the above configuration, I went ahead and created a pairing so that one was primary (‘Main’ in VIRB lingo), and the other secondary (‘Extended’ in VIRB lingo).

At this point, if I were to slide the slider forward to start recording video, both cameras would automatically record. No further action needed. When I turned off recording on the first, then it would stop on the second. Same goes for photos. Super simple.

Then, to layer in the complexity I added the Garmin Edge 810 into the mix. At this point, I used the recording function on the Edge to control the units. That way I didn’t have to touch the cameras at all:


From the Edge, the VIRB screen simply becomes another data page, just like any other screen.

You can flip the switch to record video, or tap it to take photos.

And within the settings, you can configure it to automatically start and stop recording when you start and stop your Edge device (pressing Start/Stop button on the Edge, or via Auto Pause). It’s pretty slick.

I’ll demonstrate some of those videos in the next section. Looking at the Fenix side of things, you’re able to have similar levels of control here as well. You can start/stop video recording, and while recording it’ll tell you how long the recording is:

Further, there’s a dedicated button for snapping a photo along the left side:

Now, I did find that if you stayed in active recording mode with the Fenix for an extended period of time (many hours) it would burn through batteries a fair bit quicker than normal. It’s probably not a normal use case, but worthwhile noting as I discovered it controlling some time lapses. In talking with the VIRB team this is because the Fenix is put into an ANT scanning mode during this operation, which burns through battery quicker.
Additionally, I had some troubles with getting multiple chained cameras working on the Fenix side of things. Within the Edge there were no problems, but on the Fenix it was being finicky. In talking with the VIRB team about that, they believe an upcoming firmware update should clean up that problem by streamlining some of that process.
In addition to controlling the unit from other Garmin units, they’re also releasing a dedicated remote control early next year.
The remote control feature is pretty cool – especially on the bike, but I could see other scenarios as well, and the number of units they’ve gone back and added support to is pretty cool. I would like to see better support within the Forerunner line though (as in, any support). Especially on units like the FR220/FR620 which are newer and would make for a perfect light-weight wrist control, as most of the other units today that control the VIRB are pretty bulky (Fenix, Oregon, Edge, etc…).
Use in Sport – Cycling:

If there was one sport where I’d guess that the Virb was probably designed for – it’s cycling. The Virb even connects directly to cycling sensors (Speed/Cadence), and the Virb Edit Desktop software is designed to pull files from Garmin devices, with a heavy focus on the cycling metrics (power meters as well).
I outlined in the previous section how the connectivity to the Edge works, so I won’t re-hash that here. And I’ve also covered some of the mounts up above, and later in the mounting section.
So instead, let’s just get to some video clips, sound good? First up, a short one shot on a rainy night biking around the city:
Next, we’ve got an early morning one:
You’ll see in this case I have power meter data onboard. I did that by simply importing in my Edge 810 file, which is connected to the power meter on the bike. I had to use the align function within the app (discussed more in the VIRB Edit section below) to slightly move the ‘start’ times about 11 seconds so that they aligned perfectly.
Use in Sport – Underwater/Swimming:

The Garmin VIRB has IPX7 waterproofing, which means that it can withstand water situations up to 1-meter deep (3ft) for 30 minutes. Now, depending on which part of Garmin’s site you read, you get differing insinuations on whether or not the device should actually be used in the water normally. In one area it says it’s more for accidental immersions, whereas another seems more ambivalent on it.
Nonetheless, I’m incredibly familiar with these standards, and have dunked devices many times in the past before up to the limit. You can see me doing this here.
Of course, regardless of their intent, I decided I’d take mine numerous times into the pool and the sea, to see how it fared. First up – the pool. In this case I swam around the (salt-water) pool twice for probably 15-20 minutes with it each time…generally deeper than 1m of water.

During this I discovered that the Virb actually can’t focus well underwater (without the special dive case). All my videos and photos came out fuzzy:


Interestingly, it got a bit better if I did a split above/below water level where it could focus:

Now I can’t really fault Garmin here, since that’s sorta what the dive case is for. Obviously, since I was in the water and have been using it for over two weeks since, all is grand there. If in salt-water, just be sure you rinse it off afterwards.
Second, I brought the camera to the Dead Sea and used it there, mostly as a still camera. There the water is 10 times saltier than regular ocean water. And, of more importance, the mud is as thick as you’ll see anywhere on earth.

I had no problems with the camera in the salt, mud, or water.

As of this writing the dive case isn’t quite out yet, but that’ll allow you to take the camera down to a depth of 50 meters. I will try that out (I’m a certified scuba diver), once it’s available, and will add it back in here.
Until then, I wouldn’t quite recommend using the VIRB to do swim technique sessions in the pool. Not so much from the waterproofing standpoint, but more just because everything will be out of focus. Once the case is out though, I suspect it’ll resolve both of those. Nonetheless, I figure this section illustrates pretty well that the unit is more than sufficiently waterproofed for anything else above the water level.
Use in Sport – Running:
I’ve done a bunch of running with the VIRB. A ton of running in fact – even ran a full marathon with it in my hand. I’ve found that for photos while running the VIRB is actually really appealing. This is because it’s pretty much just as light as any other camera out there, but it’s also fully waterproofed, so you don’t have to worry about it.
The downsides though is that shooting with it can be a bit awkward because there isn’t a display on the back, only on top. For photos I use the burst mode, which shoots off 5 photos within a 1-2 second range. This is perfect for ensuring you catch something (if you don’t stop running like me).

Now, when it comes to video, it works well hand-held. You can see that in my Santa 10K video I posted yesterday:
Where it doesn’t work well though is with the chest/shoulder harness:

In this case, no matter how tight I locked things down (or loose I made them), the bounce was simply far too much for any sane person to want to watch. Nonetheless, if you want to watch it, here ya go:
Note that in my trialing of other camera’s chest mounts (like the GoPro), it tends to suck as well for running too, due to the bounce. It’s better in things like obstacle courses though where you don’t have as much vertical bounce every second.
Use in Sport – Snowsports/Skiing:

You know what I love about product testing? It gave me an excuse to go skiing. Seriously. I brought the VIRB (and an army of other cameras) into the Swiss Alps to knock out a bunch of testing in colder weather. This would also be a great opportunity to toy around with the Tempe support (temperature sensor) piece as well, which I just attached to my backpack.

With that, I headed up. I decided to start off with the unit on my helmet using the slightly curved sticky adapter. I already had a GoPro one on there, so I just placed this right above it.

Here’s a short video clip from the helmet perspective:
As you can see in the photo above the video, I also picked up a 3rd party pole for taking shots of oneself. It was designed for the GoPro, but it works just fine with the VIRB adapter. Here’s a quick clip from that:
Next, I tried out the shoulder harness. Unlike the GoPro that has a chest harness, Garmin doesn’t really have one of those. The oblong shape of the VIRB doesn’t much allow for that (without creating an impalement risk). The harness fit just fine and didn’t feel in the way of normal movement. Though, it does annoyingly get in the way of my backpack.
Then I stuck a VIRB down on my totally retro skies. I used the flat sticky mount for that:

And then just simply locked everything in place into the bindings with a little strap…just in case.

Then, I went for a short jaunt and got some neat snippets:

But ultimately the whole thing lasted about 50 seconds or so:
Word to the wise: Don’t try and attach it to your skis, it just won’t hold. I had attached the mounts days prior, on both skis, and both fell off near immediately (two different days). In reading a bit elsewhere, GoPro users have the same problem. A better solution would have been to strap it to your boot. For those curious, I did also try mounting an adhesive to my boot, that didn’t last long either.
Finally, note that the VIRB has an operational temperature range of 5*F to 140*F (-15*C to 60*C).
Other uses – Time-lapse Functionality:

As long-time readers know, I’m a bit of a photo geek. And one of the things I enjoy making on occasion is time lapses. The challenge though with creating time-lapse videos is that they’re actually a pain in the butt.
There’s two basic ways to create them (in general). First is that you simply record video as-is, and then speed it up. The second is that you take a series of still photographs at a predetermined interval and then piece those together later on in software. Most high-quality time lapses that you see use the second method.
The problem here is that there’s a lot involved workflow-wise. You first take a few thousand photos (on a tripod). Then you use software to reduce the size of the images down to one of the various broadcast standards. Then you use another piece of software to add all these individual frames together into a single video. The whole process sorta sucks.
Thus, I was sorta blown away that the VIRB actually has a time-lapse feature in it. The unit allows you to specify an interval and then it automatically compiles the video together.

At the end of the day, you’re simply left with the video file of the time-lapse. No editing, resizing, or any other messiness required. Just quick and simple time-lapse. You can specify time-lapse intervals of: .5/1/2/5/10/30/60 seconds.

Now the battery on the VIRB doesn’t really last that long for most really long time lapses, but the good news is that you can power it on. I did that for some long 5-day time-lapses I did with the unit. I just plugged the other end of a super-long USB cable into a power outlet, and then was good to go.

Here’s a 5-day time-lapse I did:
Another while in São Paulo during rush hour traffic & storm:
And finally, one more from Rio (Brazil) of the beach over the course of a day:
I’ve also tossed a few more into other videos in this review. Upon completion of the time-lapse video, you’ll just have the video file like any other VIRB video.
Other uses – Auto:

I’m not much of an automotive person. As you can see, I’m more of athletic person (or, attempt to be). Nonetheless, as I drove up into the Swiss Alps for some of my skiing trip, I decided to attach a VIRB to the window of the car (inside). While I could have likely attached it using one of the permanent mounts, I decided against doing that since it would have meant doing so in the airport rental car parking lot and I was concerned it wouldn’t have time to fully ‘settle’ before I drove away (60 seconds later).
In any case, this first video is shot from within the car just as normal 1080p video:
And then second in a time-lapse mode:
What’s kinda cool here is that even in time-lapse mode (where it compiles a video together automatically based on photos taken at an interval), it captures metrics like speed – which surprised me a bit.
Battery Life:

I setup a bunch of action cameras a few weeks ago to see how things shook out battery wise. In the case of every camera above, all of them were under 4 weeks old, thus the batteries should all still work as specified. I configured all units for 1080p/30FPS recording, and then left on GPS for those units that had it. Additionally, ANT+ was left enabled on the VIRB, though only a Tempe sensor was nearby to be picked up.
I then simply started them and ran them all until they died. I was then able to reconstruct the videos to determine how long each one lasted until death. Though, in most cases since I was just at my desk next to it I could hear the beep of death for each camera and take note (though VIRB does not beep). While the photo above is pretty self explanatory, here’s the listed and actual times:
Garmin VIRB Elite #1: 2:21 (Marketed: 3:00)
Garmin VIRB Elite #2: 2:24 (Marketed: 3:00)
Garmin VIRB Regular: 2:36 (Marketed: 2:36)
JVC GC-XA2: 1hr 51m (Marketed: 1:48)
GoPro Hero3 Black: 1:29 (Marketed: 1:30)
Sony AS-30: 2:11 (Marketed: 2:40)
Pyle HD PSCHD60WT: 2:54 (Marketed: “More than 2 hours”)
As you can see, the VIRB scored a bit under the marketed times. I’m not clear exactly how one would get that much extra (30 minutes), and in the case of the VIRB Elites, one of them was brand new out of the box that day and fully charged.
Software: Desktop Application:
The VIRB Edit software can both take video files directly by importing them from any old disk, as well as directly from the camera. You’ll generally want to use the import process as it pulls in the GPS data automagically from the .FIT and .GPX files so you don’t have to. Importing is fast though, in my testing roughly no slower than just copying straight from disk.
When you open up the VIRB Edit application with the camera attached, the software will automatically inventory the clips on the unit and then ask if you’d like to import them in. If you choose ‘Import New’ then it does everything. Otherwise, you can pick specific clips to import in.

Here, you can see a progress bar on importing in the clips:

Once done it’ll show up in the library. In this case you can sift through by month, but also it’ll show up in the ‘Last Import’ folder. You can select to remove the original video files from the unit, though I typically don’t do that. With the cost of MicroSD cards so silly cheap I’ll keep content there fairly long just to ensure I’m good with it.

Once the files are imported, you can go ahead and start creating a video (a compilation). To do this you’ll tap ‘Create Video’ on the left side, which starts a project of sorts. You can then give it a name.

Once you’ve done that you can drag and drop clips onto the timeline. You can see below I’ve picked the first video clip in my pile and dragged it up into the middle timeline. You’ll see the map location displayed. In my case I was staying in the same place, otherwise, you’d see a line showing the route during the clip (see following screenshot):

Here, for example, you can see the route shown:

Now, the above step/screenshot assumed you had used the VIRB Elite. If however, you have the VIRB, then in order to get GPS track information from a GPX file, or from any Garmin Fitness/Outdoor device file (just as .FIT file). In fact, using a Garmin .FIT file ensures you’ll also get any sensor information recorded by that device.
For example, if you have an Edge 500 on your bike and have a heart rate strap, power meter, and speed/cadence sensors – then all of that will be accessible to the Garmin VIRB Edit app. To add these files. You’ll click on the right side and click to ‘Add’ (mine is already there).

Next, if you need to adjust the timing because things don’t quite line-up, then just tap ‘Adjust’. This brings you to this screen where you line-up your video to the satellite/map imagery using simple forward/rewind buttons. Once you’ve done this it keeps everything else in the video aligned.

Note that even though most of the devices you’ll be using will be gathering data from GPS, it’s pretty important to double-check the alignment if using secondary devices. I’ve found that even a few GPS devices merged together that would be getting time from satellites were off by 10-15 seconds. Which for example, is quite a bit when you look at surges on the bike. You can edit the clips if you’d like to shorten them, speed them up (or slow them down), or change the volume.
There’s not a ton of options there, though I understand from the product team that there’s a lot more coming.

We can also add music to the timeline as well. Going to the last tab along the bottom is the overlays. This is probably the most important piece, as it’s where you’ll add information like speed, elevation, G-Force, and any other sensor data.

Each one of those little squares down there has a different layout. At present, they aren’t customizable in the application, though, that’s supposedly coming. You can however customize them by cracking open files within the templates directory using a JSON file editor, but that’s a bit advanced for most users.

After you’ve picked one, it’ll then show up on the video. The little race-track looking icon is for a straight-line track of your route. This is a bit different than actually exporting out the satellite or simple map overlay. Garmin noted in their forums that there were some licensing issues here. Which, roughly translates to not paying for said licensing rights.
Some have suggested OpenStreet as an option, which I’d agree would be ideal (though, not often as good as having satellite imagery in a video in some situations).

You’ll see plenty of examples of this in my various videos in this review. Finally, once you’re done you’ll simply tap the ‘Export’ button in the upper right. Or, you can export direct to YouTube. The app will give you an option on what resolution and what folder to export it to. Pretty simple really.

As you can see, the application is pretty slim today. It does the basics, but there’s a lot of gaps from a video editing workflow standpoint. To be fair however, the application has been releasing a new version pretty consistently every 7-10 days, and they’ve been both fixing bugs and adding features.
Ultimately, I’d like to see more flexibility like the free GoPro Studio, but also a lot of area not covered there but in apps like the free Windows Live Movie Maker (which I use for most of my videos you see on the site). Further, with the ability to control multiple cameras – having picture in picture options (i.e. different angles on a bike) and being able to sync multiple video streams up for editing would really be key. I suspect if you come back to this section next spring, the app probably won’t look anything like it does today.
Which, is my final and last point…one mostly aimed at Garmin (but also applicable to a few other action cam makers entering the market): You’ve got a good bit of starter dough here. Don’t screw it up by working on it for 2-3 months and then ignoring it until the next time you want folks to buy a new action camera. If you’re in the action cam market permanently, then it needs sustained engineering on the software side – doing exactly what you’ve done this far (continual releases) to get it to the point where it’s competitive.
If you stay on the trajectory you’re on today, then by next spring or summer you’ll have a software suite that easily eclipses anything out there and makes the camera (hardware) really shine. Otherwise, it’ll be like many other half-finished projects. Just my two cents…
Software: Phone Application (VIRB Elite Only):

The VIRB iPhone and Android apps were just released yesterday, so I’ve only had a small amount of time to play with them. To get started you’ll need to enable WiFi within the VIRB Elite itself. That’s in the settings menu:

When you do so it’ll automatically specify a WiFi network name, and give you the passport to go along with it. You can change these in the menu if you’d like though.

It’s worth noting (and, kinda annoying), that once you enable WiFi, you can’t actually change any settings on the unit itself. All settings must be changed via the phone. Further, you can’t use photo mode at this point with the app.

Next, we’ll crack open your phone’s WiFi settings and ensure you’re connected to the WiFi network, then you’ll open up the Garmin VIRB app:


Once it connects, it’ll immediately show you the current preview image. This can be put into either landscape or portrait mode:

At this point you can either record something, or tweak the settings. If you shift into record mode, it’ll blink a light, just like on the unit (as well). Note that the unit doesn’t record video to the phone/app at this point, it’s just recorded to the camera’s storage card.

From a delay standpoint, it’s approximately 1-second between when something happens and when it shows up on the screen. Also, I see some minor pixelization within the preview window occasionally.

For the most part, the App today would be used to align shots and change settings. Speaking of settings, you can change/set pretty much everything via the app, except, strangely ANT+ sensors. Here’s a look at what I mean:


Given the app was just released yesterday, it’s still got a ways to go to be on par with apps from GoPro, Sony and to a lesser degree, JVC. It’ll be interesting to see what the release cadence is going forward – hopefully, as frequent with feature updates as the desktop VIRB Edit app is.
Accessories & Mounts:

While video quality and functionality is important, action cameras live or die based on their mounts. Not just in terms of whether you manage to kill your action cam, but more specifically, whether the market does. The GoPro, for example, is incredibly successful in large part due to the mount system.
Let me state up front that when I first started using the VIRB mounting system, I thought it was crap. Annoying crap.
Except, over time, I’ve started to see some distinct advantages it has over the GoPro system (and some drawbacks). It should be noted that the VIRB actually includes a GoPro mount adapter in it, so you can mount to basically any GoPro 3rd party (or 1st party) accessory on the planet.
From an advantages standpoint, the VIRB mounts include little teeth. This means that you won’t get slippage that you get with GoPro mounts, where on the GoPro side you have to pull out a screwdriver to tighten them. In the case of the VIRB, no screwdriver is required (no way to use it). Further, in general I find that the VIRB mounts actually have less clearance than the GoPro mounts, in a good way. Meaning that the GoPro mounts tend to elevate things higher up than the VIRB mounts, simply due to the design of the interlock.
Finally, the VIRB has the separate mounting plate, which means it’s far easier to remove the camera and leave the mount than it is in the GoPro, which requires removing it from the housing entirely. In the case of the VIRB it’s a one-handed operation that takes under half a second.

On the disadvantages side, you can’t be quite as flexible in some of the mounting options from a turning standpoint. The VIRB has teeth (a crapton of them per each angle), but ultimately it has to fit into one of those teeth. Whereas the GoPro has no teeth, so you tweek down to the tiniest amount. Further, I did see one case where the VIRB mounts had vibrated a bit loose on one of my rides over cobbles. Perhaps I hadn’t fully tightened it, as I never saw the issue in any other testing.

From a completeness perspective, the VIRB has pretty much every type of accessory that GoPro has. They did a good job in covering all the bases. And given the tiny included GoPro adapter, in the event something is missing, you can always leverage a GoPro mount with the VIRB.
I did this while skiing when I picked up a 3rd party pole designed for shooting yourself, and attached the VIRB to it via the adapter:

Here’s the full summary of VIRB mounts:
Copyright DC Rainmaker – Updated July 17th, 2015 @ 4:58 pm
Garmin Tempe External ANT+ Temperature SensorGarmin$29.00LinkLinkLink
Garmin VIRB Adhesive Mount Base Kit (Flat/Curved)Garmin$20LinkLinkN/A
Garmin VIRB Adjustable Mounting Arm KitGarmin$20LinkLinkN/A
Garmin VIRB Anti-glare Screen ProtectorGarmin$8LinkLinkN/A
Garmin VIRB Audio/Visual CableGarmin$30LinkLinkN/A
Garmin VIRB Auto Dash Suction MountGarmin$25LinkLinkN/A
Garmin VIRB CradleGarmin$18LinkLinkN/A
Garmin VIRB Dive Case – 50mGarmin$40LinkLinkN/A
Garmin VIRB Dive Case Replacement Lens KitGarmin$19LinkLinkN/A
Garmin VIRB External Microphone AdapterGarmin$15LinkLinkN/A
Garmin VIRB Head Strap MountGarmin$22LinkLinkN/A
Garmin VIRB Large Handlebar MountGarmin$25LinkLinkN/A
Garmin VIRB Lithium-Ion Battery ChargerGarmin$25LinkLinkN/A
Garmin VIRB Remote ControlGarmin$49LinkLinkN/A
Garmin VIRB Replacement Lens KitGarmin$19LinkLinkN/A
Garmin VIRB Shoulder HarnessGarmin$40LinkLinkN/A
Garmin VIRB Small Tube MountGarmin$20LinkLinkN/A
Garmin VIRB Spare BatteryGarmin$30LinkLinkN/A
Garmin VIRB Tripod Mount/AdapterGarmin$7LinkLinkN/A
Garmin VIRB USB Power Adapter KitGarmin$25LinkLinkN/A
Garmin VIRB Vented Helmet StrapGarmin$15LinkLinkN/A
Garmin VIRB Wind Block for VIRB CradleGarmin$10LinkLinkN/A
Garmin VIRB Wrist Strap MountGarmin$25LinkLinkN/A
Garmin/PowerMonkey Explorer Solar Charger (co-branded)Garmin/PowerMonkey$89LinkLinkN/A
K-Edge Action Cam MountsK-EdgeVariesLinkLinkLink
Note, that outside of the Garmin ones, I’ve been using the K-Edge cycling ones a lot in testing of all my action cameras. I’ve found that from a video stability standpoint, they’re freaking awesome. I think I’ve bought 4-5 of them now for various things (including shooting one of the time lapses out the window).

Of course, the cool part is because of the backwards compatibility with other mounts, you can pretty much pick-up anything you find on the market.
Bugs and Miscellaneous:

In recent reviews I’ve been adding a bugs section to cover things that I stumbled upon. Because I’ve had the units for a bit now, I’m really only focusing on bugs that I’ve seen on the most recent firmware version. Remember a ‘bug’ is different than ‘by design’. For example, the lack of a feature is something I highlight within a given section is considered ‘by design’, whereas something not really working right is below.
– When using the Fenix to pair to multiple VIRB’s, I saw issues where I would get into a funky state and only control one of the units, or none of them in some cases.
– Within the VIRB Edit software, I’m seeing some crashes when trying to export very large files (hence why I don’t yet have a cool 4-minute skiing video montage I put together in this review).
– In looking at some files, I see dropouts on some of the ANT+ data streams. For example, in my Santa 10K run a few days ago, I see that the heart rate data is missing occasionally, whereas the FR620 that I was wearing recorded it without issue 100% of the run.
Now, this doesn’t mean this is all the bugs out there. This is just the ones I saw during my use. As a single person I can’t possible test every possible feature in every possible combination to reproduce every possible scenario. Sure, I’d love to – but companies have entire teams of testers and they still miss things. So I do the best I can to note what I’ve seen above.
Product Comparisons:
The product comparison tool allows you to see how all the individual features stack up against each other within different products in the competitive landscape. I’ve thrown together a quick look at how the VIRB stacks up against the GoPro variants (there are three GoPro options that have some both insignificant and significant differences).
But, you can mix and match your own chart here.
Copyright DC Rainmaker – Updated March 16th, 2016 @ 7:21 amNew Window
Price$99$299$399$299$199
AvailabilityGlobalGlobalDiscontinuedGlobalGlobal
WiFi BuiltinNoYesYesYesYes
Bluetooth to PhoneNoNoNoNoNo
Recording LightYesYesYesYesYes
GPS builtinNoYesNoNoNo
Altimeter builtinNoYes – BarometricNoNoNo
Water ResistantIPX7 (1 meter for 30 mins), separate 50m dive case availableIPX7 (1 meter for 30 mins), separate 50m dive case available40m with included case40m with included case60m with included case
AccellerometerNoYesNoNoNo
Video Preview ScreenBuiltinBuiltinAccessoryAccessoryAccessory
Recharges viaMini-USBMini-USBMini-USBMini-USBMini-USB
Removable batteryYes / 2000 mAhYes / 2000 mAhYes / 1180 mAhYes / 1180mAHYes / 1050 mAh
Recording Time3 hours3 hours2 hours3 Hours2.5 hours
Secondary attached batteryNoNoAccessoryAccessoryAccessory
Storage Card TypeMicroSD CardMicro-SDMicroSD CardMicroSDMicroSD Card
Maximum Card Size64 GB64 GB64 GB64 GB64 GB
Records 360* VideoNoNoNoNoNo
4KNoNo12/12.5/15 fpsNoNo
2.7KNoNo24/25/30 fpsNoNo
1440pNoNo24/25/30/48 fpsNoNo
1080p30 fps30 fps24/25/30/48/50/60 fps25/30/50/60 fps25/30 fps
960p30/60 fps30/60 fps48/100 fps25/30/50/60 fps25/30 fps
720p30/60 fps30/60 fps48/50/60/100/120 fps25/30/50/60/100/120 fps25/30/50/60 fps
WVGA60/120 fps60/120 fps240 fps50/60/100/120 fps60 fps
Automatic Image RotationNoNoNoNoNo
Looping RecordingsYesYesYesYesYes
Timelapse Mode (constructs timelapse video)YesYesNo (requires desktop software)No (requires desktop software)No (requires desktop software)
Internal MicrophoneYesYesYesYesYes
MegapixelsUp to 16 MP (4664*3496)Up to 16 MP (4664*3496)12MP10 MP5 MP
Timelapse Mode (photos on interval)2,5,10,30,60s2,5,10,30,60s0.5,1,2,5,10,30,60s0.5,1,2,5,10,30,60s0.5,1,2,5,10,30,60s
Burst ModeUp to 6 photos/secondUp to 6 photos/secondUp to 30 photos/secondUp to 10 photos/secondUp to 3 photos/second
Continuous Shooting ModeNoNoYesNoNo
Concurrent w/video modeNoYesYesNoNo
Records 360* PhotoNoNoNoNoNo
Skiing ModeYesYesNoNoNo
Control from sport computerYesYesNoNoNo
ANT+ Sensor ConnectivityYes (Remotes only)YesNoNoNo
ANT+ Profile TypesOnly Remote ControlHeart Rate, Cadence, Temperature, PowerN/AN/AN/A
Overlays sport data on recordingYes, via included PC appsYes, via included desktop appsNoNoNo
App platforms availableN/A – No WiFiIOS/ANDROID/WINDOWS PHONEiOS/Android/Windows PhoneiOS/Android/Windows PhoneiOS/Android/Windows Phone
Use as remote controlNoYesYesYesYes
Stream live video previewNoYesYesYesYes
Record video from cameraNoNoYesYesYes
Multi-camera live control/previewNoNoNoNoNo
App for computerVIRB EditVIRB EditGoPro StudioGoPro StudioGoPro Studio
Remote control button/keyYes – January 2014YesYesYesYes
Diving caseYes, up to 50mYes, up to 50mIncludedIncludedIncluded
Head StrapYesYesYesYesYes
Helmet StrapYesYesYesYesYes
Handlebar/SeatpostYesYesYesYesYes
TripodYesYesYesYesYes
Suction CupYesYesYesYesYes
Chest HarnessYesYesYesYesYes
Wrist Strap/HousingYesYesYesYesYes
Roll BarYesYesYesYesYes
SurfboardYesYesYesYesYes
Curved AdhesiveYesYesYesYesYes
Flat AdhesiveYesYesYesYesYes
Adjustable Mounting ArmsYesYesYesYesYes
USB Connector TypeMini-USBMini-USBMini-USBMini-USBMini-USB
Micro-HDMIYesYesYesYesYes
Composite VideoAdapter AvailableAdapter AvailableAdapter AvailableAdapter AvailableAdapter Available
Audio 3.5mm Stereo MicAdapter availableAdapter availableAdapter availableAdapter AvailableAdapter available
Amazon LinkLinkLinkLinkLinkLink
Clever Training Link (Save 10% with DCR10BTF)LinkLinkN/ALinkN/A
Review LinkLinkLink
The tables are dynamically updated, so as new information becomes available it’ll update automatically. And again, you can make your own chart here.
GoPro vs VIRB:

Ahh yes, the question everyone is asking.
Here’s the thing…it’s a really complex answer. As it stands today, Garmin has put out a very solid first generation product. But your exact use case will help you determine which one makes the most sense.
In my opinion, if you don’t plan to connect sensors, nor care about sensor data (elevation, speed, distance, cadence, power, heart rate, g-forces, map, etc…), then it’s easy: Go with the GoPro at a lower price point. Especially since the lower-end GoPro units have WiFi connectivity, whereas the VIRB regular does not (a mistake, in my opinion given the marketplace).
If however, you care about sensor data, than in almost every case the VIRB will be a better option. Take for example cycling, there are only a few use cases I’d choose a GoPro over a VIRB. For the other 95% of cases, I’d easily go VIRB. That 5% factor is primarily around high-end video editing and using 2.7K footage and/or using some of GoPro’s Studio tools to more easily modify the colors within the video. Yes, the shape is more awkward – no doubt. And, yes, it looks funny on your head compared to a GoPro. But, everyone forgets that just a few years ago we all thought the square-looking GoPro looked funny compared to the then sleek Contour (in a helmet setting). Obviously, everyone has gotten past that.
Looking at desktop software, it’s sorta a messy answer. The GoPro desktop software is more advanced, but only in certain areas (such as modifying the video colors/look). In other areas, the Garmin software is more advanced (such as including gauges and sensor data). There isn’t a perfect answer there.
Turning to the mobile app side, it’s clear that the GoPro app today surpasses the VIRB app. No doubts about it. The GoPro apps allows more access to the content on the GoPro, and the ability to transfer that content to your phone and/or up to other sites. For me personally, I don’t tend to do video editing from my phone, but rather from my computer – so that’s not as big of an issue.
What I do though tend to use more often with action cameras is actually taking photos. It gives me a way to transfer higher-quality images to the phone that the phone might not otherwise take. So lacking that (today) within the VIRB app is a downer.
Looking at the future release cycles of both companies, GoPro has historically released new models ahead of the Christmas season (fall), while releasing/announcing new accessories at CES in January. Meanwhile, Garmin appears to have set themselves up for a similar timetable with a fall release of VIRB, and some accessories (like the remote) coming in January. Given that, I think if we fast forward to fall of 2014, we could see a really interesting competition heat up between the two companies. I’d guess that Garmin would have to expand to focus on the higher-quality side of the video and decreasing camera size, while GoPro would have to expand it’s offerings in connectivity and sensor metrics (altitude/GPS/etc…). And that’s all before we start to see companies take on 360* video like we’ll see this year coming up at CES in January (2014)…
Deciding between VIRB and VIRB Elite?

Well, that’s another tough question – even more so because Garmin was quite flexible in terms of their VIRB Edit software. See, within that software you can take the regular VIRB and mix in all the data that the VIRB Elite would normally cover, as long as you have a Garmin GPS device (like an Edge cycling computer).
In that case it merges it just fine, no need for the expensive VIRB Elite. You wouldn’t however get WiFi, so you thus wouldn’t get any of the phone app features. Right now those features are kinda slim, but I’d expect that long-term Garmin will likely follow in the same footsteps as GoPro and continue to expand those.
Then there’s the question of things like g-forces and altimeter data. For most of my activities, I haven’t seen g-forces be a big ticket item. But your activities may differ.
Altimeter data for me is however actually useful, so it depends a bit on whether I’m using other devices. For example, in skiing, the elevation data is awesome, and I wouldn’t otherwise likely carry another Garmin device with me to record that. So I’d encourage you to consider your total use cases, and whether you’d be using other devices or not. But while cycling, my Edge has a barometric altimeter, so I’d get the data there.
Finally, you’ll want to consider the advantage of the VIRB Elite when it comes to the extra steps required with the VIRB regular to merge and ensure all the file times with an Edge devices to sync up is worth the extra cash versus just doing the alignment manually.
Summary:

At the end of the day, Garmin has put out a pretty solid first generation action cam, no doubt about it. Perhaps more impressive than the cam itself, is actually the integration with other devices – like the Edge series (seen above). The ability to control my VIRB from my Edge is really cool when you see it in action.
In the case of the VIRB Elite with the internal GPS tracking and ANT+ sensors connectivity, they’ve pretty much nailed exactly what certain segments – such as cycling would want in an action camera. Even more so when you lay in the sensor detail within the videos using VIRB Edit software.
However, being a first generation product there are also a lot of little things that don’t quite ‘snap’ together yet. For example, while you can add ANT+ sensor data onto your video you can’t yet customize which sensors to use, so it’s not Burger King and ‘having it your way’. Further, while the software shows a ton of promise (really, it does), from a video editing standpoint it lacks things like titles, transitions, picture in picture, and other features that would really make it a one-stop shop like other suites. And that’s before we talk about some of the higher-quality video options within the GoPro device line from a video processing standpoint in post-production. Of course, that may not matter to everyone.
Now, the good news on the VIRB software front is that the VIRB team has been putting out software updates like nobody’s business. About every 7-10 days. So at the current rate things might be totally different in a few months. Though, I certainly wouldn’t hesitate to buy it today, as even as-is it still contains more features than just about everything else out there.
Ultimately, it’s a tough choice between latest generation cameras that are out there, and as always your exact use case will depend a little bit on which one makes the most sense for you.
Found this review useful? Or just want a good deal? Here’s how:
Hopefully you found this review useful. At the end of the day, I’m an athlete just like you looking for the most detail possible on a new purchase – so my review is written from the standpoint of how I used the device. The reviews generally take a lot of hours to put together, so it’s a fair bit of work (and labor of love). As you probably noticed by looking below, I also take time to answer all the questions posted in the comments – and there’s quite a bit of detail in there as well.

I’ve partnered with Clever Training to offer all DC Rainmaker readers exclusive benefits on all products purchased. You can read more about the benefits of this partnership here. You can pickup the VIRB through Clever Training using the link below. By doing so, you not only support the site (and all the work I do here) – but you also get to enjoy the significant partnership benefits that are just for DC Rainmaker readers. And, since this item is more than $75, you get free US shipping as well.
Garmin VIRB (regular)
Garmin VIRB Elite (select dropdown on page)
Additionally, you can also use Amazon to purchase the VIRB or accessories (though, no discount). Or, anything else you pickup on Amazon helps support the site as well (socks, laundry detergent, cowbells). If you’re outside the US, I’ve got links to all of the major individual country Amazon stores on the sidebar towards the top.
As you’ve seen throughout the review there are numerous compatible accessories for the unit. I’ve consolidated them all into the below chart, with additional information (full posts) available on some of the accessories to the far right. Also, everything here is verified by me – so if it’s on the list, you’ll know it’ll work. And as you can see, I mix and match accessories based on compatibility – so if a compatible accessory is available at a lower price below, you can grab that instead.
Copyright DC Rainmaker – Updated July 17th, 2015 @ 4:58 pm
Garmin Tempe External ANT+ Temperature SensorGarmin$29.00LinkLinkLink
Garmin VIRB Adhesive Mount Base Kit (Flat/Curved)Garmin$20LinkLinkN/A
Garmin VIRB Adjustable Mounting Arm KitGarmin$20LinkLinkN/A
Garmin VIRB Anti-glare Screen ProtectorGarmin$8LinkLinkN/A
Garmin VIRB Audio/Visual CableGarmin$30LinkLinkN/A
Garmin VIRB Auto Dash Suction MountGarmin$25LinkLinkN/A
Garmin VIRB CradleGarmin$18LinkLinkN/A
Garmin VIRB Dive Case – 50mGarmin$40LinkLinkN/A
Garmin VIRB Dive Case Replacement Lens KitGarmin$19LinkLinkN/A
Garmin VIRB External Microphone AdapterGarmin$15LinkLinkN/A
Garmin VIRB Head Strap MountGarmin$22LinkLinkN/A
Garmin VIRB Large Handlebar MountGarmin$25LinkLinkN/A
Garmin VIRB Lithium-Ion Battery ChargerGarmin$25LinkLinkN/A
Garmin VIRB Remote ControlGarmin$49LinkLinkN/A
Garmin VIRB Replacement Lens KitGarmin$19LinkLinkN/A
Garmin VIRB Shoulder HarnessGarmin$40LinkLinkN/A
Garmin VIRB Small Tube MountGarmin$20LinkLinkN/A
Garmin VIRB Spare BatteryGarmin$30LinkLinkN/A
Garmin VIRB Tripod Mount/AdapterGarmin$7LinkLinkN/A
Garmin VIRB USB Power Adapter KitGarmin$25LinkLinkN/A
Garmin VIRB Vented Helmet StrapGarmin$15LinkLinkN/A
Garmin VIRB Wind Block for VIRB CradleGarmin$10LinkLinkN/A
Garmin VIRB Wrist Strap MountGarmin$25LinkLinkN/A
Garmin/PowerMonkey Explorer Solar Charger (co-branded)Garmin/PowerMonkey$89LinkLinkN/A
K-Edge Action Cam MountsK-EdgeVariesLinkLinkLink
Thanks for reading! And as always, feel free to post comments or questions in the comments section below, I’ll be happy to try and answer them as quickly as possible.