GoPro Hero5 Black In-Depth Review

It’s been two years since the last major GoPro Hero launch. No, I don’t count the Session last year. I’m talking about a multi-camera launch like GoPro has typically done each fall for the majority of its history. Back in September GoPro launched three new cameras, alongside a drone and a gimbal. I cover all the basics of that launch day here.
This post is all about the GoPro Hero5 Black. You’ll find a GoPro Hero5 Session In-Depth Review coming up shortly (a few days), and then the Karma Drone and Gimbal reviews later this month (Update: Available now!). But even more exciting for consumers is that for the first time in a long time, we’ve got a legit high-end competitor to GoPro with the Garmin VIRB Ultra 30. These cameras were released a mere 19 days apart, and have an amazingly close feature set. Both have their pros and cons, which I’ll touch on throughout the review (as well as discuss in a round-up at the end). Without question these are the best two action cams on the market today – and that competition will only make these cams better over time. All of which is great for consumers.
With that – let’s dive into things with an unboxing section, before seeing how they size up in the weight and dimensions category!
Unboxing:

Now, I’ve got two options for you on the unboxing front. You can either watch the full video below, or skim through the photos. I recommend both. There’s plenty of interesting commentary in the video.
As for the photo side, we’ll start with the Hero5 Black in the box. It sits atop it within the clear case, making it easy to see how big it really is:

Next, if we remove the outer shell we’re left with the camera on a baseplate and a small white box:

That base-plate can actually be used later on as a simple mount. So don’t throw it away!
Then we’ve got the contents of the box removed. There’s not much there. With no need for an external housing, gone are the days of additional housing doors and such.

Let’s go ahead and remove the GoPro from the stand to expand it out a bit:

There we go, now you can see all the parts. First up are the two sticky mounts. One flat, and one rounded. Don’t worry, you can buy tons of these on Amazon for cheap.

Then there’s the mounting adapter for that sticky mount, plus the thumb screw used for any GoPro mount. You’ll notice the mounting adapter has a small rubber protector, that’s used to prevent the unit from sliding on a faulty mount. It replaces that little white rubber piece you used to get that you never knew what to do with.

Don’t forget the manual/quick start guide!

Then we’ve got the USB-C cable. Yup, USB-C. No longer mini or micro-USB here!

Then there’s the ‘Cage’ mount that the GoPro itself came in. This has the standard GoPro mount on the bottom, and then also a hole on the side for accessing the ports (to charge while in the case, either at home or even while recording):

Then we’ve got the GoPro Hero5 battery. It’s different from any past GoPro batteries, sadly.


Finally, the GoPro Hero5 Black by itself, sans case.


Next we’ll move onto size comparisons.
Size & Weight Comparison:
Now if you watched the above unboxing video (previous section) you saw that I compared the unit to a bunch of other cameras, as well as the weights of each of those. That’s the last few minutes of that video, in case you want to skip above to it.
Still, here’s some photos of how it compares. First, the GoPro Hero5 Black vs GoPro Hero4 Silver/Black (identical size):


Next, the GoPro Hero5 Black vs the Hero5 Session:

Then we’ve got the GoPro Hero5 Black vs the Garmin VIRB Ultra 30:


And here it is with the waterproof case:


Finally, the weights. I showed the weighing in of each of these during the video, but here’s the consolidated version in text:
GoPro Hero5 Black 117g
GoPro Hero5 Black with frame case 144g
GoPro Session5 73g
GoPro Session5 with frame case 89g
GoPro Session4 73g
GoPro Session4 with frame older case 90g
GoPro Hero 4 Silver 88g
GoPro Hero 4 Silver with waterproof case 142g
Garmin VIRB Ultra 30 89g
Garmin VIRB Ultra 30 with waterproof case 158g
Phew…time to get onto the good stuff!
The New Features:

While the GoPro Hero5 has many of the same specs as the previous generation when it comes to video and photo resolutions, there are some new features in it. Individually no single feature is a massive leap forward in the action cam industry, but collectively they represent a notable and substantial difference over the Hero4 Black. This section is mostly focused on these new features, while the remaining sections take a deeper dive into the core functions of the camera, as well as touch on these new features in more detail.
Fully Waterproofed: Probably the most notable item is that the GoPro Hero5 Black is now fully waterproofed without the need for a separate case, just like the GoPro Hero4 Session was. In fact, it has nearly the same rubberish material on the outside.

This means that you can take it to 10m/33ft deep without concern for killing the camera. If you want to go below that (such as diving), you’ll need to pick up the dive case (called Super Suit, down to 60m/196ft).
Now it actually gets a bit more interesting. See, the front lens is removable (in case you scratch it), so you can replace it. But even without the lens on, the unit is still waterproof to 10ft (~3m), so you need not worry if somehow that gets horribly bonked. Though, it’s actually quite tricky to take off, so it’s not likely to happen by accident unless you slam into a rock at high speed, in which case the lens case is the least of your concerns.

What is of more concern though is the USB-C/HDMI port door. This door pops off for placement into the Karma gimbal/drone, as well as just for charging:


Now this won’t easily pop-off while it’s locked in place, as you have to press a button down to open it (plus slide it). But, the trick will be not losing it after charging your camera or while the charging cable is attached. GoPro does sell the door as an accessory (albeit over priced), and I know I plan to buy an extra door and then seal it up somewhere special in my backpack/suitcase for traveling. Because I guarantee you that I’ll lose it at the most inopportune time on a trip to some beautiful watery location and be unable to take pictures of The Girl underwater in a bikini without the door.
Speaking of doors that we don’t want opening up, we’ve also got the battery compartment down below. That holds both the battery as well as the micro-SD card:

Touch Display: The Hero5 takes the touch display found on the Hero4 Silver and advanced it forward. As you might remember, the Hero4 Black actually lacked a display. This was one reason that the Hero4 Silver was actually a more day to day favorite of mine than the Hero4 Black was.

However, the touch display acts and feels significantly different here than the Hero4 Silver. The entire menu system has been redone to make it more intuitive to find settings. Along the bottom it shows you the basics for that mode. For example, in the video mode it shows you resolution and frame rate.
You can tap on it to change these specs. Only the available frame rates will display for a given resolution. In theory this looks beautiful, but in practice it’s actually more cumbersome than I expected. I think this is because there’s just too many resolutions too closely together for a normal sized finger to hit the right resolution on that small display.

On the right side of the display you can enable various advanced settings for that mode, such as ProTune, Image Stabilization, and Audio Control:

From the top you’ll be able to access general camera settings like WiFi connectivity and voice control. And from the left you can access the playback pages to review photos and videos you’ve taken. I cover all this in-detail in this video below:
All of this is of course waterproof as well. Though, it won’t work underwater. For that you’ll need to use the push-buttons on the top/side of the camera to change modes. There are still dedicated buttons, two in total. One on the top, which starts/stops recording (it also will instantly start recording if you press it while off). And the one on the side, which is used to set the modes as well as create a highlight tag while recording:

Speaking of a wet display, in general I found it doesn’t work well when wet either. Especially if your fingers are wet, it all goes to crap and fails to respond.
As I said earlier, in theory the new GoPro Hero5 Black touch display layout looks good, but in practice it needs a bit more refinement. I found that the vast majority of the time while trying to change modes the slight display lag combined with tiny option selectors meant many missed attempts at configuring things.
This is somewhat the opposite of the Garmin VIRB Ultra 30. In theory, that display’s menus looks more clunky by comparison. Without touching a unit you’d give the ‘UI design award’ to GoPro. But in practice, the Garmin VIRB Ultra 30 screen actually works better because you can easily navigate it almost every time without fail. Still, despite the Hero5 Black’s screen oddities, I’ll definitely take it over not having a screen on the GoPro Hero5 Session.
Voice Control: Like the VIRB Ultra 30, GoPro too introduced Voice Control this fall. This means you can simply tell your camera “GoPro, Start Recording”, and it’ll indeed start recording. Same goes for photos, and even changing modes. In fact, you can actually swear an expletive that rhymes with ‘hit’ and it’ll mark a highlight there. It’s cool.
You can turn this option on/off, and it’s available in seven languages. Also, if you have the Remo accessory remote, that’ll accept voice commands too in the event the camera is out of range of your voice.
But…it’s not perfect. I found that it works most of the time when standing still. But once you start moving I found both it and the Hero5 Session actually perform worse than Garmin does. At about 10MPH (15KPH) I find the ability to give commands pretty much dies no matter which way the camera is facing. Whereas with Garmin it’ll continue working above that speed as long as the camera is facing you.
So you’ll see that GoPro has more functionality (commands) than Garmin does. And earlier leaked manuals in August even showed GoPro being able to learn new commands you assign it (that hasn’t happened yet…but that’d be super cool). But in usage, the Garmin actually works better when you start moving, and there’s fewer failed commands.
GPS & Sensors: The Hero5 Black contains GPS. But that GPS won’t do anything for you. See, the GPS on the Hero5 Black is merely used to geotag the location of your photos and videos. Essentially it does what Facebook and Instagram do with your phone by saying ‘You were here’ when you took this photo. It is NOT used to record your GPS tracks while you bike/ski/surf/etc… Nor is it used to display your speed on videos. Basically, it’s not used for much of anything except saying “This was taken in NYC”.
This is obviously a huge disappointment for sports fans that wanted to overlay data like speed or distance onto their videos and have that all be done natively within the GoPro suite. After all, GoPro bought Dashware, the leading app for overlaying such metrics. Yet, tough beans for any usage there at this point. The GPS tagging icon is shown at the top left of the display:

GoPro is saying that 3rd parties might be able to tap into this, and surely their program I talked about this spring is aimed at that. But as I noted in that post, the premise and thinking behind how they want 3rd parties to use the data is laughable (and people in the industry I’ve talked too are also laughing). Who on earth wants to write their own new video editing tools for this data on multiple platforms when GoPro is supposed to be a leader in that (an entity that’s bought three different video editing platform companies in the last year). Sigh.
Electronic Image Stabilization, RAW Photos, Advanced Audio Tracks: I’m bucketing all three of these together, not because they deserve to be together, but because I want to call them out here before I dive into them more deeply down below. These are in many ways some of the biggest differences between the Hero5 Black and Hero5 Session. While the Hero5 Session does have stabilization, it does not have the new RAW photo mode, nor does it have the Advanced Audio Track capability.
That capability allows you to actually record the audio to a secondary file on the GoPro, even so much as giving you three separate tracks (one for each mic onboard). That’s super cool for video editing scenarios where you want complete and total control over the audio to ensure 100% that it’s using the right mic. By default the unit will auto-switch between them to reduce wind noise, and in my experience the unit does pretty well there. But I’ve also seen one or two minor blips where it got it wrong, so having the ability to manually control that is sweet.
The same goes for RAW photo support, which is also in the same wheelbarrow as having a new WDR mode (Wide Dynamic Range), that makes the shadows pop a bit more in photos while even-ing out the bright spots. Basically it’s HDR photos by a different name. But, it too works really well in my experience. Again, more on these new features in their respective sections.
Speaking of which, let’s talk audio and video modes.
Video & Audio Details:

Ahh yes, video time. No better place to start diving into features than video modes. In many ways the Hero5 is similar in these modes to the Hero4 Black. After all, it too has 4K @ 30FPS and 720P @ 240FPS, the two ends of the spectrum that people often talk about. The footage looks beautiful in 4K – no doubt.
So what’s new and notable here? Well we’ll start with the video stabilization. Technically this is ‘electronic image stabilization’, which works by taking a larger resolution video clip (i.e. 4K) and then smoothing the video by offering a reduced resolution rate while stabilized (up to 2.7K). By doing this it essentially stabilizes by cutting the edges off the corners to make the video appear smooth. It’s the same thing that Garmin does on their VIRB Ultra 30 (but the Garmin is limited to 1440 vs the higher 2.7K), but is different than what Sony does with their new X3000R, where they use optical image stabilization. That’s better because it doesn’t crop any of the image.
To enable image stabilization, you’ll simply swipe from the right. It’ll warn you about cutting about 10% of the field of view:

To understand what this look like, I put two GoPro Hero5 Black cameras side by side and went for a short mountain bike ride. Along the way I flipped the mountain bike. But more importantly is that one camera had image stabilization enabled, while the other had it disabled. Here’s how that looks:
For cases where you’ve got some light chop in the roadway, or even for hand holding the unit, image stabilization can dramatically improve things. Though, that’s at the sacrifice of resolution. If your final output product’s 1080p, then it’s largely a no-brainer. Do note that it generally works better when you’re shooting something that has a large portion of the image facing one direction constantly. Versus on a helmet mount, it can get a bit wonky as you move the view around a bunch.
Next we’ve got new and better audio support on the Hero5 Black. It has three mics, which allow it to record audio from three different locations on the camera. This is used to remove the sound of wind while you’re moving at speed. For example, in this video below starting at the 3:30 marker I’m riding with the unit hand-held in front of me. The Hero5 Black automatically cancels out the microphones that are facing the wind, picking up only my voice (and rather clearly):
What’s even more interesting though is the ability to record the native audio files from each microphone separately. If you enable ProTune, you’ll see a new option to do this. Within that you have three levels:

There are three level options within this: Low/Medium/High.
The result of which is that after a video (with low enabled), you’ll get a separate audio track for each microphone, plus the video too. This is ideal for more advanced editing where you want to specify exactly which audio track is used. If this doesn’t make much sense to you, then you’ll definitely want to leave this setting off, as it’ll be a solid pain in the ass to re-merge the audio files back together again. This is definitely a pro-type setting.
As for ProTune, that’s pretty much like before, which allows you to configure settings like exposure, white balance, and sharpness:

Now battery life is an interesting nugget. Mostly because GoPro has been so evasive on written answers here. Even when talking to GoPro reps directly, you get various answers (all of which were incorrect in the end). So earlier, GoPro was saying an hour of battery life for 4K footage. But in reality, it’s closer to 1hr 31mins when I tested it.
Here’s some quick tests that I’ve done with just straight recording times:
1080p 30FPS (Wide): 2:07:41 (no WiFi/GPS), 1:50:52 (WiFi/GPS enabled)
2.7K 30FPS (Wide): 1:45:05 (with WiFi Enabled)
4K 30FPS (Wide): 1:31:10 (with WiFi enabled)
All of these were simply taken at room temperature; obviously aspects like environmental temperature will impact things considerably, as will other modes and increased frame rates. But those give you some basic bounds to work within.
Photo Mode:
While the Hero5 Black doesn’t offer any more resolution than the Hero4 Black did, it does offer a number of substantial photo-focused features. First, the basics though. To get into the photo mode you’ll go ahead and tap the mode button until you see photos. Or, just tell the GoPro to take a photo using voice commands.
Now there are technically different photo modes, including the ability to take a burst photo, a series of photos as a timelapse, or night photos. Note that this photo timelapse is separate from the video timelapse option. This produces a crapton of photo files, whereas the video timelapse produces a single video timelapse file.
Within the photo mode you can change resolution, as well as perspective. Resolution is set to 12MP. While perspective options are Wide, Linear, Medium, and Narrow. The linear one is the most notable new one, which aims to reduce the fisheye effect seen on many action cams. To understand these differences, here’s a sample gallery of the different modes:


The burst mode allows you to capture a moment of action with up to 30 frames per second. You can also configure it to have those frames spread out over a few seconds too:

Here’s an example that I took as a street performer did a flip:


The 30 frames per second is pretty solid, though, Garmin’s new VIRB Ultra 30 can burst up to 60 frames per second in photo mode (albeit at a slightly reduced resolution). While I’m sure there are some uses for that, I honestly can’t think of one where 30 frames wouldn’t have covered it. But, I suppose that’s the cool thing in that there’s always unique ways people use these options.
Next is the new WDR mode, which is Wide Dynamic Range. This is sorta akin to an HDR (High Dynamic Range) photos, where you increase the shadows and even out the overexposed spots (in fact, GoPro still calls it HDR in one menu when you enable RAW shooting, a leftover to-fix item likely). But typically in HDR photography people add more contrast in post-production. But all start with three photos taken at three separate exposure stops. With WDR, GoPro merges these together to form a single cohesive photo that has much better balance. Garmin did much the same with a new bracketed option on the VIRB Ultra 30.
In my photo taking, the new WDR mode is really solid. Things look beautiful here, especially in a city in late afternoon on a sunny day where you often get lots of shadows in pictures. Check out these where you can see everything looks much more even across the board. I’d even say that I’m probably going to leave this on by default.

The last photo mode definitely worth talking about is the new RAW photography mode. This allows you to get more detail out of the photos later on in post-production with apps like Lightroom or Photoshop.

When you enable this setting (which disables WDR, and only works in ‘Wide’ view mode), you’ll get a secondary .GPR file for each .JPG file taken. You can see these once you plug in your camera/card:

These can then be edited in various applications that support it. Today that includes Adobe Lightroom CC, as well as anything that supports Adobe Camera RAW. I’m sure others will quickly support it as well too.
Note that the RAW photography mode is different than ProTune, which allows granular control of image specs such as exposure and white balance directly on the camera itself. This is offered for both video and audio, and the settings are pretty similar to that of the Garmin VIRB Ultra 30. This option is ideal when you don’t want to deal with doing post production later and/or need more control upfront. An example being in certain light conditions I’ll set the white balance to a specific value, versus having to correct them all later.

Overall the GoPro Hero5 Black produces some beautiful photos, no doubt about that. And the ability to shoot raw as well as WDR photos is great for both ends of the photography crowd that either want deep control (RAW), or just simply want the resultant shot to look like someone worked on it in post (WDR).
GoPro Apps:
GoPro currently has four different apps you’re likely to use with your camera: Capture, Quik (Mobile), Splice, and Quick (Desktop). Oh, plus the GoPro Studio for those that really want to rock it old-school.
Here’s what they all do:
Capture: This is what they renamed the default GoPro app. It’s where you change settings on your camera from the phone and how you download footage to your phone.
Quik (Mobile): This is used for editing footage already downloaded to your phone, it can whip up quick edits timed to music automatically. It cannot connect to the GoPro camera directly.
Splice: This is also used for editing footage already downloaded to your phone, it’s kinda like iMovie. It cannot connect to the GoPro camera directly.
Quick (Desktop): This is the desktop app for editing footage, as well as downloading footage to your desktop. It can also be used for uploading footage to GoPro Plus (cloud platform), as well as updating firmware on your camera. Further, it can download footage from GoPro Plus as well.
I’ll run through each app and how they work, starting with the one you’ll need the most, which is the new Capture app (aka GoPro app). If you’re familiar with the existing GoPro app you’ll find this app has essentially been skinned and re-done in a new UI with a new logo and name. It’s where you’ll configure settings on your GoPro (such as video modes), as well as how you can preview what the camera sees:


The above is useful if you have your camera setup somewhere that you can’t easily touch (for example, outside on a window during a storm). This allows you to wirelessly control it without a dedicated remote.
You can further download photos and video from this app as well, which will connect to the camera via WiFi for downloads. It uses Bluetooth Smart to sustain a data connection to the camera for up to 8 hours from the last button press, which will only reduce your battery by about 2%.
Overall the app works reasonably well, just like it did before. One oddity though is that unlike before, you can no longer rename your cameras. Instead, you get these horribly numerical camera names like you see above. There’s no method to change that currently for any of the Hero5 cameras. Same goes for the WiFi networks it creates.
Next we’ve got Quik (Mobile). This app is designed to put together quick edits based on a collection of videos or photos. As part of that it’ll sync to music these edits. The app can pull from both your local video library, as well as the GoPro cloud, but oddly it can’t pull from the GoPro directly. It works fine, though I’ve found the edits aren’t terribly concise, and end with it being a bit boring.


Then we’ve got Splice (Mobile). This is another app that GoPro bought earlier this year, and this app…well…almost does the same thing as Quik. Instead, it has a bit deeper video editing capabilities in terms of trimming and such and some basic effects, and unlike Quik it can’t connect to the GoPro cloud. Still, it’s clear that none of these teams are working together, as these apps appear more like a random collection of App Store video apps than any sort of true GoPro offering. Not to mention this app crashed constantly for me while trying to create my video, but it also took forever.


Finally, we’ve got Quik (Desktop). This app is similar to that of the Quik Mobile side. Except that it has more features. For one, when your camera is plugged in you can validate firmware levels as well as download directly from the camera:

Further, the desktop version allows uploading to GoPro Plus, which the mobile Quik doesn’t. In theory you’ll see data uploading once you plug it in, if you select the below. However, I haven’t seen it do that unless I first transfer it to my desktop, which…I don’t necessarily want to do.

You can also access your GoPro Plus cloud content within the Quik Desktop app as well, which has a small cloud icon next to it, indicating it’s on the cloud.

Once you’ve decided which content you want, you can go ahead and select those clips to create a video. Note that you cannot select GoPro Cloud clips to add to a video, they must be locally downloaded first. It of course doesn’t simply offer you the ability to do this, because…well…that’d be logical. Instead, it resets your selected list of clips and makes you select them again and choose download. Then you can re-select them now for a third time and choose to create a video.

Sigh.
Eventually you’ll get your clips and you’ll select various points in them that you think are interesting. The program will automatically cut back and forth and seemingly time it to music. It actually works fairly well, and makes it a bit easier to find the right spots in videos rather than trying to manually trim.

With the desktop version you’re focused on creating a clip to a given time length (above I have it set for 60-seconds). Once completed, it’ll give you a short video you can share out to various platforms.
As you can tell by now, there’s some potential in all these apps – but it’s such a mess of a story with conflicting and competing apps. Not to mention none of the apps feel finished, but rather half-thought through. Like someone packing up ahead of a hurricane and told simply to grab what they can.
GoPro Plus:

If there’s anything on the GoPro platform more confusing and screwed up than GoPro Plus, I don’t know what it is. This is the only solid blight on the Hero5 launch. And it’s ugly. Really ugly.
Let me try and explain what GoPro intended to do, and then I’ll explain how horribly bad it actually ended up. First, the idea behind GoPro Plus (which costs $5/month) is that it syncs the content from your GoPro Hero5 camera via WiFi to GoPro’s cloud platform. From there, you can edit it on another device. Sounds great, right?
It starts off fine. First, you’ll pair up your camera to your WiFi network like you would just about any other WiFi device:


Next, you’ll press to start syncing.
Oh.
Wait.
You can’t. There is no start button. Instead, you need to plug the GoPro in to a charging port and then wait for it to finish charging before it’ll start syncing (actually, in my experience it starts slightly before it’s totally finished charging). But eventually, it’ll finish charging and start to sync your photos and videos:

Except, it didn’t actually sync what you thought it sync’d. Instead, it sync’d a lower resolution copy of the videos, 1080p, instead of all that beautiful 4K footage you just shot on your new expensive camera. In some ways that’s reasonable because uploading that footage might take forever anyway if you did so in 4K. Once it’s finished syncing (some hours later), you’ll find it on GoPro’s site (a private portion for you):

Great! You’re ready to edit online, right?
No.
That’s not the way this works.
Instead, you have to re-download it to your device. I’m serious. There’s no capability to edit things online.
So, now we wait for your computer to re-download gigs upon gigs of videos you shot all day back to the very same couch you started this entire process on earlier that day. Oh, but one minor catch: You can’t use GoPro’s new Splice mobile app to do this (desktop Quik does work though). You have to use GoPro’s default mobile app to do this (called ‘Capture’ now, instead of ‘GoPro’, for reasons that nobody on earth can understand).
As an aside, that’s the same mother-#$##$#-app that you started this entire process with when you setup your camera to use WiFi to Auto Upload.
But it gets better.
Now that you’re back in that Capture app, you’ll select which files on the cloud to download to your phone. Once you’re done there, then you get the privilege of opening that other app (Quik or Splice) and finding/selecting those files from that app. Oh, and now you can start editing.


Now you could short-circuit this process by using the new $19 Quik adapter. But that then defeats the purpose of paying $5/month to GoPro (which they and their investors want you to do).
But hold on, I’m not even close to done yet with this circle-jerk.
Let’s say you go on vacation, which, is a core usage scenario for the GoPro (as much fun as taking my dog out to take a dump might be to film). So you head out for a hard day of skiing and then wrap up by returning to the hotel. Here’s what happens:
1) You pair up the GoPro to the hotel WiFi network.
2) But that doesn’t work, because it doesn’t support typical portal-style agreement pages.*
3) You say screw it, and pair to your mobile hotspot on your phone.
4) Now you plug in your GoPro to charge so it’ll sync.
5) But wait, now you’ll wait an hour for it to finish charging before it begins talking to WiFi.
6) Once it starts uploading, that takes another few hours to complete**.
7) Once complete, you’ll then re-open the GoPro Capture app and re-download that same data to your phone.*
8) Then, close the capture app and open the Splice App and select the footage, all of which has been down-res’d to 1080p, including that 240fps slow-mo footage of the jump, that’s now at 60fps. But first…wait for that to be imported, it’ll take forever, because Splice is slow as crap on imports.
9) Start editing.
*Even if your hotel supports an open WiFi network, the Hero5 doesn’t work with that either, because it thinks it needs a password. The software requires you type a password for a network, even when there isn’t one to type. You actually have to type something in the password box. So when it passes that random text you put in there for authentication, it fails of course. Seriously folks, I can’t make this stuff up.
**Insert massive cellular bill because you went far over your mobile data allowance for both uploading and downloading the same data.
Oh, and don’t forget you only get 35 hours of footage allowance up there. That sounds like a lot, and in some ways it is. But at the same time, that means you can’t really use this as a backup option either, since after some number of months of weekend usage you’ll run out of space.
Again, yes, you could sync it to your phone directly from the GoPro Capture app. But that’s not the purpose of GoPro Plus. What I described in this section is (somehow) the purpose of GoPro Plus.
So in the spirit of giving constructive feedback, let’s talk about what needs to change:
1) Let me sync the second I plug in. Like most people, I charge my cameras at night while on vacation, in fact, I may even charge multiple batteries by swapping them in/out of the camera over the course of the evening. Let me force start an upload of content whenever the heck I want. Your phone doesn’t restrict you from sending text messages unless it’s fully 100% charged, does it?
2) Figure out a way to allow me to upload on hotel WiFi networks. There’s a handful of ways this could be solved, such as having GoPro work with some of the major internet pass providers (such as Boingo) to be automatically authenticated. This isn’t easy, no doubt, but it’s also not the consumer’s problem that this doesn’t work in what is a core usage scenario. Oh, and fix the open-password bug. C’mon.
3) Enable the Splice mobile apps to download from GoPro Plus: Seriously, just seriously. How did you miss this? You spent $100 million dollars for these two apps (Quik + Splice). For the love of god they should work directly with your $5 platform. Also, if I download video from one app, then the other app should natively be able to access it (it doesn’t work if you download to Quik, and then try and open in Splice).
4) Let me auto-sync cloud content in Quik desktop: When at home, I’ll simply plug in the GoPro to the wall, and then I *expect* there to be an option in the Quik desktop app to download new content automatically. You know, like those popular services…Dropbox, OneDrive, Google Drive, and everyone else. Do the same here. I don’t want to re-wait for it to download each clip.
5) Don’t down-res slow-mo footage to 60FPS: This seems kinda obvious to me. Why would you do this? You wouldn’t put this restriction on your video editing team at GoPro for the high-end promo videos? Of course not, they’d laugh at you.
Ok, that’s all for now.
Now, there is one positive side to GoPro Plus: You get 20% off all GoPro accessories on GoPro.com. So that might be worth it alone if you’re planning a large GoPro accessory order. And, that even seems to include 2-day shipping for free!
Hero5 Black vs Hero5 Session:

So you’re trying to choose between the Hero5 Black and the Hero5 Session. Both solid choices, and let me give you some food for thought on deciding between the two (the next section I talk about between the Hero5 Black vs the Garmin VIRB Ultra 30). Do note I’m specifically talking here about the $299USD Hero5 Session, and *NOT* the cheaper $199 Hero Session, which lacks a ton of features compared to the $299 Hero5 Session. The key visible difference being the lack of the numeral ‘5’ in the Hero Session name.
From a top-line standpoint, here’s what the Hero5 Black has that the Hero5 Session lacks:
– 12MP instead of 10MP pictures on Session
– GPS for location stamping
– Inability to swap out battery (it’s not removable)
– RAW photo option
– WDR (Wide Dynamic Range) photo option
– Higher slow-mo specs (240fps on Black vs 120fps on Session)
– A handful less frame-rate options
– Touch display on the back (no display at all)
– Three mics vs two mics on Hero5 Session
– Ability to record individual audio streams
– HDMI port for direct viewing/connection options
You’ll still get all this stuff on the Hero5 Session though:
– Voice control
– Electronic Image Stabilization
– WiFi Uploads to GoPro Plus
– 4K Video options
– Karma Drone and Karma Grip Compatibility ($29 accessory required)
– Waterproofing to 10m/33ft
– USB-C
That’s the basic differences. Again, both cameras are very good, you won’t go wrong with either. For me, I prefer the Hero5 Black because I like to be able to see and frame up what I’m taking a photo/video of. Whereas the Hero5 Session it’s shoot and pray that you’ve got it lined up. Sure, you can use your phone for certain shots – but most of us won’t do that.
As for the Hero Session (the basic $199 one)? It’s also good, but I wonder if it’s slightly overpriced right now. I get that it’s GoPro’s best seller, but there’s so many more options at $299 with the Hero5 Session that I’d strongly recommend that over the Hero Session. I feel like given everything, something like $169USD would be a better price for the Hero Session. Just me though…
Hero5 Black vs Garmin VIRB Ultra 30:

Ahh yes, the Battle Royale of the action cam world right now. Sure, there are numerous other cameras out there. And some of them quite good. But no two cams have as many features and as high-end features as these two do. Even when you look at something like the new Sony cam with its legit optical image stabilization, it’s still hindered by it’s clunky display/menu system and their poor apps. I keep hoping year after year they’ll figure it out, but alas, they don’t.
So how does the GoPro Hero5 Black and VIRB Ultra 30 line up? Very very closely.
Here’s a table of the detailed differences between them (it’s separate from my usual product comparison tool here, which has far more depth):
GoPro Hero5 Black vs Garmin VIRB Ultra 30
General: Price$399 $399 -General: Touchscreen controlYesYes-General: WaterproofInternally to 10mWith case to 40m GoPro (but depends on preference)General: Battery life~2hrs @ 1080p30~2hr 15min @ 1080p30 -General: WiFi & BluetoothYesYes-Data: GPS EnabledYesYesGarmin uses data betterData: Accelerometer/Gyro/Altimeter/CompassGyro/Accel onlyYes to allGarminData: Can connect to sport/automotive/boat sensorsNoYesGarminGeneral: USB Connector TypeType-CMini-USBDepends on preferenceGeneral: Voice ControlYesYesGoPro (can customize)Video: Highest resolution4K @ 30fps4K @ 30fps-Video: Highest frame rate720p @ 240fps720p @ 240fps-Video: Electronic Image StabilizationYes up to 2.7K/60FPSYes up to 2.7K/30FPS GoPro – BarelyVideo: Remove distortion modeYesYes-Video: Wind cancellationYesYes-Video: Record individual mic tracksYes to seperate filesSorta to separate channelsGoProPhoto: Highest resolution12MP12MP-Photo: Highest burst mode30 frames/sec60 frames/secGarminPhoto: Ability to have pro settings modeYesYes-Photo: Ability to shoot RAW filesYesYes-Photo: HDR photo optionYesYes-Accessories: Uses GoPro mountYesYes-Accessories: Remote controlYesYes-Accessories: Gimbal optionYes – 1st party3rd Party with Feiyu Tech G5-Accessories: Drone connection optionYesSorta but not idealGoProSoftware: Cloud Sync SolutionYesNoGoProSoftware: Mobile appYesYesGoPro faster, Garmin more optionsSoftware: Desktop AppsYesYesGarmin for more powerful editingSoftware: Can automatically create highlight moviesYesYesGoPro’s mobile better, Garmin’s Desktop
But let’s make sense of this in a bit of text. Who do I recommend each camera to?
The Vacation Beach Goer: If you’re looking for a camera to go on vacation/holiday and easily line-up the shots you want on the display, with a unit that’s guaranteed waterproof in all situations – then the Hero5 Black is the better choice. It’ll give you incredible high-quality imagery (photos/video) and make it nearly impossible to kill your camera by being waterproof without a case. You won’t get data overlays like speed or g-forces, but you will get amazing videos – no doubt there. Also, the mobile apps are a bit better here than Garmin’s mobile apps.
Sports Action Person: If you’re looking to overlay metrics like how fast you’re skiing, or the engine metrics from your car, or the altitude while hang gliding, then the VIRB Ultra 30 is a better bet. The fact that it has tons of sensors inside it (and actually uses those sensors) really shows through when you connect it to their apps to overlay data onto your videos (like seen in this video). Plus, you can connect to sensors like heart rate straps, car engines, boat/marine sensors, and even a Bluetooth audio headset. Garmin has been doing that kinda stuff for years in their cams, and it shows through. Both cams will give you very solid 4K footage, and both can do 240fps at 720p. The GoPro can shoot with image stabilization higher though, up to 2.7K, vs 1440p on the Garmin.
The Prosumer Video/Audio Editor: Now this is a super-tricky one. On one hand GoPro has the ability to create RAW photos, as well as separate out the audio tracks from the three mics. That’s cool. Both cameras have a Pro settings mode for exposure/WB/etc… Yet on the flip-side, the Garmin VIRB Ultra 30 can connect to a Bluetooth mic/headset, which means you get a bit more flexibility there in wireless audio setups (it’s an action cam after all, not a studio cam). Both units can connect to wired mics via adapters. Oh, and Garmin supports saving/copying settings to an SD card for quickly duplicating settings on multiple cameras. For me, there’s no clear-cut winner here in this category.
Someone with a Gimbal: If you want a gimbal, than GoPro has the upcoming Karma gimbal, which integrates with the Hero5 cameras, albeit at a cost of $299. Right now the Hero5 camera does work with some cheaper $200 3rd party gimbals (I used one in this post above in the video section), whereas the VIRB Ultra 30 doesn’t really have a gimbal that works great out of the box with it. I suspect we’ll see some shortly that do from 3rd parties, but today that’s tougher.
Someone with a drone: No doubt, the Hero5 Black will work great with the Karma Drone ($799). Sure, you can mount either the GoPro or Garmin action cams to the bottom of most drones, but without a gimbal on those drones you’ll be disappointed in the content. At the same time, I think a lot of eyes are on the new DJI Mavic drone, which is priced in the same ballpark ($799) if you exclude the dedicated remote and use your phone instead, or $999 with a remote.
Again, these cameras are super-close and what you use it for will depend on which one is best for you. I’d say that for me going on a trip, if I’m going to the beach I’ll take the Hero5 Black. But if I’m going skiing/cycling/etc, I’ll take the Garmin VIRB Ultra 30. Good luck!
Accessories:

There are craptons of accessories you can pick up for your GoPro Hero5 Black. Basically, every older accessory except items that were case or shell specific will continue to work with the Hero5 Black. So any sort of mount, remote control, clamp, etc… all work just fine.
What won’t work? Things that were case-specific. For example, a deep-dive case won’t work since the Hero5 Black is slightly larger (by about 1-2mm in both dimensions). Same goes for something like a 3rd party gimbal you can’t adjust the dimensions on. Also, batteries are different too (both in size, and connector).
When it comes to my favorite GoPro accessories, I mostly use three things:
1) GoPro 3-Way Pole: My favorite thing ever. Virtually everything in this post is shot on that. It’s part-tripod, part selfie-stick, and part thing you can stab into the ground at a beach to hold your camera. Brilliant.
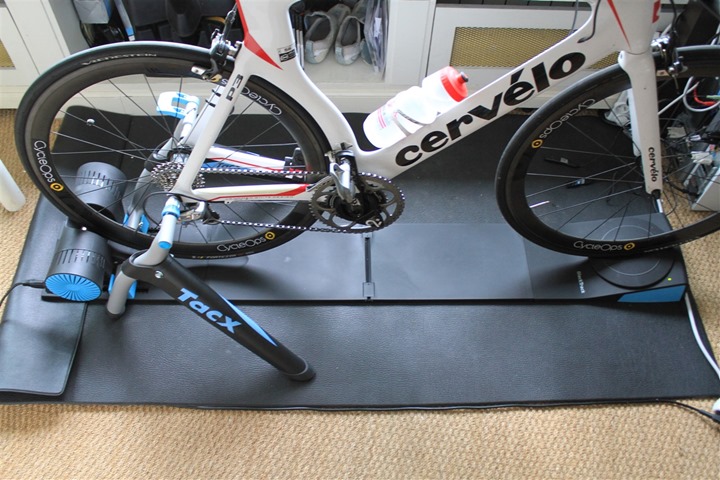
2) Feiyu Tech G4-QD Gimbal: For the Hero5 Black I’m using the G4-QD. It’s what I was using before for my previous GoPro cameras. The only bummer is you can’t hit the mode button. Not a huge deal because you can change modes via voice command. But a minor bummer. I suspect we’ll see new gimbals from Feiyu Tech shortly that are compatible. And obviously, we have the Karma Gimbal, which I’ll talk about in a second. Unfortunately, I can’t use the wearable gimbal with the Hero5, as the bracket doesn’t fit it.
3) K-Edge Bike Mounts: I ride a lot, so I use this the most for getting super-stable footage. In fact, I’ve got a small flotilla of them that I’ve bought. Rock solid.
Then we’ve got GoPro’s newest accessories, all of which are just starting to trickle out. I’ll update this post with more details/reviews on those once they come in. I’ve only briefly played with these below at various media events.
Quik Key: This will be awesome for quickly transferring videos/photos from your GoPro to your phone. It plugs in the bottom (via Lightning or Micro-USB) and allows you to slot your micro-SD card in there. Only $20 too!
Remo Remote: This is not just a standard GoPro remote for controlling the unit from afar, but also the ability to issue voice commands to it. I’ve had a chance to dive into this in great depth here in this video below.
Karma Gimbal: Next we’ve got GoPro’s Karma Gimbal, which costs $299. That’ll give you control of the camera functions from the handle, as well as the usual silky smooth footage that you’d expect from a gimbal. Here’s my preview video on it. And yes, review coming up later this month:
Karma Drone: Ahh yes, the drone itself. That starts at $799 sans-camera, and $1099 if you want the GoPro Hero5 Black in it (it’ll save you $100 that way). Or, $999 for the Hero5 Session. You can watch my early hands-on video below about that. Or read my early post on it. Again, review of that coming later this month.
Phew, so many accessories. But here’s the thing: For more common accessories, stuff like extra little sticky mounts and sorts – just head over to Amazon and buy them in bulk for a million times cheaper than GoPro. Seriously, it’s a 16 pack of GoPro mounts for $12. It’s where I buy most batteries and extra mounts beyond the ones I’ve listed above.
All My GoPro Hero5 & Karma Videos:
I’ve put together everything I’ve made about the GoPro Hero5 (both models), as well as my Karma drone and Karma gimbal videos in one handy to watch playlist. There’s over an hours worth of content in there to check out, from sample footage to explainers, you name it! You should be able to use the doohicky along the side to choose which videos you want:
And of course, you can hit up the rest of my YouTube channel here, which has plenty more action cam goodness, and even an action cam playlist with all sort of cam videos in it.
Wrap-Up:

While many lamented that GoPro took two years to get to this post, I agree with GoPro CEO’s statement that this was the GoPro version that they always wanted to make. The GoPro Hero5 is without question the best GoPro out there. Period.
The question though – is whether it’s the best action cam out there. And for that I think it’s going to come down to your personal preferences, as the competition is very close between this and the Garmin unit. Both have minor pros and cons that may appeal to one individual or group over another.
It’s clear that GoPro has room to improve the software, both of the unit itself (the display), but also the cloud platform (GoPro Plus). Not to mention getting GPS enabled for tracking speed and such, and utilizing their acquisition of Dashware to get data onto videos. Further, I did see some some minor quirks where the unit failed to respond to button presses (primarily stopping the video) once or twice. While the micro-SD cards I used were brand new, it’s always hard to track down if there was some sort of transient card issue there.
Still, I wouldn’t have any hesitation in recommending the Hero5 to anyone. The camera works well and has outstanding video and photo quality at the same time.
With that – thanks for reading!
Found this review useful? Wanna support the site? Here’s how:

Hopefully you found this review useful. At the end of the day, I’m an athlete just like you looking for the most detail possible on a new purchase – so my review is written from the standpoint of how I used the device. The reviews generally take a lot of hours to put together, so it’s a fair bit of work (and labor of love). As you probably noticed by looking below, I also take time to answer all the questions posted in the comments – and there’s quite a bit of detail in there as well.
I’ve partnered with Clever Training to offer all DC Rainmaker readers exclusive benefits on all products purchased. By joining the Clever Training VIP Program, you will earn 10% points on this item and 10% off (instantly) on thousands of other fitness products and accessories. Points can be used on your very next purchase at Clever Training for anything site-wide. You can read more about the details here. By joining, you not only support the site (and all the work I do here) – but you also get to enjoy the significant partnership benefits that are just for DC Rainmaker readers. And, since this item is more than $75, you get free 3-day (or less) US shipping as well.
GoPro Hero5 Black – Use VIP to get 10% of your purchase price in points back
GoPro Hero5 Session – Use VIP to get 10% of your purchase price in points back
Additionally, you can also use Amazon to purchase the GoPro units (though, no discount). Or, anything else you pickup on Amazon helps support the site as well (socks, laundry detergent, cowbells). If you’re outside the US, I’ve got links to all of the major individual country Amazon stores on the sidebar towards the top.
Thanks for reading!