Tacx Genius Trainer In-Depth Review

The Tacx Genius Trainer is the latest trainer to work it’s way through my ‘lab’ (aka living room). The high-end trainer is designed to let you simulate just about anything you can think of while on a trainer – including even steering the bike. But is the unit worth the price tag? And what else has changed within the Tacx software suite since I reviewed the software component last year about this time with the lower priced Tacx Bushido unit? Well, I set out to find out.
In doing so, I’ve got a pretty good grasp on how the unit works, as well as all the details inside and out. Because I want to be transparent about my reviews, once my evaluation period with the Tacx Genius + software has elapsed, I send it back to them in the Netherlands. Simple as that. Sorta like hiking in wilderness trails – leave only footprints.
Lastly, at the end of the day keep in mind I’m just like any other regular triathlete out there. I write these reviews because I’m inherently a curious person with a technology background (my day job), and thus I try and be as complete as I can. But, if I’ve missed something or if you spot something that doesn’t quite jive – just let me know and I’ll be happy to get it all sorted out. Also, because the technology world constantly changes, I try and go back and update these reviews as new features and functionality are added – or if bugs are fixed.
Unboxing:
First up is getting this baby unboxed. The box is actually fairly large. Like a big picnic cooler.


Cracking it open you’ll find the Genius well protected by Styrofoam inside:

Once you’ve wrestled it out of the box, you’ll be facing your newfound investment:

Let’s start digging through all the pieces. Starting with the least exciting – the manual:

Increasing excitement, we’ve got the USB extension cable. This is used to provide the ANT+ USB adapter a bit more range.

Then is the ever important power cable. They sent me a euro-power cable, but US versions have the US one. And the unit is 100-240v, so it can be used on either system with the help of a 99 center converter plug if you happen to move (or buy from overseas).

Now we’re down to the trainer, which I’ve pulled off to the side for now. Inside that package below the trainer are bolts and more pieces I’ll dive into in a minute.

To the left of the trainer is the steering system. It may look all small and compact, but it’s like a slinky and expands.

See, starting to expand. Wait a section until we really unfurl the whole thing. All I can think of is – ‘Is that a BlackTrack in your living room, or are you just happy to see me?’.

Before we start assembling, here’s all the Genius components unboxed in a tidy little pile:

Now in addition to the usual box, the Tacx folks also sent over this secondary box. I wasn’t really quite sure what was in it, given the first one had all the components. The Girl was hoping it might have a bunny inside.

Turns out, it was more like Noah’s Ark. Everything on earth.

Once I made the goods all look pretty, here’s what was inside. In short, two bottles, a towel, a trainer wheel, a bike protector, and a trainer mat. Oh, and the motherload of videos.

Let’s get on with setting this whole kit up.
Initial Hardware Setup & Configuration:

Now that we’ve got everything unboxed, we’ll start to put the hardware together. This goes quicker than you might think. The vast majority of your setup time will actually be on the software side.
First up is the trainer – aka the ‘brake’. We’ll be utilizing two bolts and connecting them to the frame and the brake, plus a cover piece that seals it altogether tonight.

Hex wrench, meet bolt. Bolt, meet trainer:

Magic accomplished. Trainer built.

Now that we’ve got the trainer portion assembled, lets turn our attention to the sprawling steering system (Blacktrack). The idea behind this is that it sits below your bike (so your weight keeps it from moving), and then you put your front wheel in that mount block, which you can turn left/right within various virtual reality scenarios.

But first we need to flip it over and put some batteries in it. This is probably the single item on the hardware that annoys the crap out of me.
First off, why on earth did they actually require two screws on the battery compartment? It’s a piece that never moves, and isn’t going outside. It needs no more compartment security than the batteries in a TV remote control.

The batteries power the ANT+ chip that’s used in there to communicate via private-ANT to the TTS software suite. You wiggle the unit to wake it up. Just like an ANT+ footpod.

Once the batteries are in, the little green light illuminates:

Ok, with the unit flipped over we head to the complete other end of the steering platform and affix these little blue clamps into the track. This is where you place your trainer, and thus it holds it in place.
There’s a method to measuring this all out perfectly with your bike so the stars align and you only have to validate the blue things once. But, I just did the estimation and redo method, only took two tries to get it perfect.

The only problem I have with this is that I wish they were easily movable (without a hex wrench). See, my bike is significantly larger than The Girl’s small circus bike (650c wheels to give you perspective). So in order for her to jump on the trainer, I have to remove the trainer entirely, take out the hex wrench and re-adjust everything. Then do it all again afterwards.
Ok, we’re almost ready to put our bike on for the final time!

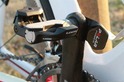
But first, we need to add the trainer skewer. If you already have a trainer skewer, than you can just keep that. No worries there. The trainer skewer is important because typical ones included with your bike are plastic (the end caps), so it’ll break in the trainer, which is bad.

And with that, we can mount the bike to the trainer. I love the blue lever on this trainer for instantly snapping the whole thing in place. Perhaps my favorite hardware aspect of the Genius.


Oh, and don’t forget to plug it in.

Next up, the handlebar controller.
The handlebar controller allows you to quickly and easily control various actions within the training suite. Such as views, pausing, starting, etc… It uses ANT+ to communicate wirelessly with the software.

What you see below is the ANT+ handlebar controller, the batteries for the handlebar controller, and the ANT+ USB adapter for your computer. Oh, and it’s sitting on the software for your computer. And that is in turn sitting on the VR steering system. And that’s sitting on the trainer mat. Which you know, is on the ground. Just so we’re clear and grounded.

After you’ve got the batteries in, go dig around and find that USB extension cable and attach the USB stick to it. Then plug it in your computer. We’ll come back to it later.

Finally, go ahead and mount the handlebar unit somewhere on your bike. Anywhere will do.

I’ve jury-rigged it onto an Edge 500 mount, which is sitting on a knock-off $5 bike computer mount that a reader sent me from Asia. Hey, it worked! Realistically, any of the out-front mounts work for this though. Like the Barfly I reviewed. Of course, you can just simply put it on your handlebars if you have a road bike.

Or, you can build your own bike computer/iPhone/iPad training stand for $30, which I walk through all the steps in that post.

Tacx Training Suite (TTS) Indoor Trainer Software:
TTS is the software application you use to control the Tacx trainer via a computer. TTS is installed on a Windows PC (not Mac compatible). Note that unlike most other cycling platforms on the market today, the TTS suite actually does require a relatively frequent or beefy computer. I had been using a computer that I normally use for virtually all of my testing, and it turns out it wasn’t good enough. So I rummaged around and put it on another box instead. If you don’t follow the specs, the software will generally suck. Been there, done that.
All of the screenshots from this review were on version 4.6. Though, I started reviewing the product in the 4.4 variant, and over the last few months it’s been upgraded as new releases come out.
Initial User and System Configuration:
Once you’ve installed the software, you’ll be creating a user account (or, downloading one if you already have one). This user account allows you access online, as well as creates an identity while logged in locally. This also allows multiple users to use the software and keep all historical information in the same place.

You can customize information such as weight/height/age and even FTP (Functional Threshold Power).

As well as the all-important photo:

With that out of the way, let’s briefly look at a few of the other configuration options. These are all found within Setup, and can be used to change the behavior of the platform across all training types. Within General, you’ll be able to change units (i.e. MPH or KPH).

Then, under the Training Settings, you’ll be able set a handful of settings related to basic configuration:

Within the Maps configuration (oddly not shown in the left side, only visible if you click ‘Next’), you’re controlling the settings for the mini (or large) map. Keep in mind these impact your performance, so if your computer is on the low-side, you may want to click wisely:

And if you thought the last setting impacted performance, click even more carefully within the VR (Virtual Reality) settings:


With that, all the settings are covered. There are a handful of other options that pertain to specific areas, so I’ll cover those as we stumble into them.
One last item I need to cover is the Google License piece. Starting last Fall, Tacx started charging users for access to Google Maps. This is due to them being required to pay licensing fees to Google. This is no different than any other company. What’s different however is that they’re essentially the only ones in the trainer marketplace to pass that cost onto you. The cost is $30US a year.
When you initiate one of the training types that requires the license, it’ll ask you to go ahead and either provide a license key, or purchase the key:


The keys will arrive by e-mail, and then you can activate the product. Only takes a second:

Hardware Pairing and Configuration:
Next up is pairing the hardware.
In general, I’d suggest that if you’re in a bad mood prior to going into this step, then you may want to take a small breather before continuing. I find that these next step work a small fraction of the time. I’ve setup two Genius units, two Bushido units, and done it countless times across countless versions of the software on multiple computers. In general – it rarely goes smoothly.
That said, onwards.
First up within the device wizard is picking our hardware type. Pretty easy, Genius.

Next, we’ll trigger the Genius handlebar controller. Press the little button, then wait, and hope. Eventually it’ll respond.

Once it finds the unit, you’re in business. It’ll briefly ask you to press whichever button is up for you (as you could have mounted it any number of ways). This automatically aligns it correctly. Quick and easy.

Next up is the brake (that’s the trainer). Same procedure. Hope and pray.

Keep hoping…

Woot…finally!

Now I should take a brief detour here. First off, the above three screenshots this afternoon took me nearly an hour to gather because the unit decided to be finicky. And, that’s after weeks of troubleshooting back two months ago that resulted in Tacx determining the brake unit was defect. So, they sent out a new one.

So while the initial issue was due to a faulty unit, the screenshot issue this afternoon is just run of the mill normal with it being upset about pairing.
Ok, detour complete.
Next the unit needs to align itself. This only takes a moment and it does it by itself.


Next comes the brake calibration. In theory, this is an easy process. In reality, it’s another process that’ll likely cause you to scream.

See, it asks you to pedal, but then, it often will instantly give you this error message saying you didn’t stop pedaling. Note, it actually never tells you to stop pedaling. It’s like getting yelled at and you don’t know why. The Tacx forums are littered with people having the same issues. In my case, I just keep on trying over and over until it finally goes. Typically the trick is to barely move your pedals (like 1/8th of a turn).

Eventually though, you might succeed.

Next up, the steering device – aka the BlackTrack.
Continuing my typical trend of hardware things not cooperating, this unit wouldn’t cooperate to save my life when I went today to take all these screenshots. Luckily, other portions of my review I had already done the photos with it working.

Now, before I’m done ranting (I get to rant, this section here cost me another 45 minutes of life), note what it tells you to do: Remove the batteries and put them back in.

Well, do you remember how you swap out batteries on the steering system? Yes, a screwdriver, and under the unit, with two tiny screws.
Which means that because your bike is already mounted to the trainer, which is in turn mounted to the BlackTrack and holding it down, that you’ve gotta do something like this to get at the battery compartment.
If there’s one piece of the entire Tacx system that wants to make me scream and cry all at once, this.is.it. For the love of all things holy – do not require removal of batteries to pair. Do not require a screwdriver to access the indside of an indoor battery compartment, and do NOT put the compartment below the system that the bike and trainer sits. And finally, just work. Please, just work.

Ok, deep breath.
Next, pairing the heart rate. Of all things, the ANT+ heart rate sensor is the most common and basic element of the entire ANT+ world. Millions and millions of heart rate straps sold. The most used ANT+ device profile. Hundreds of apps and devices work flawlessly on it daily.
Surely this will work instantly.

But it doesn’t. It takes a bunch of poking and prodding before it sticks and connects.
And in general, every time I use it it fails to connect and I have to re-pair it again.

Next up, setting your heart rate zones. This is pretty easy and straightforward.

And with that, we’re done and ready to start cycling. Woot!
If it seemed above that I’m frustrated with the hardware pairing process…it’s because I am. In fact, it’s the sole reason why I get anxious anytime I have to use the system. It just rarely ever works instantly. My biggest pet peeve in life is wasting time. And most times I schedule my trainer rides with little time to spare on either side of it. When I have to waste 10-30 minutes futzing with the trainer because it won’t find anything, it makes me want to throw it out the window. And this isn’t a new problem. It’s the same issues I saw with the Bushido a year ago and plenty of software versions in between.
Ultimately, I look at things in a more basic manner. ANT+ as a platform usually functions quite well. It just works. I’ve got dozens of open ANT+ devices here and the communications between them and everything works fine. However, whatever Tacx has done in their private-ANT implementation simply isn’t stable or reliable. I can have the transmitter inches away from the devices and it won’t find things. I don’t know what the issue is and whether it’s on the hardware side or the software side, but I know it’s deeply frustrating and a major turnoff for me.
Virtual Reality Mode:

Virtual Reality Mode is likely what most folks think of when they think of computerized cycling software. This mode creates an imaginary 3D environment to mimic various landscapes – from cities to forests. It’s within this world that the steering system is useful for.
First though, we’ll start off with picking out which Virtual Reality Course we want. We’ve got four main options we can freely wander around in, plus a couple on the lap-based options (like crits).


Once you’ve selected a given environment, you’ll be able to select a specific event within that. As is the case throughout the suite, the elevation profile of the selected course is shown to you below the course, along with some summary information on the right side.

You can also configure components (optional). I went ahead and added five opponents.

With that, we’re ready to start. Or, as it was in my case – false start. No worries, normally you don’t false start.

After my false start, I was a bit behind the pack, so it took a moment to catch-up. You can see them just ahead of me.

Now I’m back in line.

Here’s a quick video I shot giving you a feel for the video quality and just the general flow of things:
Finally, once you’ve completed an event, you can save it. This is true of every activity within the suite, and it allows you to save the results even if you don’t fully complete the course.

Like I noted above, there’s a bunch of different environments. Here for example, is the forested one.


And, here’s a quick video of that too. Note specifically about mid-way through the video where I start to descend and the forward drive on the trainer kicks in. This is where the unit actually attempts to mimic downhill segments and drive the trainer wheel forward. I pan the camera around to capture that.
The graphical quality of the Virtual Reality environments is quite high. By far the highest amongst any cycling program on the market today. The difference graphically between the Tacx suite and the nearest competitor is like comparing a small McDonalds Happy Meal toy car to that of a massive Las Vegas Stretch Hummer. There are sounds within the environment as well, which you may be able to hear in some of the videos above (a bit hard above the trainer noise).
That said, while the VR worlds are neat, I think most cyclists that buy this product are probably going to focus on the films or GPS rides more than anything else.
Tacx Films (Videos) Mode:

The next component is the Tacx Films section. These are real-world videos that are show on usually famous routes or races. They enable you to ride the route and have the video speed synchronized to your cycling speed.
While there are a few test/demo videos included, you’ll ultimately need to purchase and install some of your own. Today they come on DVD’s. Once you insert the DVD in, it’ll usually take about 10-20 minutes to copy the contents over to your hard drive using the provided installer. It’s just like installing a new piece of software:

With them copied over to your hard drive, you won’t need the DVD’s when you want to run the videos. Once the video is copied over, you’ll need to enter in the activation key. This is found within the DVD packet. I’ll point out that this is a solid pain in the ass because the keys are actually case sensitive. And even worse is that if you mistype something it will clear it. So you can’t just figure out what you typed wrong and re-do it. Rather frustrating.

After the key is entered, you’re good to go.

Once you’ve got the videos installed, you’ll go and select a given video from the Tacx Films section on the left side. This will show you all videos currently installed. You’ll notice that each video series has multiple components or segments to it, which are shown on the right pane:

As you click on different segments, it’ll highlight the altitude profile for that segment:

And, if you click on the ‘Video’ tab, it’ll show you a frame from that segment of the video:

The next tab – ‘Route’ – allows you to view the route on Google Maps. It’ll highlight the portion of the route that you’ve selected as a segment:

You can also choose any starting point by just clicking ‘Customize Starting Point’:

With all that done, let’s go ahead and click ‘Start Training’. Note that if this isn’t illuminated, it means to check the connection to the trainer, as something be broke. It happens.

Once you;’ve started, you’ll likely be in the tri-split screen. On the left you’ll see the video itself, with the graph of your current metric data graphed below it (heart rate, speed, power, cadence, etc…). Along the bottom you’ve got the ride stats. And on the right you have a Google Earth view of your current position on the course. Note in that right window how there’s a small statue on the GPS map, and indeed that same statue is present in the video.

You can adjust the view by using the handlebar controller:

For example, you can change to just show the entire video:

You can pretty much hide or make visible any component of the screen. So if you had a giant projector wall and just wanted the video without any data, you could do that.
Here’s a short video showing you what the video itself looks like while riding:
Today, the Tacx films are purchased on DVD’s, and vary in price from $30-$70, with a few cheaper at $10. The video quality isn’t HD, but rather DVD-quality. In either case, that’s the costs add up for just for a video. Looking at the Arizona Climbs DVD, it’s of 50 miles of climbs (Mount Lemmon and Mount Graham). No doubt, great videos, great climbs. But is it worth $50?
I did have the chance to try out some of the HD videos that Tacx is looking to distribute – potentially on BluRay (I think downloading would work too, to be honest). The quality of these were pretty solid. For example, the Wildflower 2012 one was stunning.


Same goes for a few others I tried out. Really stunning scenery in HD.


This, near Big Sur:

Again, the quality on all these were stunning. Though, the sizes are pretty big – Wildflower was 11GB, the Alps were 28GB each (with three segments each at 8 hours!), and Yosemite was 22GB. But again, amazing quality:


The only challenge is that for me as a personal preference, I struggle to fully appreciate the high-quality nature of the videos while on a trainer. Which is no doubt strange given I spend significant amounts of time and money on high quality photography and video here on the site. It’s just a ‘my brain is busy pedaling hard’ thing while on a trainer. That said, I know many folks do really appreciate the super-high resolution videos shot on a professional video platform, and I think in this competitive marketplace, differentiating yourself against videos taken with just a GoPro is worthwhile for Tacx.

I also very much appreciate what other companies are doing around ‘all you can eat’ with respect to trainer videos. I’d much rather pay a flat fee (either upfront or monthly) to get access to as many videos as I can. Even if the quality is less. But, everyone differs in what they prefer.
GPS Rides Mode:
The next mode enables you to ride outside routes in a Google Earth like atmosphere. Doing so does require you to have the GPS (or GPX specifically) file of the route. The good news is these are easy to find and create. For example, you can go onto Garmin Connect and download GPX files for just about any route on earth. Or, you can go to MapMyRide.com and do the same. Again, TONS of places to get/make GPX files.
In my case, I grabbed a file from a recent ride I did, and from Garmin Connect I just clicked ‘Export’ and exported out the GPX file.
Then within the Tacx suite I went into the Import/Export menu and imported in the GPX file.

From there, I switch into the GPS Rides section (left tab). By clicking on my ride I can see my route profile and the typical summary information on the right side.

Once that’s done, you’ll go ahead and click ‘Start Training’. The Tacx suite will give you a 5-second countdown:

You’ll notice that the screen looks a bit wonky. The software is attempting to map the satellite imagery to a 3D elevation map. Which means when it comes time for doing so near the river, it drops it down quite a bit. The problem with this is instantly evident about 40 seconds into my ride when the GPS track believes I went for a dip in the river. Because of this descent, the motor on the trainer kicks in as if I were descending – quickly spinning up my speed like I just dropped down a 20% grade.


The fault for this lies amongst a few different parties. First is that the GPS track I recorded on my ride isn’t quite perfect. Second is that the Tacx suite doesn’t appear to apply any smoothing to the file, to remove these sorts of issues.
Ignoring that however, the rest of this functionality works as you would generally expect.
You can change the camera view whenever you’d like via the handlebar controller. For example, zoom out out more, or rotating around the point.


In addition to the Google Earth mode, you can also switch into a graphical charting view. For example, I loaded up a different course, and switch into that. You’ll still see the same metrics along the bottom (though, you can turn them off).

And of course, you can still go into the panoramic or other external views.

If you’re training for a given race, the GPS mode is probably your best bet to simulate certain sections of the course. It’s easy to download the GPX files and import them in, and best of all – that piece is free.
Catalyst (Coaching/Training) Mode:
Catalyst and coaching mode is probably the least exciting component of the Tacx training suite. But it’s actually where I typically spend most of my time.
In this mode, you can specify various constant such as controlling the wattage or incline – and then base your workouts on that. For me, I usually use Watts – Time, which allows me to control the wattage during the workout and just ride as long as I’d like.

After selecting it, I’ll be brought to the main graph screen. There is where I’ll remain the entire workout.


During the workout I can use the handlebar controller to increase/decrease the resistance.
And as the workout progresses, you’ll see the charts are updated with my historical information from that ride.

Along the bottom is my current information. Speaking of which, based on what I’m seeing – while the power is consistent, it seems to generally read high (based on three other power meters on my bike). And cadence also reads slightly high. This could potentially be tied to an issue with calibration, though, I followed those steps as best as the system would allow for.
Finally, I found that the system reacted fairly slowly to shifts in power. In the above section you can see how I set it and forget it for 240w. I was doing some mixed higher cadence stuff, where I’d burst up for 30-seconds. It would take about 15-20 seconds until the trainer would fully re-stabilize on the wattage back to 240w. During this stabilization phase, the unit was ‘slow’ by upwards of 200w.Typically on most trainers I see this happen within 2-5 seconds. After all, that’s sorta the point of set-wattage training sessions. I can change cadence and speed and it should remain the same.
Once I’m done with my workout, I can save it as usual. I’ll talk about how I can export it out in a minute.
MultiPlayer:
Depending on which license pack you bought, multiplayer will cost extra. Approximately $40 per year extra. When you go into multiplayer, it’ll ask you to buy or enter a license.

You can buy the license online and it gets e-mailed to you immediately.

Once you have it, you’ll enter it in and activate like any other component of the platform that request activation.
After that, multiplayer is ready to roll!
Now, multiplayer requires either you join an existing session, or create your own. Oftentimes, when I went to join an existing session, either there wasn’t any going on – or, the pickings were slim:


There is also a calendar of upcoming events:

Of course, you can also create your own multiplayer session anytime you’d like to. This can be done on a private network, or across the internet:

I went ahead and created my own multiplayer session:

Sadly, nobody joined me. Perhaps someday I’ll schedule a large multiplayer event. Like the Tour de DC Rainmaker.
The VR Steering Platform:

Lastly, a brief moment about the steering system – BlackTrack. The BlackTrack is used to steer around the 3D Virtual Reality worlds within the Tacx suite. And, to that extent, it does that just fine.

However, the challenge I have is that the usefulness of it seems limited. For example, taking a look at the below video, if I just leave the trainer alone, it’ll simply turn the bike for me (virtually), so that I don’t crash. Because I don’t crash, there’s no repercussions for not using it. Thus risk is removed, and excitement along with it. It becomes a gimmick (and, an expensive one at that).
Ultimately, I don’t think the technology holistically is there yet today where steering makes sense on a trainer. Perhaps down the road when the Google Streetview can be cleanly streamed (today it’s blocky and ugly), it’ll work better. Especially when combined with some form of heads up display that I can look left/right and see what’s around me (that piece is much closer). Again, just my two cents.
Viewing Historical Data, Exporting Data:
Analyzer:
Under the ‘Extra’ menu, you can open up the Analyzer. The Analyzer allows you to look at past workouts and some of the metrics collected on them. Here for example is my Sunday indoor trainer workout. You can see summary information at the bottom (such as Speed/Cadence/Power averages and maxes), as well as heart rate information and heart rate zone data.

Along the top is the graph for my workout. I can zoom in or out of it, and slide along it. I can’t highlight specific sections though to get more data about just that section (I can highlight a given point to get data about that point however).

The Analyzer does overall provide a relatively clean and simple interface for viewing your past workouts.
Exporting Training Files (to other sports tracking logs):
In addition to analyzing your data within the TTS platform, you can also export it out to a handful of other platforms. For example, I exported my data out to Training Peaks.

You can export data out to BikeNet, TrainingPeaks, XML, and HRM formats.
Updating the TTS Suite Software:
Every couple of months the TTS suite receives an update. The vast majority of time this update is free. Every once in a while though – when they shift from major versions (such as 3.x to 4.x), it costs money. Unfortunately, a fair bit of money. That said, when it’s free, it’s pretty straight forward. When a new update is available for the TTS suite, it’ll show up on the right side, with a little icon on the right sidebar, indicating a new version. When you click on it, this wizard will appear:

Above it says all the new features, which are also usually listed in the main news feed that shows up in the software.
You’ll click on ‘Download’ to download the software, which will close the Tacx suite and start the downloader:


As an aside, you can also always just launch the Tacx Updater (found under Tacx in the Windows program menu), which allows you to update individual components:

The whole suite might take just a wee bit of time – but eventually it finishes. Which will then kickoff the installer, pretty much just like when you first installed the software:


With that, you’re updated and ready to go on the new version.
Updating the Tacx Trainer Firmware:
In addition to the software running on your computer, the trainer itself (technically called the ‘brake’ unit) also receives occasional firmware update. Over the past few months a new firmware update came out for the Tacx Brake, so I went ahead and updated.
You’ll see the update in one of two places. Within the software, an alert will pop-up, and you can see the update via the Device Wizard (if pairing):

Or, via the Tacx Updater that I noted above. Ultimately, the Device Wizard just redirects you to the Tacx Updater.

Once you click install, it’ll go about its business. It takes a couple minutes.

And then it’s done. Mission complete.

While the process is pretty straight forward, I generally abide by the rule that when updating firmware – don’t do anything else on the computer and just let the device be. Failure typically is not a good option.
Sound/Noise Levels Comparison:
Sound tests are kinda a funny thing. There’s a lot of factors that influence trainer noise levels. Everything from the gearing you use to the tires to the room and flooring you’re in.
However, the single item that drives an increase in noise is speed. Not resistance or wattage. I can put out 800w or 80w and have it sound exactly the same as long as my speed is the same. Note that this is different for non-resistance controlled trainers (like fluid ones). Those don’t have a resistance controlled unit on them.
Next, note that despite the urban legend that a decibel or two more than doubles the noise – that actually isn’t the case. You can quite plainly see and hear that in the below as I increase sound.
That said, I take a quick stab at giving you a rough idea of the sound level. Below is the Tacx Genius trainer, measured at about 1-meter (3ft). As you can see, it peaks at about 82.1 decibels.
Doing the same test at the same position across a few more trainers (KICKR, Kinetic Road Machine, and LeMond Revolution) below you can see that they’re all about the same, except the LeMond Revolution.
Overall, you’re unlikely to see significant differences here between different units in this category.
One item I will point out is the difference the trainer tire made. For fun, I put on the trainer tire that Tacx supplied:


In my case, I just put it on a different wheel. Obviously that makes no impact on sound, since a wheel itself never touches the trainer – that’s the job of the tire.

Note that you should only ride the trainer tire indoors, no outdoor riding here. Which basically means you want a cheap second wheel – as taking it on and off all winter is a pain in the butt.
I then ran two sound tests. Both were identical in procedure and done back to back. I did an initial ramp to 20MPH with a set-wattage of 200w (thus constant resistance), and then did a secondary ramp from 20MPH to 30MPH. Gearing identical. Here were the peak values:
Non-Trainer tire:

vs Trainer Tire:

I never would have thought that the trainer tire would be louder. Not much louder, but a tiny bit.
Thoughts on Tacx Customer Service & Support

Never before in a review have I addressed the customer service and support side of a product. This is honestly because I’ve mostly never had a reason to. By and large, virtually every company I’ve reviewed in the sports technology world has really solid customer service and support. Sure, there is always the bad apple incident here and there – but on the large, I field very few complaints that show any consistency.
Except one company.
And it’s for that reason that I’ve added this section. Obviously, as a well known reviewer within the industry I don’t necessarily see the full customer service experience. Requests and items get answered and fixed within minutes. And physical components are overnighted to me internationally should something arise (such as issues with the brake unit that caused some delay in this review). Thus what’s far more important is how you are treated and supported.
And that’s where I’ve seen near weekly complaints from you around Tacx customer service and support. I’ve actually tracked down a few of these as part of a frank conversation with the Tacx folks about this. Most of these cases seemed to actually center around either licensing, lack of support response, or hardware not working.
In the cases of licensing, most of the complaints were focused on issues with keys not working, and customers feeling that Tacx was essentially telling them ‘tough luck’. Even keys bought shrink-wrapped weren’t working – and with resellers not accepting software returns, people were literally up a creek with a multi-hundred dollar piece of software.
On not responding, many folks have been frustrated by both the speed, and lack of response to complaints or issues. E-mail requests going into the ether, or have extremely latent responses on others. I’ve heard from Tacx and they said they’ve been trying to address this.
Finally, on hardware not working. Just last week an owner e-mailed about their 10-month old Genius seizing up. Tacx wasn’t responding to his repeated enquiries, so he had to sort it out with his local bike shop. After more arguing there, his LBS did agree to send it to Tacx. After it arrived at Tacx, it took over two weeks until they even looked at it. They did end up agreeing to replace the unit – but the entire experience has left this customer looking to sell it as soon as it arrives back (whenever that may be). This is a message I’ve heard a number of times from other customers. And the Tacx support forums are literally littered with folks in this situation.
Now, this isn’t to say that Tacx was at fault in 100% of these cases. In fact, there were some that I’d say the customer probably was at fault. But the overarching aspect was how Tacx dealt with the issue. There’s a saying – which is that “The customer is always right“. In my opinion, when a customer who you’ve known has spent $1,000+ on hardware comes to you (otherwise they wouldn’t be talking to you), you should just trust that they aren’t out to get you for that last $40-100. Perhaps you’ll have a few folks who abuse the system, but that is far outweighed by honest folks who just want their product to work.
Note that my above thoughts are in addition to complaints around the occasional bugginess of the software (some of which I saw and noted). No doubt that Tacx has in my opinion made really good progress over the last year on the stability of the software. They really have. But, I do sometimes feel that a minimum QA bar isn’t being met. Big ticket items head out the door that should be caught with a consistent regression testing methodology. Still, progress is being made there. But I really feel like Tacx needs to stop all new software functionality, and simply spend however many months it takes to work their way through every bug in their forums until people stop posting bugs.
Of course, these don’t represent every customer. There are undoubtedly plenty of customers that have good customer service issues and flawless software. As I think everything can be summed up best from a reader who e-mailed me last week when he said (paraphrased): ‘When things are going well with the Tacx, it’s an awesome piece of kit. But when it stops working, the situation quickly turns into a bad place.’
[Update: March 7th, 2013 – Tacx Responds]
Tacx has responded to my review with a PDF letter that they’ve asked to be posted. I’ve included a link to the PDF here, as well as copied the full contents below:
Dear Ray,
Thank you for your feedback. Your review does include real experiences, which is the power of your blog. We do feel the need as Tacx to respond to your blog, because we also believe that the negativity should be taken away by us. The whole Tacx team is dedicated to their products because of their passion and wants to offer the best trainers in the world. Just some comments on your blog.
Google License
If possible, we would like to offer this for free, as we did in the past. Due to a decision by Google, Tacx is no longer allowed to offer the Google Earth application as a free feature to our customers. Tacx doesn’t make profit with this license and pays an even amount to Google per ride.
Setting up your Trainer
We made improvements during the year in setting up a wireless system, and changed our software to this. With wireless communications for the genius we are constantly testing and looking for better options to connect the system.
Service and Support
We are aware that some things did not go as well as expected last year. Unfortunately one of the major support issues we have seen with customers are the duplicated software codes that were send out by mistake. We send out a clear message through our dealer network telling customers could how to resolve this problem. Unfortunately we were not able to track down all double codes into the field, so that is what you have seen on Forums.
We understand that when customers get a new trainer and receive a message that the code is used, that the first experience is not good. We are doing everything to prevent this for the future. Looking to moister issues, production has been changed last year to prevent this. We are aware that we are in a sport industry and that most of the equipment should be sweat resistance.
There is a lot of misunderstanding on our way we deal with the support. First of all we have our dealer network. The Tacx Test Center dealer gives first support and should direct the customer to the correct solution. This face to face communication we believe is the best, because Tacx does not have a worldwide telephone support desk.
However, Tacx also sees that not all consumers are buying via this route, so that is the reason we made the analyzing tool on our website (www.tacx.com/service). This tool is helping the customer, via some questions, to the correct solution. The feedback support (via [email protected] or twitter.com/TacxSupport) is more related when questions cannot be answered from our tool, or license questions. We are using our SLA in this, but notice also on forums that people expect quicker response in some cases. In the next season we will use a track and trace support desk system so this can be better monitored and increase our people on our support desk.
Tacx will make an announcement of this structure this year on our website.
Kind regards,
The Tacx Team
From Ray: I don’t have any particular response to the response.
Trainer Comparison Tables:
You can utilize the below comparison table that’s dynamically updated over time (so as features change via firmware) to compare the different trainers that I’ve reviewed. Note the key part being ‘I’ve reviewed’. There are no doubt many other great trainers on the market, it’s just that if I haven’t reviewed it, I don’t feel right including it based on some marketing fluff.
Also, as you’ll probably notice, these are higher end trainers. If you’re looking for lower-end options, see my general trainer recommendations post.
Copyright DC Rainmaker – Updated November 22nd, 2016 @ 3:02 pmNew Window
Price for trainer$1,340$799$1,199$1,629
Attachment TypeWheel-onWheel-onDirect Drive (no wheel)Wheel-on
Available today (for sale)Available todayYesYesYes
Availability regionsGlobalGlobalGlobalGlobal
Connects to computerYesYesYesYes
Uses mouse/keyboard as control unitYesYesYEs (with apps)Yes
Uses phone/tablet as control unit (handlebar)NoYesYes (with apps)3rd party apps/hardware required
Wired or Wireless data transmission/controlWirelessWirelessWirelessWired/Soon WiFi
Power cord requiredYesYesYesYes
Flywheel weight12.5lbs/5.7kgs
Can electronically control resistance (i.e. 200w)YesYesYesYes
Includes motor to drive speed (simulate downhill)YesNoNoNo
Maximum wattage capability-1,000w+2500W @ 30mph1,500w
Maximum simulated hill incline15%
Ability to update unit firmwareYesNoYesNo
Measures/Estimates Left/Right PowerNoNoNoYes
Can directionally steer trainer (left/right)YesNoNoNo
Can simulate road patterns/shaking (i.e. cobblestones)NoNo
Includes temperature compensation–Yes-
Support rolldown procedure (for wheel based)YesYesYesYes
Supported accuracy level-+/- 5%+/- 3%+/- 2.5%
Allows 3rd party trainer controlNoYesYesYes
Supports ANT+ FE-C (Trainer Control Standard)NoNoYesNo
Supports Bluetooth Smart control for 3rd partiesNoYes (depends on version)YesNo
Can re-broadcast power data as open ANT+NoYes and No (see review notes)Yes3rd Party Required
Can re-broadcast data as open Bluetooth SmartNoNoYesNo
Amazon LinkLinkLinkLinkN/A
Clever Training Link (Save 10% with DCR10BTF)LinkLinkLinkN/A
Clever Training EuropeLinkN/A
Review LinkLinkLinkLinkLink
Remember to click the ‘Expand Results’ button as it’ll show a gazillion more rows than the quick preview above.
Summary:
Summarizing the Tacx Genius is a tough nugget. There’s a lot of good in the trainer platform. The software itself has definitely improved over the past year since I used it last with the Tacx Bushido trainer. And the Genius hardware certainly has some unique advantageous around driving the trainer forward on descents to better simulate outdoor riding.
On the flip side, the hardware pairing bugs can be incredibly frustrating, and a huge turn-off to using the trainer. And while I didn’t personally experience any customer service issues – I hear from you regularly about them. Perhaps this review will be a catalyst for change there.
When looking at the competitive marketplace in this category, the Tacx Genius is priced slightly high (in comparison to other high end trainers). And even higher once you add in many of the individual costs (such as the annual Google Earth costs). Additionally, the lack of openness in the platform today makes it less appealing long term and companies are shifting towards providing a more open platform (for example, the Wahoo KICKR, and resent statements from CycleOps around adopting the same control platform for their trainer). But their software package as a whole is the most complete in the industry, and the most advanced out there.
As you can see, it’s tough. When the going is good – it’s really good and works really well. But when it’s not, well…
Pros:
– Tacx graphical interface feels very polished
– Can easily export data to 3rd party services
– When everything works, life is great
– Easy to import/create your own courses
– Ability to simulate descents (downhill via trainer drive)
Cons:
– Software connection to hardware can be buggy
– Requires a higher end computer to operate smoothly
– Lots of individual licensing costs really add up
– Customer service remains a major concern
Found this review useful? Or just wanna save a bunch of cash? Read on…
Hopefully you found this review useful. At the end of the day, I’m an athlete just like you looking for the most detail possible on a new purchase – so my review is written from the standpoint of how I used the device. The reviews generally take a lot of hours to put together, so it’s a fair bit of work (and labor of love). As you probably noticed by looking below, I also take time to answer all the questions posted in the comments – and there’s quite a bit of detail in there as well.

I’ve partnered with Clever Training to offer all DC Rainmaker readers an exclusive 10% discount across the board on all products (except clearance items). You can pickup the Tacx Genius Trainer below. Then receive 10% off of everything in your cart by adding code DCR10BTF at checkout. By doing so, you not only support the site (and all the work I do here) – but you also get a sweet discount. And, since this item is more than $75, you get free US shipping as well.
– Tacx Genius Trainer (with software)
Additionally, you can also use Amazon to purchase the unit or accessories (though, no discount on either from Amazon). Or, anything else you pickup on Amazon helps support the site as well (socks, laundry detergent, cowbells). If you’re outside the US, I’ve got links to all of the major individual country Amazon stores on the sidebar towards the top. Though, Clever Training also ships most places too and you get the 10% discount.
Thanks for reading! And as always, feel free to post comments or questions in the comments section below, I’ll be happy to try and answer them as quickly as possible. And lastly, if you felt this review was useful – I always appreciate feedback in the comments below.
Finally, I’ve written up a ton of helpful guides around using most of the major fitness devices, which you may find useful in getting started with the devices. These guides are all listed on this page here.