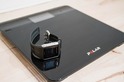
Quarq DZero Power Meter In-Depth Review

This past summer at Eurobike, Quarq announced their latest generation of power meters, the DZero lineup. The aim of this line was to refresh the existing offerings, while also somewhat simplifying things. Most visible to consumers though was the addition of Bluetooth Smart transmission, making for dual ANT+/Bluetooth Smart capabilities. Alongside that was an updated multi-color LED for status clarity. Behind the scenes, the company tweaked the strain gauge design to increase accuracy levels. Finally, the company also added support for Boost 148 and BB386 EVO bottom bracket compatibility. Phew.
I’ve been riding a DZero loaner unit that Quarq sent to try since December. Plenty of indoor and outdoor rides across all sorts of lovely winter (and now spring) conditions. In doing so, I’ve been recording boatloads of test data, with usually 2-3 other power meters on the bike at the same time. Like normal, I’ll be sending the unit back to Quarq once I’ve wrapped up the review.
With that – let’s dig into what’s in the box and then get it setup on the bike.
Unboxing:

The exact configuration of your Quarq DZero box will vary based on what exactly you ordered. In my case, the loaner unit I got came with chainrings pre-installed, minimizing the amount of work involved in setup. I like that…because I’m lazy. Though realistically installing chainrings is just a couple minute task at worst, it takes only a hex wrench.

As noted, my unit came with the chainrings pre-installed, but they also included some extra chainrings for craps and giggles. Further, they included a bottom bracket adapter, simply because the bike I was installing it on didn’t match the bottom bracket of the unit.
Otherwise, inside the box, you’ll find a small packet of papers that serves as a guide and warranty cards. And then, of course, you’ll find both the drive-side (with chainrings) and non-drive side crank arms situated.


And a closer look at the informational pieces of former trees:

If you take a peek at the piece of paper rubber-banded to your crank arm, it’ll show the test information from the factory calibration test pass. It’s actually pretty cool how that all works, and I showed it within my behind-the-scenes post at Quarq’s HQ last year or so.

Here’s how the two look when positioned all pretty:


And thus concludes our unboxing section. I love unboxing sections that have a mere two parts to the device. Note the coin cell battery is already pre-installed.
Installation/Configuration:

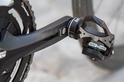
Like any power meter, getting the Quarq installed will vary depending on what your current bottom bracket setup is relative to whatever you bought from Quarq. If you were smart, you bought the same bottom bracket setup, and thus your installation is pretty quick and easy. If instead you elected to introduce unnecessary pain and confusion, then you bought some other standard and now need to also convert your bottom bracket. That, in turn, may be easy, or you could spend all day waiting for glue to dry.
In this case, I kept things relatively simple and thus the change was easy enough. Since I was using GXP previously, I merely needed to remove a few screws and pull out the existing crank set.

Then, I slid in the new crank set. Don’t forget to put the chain on the correct side of the axle, else, you’ll swear a bunch when you get to the end and realize you have to start over again. Don’t worry, I forget about 73% of the time.

Once done you’ll go ahead and screw on the non-drive crank arm on the other side and then attach your pedals. Don’t forget spacers if your pedals require them.


Of course, just like bottom bracket changes can vary, so can how you buy the Quarq when it comes to chainrings. If you bought just the power meter spider, then you’ll need to install the chainrings (those are the spikey things that you can use like a Frisbee if fending off a knife attack). Whereas if you buy the whole kit with them pre-installed, then you’ll save yourself 5-15 minutes of time. It’s super easy to install chainrings though.

Once everything is set, toss your bike on a trainer and do a few brief (like 5-20 second) hard efforts to ensure that:
A) The front doesn’t fall off, and…
B) It doesn’t sound like anyone is dying down there.
If both things check out, then we can move onto doing a zero offset. Which I might as well cover in the ‘general use’ section. Beyond that, we’re done here.
General Use Overview:

As has been the case for about a decade, using a Quarq power meter is pretty darn simple. You can more or less set it and forget it. Yet there remains a fair about of tweaking that can occur behind the scenes with their apps, for advanced users that want it. In fact, I’d argue no power meter has as much tweakable potential. On the flip side…it’s generally best not to tweak things unless you really truly know what you’re doing.
First though, let’s start with the basics. And no better place to begin than the battery compartment. The unit hosts a CR2032 battery, like many ANT+ sensors these days. Quarq states a battery life of about 200 hours, though I haven’t ridden enough hours yet on it to find the end of that tunnel. Generally speaking, their battery life estimates are pretty solid. Not to mention that Quarq says that realistically folks can probably get up to 300 hours in the right conditions, but that they went with a more conservative 200 hours for those that might be riding in battery-challenging conditions like the Arctic Circle in December.
The battery compartment can be found right on the front, easily unscrewed and accessed without any tools. Long-time Quarq users (and Quarq themselves) know that much older generations of Quarq units (i.e. those before around 2012 or so) had a bunch of challenges with battery caps and water ingest. But since then things have been pleasantly quiet.
The battery is found under that little ‘Q’ cap-looking thing:

We’ll move onto connectivity, for which the DZero supports both ANT+ and Bluetooth Smart. This means you can use any head unit that supports ANT+ power meters like a Garmin or Wahoo device, as well as those from Polar and Suunto that support Bluetooth Smart power meters. I’ve tested it across virtually all Garmin devices made in the last few years (via ANT+), as well as via Bluetooth Smart on the Garmin Fenix 5 and FR935, Polar M460, Wahoo Bolt, and even Zwift iOS. No issues.

When it comes to the data types the DZero supports, it will depend on which protocol you use:
ANT+ Power (total)
ANT+ Power Balance (estimated)
ANT+ Cadence
Bluetooth Smart Power
Bluetooth Smart Power Balance (estimated)
Bluetooth Smart Cadence
Since the unit isn’t a separated left/right power meter (i.e. like a PowerTap P1 or 4iiii Precision), it tends to handle 3rd party compatibility over Bluetooth Smart better than those that are dual systems on Bluetooth Smart. On ANT+ there are no issues at all with either type. Pro Tip: If reading this review some time down the road and you want to validate compatibility with your specific head unit over Bluetooth Smart, double-check the comments section below. Many folks will chime in to confirm operation. For example, you can see the Polar M460 connecting to the Quarq DZero below:

As for the metrics noted above, you can see this detail on the head unit itself of course, or afterwards on various platforms depending on the capabilities of the platform. For example using the baseline of Garmin Connect, here’s what you’ve got for a ride. Whereas if you pair to Suunto’s platform you won’t get some of the additional power meter metrics beyond baseline power, since Suunto doesn’t support those. Meanwhile, Polar sits somewhere in the middle on support of advanced metrics.

When it comes to pairing your head unit, it’ll show either an ANT+ ID or Bluetooth Smart name. In the case of ANT+, for example, the ANT+ ID is actually the last five digits as listed on the power meter itself (seen below). Whereas in Bluetooth Smart it’ll list Quarq DZERO in the results, as well as a unique Bluetooth ID (like seen above in the Polar M460).
Most head units support re-naming the sensor ID to something more friendly so you can remember/find it later. In the case below I’ve renamed it to simply ‘Quarq’.

One of the most important things to do is regularly check your zero offset, which is a form of calibration. Technically there are more detailed calibration levels, but for 98% of consumers out there, the zero offset is as close as they’ll get. This allows you to monitor a given value and see if there are major changes to it. Generally speaking, that number will shift slightly with temperature, but in rare cases it can also change dramatically if something has gone wrong with the unit.
In the case of Quarq, there is no ‘right’ number, but rather you’re looking to see minor shifts each time (a few digits) at most. If you see a major shift and you haven’t moved your bike to Antarctica, then I’d ring up Quarq service.

With a Quarq DZero unit the company does their 10K temperature compensation for each unit that leaves the factory, which means they record how the unit responds to a massive temperature range, ensuring higher levels of accuracy at any cycleable temperature level. I detail how that works in my behind the scenes post at their factory.
Still, I find it a good practice to do a zero offset (which is technically what you’re doing) before I start each ride after taking the bike outdoors. Or indoors too. This just lets me mentally validate all is happy. To do so on the Quarq you’ll simply remove your feet from the pedals and then use your head unit to perform a ‘calibrate’ or ‘zero offset’ (wording will vary based on head unit).


It’ll come back with the aforementioned value a few seconds later.
One can also do the same on the mobile app too if you’d like. Which makes for a perfect time to talk about said app.
With Bluetooth Smart being added to the platform, it means the company has tweaked their Qalvin app to connect over Bluetooth Smart (BLE) for configuration tweaks to the DZero. This is where you can also update firmware. The DZero app is free on iOS and Android.

Within the app you can check status of the power meter, as well as tweak some settings and calibration related parameters. It’s both silly easy to use and fairly powerful. And of course, you can update the firmware too.


With that, we’ve covered pretty much all you need to know about using the unit. So, let’s shift into whether or not the thing is accurate. In many ways, that’s more important than above anything in this section.
Power Meter Accuracy Results:
I’ve long said that if your power meter isn’t accurate, then there’s no point in spending money on one. Strava can give you estimated power that’s ‘close enough’ for free, so if you’re gonna spend money on something it shouldn’t be a random number generator. Yet there are certain scenarios/products where a power meter may be less accurate than others, or perhaps it’s got known edge cases that don’t work. Neither product type is bad – but you just need to know what those use/edge cases are and whether it fits your budget or requirements.
As always, I set out to find that out. In power meters today one of the biggest challenges is outdoor conditions. Generally speaking, indoor conditions are pretty easy to handle, but I still start there nonetheless. It allows me to dig into areas like low and high cadence, as well as just how clean numbers are at steady-state power outputs. Whereas outdoors allows me to look into water ingest concerns, temperature and humidity variations, and the all important road surface aspects (i.e. vibrations).
In my testing, I generally use between 2-4 other power meters on the bike at once. I find this is the best way to validate power meters in real-world conditions. In the case of most of these tests I was using the following other units concurrently:
PowerTap G3 hub based power meter
PowerTap P1 pedals based power meter
Stages Gen2 left-only unit
Tacx NEO Trainer
Wahoo KICKR2 Trainer
In general, my use of other products is most often tied to other things I’m testing. Also, when it comes to data collection I use a blend of the NPE WASP data collection devices, a fleet of Garmin head units (mostly Edge 520/820/1000 units) and some Wahoo ELEMNT BOLT units.
Note, all of the data can be found in the links next to each review. Also, at the end is a short table with the data used in this review. I’ll likely add in other data not in this review over time as usual.
With that, let’s get started on an indoor trainer ride, which is always a great place to start. In this case it was a ride where the Tacx Neo trainer was controlled via FE-C from a head unit. I was simply setting specific wattage values via the head unit. This is a great and simple test to ensure that there isn’t any obvious drift between the products over time. Here’s the Analyzer link that these graphs come from for that ride.

(Above the data is smoothed at 5s, and the purple lines you see earlier on were some sort of ANT+ dropout on the P1 units. I moved the head unit and it resolved it.)
Above you can see that up until the 36-minute marker the three units stay fairly darn close. Within a few watts in most cases, with the Tacx Neo generally being the lowest (as it should be considering drivetrain loses), and the P1 and DZero units blended together.
One odd area though is between the 35 and 43-minute markers, when I increase the cadence slightly to about 115rpm (which isn’t all that high in the grand scheme of things). All three units ‘separate’ and report different values. Unfortunately, this is one of those rare scenarios where I can’t establish a clear ‘winner’ in this case, since none are the same.

After that high cadence section all three units merge back together again, so it definitely is a bit peculiar, and not something I saw in subsequent tests. It’s plausible given this is older data that it was on the earlier firmware version, but I’m pretty sure I updated firmware back in the early February timeframe.
Let’s shift then to another indoor trainer ride, this time on Zwift. Zwift is interesting for the variability within power, and the fact that it forces numerous units to react more quickly than a simple ERG mode. Here’s that workout file.

In the above charts, the power data is smoothed at 5s to make it easier to see. Overall you can see things match quite nicely. Even those sprints which close in on 700w+ match up very well. And keep in mind that’s actually higher than that, because of the smoothing factor.
If I zoom in on the lesser sprint at 33 minutes, you can see all three units react rather beautifully:

I would have expected the P1 and DZero to be a bit closer here, though not much. If you use a +/-2% accuracy range, that means you’re looking at each one having a swing of +/- 12w on 600w. So a total swing potential of 24w on 600w between the two units – and we’re within that envelope (and especially once we include slight differences in measurement locations).
And again the same at the 13-minute marker with all being inside the accuracy envelope.

Even if reduce the smoothing to 2s we can see all three units match quite well on that final sprint. Keep in mind that, due to slight differences in the way different types of power meters transmits and head units record data, it’s virtually impossible to get the same 1-second value for max power between units (plus, they vary in recording location anyway).

That said, spitting out a mean-max graph for these, you’ll see that even the upper peak 1-second max recorded value is pretty close. The remainder of the units track evenly across the entire duration, albeit at perhaps a few watts more separation than I’d like. Nothing out of spec, but ideally they would have been just a couple of watts closer.

Finally, let’s shift gears and head outside. It’s more fun out there anyway. This nearly three hour ride covers plenty of terrain, including cobbles and other rough roads. Plus of course nice smooth roads as well as plenty of stop and go moments. As you can see, it’s a bit of a mess to look at from the three-hour view:

Though what’s important here is that there’s almost no separation between the three units.
So let’s zoom in on a few sections to dive into in more detail. First I’m going to pick a section which is largely steady-state at about the 1hr marker:

The data above in this little 7 or so minute section is rather clean. All three units track quite nicely, and the ‘ordering’ is correct with the PowerTap G3 hub being the lowest, then the Quarq DZero, and finally the PowerTap P1 being highest. Despite some solid 500w surges (the above data is smoothed at 10 seconds), it still looks pretty. Below, I put the smoothing at 3s and the numbers are still very close:

Picking out another point, here’s a 900w sprint, at 0-seconds of smoothing. Again remember that you’ll virtually never see a perfect match in these max effort type scenarios. Interestingly, you can see the slight oddity in the PowerTap G3 hub for about 1-2 seconds at the base where I briefly slowed my cadence. The G3 misses that (it often does) whereas the Quarq and P1 pick that up.

Speaking of cadence, as many know, Quarq shifted from a magnet-based requirement a few years back and has been since allowing you to run magnet free. In digging through a fair bit of data I’m not seeing any issues here either with respect to cadence variability. Here’s a random snippet of cadence out on the road.

Last but not least, to wrap things up we’ve got a mean-max chart for the three hour ride:

The units are pretty much glued together throughout the ride, minus a very slight bit of difference at the peak 1-minute to 2-minute power. Though, it’s pretty minor differences with mostly the G3 hub that differs there (and is within accuracy range spec).
Overall I don’t see anything of concern here. While Quarq did have an issue back in early January impacting accuracy for some people in certain high-wattage sprint situations, that isn’t something I saw with the firmware update released in late January intended to address it. It’s also possible my paltry sub-1000w efforts simply couldn’t trigger said bug (that again, they and other users have said has been resolved). For everything else, the power numbers and accuracy figures I see are in-line with other units that are generally known to be trusted and respected within the industry.
Finally, here’s a table of all of the comparative data that I’ve used in this review, along with others I didn’t show in this review. Further, there are additional days where I just didn’t capture 2-3 other power meters concurrently, but may only capture one additional power meter. So I didn’t include those in here.
Quarq DZero Power Comparison Data
March 30thAnalyzeQuarq DZero, PowerTap P1 Pedals, Stages Gen2, Tacx Neo, XertMarch 26thAnalyzeQuarq DZero, PowerTap P1 Pedals, PowerTap G3 HubMarch 24thAnalyzeQuarq DZero, PowerTap P1 Pedals, Tacx Neo, ZwiftMarch 5thAnalyzeQuarq DZero, PowerTap P1 Pedals, Tacx Neo, XertFeb 17thAnalyzeQuarq DZero, PowerTap P1 Pedals, Tacx Neo, FE-C Manual ControlFeb 6thAnalyzeQuarq DZero, PowerTap P1 Pedals, Tacx Neo, ZwiftDec 28thAnalyzeQuarq DZero, PowerTap P1 Pedals, Kinetic SmartControl, Kinetic Fit App
You can click on any of the links above and also select to ‘Download Set’, which lets you download all of the original .FIT files from the various devices used to record the data. All of the data is shown using the DCR Analyzer.
Power Meter Recommendations:
With so many power meters on the market, your choices have expanded greatly in the last few years. So great in fact that I’ve written up an entire post dedicated to power meter selection: The Annual Power Meters Buyer’s Guide.
The above-noted guide covers every model of power meter on the market (and upcoming) and gives you recommendations for whether a given unit is appropriate for you. There is no ‘best’ power meter. There’s simply the most appropriate power meter for your situation. If you have only one type of bike I’d recommend one power meter versus another. Or if you have different needs for swapping bikes I’d recommend one unit versus another. Or if you have a specific budget or crankset compatibility, it’d influence the answers.
Now since the guide came out this past fall, there really hasn’t been any major entrants in the market that weren’t already covered in that post. However, there have been two noteworthy reviews since, plus one coming up shortly:
A) 4iiii Precision Dual Review: The post in my annual power meter guide didn’t cover the accuracy aspects of the newer left/right setup, so I didn’t dive into general recommendations. But as you saw in my Precision in-depth review a month or two ago, that’s solid. No issues recommending it, works well.
B) WatTeam Gen2 Dual: You also saw in that review a month or so ago, and it was mostly pretty good. The WatTeam re-introduced their $499USD dual left/right power meter this past winter. There were two quirks that I saw though, so you’ll want to check out that review to see if those impact you.
C) ROTOR 2INPower: This is their dual left/right setup that they announced last year and started shipping in the fall-ish. I’ve completed all data gathering on it, and all photos on it. Early glance at the data shows it looking very good, but I haven’t dug into all the files yet. Either way, review up next week!
But again – check out the power meter recommendations guide here. I typically do this in September, and I didn’t see any notable power meter announcements at Sea Otter last week (where we sometimes see power meters announced), thus I’ll likely hold off on doing another annual summary until September as well. Especially since the word ‘annual’ implies once a year. ?
Summary:

It’s probably not much of a surprise that Quarq would deliver a solid unit, that’s generally what they’re known for. Still, it’s important to validate that assumption and ensure it holds true. And in the case of the newly added Bluetooth Smart compatibility, it’s important to ensure it works on leading units out there via Bluetooth Smart. I’ve checked it on the Wahoo BOLT, Polar M460, and Fenix 5 (via Bluetooth Smart). Plus, of course, boatloads of others via ANT+ without issue.
For those power users (in the data geekiness way), the extra validation and config options that Quarq offers via their smartphone app will likely continue to be appreciated. After all, they were the first one to introduce those options many years ago. At the time it enabled bike shops and others to quickly validate configurations and settings. These days it allows consumers to validate those same settings and check for firmware easily.
I’d have zero issues recommending the DZero to anyone, it just works, and works dependably every time with virtually no fiddling.
Found this review useful? Or just wanna save 10%? Read on!

Hopefully you found this review useful. At the end of the day, I’m an athlete just like you looking for the most detail possible on a new purchase – so my review is written from the standpoint of how I used the device. The reviews generally take a lot of hours to put together, so it’s a fair bit of work (and labor of love). As you probably noticed by looking below, I also take time to answer all the questions posted in the comments – and there’s quite a bit of detail in there as well.
I’ve partnered with Clever Training to offer all DC Rainmaker readers an exclusive 10% discount across the board on all products (except clearance items). You can pick up the Quarq DZero from Clever Training. Then receive 10% off of everything in your cart by adding code DCR10BTF at checkout. By doing so, you not only support the site (and all the work I do here) – but you also get a sweet discount. And, since this item is more than $49, you get free US shipping as well.
Quarq DZero Power Meter (various models)
Thanks for reading! And as always, feel free to post comments or questions in the comments section below, I’ll be happy to try and answer them as quickly as possible. And lastly, if you felt this review was useful – I always appreciate feedback in the comments below. Thanks!