CycleOps Hammer Trainer In-Depth Review

It’s Hammer Time.
The Hammer is CycleOps’ answer to the highly competitive high-end direct drive trainer realm. Or said differently, it’s their answer to the KICKR.
It feels like an eternity ago that the Hammer was announced. In reality though, it was a ‘mere’ 7 months ago, in early May, when CycleOps held their media event and announced both the Hammer and Magnus trainers. At the time both were set to ship by summer’s end, but like almost every other trainer company this year, those plans hit a few snags and delays set in.
Still, Hammer is now shipping and slowly becoming available throughout various distribution channels (the Magnus has been shipping a bit longer now, but is also backlogged too).
The Hammer is the first resistance controllable direct drive trainer from CycleOps, but hardly their first trainer. In fact, they had resistance controllable trainers out well before Wahoo and their KICKR. It’s just that in those days the trainers only worked with their respective apps. Here’s a look at those days. But more than that, this trainer is really a step forward for the company in becoming a legit competitive trainer offering again – both in the higher end realm with Hammer, but also the mid-range realm with Magnus. For this post, I’m focusing purely on the Hammer.
As usual, I’ll note that CycleOps sent me the trainer as a loaner to try out. Also like usual, I’ll be sending it back to them upon completion of these trainer reviews. That’s just the way I roll. If you found the review useful, you can pick up the CycleOps Hammer and other gadgets from Clever Training at the bottom of this review. In doing so DCR Readers save 10% and support the site. Plus, you’ll get free US shipping. Win-win!
With that – on to the trainer!
What’s in the box:

First up is cracking open the not-bite-sized box. Though, pretty much par for the course insofar as trainer boxes go. Inside you’ll find the trainer lying on its side looking up at you.
As someone who has unboxed his share of trainer boxes, I appreciate boxes that don’t require you hold them upside and wait for the trainer to slowly slide out the bottom clunking on the floor like a dead body.

Inside, it was wrapped up in plastic. This is another nice touch, in particular for trainers that use foam packing material (this one doesn’t). For example the lower end Tacx trainers use a Styrofoam that easily cracks and splinters into a million pieces, which you’ve got to then painstakingly clean up as it static-clings to your unit. I mean, not that I’ve had to unbox a dozen or so of them or anything.

Here’s what that looks like sans-condom:

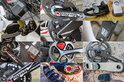
Next, inside we’ve got enough power cables to plug in half the neighborhood. Or, half the world. There’s one cable for each country type, along with the power brick that connects to the trainer itself.

There’s also some manual paper stuff. One tip is to take this serial card (which contains your ANT+ ID) and tape it to the outside of the power brick (I’ll show you a pic later), that way you can always remember which cable is which. Another life lesson learned from having too many trainers.

One interesting omission compared to every other trainer out there (especially ones over $800) is the lack of an additional quick release skewer. I suppose many people have an extra one of these floating around, but still, it’s odd. I’d recommend picking up one for $9 or so from Amazon or your local bike shop. You can also just use your existing quick release skewer from your bike, though many people prefer just being able to loosen the skewer on their wheel and move the frame to the skewer on the trainer.
Next you’ll find additional thru-axle adapters, depending on the exact axle type you have on your bike. You do not need to purchase additional adapters or skewers for thru-axle bikes, as it’s included in the box (unlike the KICKR or NEO).

Here’s what all this jazz looks like sitting by itself on a table looking like a lonely puppy:

But, there’s a secret compartment I’ve still yet to show you. But a guy’s gotta have his secrets, right? More on that in a minute.
Setting It Up:

The Hammer is pretty easy to setup. It doesn’t require any assembly of the body itself, though does require you install a cassette on it. As frequent readers know, one of pet peeves in life is that trainer companies (except Wahoo) make you go out and buy a cassette. The cassette itself isn’t that expensive – usually about $50-$60 for the Shimano Ultegra one that I bought half a dozen of each year. But it’s the extra tools you’ll need. Again, these aren’t super expensive either – another $20-25 all-in (a cassette locking tool, wrench, and chain whip). But all in you’re talking in the $70-$85 range more than you expected. Note that Wahoo is the only one that includes a cassette in the price (pre-installed). Of course, you can swap it out for your own.

As such, your first order of business is installing said cassette. It’s easy enough, and will likely take you 5-10 minutes if you haven’t done it before. If you’re a frequent cassette flyer, then you’re likely looking at 2-3 minutes.

When it comes to cassette types, the unit accepts Shimano 8-11 speed cassettes.
Further, on the thru-axle support, it has compatibility for 130mm, 135mm, 142mm, and 148mm axles, which makes it the broadest range of axles supported today (KICKR tops out at 142mm, and NEO at 135mm).
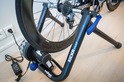
Once your cassette work is done, your beauty awaits:

At this juncture you’ll want to grab that power plug and get things situated. The Hammer does require power to provide resistance. Without it, I’ll just sorta provide very low resistance (under 150w), and a brief higher resistance pushback if you try and sprint. This is akin to virtually all other higher-end trainers except the Tacx Neo.

Finally note that the power adapter works for 110-220v, so you can use it anywhere on earth. And if the space station operates on 110/220v, you can use it there too.
Usage Basics:

Like most trainers these days, the trainer-specific usage is silly simple. That’s in large part because most of the complexity has shifted to 3rd party apps, and going wireless has largely eliminated much of the setup and day to day complexity. With the Hammer, you simply mount your bike and start riding.
Of course, first you might want to deploy the Hammer party trick, which is its hidden front wheel block. When you first get the Hammer, it looks like this – all folded up:

However riding the trainer like that would be pretty darn unstable. Instead, you’ll want to fold out its legs, which unlock via the small yellow buttons along the edges:

You can adjust each leg’s foot, in case you have wonky-ass uneven floors like me.

Once you’ve opened up the legs, you’ll find that secret held inside: The front wheel block.

You can then place this small plate under your front wheel, which can help minimize twisting from the handlebars. Magic!

Now in the event you need to move the unit around, it’s got a handle up top that’s easy to grab:

As noted earlier, along the back is the power port, and below it lists your ANT+ ID. In general you won’t need this unless you have multiple units in the room. But still, it’s super-handy to have. Once plugged in you’ll get a small status LED along the top of the trainer that can be easily seen while riding it.

Of course, the main purpose of buying a resistance controlled trainer is of course the ability to automatically control resistance and power levels. This typically takes two common forms:
ERG Mode: Setting a specific power level – i.e. 225w. In this mode, no matter what gearing you use, the trainer will simply stay at 225w (or whatever you set it to). The Hammer has a maximum wattage set point of 2,000w.
Simulation Mode: Simulating a specific outdoor grade – i.e. 5% incline. In this mode, it’s just like outdoors in that you can change your gearing to make it easier or harder. Wattage is not hard-set, only incline levels. The Hammer has a max simulated incline of 20%.
There are variants of these that different trainer control protocols utilize, but basically everything gets back to one of those two ways of controlling a trainer. From a usage standpoint, different apps will focus on different things. For example, Zwift in regular mode will be setting the incline/grade, while TrainerRoad and Zwift in workout mode will be using ERG to set specific wattages.
When it comes to ‘road-like feel’, it’s always fairly subjective. But essentially people are looking at the inertia and how it feels – primarily when you accelerate or otherwise change acceleration (such as briefly coasting). A key driver of this is the flywheel size. Be it physical or virtual, flywheel sizes tend to be measured in weight. In general, the larger the flywheel size the more road-like feel. The Hammer has an official flywheel weight of 20LBS/9KG which is the highest of any flywheel out there today in a direct drive electronically controlled trainer (by almost double).
As I’ve said numerous times, for me personally, it’s hard to separate the fact that I’m riding indoors from outdoors. It’s still a trainer, and I’m still looking at a wall in front of me. My brain can only turn that off so much. Overall I think the unit’s got a pretty good road-like feel, and it handles well when I crest the top of hills in Zwift, or even feels like soft-pedaling while going down descents. Additionally, rolling into a sprint feels pretty good. Not spectacular, but most trainers don’t feel spectacular – even at this price point.
Now it used to be that you’d use apps by trainer companies to control your trainer. But these days that’s far less common. The vast majority of consumers go with the vast collection of 3rd party trainer apps. Though, CycleOps actually does have a pretty legit training suite, which I cover a bit in the next section.
However, for all apps you should visit my recently released trainer app guide – which covers over 20 different training apps, the majority of which will connect to the Hammer just fine due to the adoption of standards by CycleOps in the Hammer. With that, let’s talk standards.
App & Protocol Support:

The CycleOps Hammer is one of two new trainers this season from CycleOps (the other being the Magnus), and both of which are the first dual-protocol trainers that CycleOps has released. Prior to this they had both ANT+ and Bluetooth Smart versions, but never one version with both protocols combined.
Further, these would be the first trainers that CycleOps has released that supports the ANT+ FE-C standard that was introduced some 18 or so months ago. This would actually make for one of the last of the majors to adopt FE-C. Which isn’t to say that CycleOps ‘had’ to, since they already had opened up their protocol to virtually all apps – so the net difference is pretty minimal for them. Instead, it just makes it easier for newer apps to get these trainers compatible.
In any event, all this means is that it’ll transmit across ANT+ & Bluetooth Smart, while also allowing resistance control across ANT+ & Bluetooth Smart. Resistance control is what enables apps to specify what resistance level the trainer is at, such as wattage and slope.
The CycleOps Hammer supports the following broadcast and control standards:
ANT+ FE-C Control: This is for controlling the trainer via ANT+ from apps and head units. Read tons about it here.
ANT+ Power Meter Profile: This broadcasts as a standard ANT+ power meter (with speed in the case of the Hammer)
Bluetooth Smart Control: This uses the CycleOps variant of BLE control, the same as their other Smart Trainers starting back with the PowerBeam lineup. There is not yet a BLE trainer control standard (soon!); so each company does their own thing.
Bluetooth Smart Power Meter Profile: This broadcasts as a standard BLE power meter, with speed as well.
Note that the Hammer does *not* broadcast cadence across any channels.
Within these standards you can basically control or connect to the Hammer from just about any 3rd party app or device out there. If an app doesn’t support one of these protocols, it probably sucks horribly. Zwift, TrainerRoad, Kinomap and dozens more support these. As do head units like Garmin, Wahoo, Lezyne, Stages, and more. The power of using standards! No pun intended.

In my usage of the Hammer, I’ve utilized it with: Garmin Edge 510, 520, Garmin Edge 820, Edge 1000, Fenix3, Zwift (Workout & Regular Mode on both iOS and PC), CycleOps Virtual Training App (iPad and iPhone), and TrainerRoad.

Still, once calibrated you can do your workout just fine:

I had no problem doing calibration however within the CycleOps Virtual Training (CVT) app, and then using Zwift and TrainerRoad. You can see it showing as an ANT+ FE-C source in the below completed workout.
")
Note that Zwift has never (oddly) supported calibration of any trainers within their app. This is somewhat ironic given that Zwift is the only app that from an integrity standpoint actually stands to benefit from calibration. All other apps if you don’t calibrate you’re only harming yourself, whereas with Zwift you’re effectively harming other competitors (and/or perhaps yourself too). Still, Zwift sees the trainer just fine and you can otherwise ride it just fine and dandy, be it the desktop via FE-C, or the iOS app.
For example, here I am using the new Zwift iOS with Bluetooth Smart control over Hammer:


While I suspect we’ll see TrainerRoad soon support the Hammer calibration natively, you can see it in process within the CVT app. CycleOps Virtual Training (aka Virtual Training) is actually compatible with virtually every trainer out there, even ones not made by CycleOps. It’s also got about the widest collection of functions in an app. It does real-course videos from around the world, structured workouts, and even replications of various outdoor races/courses. Plus, you can upload your own stuff there too if you have an action cam, allowing you to re-ride it later.


Within the CVT app, you can also save and store the bike settings, as well as trigger that calibration function that I mentioned earlier:


When you do a calibration of the Hammer, it takes a…umm…long-ass-time. 120 seconds to be precise. Actually, it’s slightly more than that, about 136-138 seconds. See, you’ll start by spinning up to speed:

And then you’ll stay at that speed for 120 seconds.

Finally, upon the conclusion of 120 seconds – you’ll stop pedaling and let it coast to a stop. It’s this coasting time that they’re actually measuring. Note that this calibration procedure is exactly the same as the Magnus trainer that also came out from CycleOps this fall.
The good news though is that in talking with CycleOps, they’ll be slicing that calibration period down significantly. In the beta firmware update I tried today, it’s down to 20 seconds for standard ANT+ FE-C calibrations (no matter the app/device), and in an upcoming firmware update they’ll match that on Bluetooth Smart calibrations. They noted that the 120 second calibration period originally came from the older PowerBeam series, and was simply something that hadn’t been tackled yet for the new line. A 20 second calibration is on par with virtually every other trainer out there.
The trainer will remember calibration values from other apps, so you can quickly use the CVT app on your smartphone to set a new calibration value.
Sound Levels:

Measuring the sound of silence. One of the most requested things y’all ask me to do with trainers.
Let’s get this out of the way: The CycleOps Hammer isn’t silent. It’s not like the Neo (which costs $400 more). But it’s not noisy either. It sits in the same ranking as the new Wahoo KICKR (KICKR2) as well as to some degree the Tacx Flux. It’s not as quiet as the Elite Drivo though. You’ll of course hear it in the video below and decide for yourself. Still, it’s better than any of their past units, better than the original Wahoo KICKR.
First however, something to note about noise testing. Someday I’ll write all about trainer sound and noise testing. I’ve learned a lot over the years, and the more I do the more I realize how hopeless it really is to give folks a truly accurate view of the sound levels in videos (let alone measure them). There are a massive number of environmental factors that truly do have a huge impact:
– The room materials (which can make trainers quieter or louder due to echo, noise dampening, etc…)
– The size of the room
– The exact distance of the camera and/or decibel meter
– The mode of the decibel meter
– The type of mics used
– The sound levels of the mics used
– The exact position of the mics relative to different sides of the trainer
– How the mics capture different tones
– How I edited the audio (normalized levels)
– The speed of the trainer
– The cleanliness of the drivetrain on your bike
– The shifting accuracy (tuning) of your bike’s drive train
– Whether or not I remembered to turn on the @#$@# mics
– And other items I’m likely forgetting
Any one of these items can make the entire trainer sound dramatically different. I think I might put together a funny video showing just this some day. Maybe I’ll pretend to be different people on YouTube, just to demonstrate how different I can make a single trainer sound. All of which makes doing repeatable tests over the course of years very difficult. So instead, I’m going to focus on ‘in the now’ type tests by showing two trainers side by side in as close of conditions as possible.
In the meantime, I’m going to continue using my handy dandy decibel meter stoplight (this first video explains how it works, while the second video shows the Hammer):
To demonstrate how this trainer sounds, I’ve stacked it up against the KICKR2 and the Elite Drivo. I go side by side with them in the same space, so you compare them in like conditions. Note that I have a separate video comparing the Tacx Flux, Tacx Neo, and Wahoo KICKR2 – in case that fancies you. But the below video is all about the Hammer.
As you can hear, it’d be hard to pick a distinct winner between the KICKR2 and Hammer when it comes to noise. They’ve virtually identical, with just slight differences in tone.
Accuracy Testing:

Next up we’ll take a look at accuracy, specifically power meter accuracy. The CycleOps Hammer claims a stated accuracy level of +/-3%, which is slightly beyond other trainers in this price ballpark. Some are slightly better at +/-1% or +/-2%, but that wasn’t in the cards here for the Hammer.
In my case I was looking to see how it reacted in three main areas: Zwift, TrainerRoad, and ANT+ FE-C control via Garmin. However, I also validated accuracy in CycleOps’s own CVT app. The actual apps don’t much matter (at all), but rather the use cases are different. In Zwift you get variability by having the road incline change and you being able to instantly sprint. This reaction time and accuracy are both tested here.
Whereas in TrainerRoad I’m looking at its ability to hold a specific wattage very precisely, and to then change wattages instantly in a repeatable way. There’s no better test of that than 30×30 repeats (30-seconds at a high resistance, followed by 30 seconds at an easy resistance). However, my legs and workout structure decided to go with slightly longer 1-minute intervals this time. Not that it matters too much since you see the impact of accuracy shifts in the first 5-7 seconds for these tests anyway.
So we’ll start with TrainerRoad. In TrainerRoad the Hammer is utilizing ERG mode via ANT+ FE-C control. This means that TrainerRoad tells the trainer a given wattage level, and the trainer should hold it. After all, that’s the entire point of ERG mode – very specific wattage levels. Whereas other trainer modes are used when you want to simulate a specific gradient (such as in Zwift…but more about that in a second).
Here’s the workout I selected (requires a TrainerRoad account to view, but it’s shown below in this screenshot):

And here’s the high level data, in this case showing it smoothed at 20s. We see a bit of disagreement between the units, at the higher end, partly because they measure in different places, and partly because of the +/- 3%.

If I look at the early peaks, it seems to hit those pretty close to spot on.

But remember I mentioned smoothing? I do that to make it easy to pick-out accuracy issues, as power data is normally pretty noisy. Except that in the case of ERG mode, it actually shouldn’t be noisy, it should be very ‘tight’. Here’s what it looks like unsmoothed:

Woah, that’s not good. What’s up there? That kind of variability is perfectly normal outdoors, but not indoors in ERG mode. It’s fluctuating +/- 50w or more, a trend I see reflected on the power meters as well. To be clear, it’s *accurate* during those periods, it’s just not holding the wattage set point it should be (i.e. 300w). Instead, it’s like a drunk driver that can’t keep in its lane.
So, I circled back to CycleOps and let them do some digging. A short bit later they came back with a firmware update. They found that in my case the speeds I had used in ERG mode were causing a bug which led to the high variability of the ERG set point, producing the drunk-driver effect. So they shipped over a beta firmware update to address it. Here’s the results of that quick test:

And then below on the Analyzer, both at 0s smoothing (left) and 20s (right) smoothing to match above graph styles:
(Note: You see a few minor dropouts in the graph on the Hammer, this is a case of an ANT+ dropout to that Edge 510, as it doesn’t show on the TrainerRoad data stream. One of the reasons I often duplicate data recording on multiple devices.)


As you can see, now it’s nice and crispy – as it should be. Boom, almost perfect! That firmware update should be released shortly to the public, after they do a few more rounds of testing to ensure this didn’t break anything else. Again, the issue wasn’t that the power wasn’t accurate, but rather that it just didn’t hold the designated ERG point correctly.
You’ll notice a very minor difference above between the first four and last four intervals. I changed my gearing to change speed, since that can impact results. You’ll see the last four are a tiny bit cleaner than the first four. CycleOps says they’ll be tweaking things a tiny bit more over the coming days to get it a bit cleaner. The change mainly impacted how they were using wheel speed previously.
Next, we’ve got Zwift. In Zwift you can either be in ERG mode (workout section), or simulation mode (general Zwift). I tried both actually, mostly because I was curious how Zwift ERG might differ from TrainerRoad ERG. But first, the regular Zwift riding mode wherein I just wandered around Zwift for 45 or so minutes. After which, I plotted the data:

That’s some really beautiful alignment there (shown above at 10s smoothed). Even zooming in on the sprints, it does really well. Keep in mind that max power in a sprint is often a function of how/when it’s recorded by the head unit. So seeing slight variances between units is 110% normal. Note the below data was collected on production firmware, not beta.

Next, a quick look at the Zwift workout mode, from a workout this morning lasting about 30 minutes:

Well then, that looks pretty. Check out that max power – all incredibly close on those short sprints (the above is shown smoothed at 5s). You see a slight bit of difference between the power meters in the first two intervals (at the 5/7 minute markers), but then things settle out really nicely. I’m not terribly worried about that, as settlement in accuracy over the first 8-10 minutes of any trainer is normal – even the ones that say they don’t need to settle usually do. You can click on that link above to dig into this set further as well.
So where do things end up? It seems that in general the accuracy side is pretty good. I had one weird calibration run, which I didn’t fully realize until later on, which resulted in this odd set here. I’m about 90% certain that’s because something went amiss mid-calibration that I suspect is related to a flaky wall outlet I had temporarily plugged it into while filming my sound levels video. It dropped the connection towards the end of the calibration and I’m wondering if it actually set anything at all. Either way, I’ve never had that happen again or before – so I’m considering it an anomaly related to the power issue (since I lost all connectivity to it).
But if I ignore that, and look at successful calibrations, or heck, no calibrations at all, it matches very nicely with the other power meters on the bike. Obviously they’ll need to release that beta firmware update to address the ERG set point, but I don’t have any concerns there. It sounds like they just want a few more days to validate things before releasing it to the wild.
Trainer Comparison:

So which trainer is your best bet? Well, that’s an extremely complex topic. One that I dedicate an entire post on each year as part of my annual trainer recommendations guide. That guide came out a month or so ago, and is available here.
At this point I have ridden every trainer coming out this season, all of which I now have final versions of. Here’s the higher-end versions that compete with the CycleOps Hammer
CycleOps Hammer: Final In-Depth Review (this post, duh)
Elite Drivo: Final Production In-Depth Review
Tacx Flux: Final Production In-Depth Review
Tacx NEO: Final Production Unit ridden for a year, post here
Wahoo KICKR2: Final Production In-Depth Review
When it comes to accuracy, all of these units are pretty darn solid. I’d give slightly higher marks to the Elite Drivo and Tacx NEO, but we’re talking the tiniest of margins there.
If you’re looking for silence, as noted the quietest trainer is simply the Tacx NEO. There’s really no comparison there. The second quietest would be the Elite Drivo, at least because the tone/pitch isn’t as high as the Hammer/KICKR.
When it comes to apps, the Hammer has a slight advantage of Elite in that many apps have previously supported the PowerBeam series on Bluetooth Smart, which means they also work on the Hammer/Magnus. The Wahoo KICKR/KICKR2 has slightly more support on some fringe apps, but for all the big apps it’s a wash.
In any case, I’ve added the CycleOps Hammer to the product comparison tables. For the purposes of below, I’ve compared it to the Wahoo KICKR2, Elite Drivo, and Tacx NEO. But you can make your own comparison tables here, and compare it against any trainers I’ve ridden:
Copyright DC Rainmaker – Updated May 20th, 2017 @ 12:33 pmNew Window
Price for trainer$1,199USD$1,299/€1,390/£1,099$1,599USD/1,399EUR$1,199
Attachment TypeDirect Drive (no wheel)Direct Drive (no wheel)Direct Drive (no wheel)Direct Drive (no wheel)
Available today (for sale)YesYesYesYes
Availability regionsGlobalGlobalGlobalGlobal
Connects to computerYesYesYesYes
Uses mouse/keyboard as control unitYes (with apps)Yes (with apps)Yes (with apps)YEs (with apps)
Uses phone/tablet as control unit (handlebar)Yes (with apps)Yes (with apps)Yes (with apps)YEs (with apps)
Wired or Wireless data transmission/controlWirelessWirelessWirelessWireless
Power cord requiredYesYesNoYes
Flywheel weight20lb/9kg13.2lbs/6kgSimulated/Virtual12.5lbs/5.7kgs
Can electronically control resistance (i.e. 200w)YesYesYesYes
Includes motor to drive speed (simulate downhill)NoNoYesNo
Maximum wattage capability2,000w2,000w+2,200w2500w @ 30MPH
Maximum simulated hill incline20%24%25%20%
Ability to update unit firmwareYesYesYesYes
Measures/Estimates Left/Right PowerNoNoNoNo
Can directionally steer trainer (left/right)NoNoNoNo
Can simulate road patterns/shaking (i.e. cobblestones)NoNoYesNo
Includes temperature compensationYesN/AN/AYes
Support rolldown procedure (for wheel based)YesN/AN/AYes
Supported accuracy level+/- 3%+/- 1%+/- 1%+/- 2%
Allows 3rd party trainer controlYesYesYesYes
Supports ANT+ FE-C (Trainer Control Standard)YesYesYesYes
Supports Bluetooth Smart control for 3rd partiesYesYesYesYes
Can re-broadcast power data as open ANT+YesYesYesYes
Can re-broadcast data as open Bluetooth SmartYesYesYesYes
Amazon LinkLinkLinkLinkLink
Clever Training Link (Save 10% with DCR10BTF)LinkLinkLinkLink
Clever Training EuropeN/AN/ALinkN/A
Review LinkLinkLinkLinkLink
Again, remember you can create your own comparison tables here and mix and match trainers till your heart’s content.
Summary:

It’s clear that CycleOps/PowerTap have found their stride in the past 12-18 months. Last year they’ve announced and started shipping the popular PowerTap C1 & P1 power meters, and now this year they followed that up with another double – the Magnus and Hammer trainers. All of which support dual-ANT+/Bluetooth Smart connectivity, giving you choices on the apps and devices you use. And most importantly, all are solid products – including the Hammer.
While I would have liked to see CycleOps aim for a slightly higher accuracy rating (+/-2% instead of +/-3%), it appears that in practice they’re already achieving that anyway. And quite frankly, I’m more focused on actuals than theoreticals. The upcoming beta firmware I tested should resolve the outstanding quirks I saw in ERG mode, which will round this out to be a a very solid trainer option.
When looking at the growing flotilla of trainers in the ~$1,200 price range (KICKR/Hammer/Drivo), you’ll find it really comes down to nuances. One might have a slightly different road feel, or a different noise pitch. While another might have barely different accuracy specs or thru-axle support differences. And another may fold up one way vs a different way, or be supported better in one specific application vs another. It’s almost to the point of being a wash between them, if not already one.
With that – thanks for reading!
Found This Review Useful? Or just wanna save 10%? Here’s how:

Hopefully you found this review useful. At the end of the day, I’m an athlete just like you looking for the most detail possible on a new purchase – so my review is written from the standpoint of how I used the device. The reviews generally take a lot of hours to put together, so it’s a fair bit of work (and labor of love). As you probably noticed by looking below, I also take time to answer all the questions posted in the comments – and there’s quite a bit of detail in there as well.
I’ve partnered with Clever Training to offer all DC Rainmaker readers exclusive benefits on all products purchased. You can read more about the benefits of this partnership here. You can pickup the Hammer trainer through Clever Training using the links below. By doing so, you not only support the site (and all the work I do here) – but you also get to enjoy the significant partnership benefits that are just for DC Rainmaker readers. And, if your order ends up more than $75, you get free US shipping as well.
CycleOps Hammer Trainer
Thanks for reading! And as always, feel free to post comments or questions in the comments section below, I’ll be happy to try and answer them as quickly as possible.