Bryton Cardio 60 GPS Multisport Watch In-Depth Review

The Bryton Cardio 60 is an interesting relatively unknown nugget on the triathlon watch scene. It’s interesting because it’s one of the few (if only?) multisport GPS watches that’s not actually offered in North America. But outside of that scope, there’s significant interest in how well this unit performs at the lower price that it tends to be sold at. Does this unit have what it takes to unseat any market leading incumbents? And if so – is it right for you?
I’ve been using the device for months now, on swims, bikes and runs – so I’ve got a pretty good grasp on how the device works. Because I want to be transparent about my reviews, once my evaluation period with the Bryton unit has elapsed, I send it back to Bryton in Taiwan. Simple as that (well, actually, sending an international shipment from France to Taiwan sounds like it’ll probably be FedEx hell…). Sorta like hiking in wilderness trails – leave only footprints.
Lastly, at the end of the day keep in mind I’m just like any other regular triathlete out there. I write these reviews because I’m inherently a curious person with a technology background (my day job), and thus I try and be as complete as I can. But, if I’ve missed something or if you spot something that doesn’t quite jive – just let me know and I’ll be happy to get it all sorted out. Also, because the technology world constantly changes, I try and go back and update these reviews as new features and functionality are added – or if bugs are fixed.
Unboxing:
First up is getting the unit all unwrapped. So unless you bought it from a friend, you’re probably going to start here:


After unpacking all the parts, you’ll find yourself with a few plastic bags, some paper, and the unit itself:


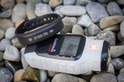
However, those plastic bags are somewhat deceiving. In fact, there’s quite a bit of stuff stashed in the box. We’ve got the unit itself, a heart rate strap, a bike mount, a USB charging/download cable, and then the biggest ANT+ speed/cadence sensor known to mankind.

So let’s walk through all the pieces briefly, starting with the least exciting: The Manual.

Next up we have the rubber bike mount. This wraps around your handlebars and enables you to easily see the watch while your ride (instead of on your wrist, though you can certainly wear it there too).

Then we’ve got the ANT+ heart rate strap. There’s the strap portion, and the transmitter pod. If you already have an ANT+ HR strap then you can use that one instead if you prefer, it’s totally interchangeable.


You’ll simply snap the two parts together, like below. The CR2032 replaceable battery will last about a year with normal use. No need to separate the two pieces when not in use.

The next ANT+ component is the ANT+ Cycling Speed/Cadence sensor. This unit will register your speed while indoors on a trainer, or outdoors if you wish (such as mountain biking). Additionally, it’ll measure your cadence as transmitted in RPM’s (Revolutions Per Minute). Your cadence is simply how fast your legs are spinning, measured on one-side each time the crank goes past the magnet. Normally folks ride between about 85-95RPM.

Like the HR strap, if you already have an existing ANT+ speed/cadence sensor on your bike, there’s no real reason to switch to this one. It’s a bit large and in charge compared to most out there.

Next we have the charging cable. It’s got four little prongs on it, two for power and two for data. Pretty much the norm for GPS devices these days.


You can see how it clamps right onto the unit, holding it pretty firmly.

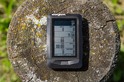
Finally, the unit itself. The Cardio 60 has five buttons. Two on each side, and one silver one in the center.


When you first get the unit it asks you to charge it up for four hours before initial use.

I’ll dive into all the individual components in more detail throughout the review, so fear not, we’ll come back to everything later. In the meantime, let’s see how it compares to others on the market from a size perspective.
Size Comparisons:
As is always the case, I line up other units in the same category. In this case, that’s the GPS-integrated triathlon watch category. Which, is precisely why you don’t see a Polar device on there. As it stands today, they don’t make a GPS-integrated triathlon watch (must have true waterproofing). The other units represent pretty much everyone else in that market, or about to be in that market (as is the case with the Leikr unit). I don’t have a Bia watch on hand, thus why it’s not included.

(Left to right: Timex Global Trainer, Garmin FR910XT, Suunto Ambit 2, Bryton Cardio 60, Leikr GPS, Magellan Switch, TomTom Multisport GPS)
So, as you can see from a watch face standpoint it’s average to slightly on the smaller size. I suspect women will like this a bit more than other larger units such as the Garmin and Suunto watches.


If you look at depth (aka how high it sits off your skin), you’ll see that it’s far thinner than most other units on the market today. Super-thin. You can see the airgap below the watch when the roller is level.

And here’s the back of the watch bands, since a number of you have asked for that in the past (same order as above):

Overall from a size standpoint the watch is very nice, and really much better than many others. Though do keep in mind that unlike the most of the others on the rolling pin it doesn’t contain a barometric altimeter, nor have indoor swimming support. Thus, the sensors for those may contribute some (albeit almost none) to the overall size of the units.
Running:

First up in running (and the watch in general) is getting it all turned on and the user profile setup. You can configure this within the user options. The watch supports a single user profile. Within it you’ll configure your age (birthday), weight, sex, and heart rate (HR) max and thresholds. The primary use for the biographical information is calorie burn calculations, whereas the HR max/LT’s are used for some of the data fields and HR zones.


Next up you’ll want to pair the heart rate strap, which uses ANT+. If you already have a HR strap, you can use that. Otherwise, you can use the Bryton strap. To pair it you’ll dive into the sensors and then the HR sensor menu:

Next, you’ll go ahead and scan for the sensor and it’ll find it. It’ll display the ANT+ ID of your specific sensor (it’ll be different than mine). Once you’ve paired the strap, it’ll remember it for future activities.


Now, me and the Bryton HR strap have a bit of a love/dislike relationship. I love that I had zero spikes or dropouts with it – it was pretty much my favorite strap through my initial testing.
And then I did a race with the unit. As is the case with virtually any triathlete using a HR strap, you place it under your tri-suit, and then subsequently under your wetsuit. I did that, just as I have for the last 6+ years. Except this time when I exited the water some 13 minutes later the unit didn’t find the strap like it usually does. Nor for that matter anytime thereafter. I replaced the battery, did some troubleshooting and talked with Bryton about it. It appeared that water immersion has killed the strap. Even the absolute minimum IPX7 baseline test of 1 meter at 30 minutes should have been easily passed.
We’ve had a bit of discussion about it since. They believe that the strap should be waterproof, and shouldn’t have had that issue. Obviously, my test could be a one-off, or it could be the reality of the strap design. It’s hard for me to say.
Anyway, back to running…
With that, we’re ready to head outside. First up is selecting the sport via the menu, I’ll choose Exercises > Running.

Next it’ll start the search for satellites. As it does this it’ll give me a simple status screen:


In the event you’re running indoors, you can cancel this GPS search and just go into indoor mode, which will use the built-in stride sensor to calculate speed and distance. I didn’t have an opportunity to test the indoor portion, but hope to in the coming days at an upcoming hotel – and will add that into the review. I wanted to get the review out the door for folks without waiting for this final piece. You cannot pair a separate ANT+ footpod.
So, with GPS found we’re ready to go:

To start running we’ll simply tap the enter/OK button again to start recording. As we run, the unit will display all of your typical metrics such as pace, distance, time and anything else you configure.


To configure data fields we’d dive into the settings for a given sport. Each sport (swim/bike/run/other) contains data field configuration settings. It’s actually fairly detailed, albeit a little confusing. First up you’ll need to know that “Meter” really means ‘Data Screens’. You’ll see this in a number of places where the language doesn’t quite convert well to anything that makes sense. Once you understand that piece, that’s where you configure the screens.

Within that you can configure up to four data pages per sport, with each data page containing up to four fields. Again, Meter1 really means ‘Data Page 1’, and so on.

I’ll dive into all the data pages later in the review in the ‘Data Fields’ section. But here’s a sneak at a few:


Additionally, you can get two data pages as ‘Lap pages’ (again, called ‘Run Meters’ in the confusing nomenclature, and then just ‘Run Lap’ below). These additional data fields would contain current or last lap stats. Here’s what it looks like running:


One specific data field that I really loved on this unit that I haven’t seen on any previous unit is the last 1KM pace data field. While I could have added something like ‘Lap Average Pace’, the last 1KM is nice in that it’s more of a highly stabilized pace metric. This is useful when you may have longer intervals and want a clear picture of how things are progressing over that last 1KM, rather than perhaps a 1-2 mile long lap average. In many ways, very similar to power meter data smoothing fields that are commonplace on cycling units.

Moving along to other functions, the unit includes an Auto Lap function, except here it’s called “My Lap”. You can configure this based on distance or location, but not time.

This would automatically trigger based on a preset distance, such as every 1KM or every 1 mile:


You can also just manually trigger a lap at any point by pressing the lap button (middle button):

Next we’ve got the alerts function, confusingly named “Exer. Remind” – I think they were going for “Exercise Reminders”, but that didn’t fit:

Ignoring the industry trend setting name, it’s actually more robust than most alert functions out there. You can set alerts based on: Pace, Heart Rate, Stride Rate (Cadence), Distance, and Time.

If I went in to setup a Pace alert, I’d specify a low-speed and a high-speed, like a bracket of sorts. This is ideal because due to GPS stability you wouldn’t want to set an exact pace such as 7:30, as you might be constantly getting beeped at. Instead, you’d set something like 7:20 to 7:40.


In my case, I set a bit of a broader range:

While running, this will trigger a “Pace is too Slow” or “Pace is too Fast” alert. Though, not immediately, which is kinda nice. Rather, it’s about 15-20 seconds later that it triggers. Having run with many alerting systems, I prefer a tiny bit of leeway in case of things like running around someone or the sort.

Next we’ve got the internal stride sensor. This sensor enables two functions. First is the ability to see running cadence, and second is the ability to get pace estimates while indoors on a treadmill or in a tunnel. In my experience with the cadence portion – it seems quite accurate. I’m impressed (lower left is Last Lap Average Stride):

On the tunnel piece, I saw the same in sections of my route that were without GPS coverage (underground). Pace data was kept throughout the GPS gap period.
I’d be remiss if I didn’t talk about Auto Pause. Namely, the lack of ability to turn it off. As you’ll see throughout this review, this ends up being a bit of a challenging feature for me. I typically don’t run with auto pause. Instead, I just let the clock run. And if I stop it (such as at a light), it’s because I’ve specified it. Whereas Auto Pause as a feature will automatically pause the timer for you when you slow down below a specific speed (such as to stop at an ice cream shop).
The challenge with Auto Pause and running in particular is that it’s easy to trigger false-positives, which means that the unit thinks I’ve slowed down to a stop, but in reality I’m just walking slowly during the rest portion of an interval. Unfortunately, the Cardio 60 doesn’t allow disabling the Auto Pause, nor allow configuring the trigger speeds (it’s the only unit on the market with these restrictions). Again, I’ll cover in detail what the impacts of this are later throughout the review.
Finally, when you’re done running you’ll go ahead and hit the bottom left button to stop the timer.

Then, you can press it again to end the run. With that, we’re ready to dive into the other sports. Keep in mind that virtually everything I’ve covered above within the running section applies to the other sports as well, just in a manner applicable to those sports.
Cycling – Outdoors:

As a multisport watch the Cardio 60 is able to track your rides just as well as running. First up is how to mount the watch. You have a few options. First is the most obvious, which is simply riding with it on your wrist. This is how I used it most of the time. Since the device lacks a multisport quick-release kit/bracket to easily go from swim to bike to run, keeping it on your wrist actually makes a fair bit of sense:

Obviously in this mode you’ll have to twist your wrist to see it, which is a bit of a downside. But if your goal is more data collection on the bike, then it works fine.

The second option is to use the included bike mount. This mount works really well on road bikes, and I was able to test this when I rented a road bike for a few days (I normally just have a triathlon/TT-style bike).


But again, for triathlons you’ll spend a bit of time trying to move it from wrist to bike and back again, so you may want to think carefully if it’s worth it (at least for short-distance tri’s). In my case with the sprint triathlon I used it in, I just left it on my wrist for the duration. If it were a half-iron or iron-distance race I would have swapped it to the handlebars.
You will notice however that the bike mount is a bit clunky, aside from being what I’d suggest is a bit too small from an inside width standpoint. While these were admittedly less than circular handlebars, they are what is commonplace today on many bikes:


Next we’ll want to setup your bikes. You can configure two bikes, each with a specific weight, type and wheel size.

Realistically, the only data field that’s used in calculations is the wheel size data field. Sensors are paired to the watch in general, and are not unique to a given bike.

With the mounting and configuration all taken care of, it’s time to get onto using it. To enter the cycling mode you’ll go ahead and tap Exercises > Cycling, which will change the data screens to be cycling relevant.
Like in running mode, you can customize the screens as you see fit. But as a baseline the screens will display in MPH (or KPH if you’ve selected Metric), instead of running metrics such as ‘Pace’.

Note that the Cardio 60 doesn’t have any altimeter (GPS or barometric) included (or enumerated through the data fields). Which means that it depends on post-ride processing of your data to determine elevation based on your GPS track.


While cycling you can display your cycling cadence. Cadence is the revolutions per minute (RPM) of your crank, which is typically between about 80 and 100RPM for most riders in most situations. It’s measured one-crank only (left), using the ANT+ speed & cadence sensor:

You’ll then see it displayed on the unit itself (in this case, during a workout program):

Lastly, when you upload the data to the site, you’ll see the cadence data displayed there as well:

I did notice a few more drops than I’d expect while cycling, from the cadence sensor. However, it’s unclear if the issue here is the sensor or the unit. It definitely appears distance related however, given if I move further up my aerobars it drops.
I’ll dive more into the display of data on the site a bit later on.
Cycling – Indoors on Trainer:

The Cardio 60 connects to indoor speed and cadence sensors, which enables it to track distance and speed indoors while on a trainer. Now keep in mind that speed and distance indoors on most trainers isn’t a terribly useful metric. It doesn’t tell you that you worked any harder – or even went any further. Unless you have a fluid trainer (where the resistance is non-changeable and fluctuates with higher speed), then you’ll be able to change how hard you work simply by changing gears. Which in turn impacts speed. I can go from 15MPH to 30MPH by simply changing gears and cadence, without actually working any harder (adding more power or heart rate). All that said, many folks still like to track speed and distance indoors.
You’re able to pair the Bryton unit to both ANT+ Speed/Cadence combo sensors, as well as ANT+ Speed-only sensors (and just Cadence-only too). You cannot pair to ANT+ power meters.


After pairing the sensors, you’ll want to go ahead and go into the bike settings page and specify the wheel size. This is important to ensure accurate speed.

Once you’ve paired to those sensors and configured you’ll be able to go ahead and start a ride. You’ll start the ride just like you normally do via the Exercises > Cycling menu.
Then, instead of waiting around forever for it to attempt to find satellites, you’ll just go ahead and tap the OK button to trigger the unit to start recording. When you do so you’ll be given the below menu with the option to disable the GPS and go into indoor mode:

With that, it’ll turn off the GPS and simply track speed with just the speed sensor. Note that you don’t actually have to do that, even if you forgot and just start cycling, it’ll still use the speed sensor data over the non-existent GPS data.
While cycling indoors the unit will work just like it would outdoors – distance, time, speed, cadence, etc… are all present and recorded:

Afterwards, when pulling up the activity on the site, you’ll see the same metrics there as well:

From my perspective, while indoors cycling I have zero complaints about the unit – it works exactly as you’d expect it to.
Swimming – Openwater:

The Cardio 60 supports openwater swimming – meaning outdoors and not in a pool. In this mode it’ll measure your distance while swimming outdoors. Again, not in the pool, just in a lake, ocean, river, or, I suppose, this really large pool.
To get into the openwater swim mode you’ll go ahead and dive into the Exercise Menu, then Opendoor Swim:

Because this mode depends on GPS, you’ll need to wait briefly for it to find satellites:

Then, it’s go time:

While swimming, the unit will provide you with distance and pace information, or any other information you’ve setup within the data fields.

Note that it will not provide you with stroke related information, since the unit doesn’t track that.

You can also create laps as you see fit as well:

Over the course of the past few months, I was able to sneak in a few swims with the unit in openwater. Unfortunately, living where I live, regular openwater swimming isn’t permitted (actually, I’d get fined). So I have to be content to do it while on trips.
My first swim with the unit was out on the French coast, and I was doing a loop around castle. In doing so, I measured the baseline distance with a GPS (Garmin FR610, right) in my swimcap. This is a well-proven technique for getting extremely accurate distance while openwater swimming. In this first case, the actual distance was measured as 1.27 miles.
On my wrists I wore three other watches – the Garmin FR910XT, Suunto Ambit2, and the Bryton Cardio 60. As you can see below, the units varied a bit from the baseline, with the Cardio 60 actually coming the closest to the real value, being only .01 miles off – well within the GPS accuracy of any given unit here.

Next up was a short out and back channel crossing. The waters in this case were miserably rough and choppy – hence why it was much shorter than you might anticipate from me. I had planned to go well beyond the initial channel to another island, but ultimately I decided it simply wasn’t safe to do so.
Below you can see the baseline at .37 miles (again, FR610 in swimcap). The Ambit2 overestimates the distance as usual, and the Garmin and Bryton units come in right next to each other at .31 and .32 miles, with the Bryton being overall .05 miles off. Given the conditions in this particular swim, these aren’t as bad as they appear. Given the swells were enough to instantly make both land and a reasonably high castle a few hundred yards away disappear, I’m somewhat impressed with how close the Cardio 60 and FR910XT units were to each other.

Finally, here’s some data from a race. In this case the Versailles Triathlon. In that event I wore the Cardio 60 on one arm, and the Garmin FR910XT on the other. I didn’t however wear a reference unit. The swim was specified as 750m, though due to an errant floating away buoy (seriously, read my race report for more details), I swam more than the specified value. However, whether or not the course was measured correctly is obviously a tough one – you’d be surprised, most triathlon swim courses aren’t measured accurately.

Looking at the values, here’s where things ended up:
Garmin FR910XT: .56 miles = 901 meters, Total Time Specified: 13:11
Bryton Cardio 60: .53 Miles = 852 Meters, Total Time Specified: 12:22
Which one was most accurate? Well, that’s tough. From a true time standpoint, the FR910XT was most accurate. This is the same pattern you see above in some of the other photos, where due to auto-pause, the unit doesn’t correctly include all of my swimming time. In the case of some of my earlier swims, it’s certainly possible that with current I wasn’t making solid forward progress. However, in the case of the race – I assure you, I was always making some progress (even if backtracking due to buoy-fail). Thus, it might explain why the Cardio 60 is lower, if it triggered the pause on the auto-pause threshold, thus accounting for the missing 50 seconds of time. And 50 seconds is roughly how long it would have taken me to swim 50 additional meters. In fact, if you look closely using a 3rd party application (Sport Tracks), you can actually see all the Auto Pauses occurring:

The closeness of the two units in this case is somewhat impressive. And I’d guess that if you removed the Auto Pause (you can’t turn it off currently), then they’d probably be near spot-on with each other. Whether or not I actually swam that distance that day is obviously up for debate, but it seems like a reasonable pace for my swimming abilities at that time of year.
Overall when you look at the other two tests, it does appear like the Bryton is the most accurate unit from an openwater swimming perspective. And I think with the removal of Auto Pause, it could become even that much stronger in the water.
Here’s a look at the map created by the Cardio 60 during one of the longer openwater swims:

Swimming – Pool:
I wanted to call out this section specifically in bold heading, mostly as a method to minimize the number of questions asking about it later.
No, the Cardio 60 does not support indoor pool tracking, or any pool tracking for that matter (indoor/outdoor, or half and half). Though it does actually contain an internal accelerometer that could be leveraged for swim tracking (currently it’s just used for stride data, it won’t track anything in a pool.
For the Cardio 60, it’s outdoors openwater swimming only.
Multisport Mode:

The Cardio 60 supports multisport mode, which is integral to any triathlon watch. Multisport mode enables you to seamlessly transition from swim to bike to run (or between any specified sports). It will automatically change to the different sensors you’ve previously paired (such as speed/cadence for cycling), as well as change your views for the different sport profiles.
To setup multisport mode you actually have two options on the Bryton Cardio 60. The first is the default ‘Triathlon’ mode which simply does Swim/Bike/Run, in that order, with the option to enable recording of transitions:

In this configuration you’ll change sports by pressing the big center OK/lap button between sports.
The second option is to manually create a ‘Multisport’ workout, ideal for two-sport events such as duathlons.

In this configuration you can manually add the sports you’d like:

And you can keep adding segments too – in the event you’re fortunate (or unfortunate) enough to do multiple iterations of a given event:

And you can specify whether or not to include transitions (both multisport and triathlon mode offer that):

Once you’ve either created your own Multisport mode, or selected Triathlon mode, you’ll go ahead and start the activity just like any other from the Exercises menu. Then as noted above it’ll automatically transition between each sport when you tap the center/enter/ok button.
I used this during my Versailles race, and it worked fairly well. There were a few things I noticed. First is that while it did record the transitions, my total time was off a bit from the official race time. This is due to the auto-pause triggering on while in transition while standing at my rack. As I’ve mentioned elsewhere, you can’t disable this. So that artificially lowers your times.

Second is that while in Triathlon mode the unit won’t create separate files for each sport. This means when I upload it to the Bryton site it looks like one giant event, without any detail for each sport. So looking at paces for the swim is somewhat difficult because the bike is so much faster (from a graph scaling standpoint).

You can look at each activity from a ‘lap’ perspective, which correlates to the different segments – but in that mode it’s just purely the textual information:

When it comes to 3rd parties, this is made equally as difficult, as those platforms don’t recognize the combined nature of the activities as some sites do with Garmin .FIT files. So while you can import the files, it’s just one massive blob from a workout standpoint:

Overall it does work quite well from a device-standpoint, but some of the software follow-up pieces do make it fairly difficult to actually analyze the files in more depth sport-by-sport.
Workout and Interval Mode:

The Cardio 60 contains a few different workout/interval modes. First up is the ability to create/follow a simple workout plan for a given training session. This would best be defined as something like following a single HR zone for the duration of the workout:


Next, we’ve got the ability to create a specific interval session. The unit allows you to specify a warm-up, cool-down, and then intervals with both a rest and work period – along with the repetitions. The interval work/rest portions can have a time or distance target set, as well as a specific HR target set (or not). You can also manually trigger the warm-up to be complete.

I give full credit here to Bryton for nailing the execution on this. This is the proper way to do this, it must include all those parts. A number of companies recently have hosed this up. Really, it’s not that complex. Must have: Warm-up, rest, work, repetitions, cool-down. Must have time or distance, and must have a target offered. Beyond that is icing on top (for example, the unit could have set targets outside of just HR).
In addition to defining your own custom interval workout, you can also utilize a Bryton created workout, of which 5 default ones are included:

And, you can do some basic tests at specific distances – specifically around establishing your threshold heart rates.

Finally – my favorite part: The ability to create workouts online and then download them to the unit. While you can do this manually on the unit in a pinch, that’s about as fun as draining the fluid out from under your toenails after that first marathon. Instead, doing it online takes way less time.
To do so you’ll go ahead and in the Dashboard create a new ‘Workout’. This will launch this wizard:

Once you’ve categorized and named the workout, you’ll move onto step 2, specifying the steps (yes, that’s kinda confusing). On this page you’ll start to add the individual steps:

Each step contains a target as well as a duration. The duration can be triggered by more than just time. Below are the options you’ve got, quite a few.

Then, you’ll continue to add steps to the workout until completion. You can add reps in there as well for repeating steps or sections.

The process works really well actually. The only downside is that you can’t re-arrange the steps on the left-side. So if you hose-up and forget a step, you pretty much have to delete everything back to that point. Further, I can’t find any way to edit the workout post-creation. Only view it. That’s a bit of a shame in that my workouts often have core elements that are similar, so a quick edit would be much easier than recreation.
Once you’re done, you’ll go ahead and click save. From there it’ll show up in your dashboard under workouts:

Next you’ll want to download it to your device. To do that you’ll click ‘Add to My Download List’ above, which then puts it into a bit of a shopping cart. From there, you’ll go to your download queue and tell it to push it to your device (which should be connected to your computer):

And just like that, workout downloaded:

With that, you’re ready to utilize the workout. To do so, you’ll dive through the menu’s: Train & Test > Cycling > My Workout > View > [Trainer Workout].

Once within the workout, you’ll see the target for that workout displayed:

Additionally, at the bottom you’ll see the time remaining for that step. Also on the top you’ll see the current step I’m on (2/5).

At 1 minute to go in a given step, the device will buzz and then at 30 seconds it’ll display instructions for the next step in a bit of a split-screen setup:

If you go above or below the target, the unit will alert you with arrows and a buzz:

Overall the workout function works quite well on the unit, and aside from some of the website pieces associated with it, I don’t have any complaints here.
GPS Accuracy:

The Cardio 60 is the first unit that I’ve tested that’s thrown my testing practices for a bit of a loop. Normally I’m able to simply start all the units at once – go for a run or a ride, and then stop them all at the end. In order to keep things straightforward from a test data standpoint, I don’t tend to bother to pause/resume the units while I’m out and about. So if I have to stop due to traffic/light/etc, I just let the timer run.
Except with the Cardio 60 I can’t do that. It will automatically pause when I stop or slow below a certain threshold, and then resume again when I speed up. This is commonly known as Auto Pause, and typically it’s something that you can enable/disable – but on the Cardio 60, you can’t do that. It’s always enabled.
This in turn has an interesting result – notably that it underestimates distances while running or cycling – at least in cases that may include any sort of quick turns, backtracking on one’s track, or similar activities. For example, on the below run, I never once stopped. It was an interval run, so that included some intervals – potentially some slow ‘I’m dying let me catch my breath’ walking – but not stopping. And you can see that it was notably below two other devices I was using to track:

And this was hardly the only time I saw this – even in cases where the times were pretty close.


The other challenge with this behavior is that it makes your runs appear faster than they really are, in terms of average pace. Since it pauses the time, that influences those averages. So even in cases where the distances match, the average paces won’t.
Now, when I get to cycling – it’s generally a much better story. As you can see here, after 25 miles, the two units are only .07 apart.

Again, look at the Garmin vs the Bryton (ignore the TomTom because it was just confused by the speed sensor wheelsize issues it has). And using the iPhone for distance is always a toss-up:

So while cycling isn’t bad, running definitely isn’t great. In some ways some of you may look at being .02 miles short each mile as not a bad thing, and that’s partially true. But what’s most apparent is that it’s always short, no matter what I put it up against. Which tells me it’s more of a systematic thing (and in this case, the issue is easily spotted as auto-pause).
But it’s not horrible either. And honestly, I think it’s really actually a fairly easy fix for them.
Unfortunately one can’t really argue that it’s showing me my true distance today – because that’s not the case. In actuality, it’s missing sections of my runs/rides where I’m below the non-changeable speed threshold, or where the GPS believes I am (such as on a switchback that may appear like I’m going much slower).
Moving onto GPS stability, in other words how stable the GPS pace is – the unit does much better there. I had no issues with GPS pace stability during my runs.
So overall from a GPS accuracy standpoint, it’s a tough nugget. I asked Bryton about the Auto Pause, and they said that today it isn’t changeable, but that down the road it could be. If that does change, then that helps things a bit – otherwise, the unit will almost always be short in distance.
Viewing history on watch:
The Cardio 60 includes a simple history feature to look back at past activities. You’ll access it through the aptly named “View History” function:

Within it you’ll see all your past activities, based on the activity date:

You can dive into a given activity, though it doesn’t offer all the level of detail that most units do (as far as per lap data, etc…). Rather, more just of a topline summary:

Obviously, as I’ll cover in a minute, most folks will be viewing the data online – which is where the real historical information comes out.
Using as a day to day watch:

The unit easily works as a day to day watch in non-GPS mode, staying on for weeks at a time. You can configure a single alarm on the unit within the settings:

You can also change the display of the watch face to be either digital or old-school analogue:

Also, you can configure the various date and display parameters based on your geographical preferences:


Backlight:
The unit includes a clean and crisp backlight that’s almost as clear as the Garmin FR910XT. Easily no problems at all reading it at night.

You can configure the backlight to turn-off automatically at a range of times from five seconds to two minutes, or, just stay on until manually turned off.

Uploading data from watch:

To upload data from the watch you’ll first need to connect the device using the USB cable as shown above. From there you have two options. The first involves downloading the Bryton Bridge software, which is a desktop client that connects to the device and then exports out the workouts. It also enables firmware updates of the device.

When the software works, it works well. It allows you to download multiple workouts and convert them into various file formats:

However, the ‘when it works’ part is key, as I often found, sometimes it just doesn’t work:

So instead, I’d just use the website uploader, which does the same thing except without having to install the software:

Once you click upload it’ll dig through your device and enumerate the files:

Here’s the list of files:

Now as you can see by looking at the exercise times, they quite frankly don’t make sense. I assure you – training for an ultra marathon I am not. Nonetheless, we’ll click Save and let it go about its business uploading:

Once that’s complete, the files are now available for viewing online, and simply clicking ‘View’ will take you there. Which, takes us to the next section.
Online Analysis via Bryton Website:
Once you go ahead and click on a given file it’ll open up that activity. Along the right side you’ll see summary information about that workout. In this case, the below workout was a bit of an interval workout I did in Seattle last week.
On the major portion of the screen you’ll see a map of your route, and then below that the graphs.

Below the graph you’ll see the different ANT+ metrics that were connected during that run (such as HR), as well as data like pace and altitude.

You can turn on or off a given metric by just clicking it:

You can also click on a section to get more details about it, though you can’t highlight a chunk of time and see just that portion. Only a single point in time.

Along the right there are a slew of summary stats. Some of them seem quite valid, but others seem semi-questionable. For example, in this run I somehow went downhill twice as long as uphill. Given it was an out and back workout, I’d sorta expect those to be the same. It also doesn’t hide non-applicable stats, such as temperature or power.


While the site has baseline functionality, I find it a bit cluttered and cumbersome. I’ve also found numerous errors, alerts, and pop-ups that don’t really make a lot of sense, nor are applicable. It’s like playing minesweeper sometimes. For example, while I can view lap summary information – I can’t actually view all of it, because it renders above the browser zoom line (Chrome):

If you’d like to look around at the site, here’s a link to a few workouts:
The Seattle Run
A long ride around Paris and Versailles
Versailles Triathlon
Openwater Swim
The good news is despite the somewhat clunky nature of the site, you can export the files out relatively easily. To do so, on every activity you’ll find the export option in the corner, which exports it to the common formats of PWX (Training Peaks), GPX (GPS sites the world around), BDX (Bryton’s own data format), and TCX (Old school Garmin files). TCX is most commonly supported for devices everywhere. Though it would be nice to see .FIT file exports added, as most modern apps now support that.

With our data exported, it’s time to check out 3rd party support.
3rd Party Support:
With the site (and in theory, the software), exporting out into the .TCX and .GPX file formats, you can pretty much upload to just about anything in theory. Of course, as I’ve learned, just about every company in the sports technology market seems to manage to mess up the file formatting in one way or another (yes, even Garmin). That said, things seem fairly good here from what I’ve seen thus far.
Here’s what I’ve tested and validated as good:
– TrainingPeaks
– Garmin Connect
– Strava
– Sport Tracks
And, for fun, for those developers in the crowd, here’s a pile of .TCX files that you can test yourself. These mirror the activities you see that I provided links to in the previous section (Swim, Bike, Run, and Multisport activity).
Data Fields:
Within the unit you can configure four data pages per sport (+ two lap pages), and four data screens per page. And within that, here’s the fields you’re able to configure:
(Note that the unit doesn’t actually display any categories within a sport, it’s just one big massive scrolling list – thus, I’m writing them out in the order they appear.)

Bugs and Notes:

As I’ve been doing with all reviews since earlier this spring, I’ve been now including a bugs section. These are bugs or oddities that I saw during my review. This section is meant to encapsulate items that I specifically saw. No doubt there are other bugs out there for the product, and no doubt, if you own the product you may have seen others. But since I didn’t see those, it’s not really fair to include them in this section. In the case of this product, since it’s already on the market, in some ways the bar is higher than for products that are still in some form of beta/pre-release situation.
Here’s what I ran into during my testing phase:
Non-English Text Appears: Odd non-English text randomly popped up in one of my data fields mid-ride. No clear reason why, or what it was supposed to be.

Incorrect Lap Values: I’ve seen issues with lap values being inverted, where the total activity time somehow gets inserted into the Lap 1 time, despite having additional laps without issue. Thus forever answering the question of how I fit 30 hours worth of stuff into a 24 hour day.
General website funkiness: There’s lots of little errors that I’d get across the site, as well as things that shouldn’t be shown as they aren’t applicable to my device. For example, you can tell it to send a previous workout to your watch, but that’ll fail since the watch doesn’t actually support it. Or showing power metrics for running workouts. Stuff like that.
Linguistic items: Ultimately, if I can’t figure out what a feature does by the name you’ve assigned it – that’s a problem. Assuming that “Run Meter” means ‘Data pages’ is a pretty big stretch. There’s numerous examples of this in almost every menu of the watch. They really need to hire a native English speaker and completely revamp the menus to make sense to an English speaker. I can’t speak for other languages if they are better or worse there.
Unable to download files: Sometimes I’d get errors when trying to download files from the watch to the computer. It wasn’t clear why errors would occur, or how to troubleshoot them beyond clicking OK (which wouldn’t work).

A Garmin Carbon Copy?

Bryton and Garmin have a long and notoriously messy history. Though you may think that Garmin feuds with companies the likes of Polar and Timex, in reality, it’s Bryton that most of their ire is directed at. Garmin accuses Bryton of infringing on patent work and otherwise making copies of their (Garmin’s) devices. In fact, more so than just accusations flying around – Garmin has taken Bryton to court over it. The resultant being that Bryton doesn’t sell products in the US. Instead the Taiwan-based company focuses on pretty much the rest of the world, with a distinct focus on Australia, South Africa, the UK, and portions of Asia.
I asked Bryton about why they don’t sell products in the US anymore, and they noted they were interested in finding the right US distributors for product launch. However, numerous others throughout the industry I’ve spoken to have put it more simply: It’s the only thing keeping Garmin from filing further lawsuits.
So I was curious then to the extent these accusations went from legal to reality. Keeping in mind that the accusations span a number of previous products. But for the sake of this, I’ll just compare the Garmin FR910XT to the Bryton Cardio 60 to see where things stand today.
Looking at the devices from the front (above), there’s no doubt that the Cardio 60 looks pretty similar. However, in looking at it from the side, it’s actually a fair bit thinner. And in fact, a fair bit lighter.

Next, if we talk menus and functionality – I’d hardly go as far as saying anything there is a copy. Mostly because the Garmin menus are mostly logical, whereas the Bryton menus aren’t quite as flowing. And there’s virtually no similarity there from a structure standpoint.

If we look at other features, there’s very little between the two units that doesn’t exist in virtually every other device on the market. Perhaps that means that other devices have copied Garmin’s, or perhaps it means that at this point things are just pretty much the norm.
On the Garmin FR910XT (or even the FR310XT) for example, there’s plenty of categories that the Bryton doesn’t even touch. For example, power meters, outdoor swimming, Virtual Racer and related, and more settings and options than you can shake a stick at.
Now about the only area where it’s clear that Bryton has blatantly copied Garmin is in their marketing. You may remember this series of ads that played over the past few years from Garmin (be sure to listen to the music on both):
Then, this ad that came out afterwards from Bryton:
Or this one (embedding not permitted).
It’s so similar that all you can really do is laugh. And no doubt, the boxes and even internal packaging design do look pretty darn similar. The same cutout, preview window shape, and all.
But the devices themselves? For better or worse…not so much.
Thoughts on competitive offerings:
Ultimately, many folks look at the Bryton units as a refuge from the higher priced offerings from companies like Garmin, Suunto, Polar and Timex. In evaluating at the integrated-GPS triathlon market, the two main competitors with similar feature-sets, that’s really the Garmin FR910XT, Suunto Ambit 2/2s – and on the lower end, the TomTom Multisport.
So how does the Cardio 60 compare to those?
Well, in the most cut to the chase method possible: You kinda get what you pay for.
Which isn’t to say that the Cardio 60 is sub-par, in fact, far from it. But, there are certainly a number of little quirks, oddities and lack of polish – and at about $300US it puts it in a tough spot (it’s not offered in the US, but that’s the best price I could find for it). And in the case of the website state, lots of little bugs. Whether or not those specific things matter is up to each individual. However, there’s also lots of neat little features that make it unique (such as included stride sensor, last 1KM-style pace information, etc…).
At the various price points, the TomTom is really a very viable competitive unit to the Bryton. But as I often note, the Garmin FR310XT, albeit slightly older, is far more feature-filled, and just as cheap these days sub-$200. Thus again making it a personal decision on which features you find most valuable. For example, if you want power meter support – go for the FR310XT. If you want indoor swimming and don’t care about ANT+, check out the TomTom. If you want fairly accurate outdoor swimming metrics, the Cardio is a good bet.
It’s always difficult to give folks exact advice on which unit to get or not get, which is why I try and give you as much information as possible. Different features matter more to one person or the next. Thus, here’s a big old comparison chart to help you figure it out:
Copyright DC Rainmaker – Updated May 19th, 2017 @ 6:13 pmNew Window
Price$300$249$369$149-$299 (Features Vary)$219
Product Announcement DateJan 2013Mar 14th, 2017Sept 7th, 2016Sept 1st, 2016May 16th, 2016
Actual Availability/Shipping DateMar 2013Mar 14th, 2017Sept 16th, 2016Sept 8th, 2016Expected June 2016
GPS Recording FunctionalityYesYesYesYesYes
Data TransferUSBBluetooth Smart, WiFi, USBBluetooth SmartUSB/Bluetooth SmartBluetooth Smart, USB
Waterproofing30mIPX750m50m50m
Battery Life (GPS)16hrs GPS on (28 days in standby)15 hours5hrs GPS on time (24-48hrs standby)Up to 11 hours (varies)8 hours
Recording Interval4s1-secondVaries1sSmart Recording
Satellite Pre-Loading via ComputerYesYesYes3 daysYes
Quick Satellite ReceptionExcellentYesGreatYesYes
AlertsVibrate/Sound/VisualSound/Visual/LED’sVibration/Audio/VisualVIBRATE/SOUND/VISUALVibration/Visual
Backlight GreatnessGreatGreatGreatGreatOK
Ability to download custom apps to unit/deviceNoNoYesNoNo
Acts as daily activity monitor (steps, etc…)NoYesYesYes
Can control phone musicNoYesNoYes
Has music storage and playbackNoYesYesNo
Bluetooth Legacy (pre-4.0) to PhoneNoNoNoNoNo
Bluetooth Smart (4.0+) to Phone UploadingNoYesYesYesYes
Phone Notifications to unit (i.e. texts/calls/etc…)YesYesYesYes
Live Tracking (streaming location to website)NoYesNoNo
Group trackingYesNoNo
Emergency/SOS Message Notification (from watch to contacts)NoNoNoNo
Built-in cellular chip (no phone required)NoNoNoNo
Designed for cyclingYesYesSortaYesNo
Power Meter CapableNoYesNoNoNo
Power Meter Configuration/Calibration OptionsN/AYesN/AN/ANO
Power Meter TSS/NP/IFN/AYesN/AN/ANo
Speed/Cadence Sensor CapableYesYesN/AYesNo
Strava segments live on deviceYesWith Strava appNoNo
Crash detectionNoNoNo
Designed for runningYesNoYesyesYes
Footpod Capable (For treadmills)Internal accelerometerN/ANo (can use accellerometer though)No (Can use internal accelerometer)No (uses internal accelerometer)
Running Dynamics (vertical oscillation, ground contact time, etc…)NoN/ANoNoNo
VO2Max EstimationNoN/ANonONo
Race PredictorNoN/AnonONo
Recovery AdvisorNoN/ANononO
Run/Walk ModeNoN/ANonoYes
Designed for swimmingYesNoYesYesNo
Openwater swimming modeYesN/AYesNoNo
Lap/Indoor Distance TrackingNoN/AYesNoN/A
Record HR underwaterNoN/AYesNO (NOT ENABLED IN SWIM MODE)N/A
Openwater Metrics (Stroke/etc.)NoN/ABasic stryoke type onlyNoN/A
Indoor Metrics (Stroke/etc.)NoN/ABasic stryoke type onlyYesN/A
Indoor Drill ModeN/AN/ANoNoN/A
Indoor auto-pause featureN/AN/ANoNoN/A
Change pool sizeN/AN/AYes15m-50mN/A
Indoor Min/Max Pool LengthsN/AN/A1y/m to 1,500y/m+YesN/A
Ability to customize data fieldsYesN/AVery limitedYesN/A
Can change yards to metersN/AN/AYesYesN/A
Captures per length data – indoorsN/AN/ANoYesN/A
Indoor AlertsN/AN/AYes (goals)Goals OnlyN/A
Designed for triathlonYesNoNoSortaNo
Multisport modeYesN/ANoNoNo
Create/Follow custom workoutsYesPlanned Fall 2017NoNoNo
On-unit interval FeatureYesNoNoYesNo
Training Calendar FunctionalityNoNoNoNoNo
Auto Start/StopYes (but can’t turn off)YesYesNoYes
Virtual Partner FeatureNoNoNoYesHas Virtual Pacer
Virtual Racer FeatureNoNoNoYesNo
Records PR’s – Personal Records (diff than history)NoNoYesNoNo
Day to day watch abilityYesNoYesYesYes
Hunting/Fishing/Ocean DataNoNoNoNoNo
Tidal Tables (Tide Information)NoNoNoNo
Jumpmaster mode (Parachuting)NoNoNoNo
GeocachingNoNoNoNoNo
Weather Display (live data)NoNoYesNoYes
Follow GPS Track (Courses/Waypoints)NoYesNoYesNo
Markers/Waypoint DirectionNoNoNoSortaNo
Routable/Visual Maps (like car GPS)NoYesNoNoNo
Back to startNoYesNoYesNo
Impromptu Round Trip Route CreationNoNoNoNoNo
Download courses/routes from phone to unitNoYesNoNoNo
Altimeter TypeNoneBarometricBarometric altimeterDepends on modelBarometric
Compass TypeNoneMagneticN/ADepends on modelN/A
Optical Heart Rate Sensor internallyNoYesYesYes
Heart Rate Strap CompatibleYesYesYesYesNo
ANT+ Heart Rate Strap CapableYesYesNoNoNo
ANT+ Speed/Cadence CapableYesYesNoNoNo
ANT+ Footpod CapableNo, Internal accelerometerNoNoNoNo
ANT+ Power Meter CapableNoYesNoNoNo
ANT+ Weight Scale CapableNoNoNoNoNo
ANT+ Fitness Equipment (Gym)NoNoNoNoNo
ANT+ Lighting ControlNoNoNoNo
ANT+ Bike Radar IntegrationNoNoNoNo
ANT+ Trainer Control (FE-C)KICKR/KICKR Snap Only (FE-C Fall 2017)NoNoNo
ANT+ Remote ControlNoNoNoNoNo
ANT+ eBike CompatibilityNoNoNoNoNo
ANT+ Muscle Oxygen (i.e. Moxy/BSX)YesNoNoNo
ANT+ Gear Shifting (i.e. SRAM ETAP)YesNoNoNo
Shimano Di2 ShiftingYesNoNoNo
Bluetooth Smart HR Strap CapableNoYesYesYesNo
Bluetooth Smart Speed/Cadence CapableNoYesNoYesNo
Bluetooth Smart Footpod CapableNoYEsNoNo, has internal accelerometerNo
Bluetooth Smart Power Meter CapableNoYesNoNoNo
Temp Recording (internal sensor)NoYesNoNo-
Temp Recording (external sensor)NoNoNoNoNo
Compatible with Firstbeat HR tools-NoNoNo
PC ApplicationBryton BridgeN/ANoneMySports ConnectGarmin Express
Web ApplicationBryton MySportN/ANoneTomTom MySportsGarmin Connect
Phone AppN/AiOS/AndroidiOSiOS/AndroidiOS/Android/Windows Phone
Ability to Export SettingsNoNoNoNoNo
Amazon LinkN/AN/AN/ALinkLink
Clever Training – Save a bunch with Clever Training VIP programN/ALinkN/ALinkLink
Review LinkLinkLinkLinkLinkLink
Remember to click the ‘Expand Results’ button as it’ll show a gazillion more rows than the quick preview above. Or, you can mix and match your own comparison table here with products that are of interest to you.
Summary:

The Cardio 60 is an interesting little unit, no doubt. Ignoring some of the linguistic items within the device, the unit itself is actually fairly solid. It’s got great data fields and good customization. The unit is accurate within the bounds of the Auto Pause that holds it back. And on swimming, it does quite well. The issues I have with it are really all related to software – primarily on the website and the device uploader. With the issues I have on the unit itself, they tend to be related software decisions that can be relatively addressed (and the company has shown extreme willingness to address issues I’ve brought up in future updates).
From a price standpoint, as I noted above, it’s in a tricky spot. Tricky in two ways. First is that it’s actually really hard for me to compare prices since they don’t market in the US, and each market they do sell in prices them somewhat differently. That said, using some of the lower prices I could find and converting them into USD, I offer the following: Sitting $100+ more than the Garmin FR310XT these days isn’t a place you want to be unless you’ve got something additional – such as indoor swimming. Which this doesn’t (and also doesn’t have power meter metrics). And lack of North American availability is also a tough pill to swallow. That said, in certain markets the Cardio 60 may be priced equal to or lower than the FR310XT – in which case you should absolutely take a look at it and balance out the items I’ve noted in the review with your requirements. Without a baseline of prices to work from it’s hard for me to make absolute recommendations.
It should be noted that I can’t make any comments one way or the other on (tech/product) support from Bryton. I know from reading the interwebs that people have had varied experiences – mostly dependent on which country you were in. I brought that up to Bryton and they acknowledged that certain countries have had a rough go, but that they were working to align those. The challenge as it stands today is that everything is mostly handled at the distributor level, rather than the company (Bryton) level. Generally speaking that doesn’t work in the technology world.
I’m optimistic that we’ll see some good work out of Bryton in improving the software and firmware though, and I’m looking forward to seeing what device they’ll introduce down the line that might close some of the competitive gaps.
With that, thanks for reading! And as always, feel free to drop questions or comments below and I’d be happy to try and get them answered.