Polar Look Keo Power System–Pedal Based Power Meter–In-Depth Review
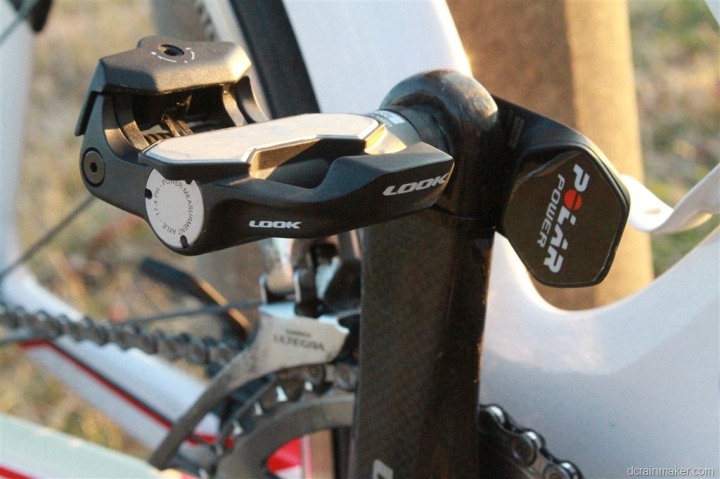
The Polar Look Keo Power System is the first pedal based power meter to make it to market, meaning, you can actually go out and buy one. Announced nearly two years ago, the units finally started trickling out into the marketplace over the past few months.
Polar sent out a unit back in the spring for me to check out and evaluate. Since then, I’ve been moving it between my bikes and giving it quite the workout. In doing so, I’ve got a pretty good grasp on how the unit works and where it succeeds as well as falters. The question is, does it justify the high price – and, are pedal based power meters the future? Well, stick around to find out.
Because I want to be transparent about my reviews, as I mentioned above Polar sent me this pedals and head unit as a trial unit. Once that period elapsed, I sent the whole beaten and broken box back to the folks in New York (went back on Monday). Simple as that. Sorta like hiking in wilderness trails – leave only footprints. If you find my review useful, you can use any of the Amazon links from this page to help support future reviews.
Lastly, at the end of the day keep in mind I’m just like any other regular triathlete out there. I write these reviews because I’m inherently a curious person with a technology background (my day job), and thus I try and be as complete as I can. But, if I’ve missed something or if you spot something that doesn’t quite jive – just let me know and I’ll be happy to get it all sorted out. Also, because the technology world constantly changes, I try and go back and update these reviews as new features and functionality are added – or if bugs are fixed.
Unboxing:
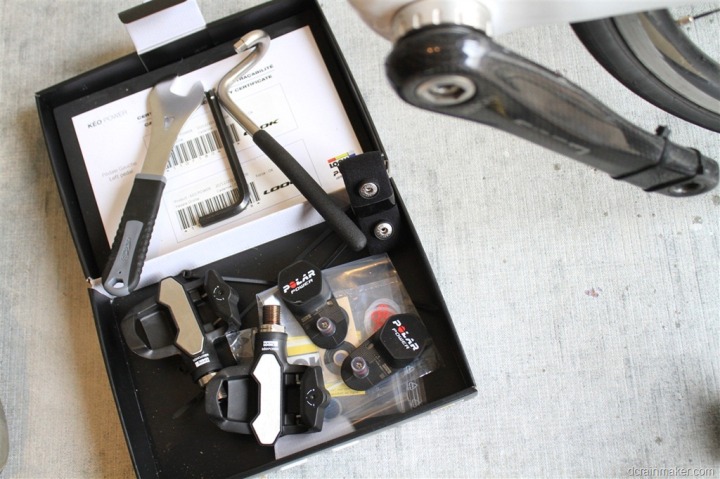
First up, the outside of the box. Size-wise, it’s like someone took a shoe box and sat on it. Roughly the same length, and a touch bit wider, but way thinner.
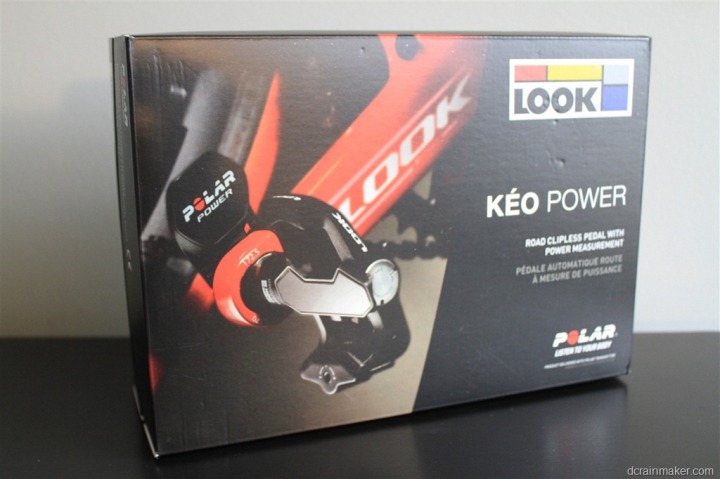
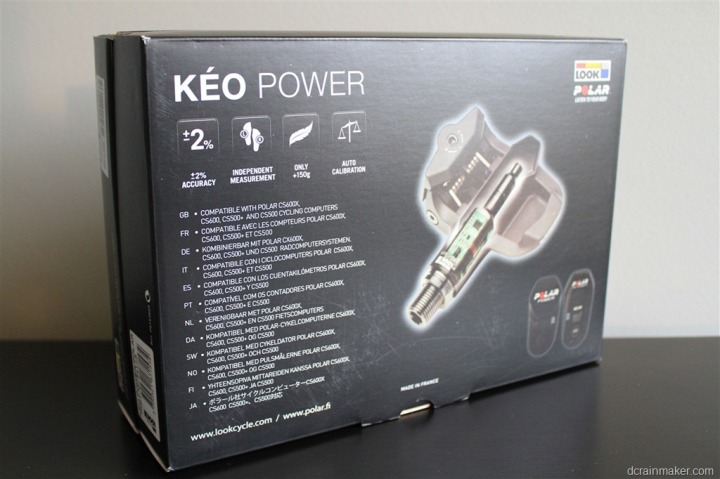
When you crack it open, you’ll find a two level apartment. The upper level shows off the expensive parts, and the lower internal level is where the cheap stuff is (tools, manual, spare parts, etc…).
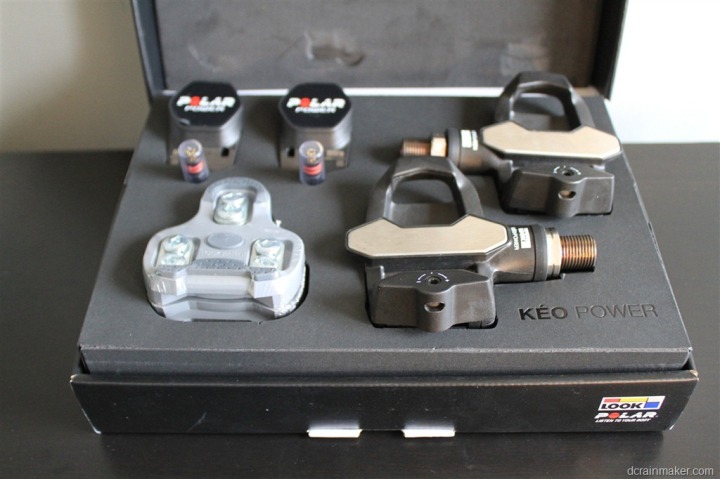
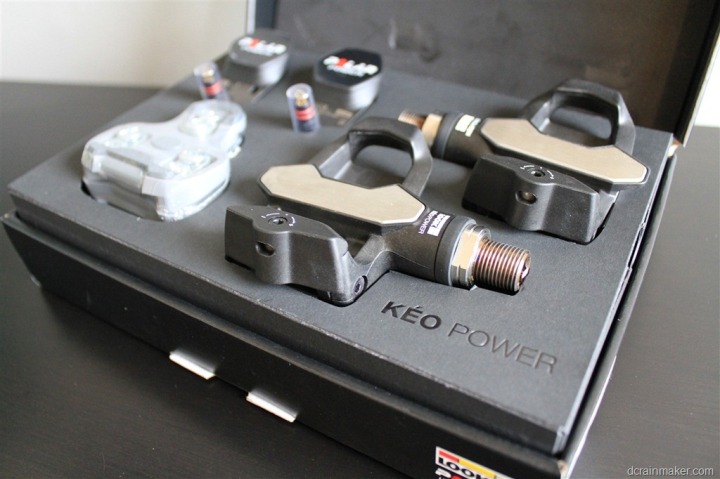
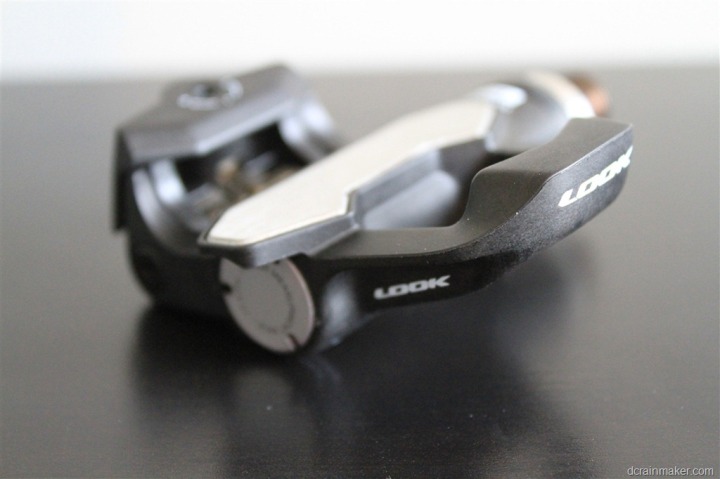
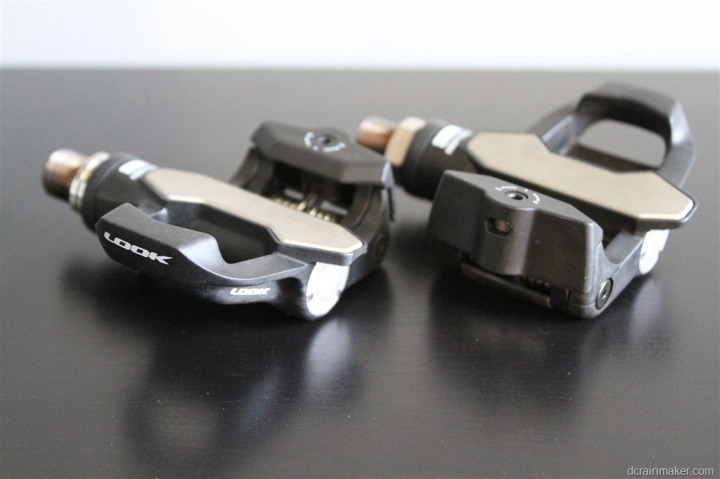
First up – the most critical and expensive piece, the pedals themselves:
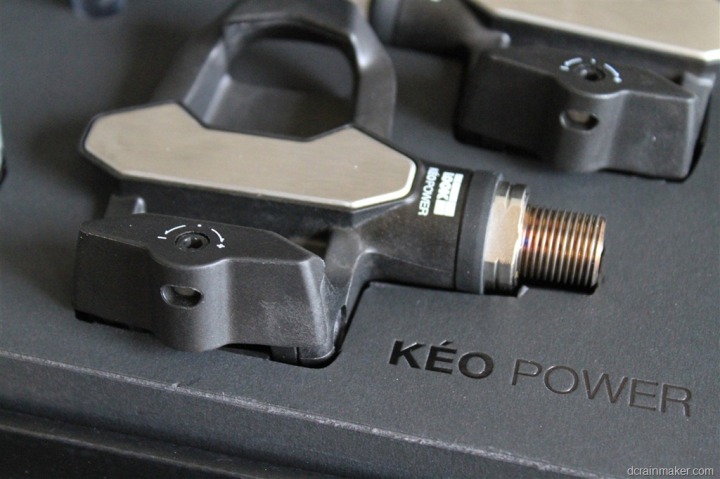
Obviously, there are two pedals. One for the left side, and one for the right side.
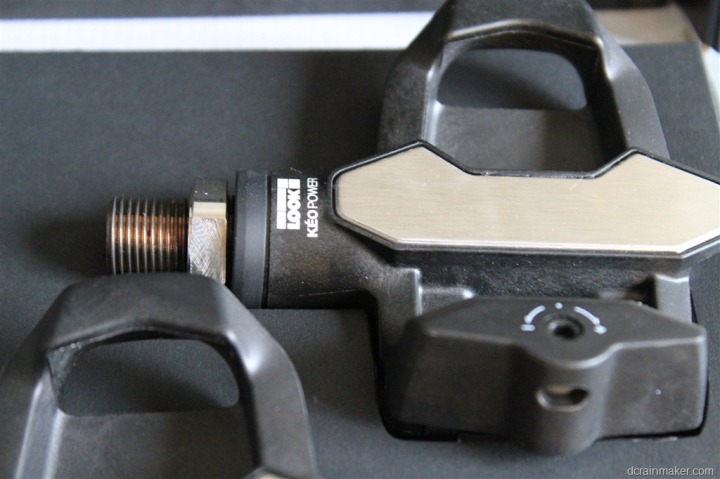
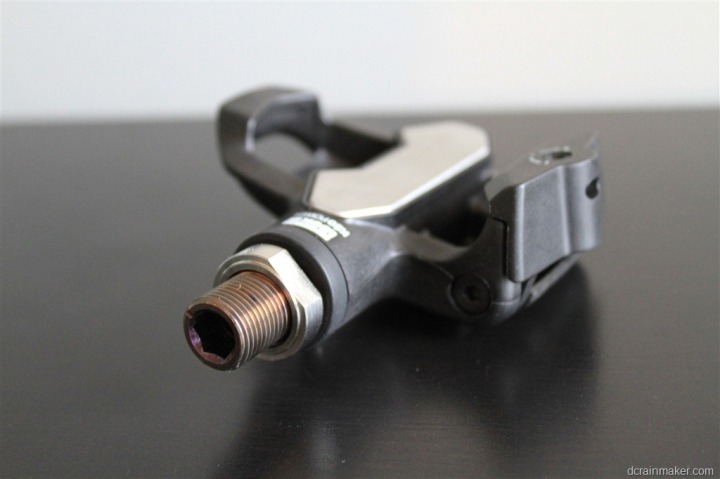
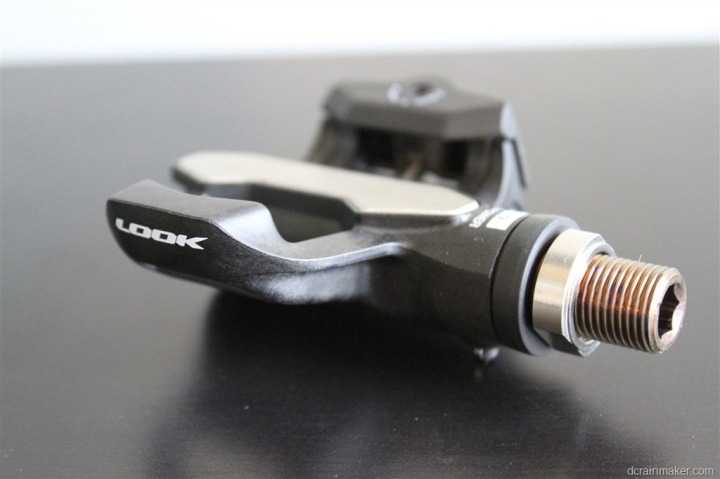
Then we’ve got the transmitter pods. These connect through the pedal mounting hole in your crank arm to the pedal, and then transfer data via the small pins you see. Ultimately this data is then transmitted wirelessly between the two pods and up to the head unit.
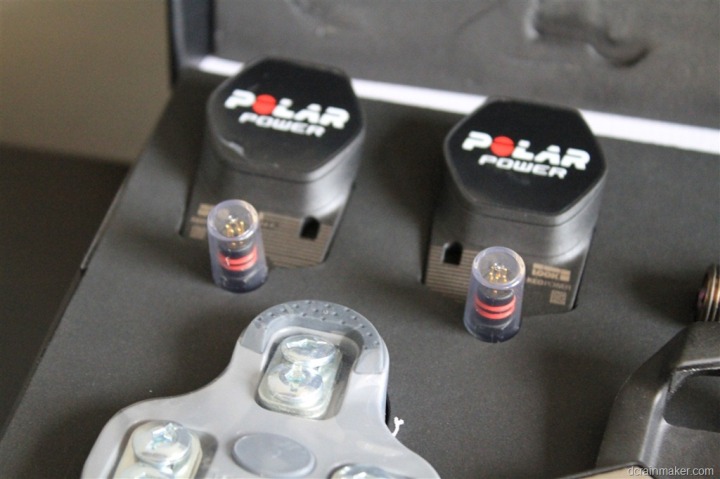
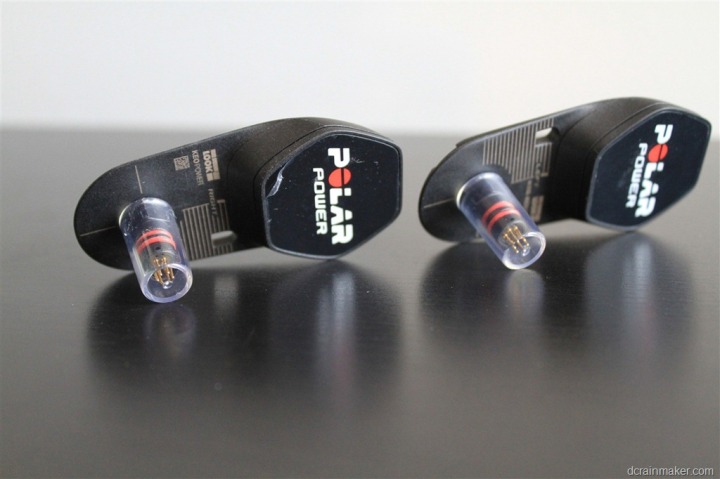
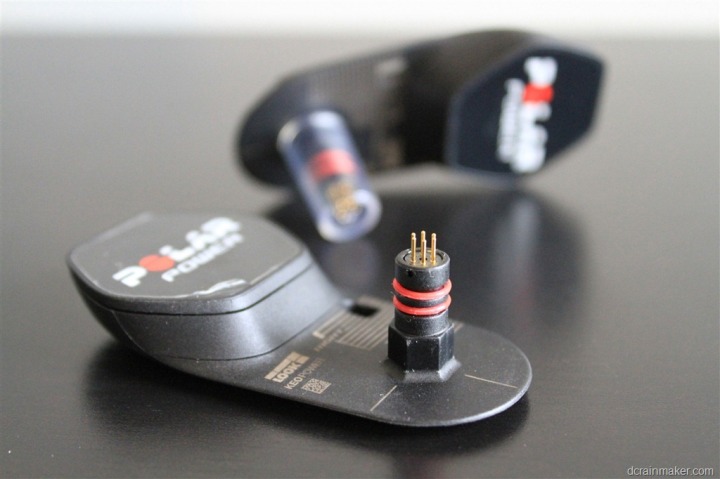
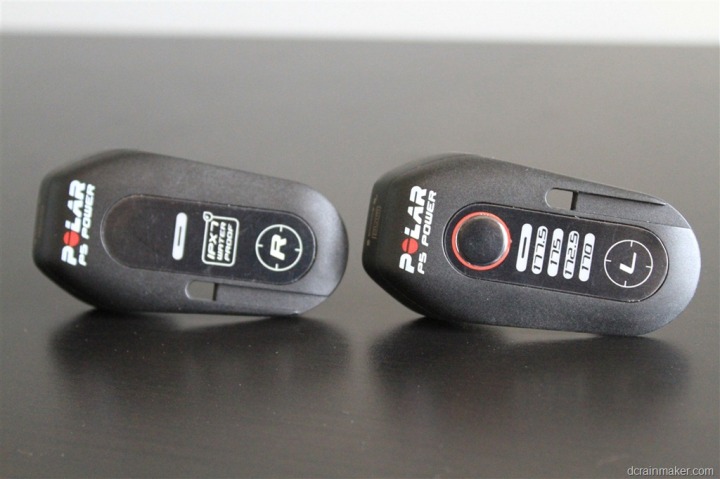
As you can see, there are designated left and right pods. This would be differentiated by the big ‘L’ and ‘R’. The left pod is the master pod, and the one that you specify crank length on. It’s also the one that transmits to the head unit. Only the left pod has a button on it, the right pod does not. Both have battery compartments though.
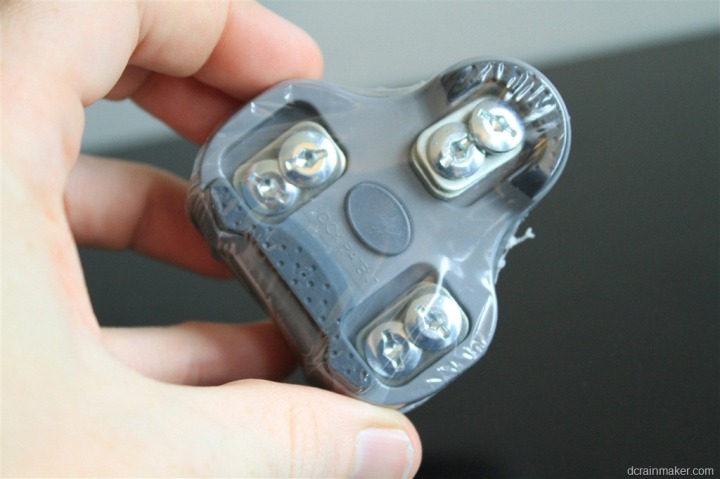
Next up are the Look Keo cleats. If you’ve already got Look Keo cleats on there, there’s no need to use these.
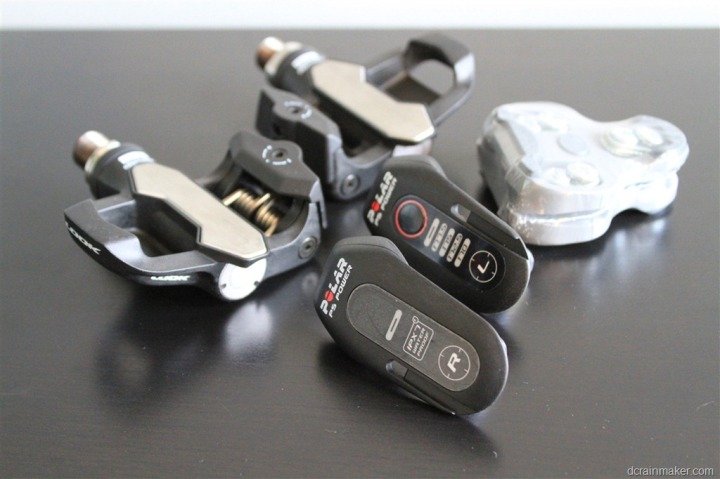
Here’s one last shot of all the important goods:
Hidden in the lower compartment of the box is the manual and the tools to install the power system:
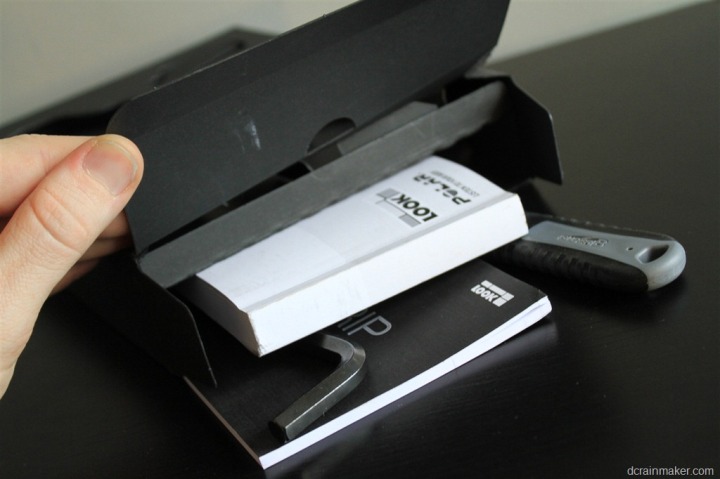
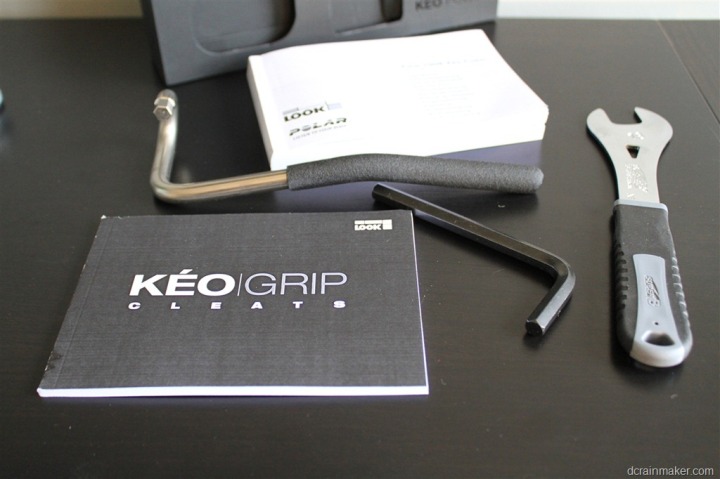
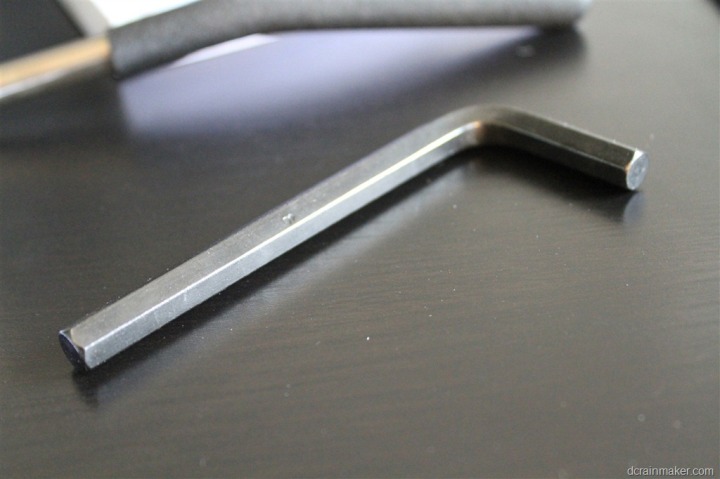
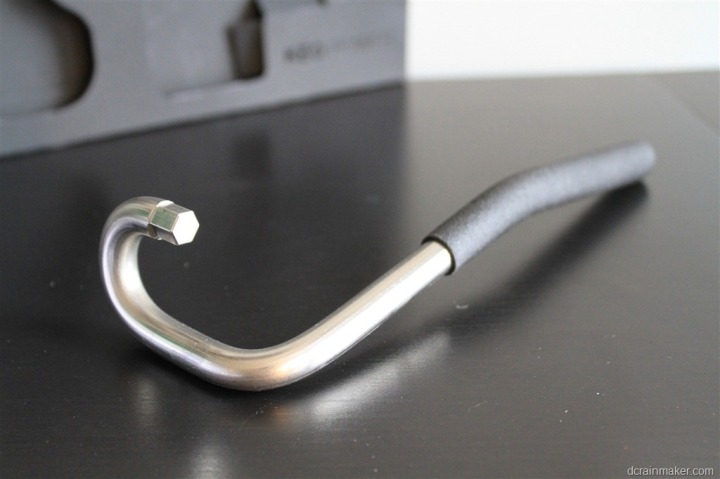
There are three tools, one of them fairly unique. The first not-so-unique one is a hex wrench, which simply fits into the backside of the pedal to tighten/loosen it.
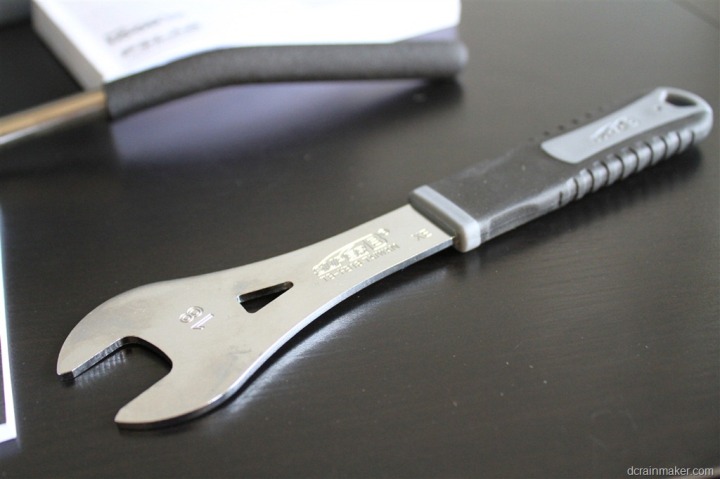
Then we’ve got a small pedal wrench. You’ll use this with either of the two other tools to apply pressure and lock the pedal in place.
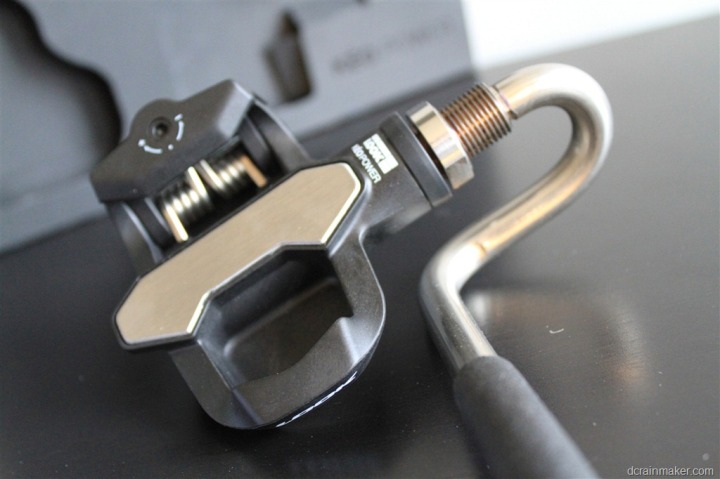
And finally, the strange looking tool. This is also a hex wrench, but it’s designed so that you can align it with the crank arm to try and get the perfect fit. I’ll talk more about this later. While it’s a semi-useful tool, I can think of some much better designs that would accomplish the job with less confusion and more accuracy.
You can see below how it fits into the pedal – but we’ll talk more about how you really use to line things up.
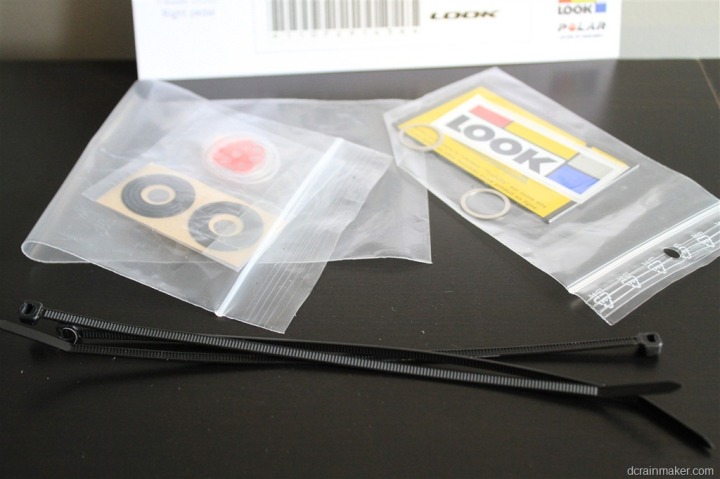
In order to complete the installation, you’ll need a few baggies of small parts, which include o-rings and spacers. You probably won’t use them all, and there’s some spares in there.
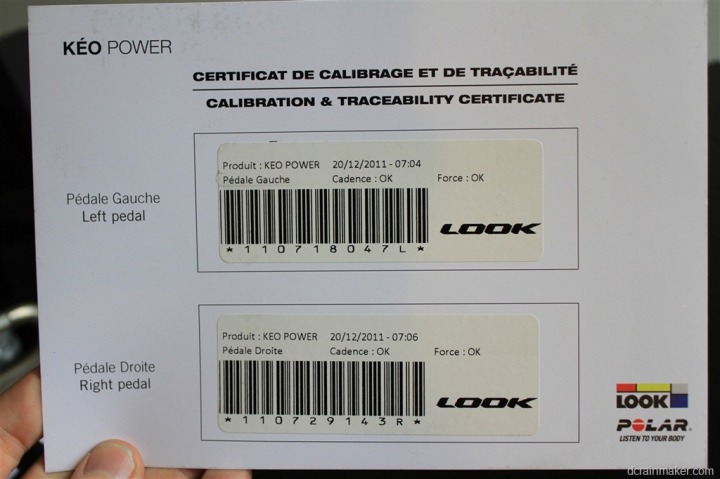
Last but not least on the power meter side is the calibration certificate. At present, this isn’t terribly useful to be honest. Though Look has talked in the past about adding more calibration information.
Finally, in the event you also picked up a CS600X, here’s a quick unboxing photo or two from that. Since that unit isn’t really the focus of this review (except as applicable to power measurement, which I’ll dive into later), I’m going to keep it to just a handful of photos.
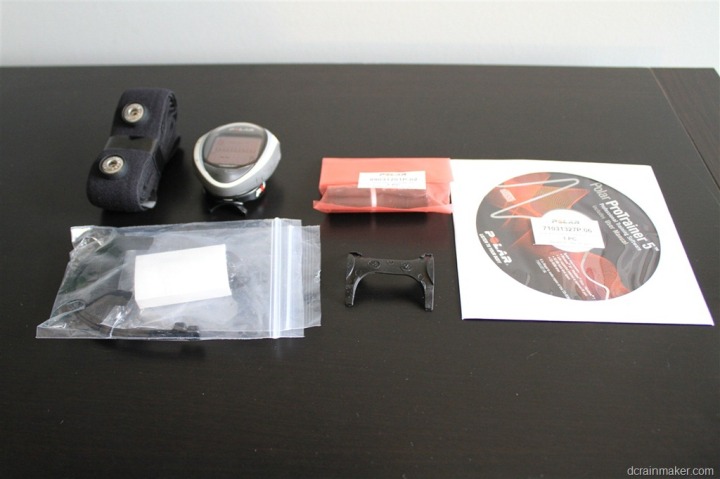
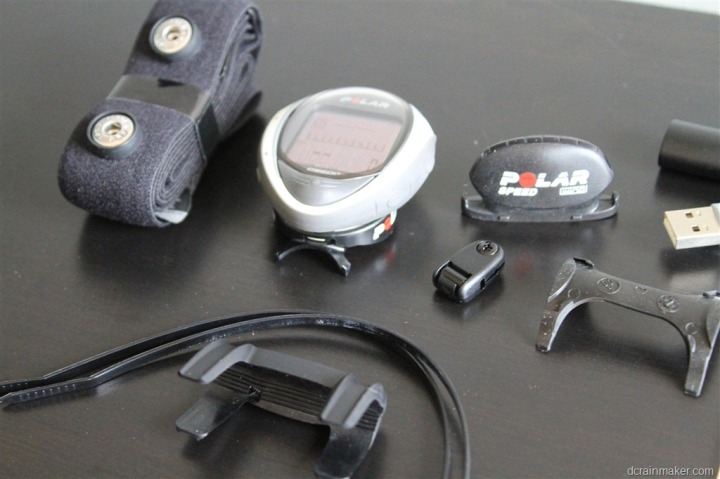
As you can see above, there’s a heart rate strap, a CS600X attached to the mount. Then a WIND speed sensor, as well as a couple of mounts for that, and then finally, just sneaking out of frame on the right side of the lower photo is the IrDA USB stick to wireless transmit your workout data to your computer.
Battery:
I just wanted to briefly call out that the Polar power system uses two CR2354 batteries, one in each pod. They are easily accessible by just twisting the cap of the transmitter pod about 20*. The cap then pops off, and you can pry out the battery.
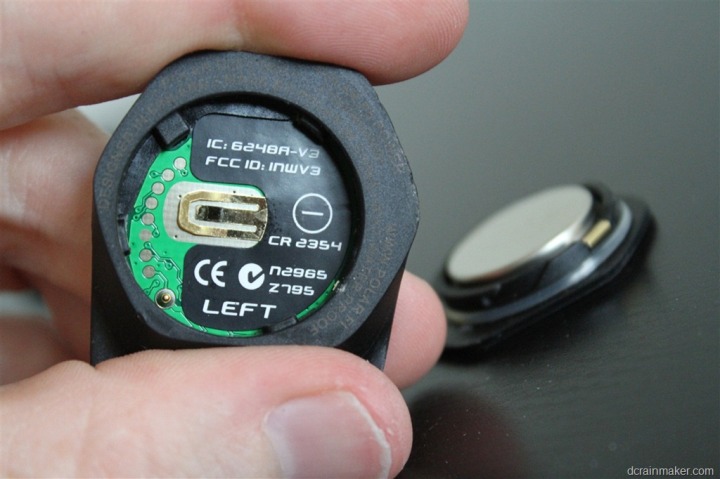
One tiny item to beware of though is to ensure you’ve locked the cap back in place on the pedal pod – otherwise it could fall off, and outside, that would suck a lot.
Installation:
I’m become really good at installing the Polar power system. However, that doesn’t mean it’s entirely easy, nor quick. It’s like flipping pizza dough in the air – it just takes a lot of practice.
Installing the pedals requires the three tools included in the box. Though ‘requires’ is a bit of a strong word. You can get by without them, and in fact, I found that over time I could actually install it faster and with more accuracy than with them. Nonetheless, here’s the tools at hand:
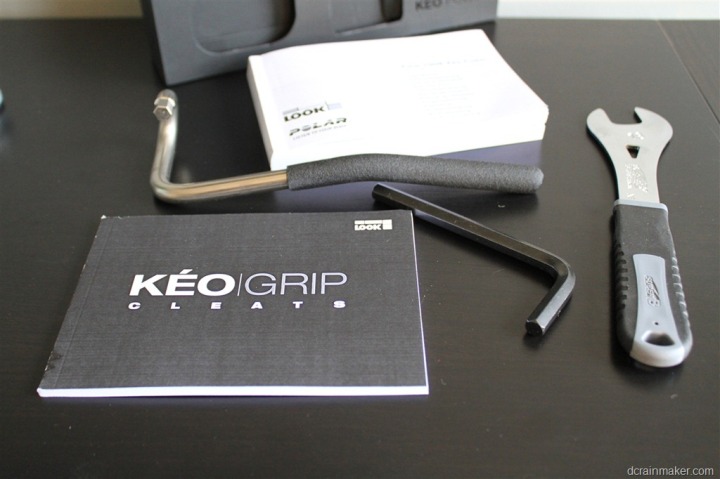
As noted earlier, you’ve got a beastly hex wrench, a twirly-twisted hex wrench, and a pedal wrench. The installation and removal of the pedals will require the simultaneous use of two of these tools at all times.
First though, deal with getting your cleats on your shoes (if changing cleat types). I recommend this first for two reasons. One, if you have issues with getting the cleats on/off your shoes, at least you can stop before you disassemble your bike setup and spend time on it. And secondly, it gives you a chance to ‘warm-up’ before the main game.
As far as putting the cleats on, I won’t bore you with detail here. It’s fairly straight forward. You unscrew some screws on your old cleats, and screw the new screws and cleats in. No manual required.
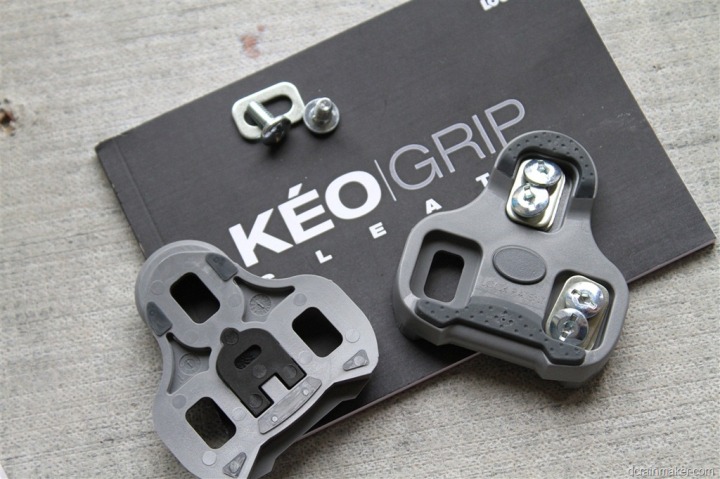
Once you have that settled, it’s time to get cooking on the pedals themselves. Budget an hour for your first attempt. If you get it done in less time, go get an ice cream cone or something. Oh, and secondly, you’re going to likely want to do this on a trainer, so you can not only have the bike in a stable location – but also test it out easily afterwards.
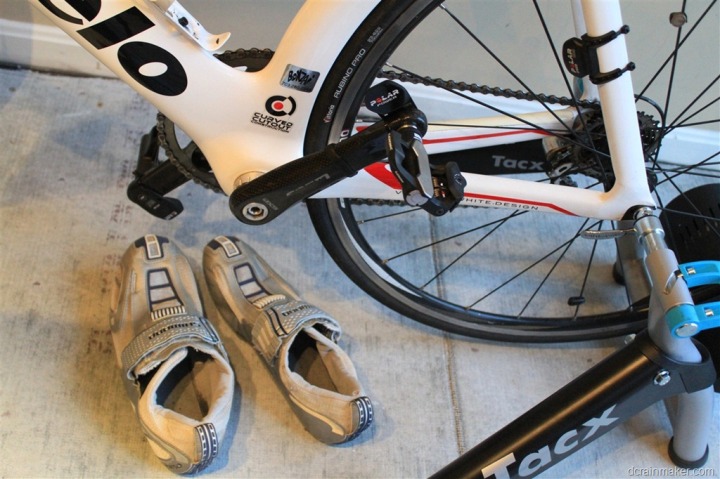
With that, first we’ll start with getting the pedals on. For the most part, this piece is fairly normal. You’ll simply insert them into the crank arm thread and then work your way in.
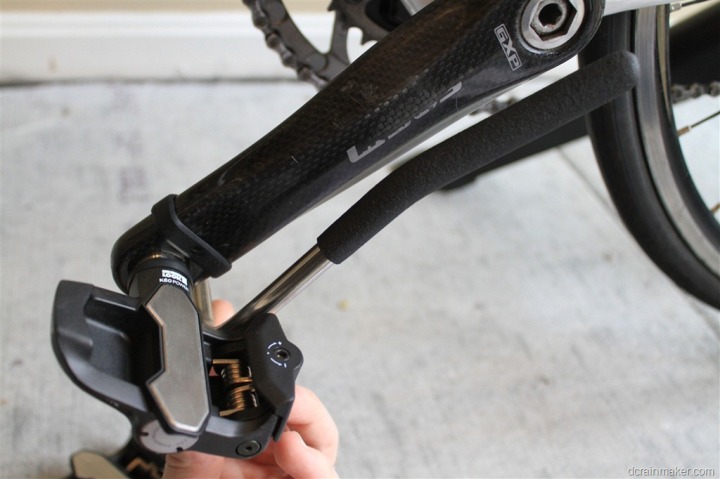
The one catch is that the pedal axle needs to ultimately be flush (or pretty close to flush) with the back of the crank arm. Meaning it can’t be sticking out a bunch. See below how it’s roughly flush along the backside.
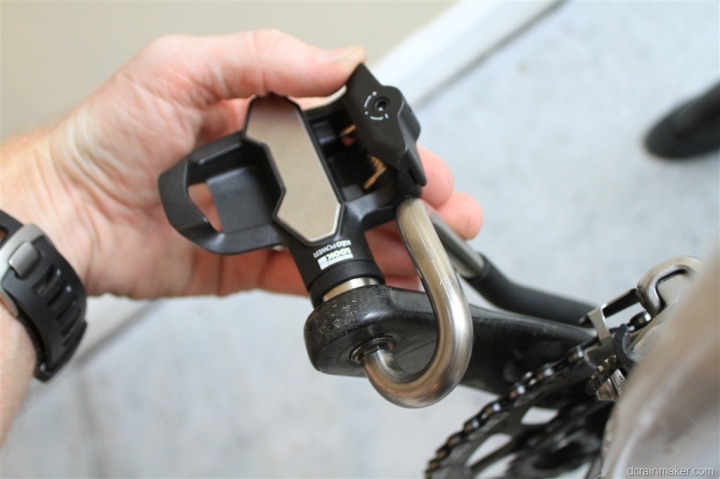
Now you see how I’ve got the funky wrench in there. Notice how that wrench is aligned with the crank arm. This is supposed to allow you to line things up evenly. In reality, it can sometimes cause more confusion. At the end of the day, only three things matter:
1) You must have the little notch at the end of the pedal axle pointed FORWARD and level
2) You must have the pedals be tight (using both the funky hex wrench and the pedal wrench)
3) You must have the pedal axle not extend beyond the crank arm’s back (there are spacers to help here).
On #1 above, the notch I’m referring to is visible as you rotate the pedal axle in (see below at 3PM position). This has to be level and point forward on the bike, at the 3PM or 9AM position (if looked at from the other side of your bike):
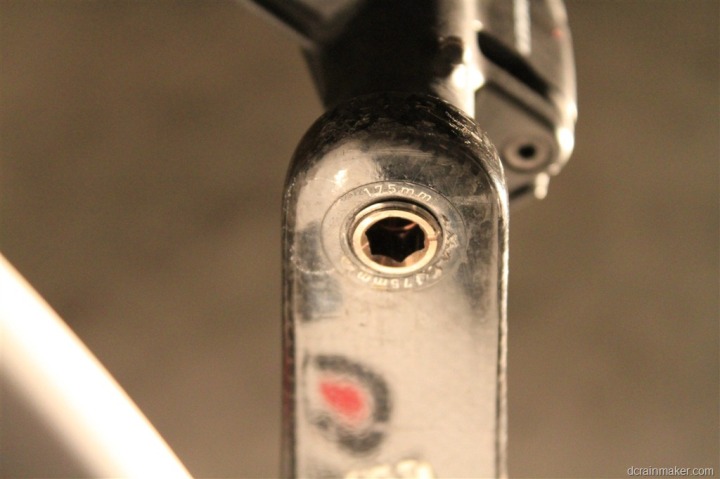
It has been said by others that if this is off by even a few degrees, it’ll affect calibration of the unit. I can say that if it’s off substantially, the unit will simply error out and will give you error lights.
The above sounds easy on paper, but getting it right with all the spacers involved becomes a huge pita. Over time you’ll get really good at it. But initially it’ll take you a while, especially the first time on a given bike which may have different crank arm width requirements. I recommend doing one pedal at a time (fully), and then tackling the next one.
Once that’s all set, it’s time to add the pedal pods. Now you’ll notice there are two pods. They say left and right, but more importantly, they have a correct orientation. If not put on correctly, they will error out.
But here’s a trick to figuring out which way they go: The little channel where the zip tie goes will ALWAYS be on the inside of the crank arm (closest to your bottom bracket). If it were on the outer edge, it’d simply fall off over time, and that’d suck. See below (before zip tie) how the channel in the pedal pod is on the right side.
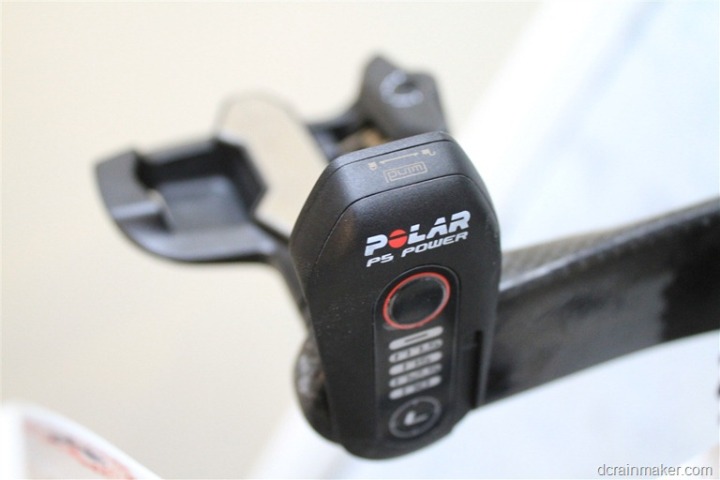
Note that if the pod doesn’t go in smoothly, it means that something is amiss. First validate that the pedal axle is flush against the crank arm. Then validate that the notch is correctly aligned. And then validate that the pod is on the correct side, and in the correct orientation. The pedal pod is designed so that it fits well one way (the correct way), and not so well other ways (the incorrect way).
Now, we’ll go ahead and add the zip tie. It’s really important that the zip tie be really tight. If not you may get dropouts later on.
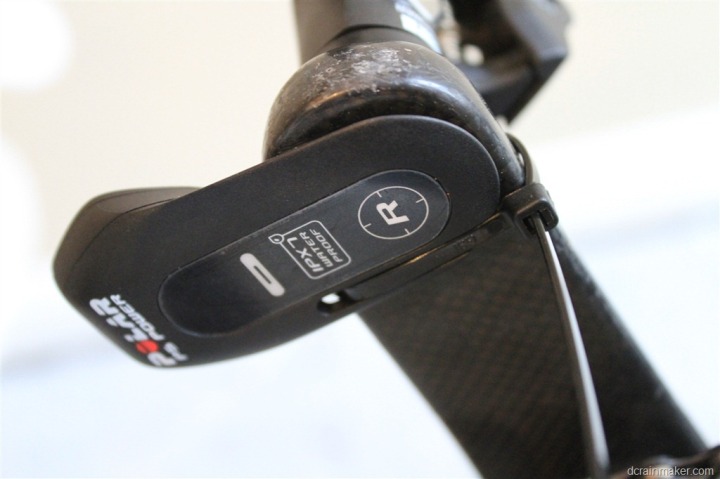
Then simply repeat this process for the other side. The last and final step is to pair the unit together on the head unit, and specify the settings used within the manual for each supported bike computer. Because the older Polar head units don’t know anything about the left/right Keo system, you’re actually faking the older Polar chain based system – hence why some of the values don’t quite seem to align to a pedal based system (like chain width and length).
Calibration:
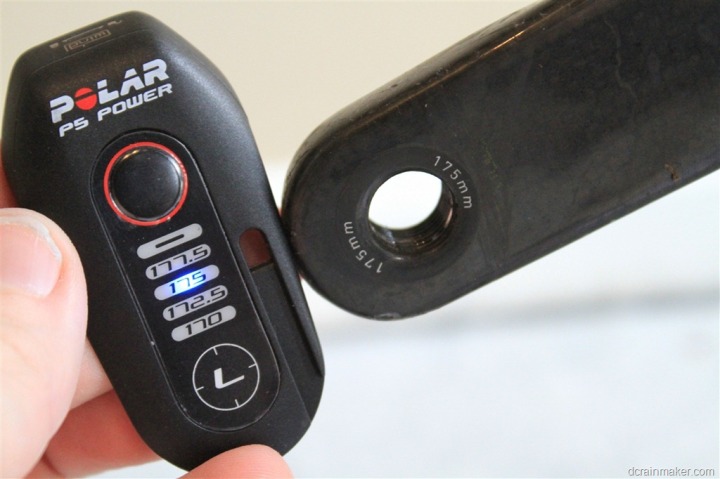
I wanted to call this category out specifically, despite the fact that there’s really nothing to call out. The Polar power system does not support any end-user driven calibration options or parameters. There exists only one on unit configuration option, which is specifying the crank arm length. This is done through the button that’s located on the left pedal pod.
The supported crank width/length/height limitations are as follows:
Crank Lengths Supported: 177.5mm, 177mm, 172.5mm, 170mm
Crank Width Maximum: 16mm
Crank Height Maximum: None
You only need to specify the crank length however, via the little button, which will illuminate your selection and save it from there on out. Once you’ve set it once, you’re good to go for life:
Calibration and system validation occurs each time power on the unit, at which point the unit will validate all parts are reachable, and at least connected. Additionally, you shouldn’t be spinning the cranks, as it does a very basic calibration here. Ideally this is done prior to stepping on the bike. Note that if you do add movement to the bike during the calibration procedure, and it accepts the calibration – you can get odd data (thus graphs) like the below, showing how the balance is incorrect (see how the orange is completely off balance):
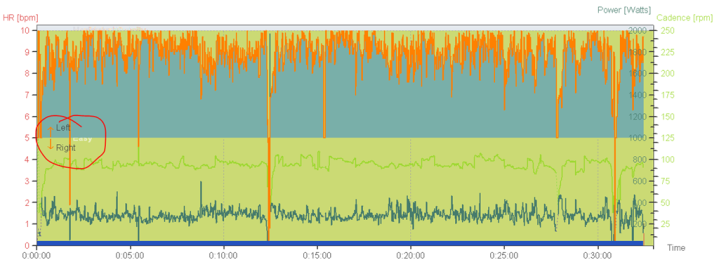
But again, there is no method to validate the calibration values, nor to change or check them.
Day to day use:
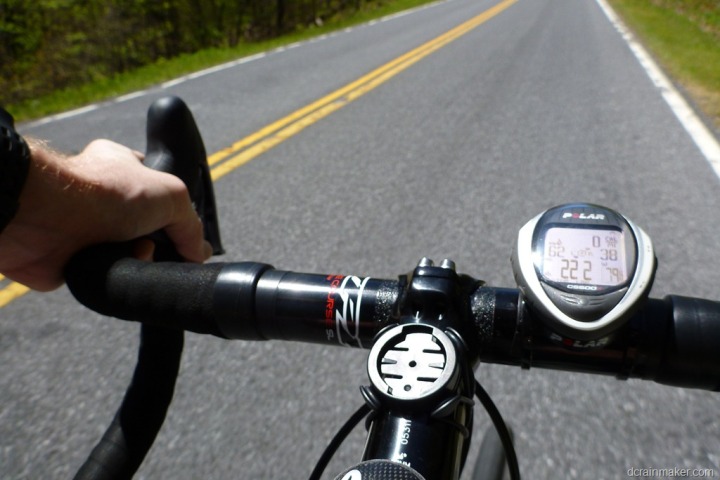
Once you’ve got the unit installed, using it day to day is fairly straight forward. In order to start using the unit you’ll merely need to press and hold the button on the left transmitter pod. Only for a second or two, otherwise you’ll kick it into configuration mode if you hold it too long.
Once that’s done the left pod unit will start blinking. It does a quick check of all the components (basically, are both transmitter pods there and both pedals there), and then will go into a steady blink while it’s on.
At this point, you can go ahead and start up your Polar head unit. Assuming you’ve already paired it – it’ll go ahead and find the power meter and connect to it. If you fail to remember to turn on the power meter first, the unit will remind you with a ‘Check power’ status message – both before pressing start as well as afterwards.
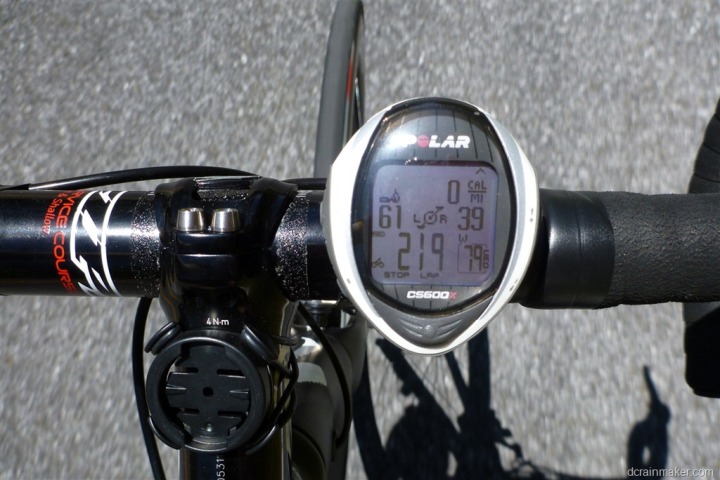
Once the connection is established, the unit will receive and display all four metrics: Left Power Percentage, Right Power Percentage, Total Power (watts) and cadence (RPM):
When you’ve completed your ride, the pedals will automatically power off after no movement for an extended period of time.
This is of note to triathletes, who will need to remember to start the pedals while in transition during T1. If you try and start them prior to the race, it’s unlikely the pedals will still be turned on by time you finish the swim and get back to your bike. In my case, I found this best to do when I first arrive at my transition rack. That way it can do the self-test while I’m dealing with getting my helmet on and things of the like.
Left/Right Power:
The biggest initial draw for many to the Keo power system is likely the ability to gather left/right power data. After all, this is relatively new to the mobile power meter market (it’s historically been available primarily in static/lab settings). However, one of the challenges with left/right power is how exactly to apply it in the course of normal training.
A lot of smart people (i.e., people who write books on the topic) have now been discussing it for a couple years (since the first announcements appeared), however, in general there isn’t a great consensus on how to realistically use this data in training. Meaning – how (if at all) does focusing on increasing your left power balance 4% help you? And, what’s the best way to do that?
Down the road, the ability for pedal-based systems to provide additional positioning information may make bike-fit a more precise science. For example, the ability to test that by moving the cleat 2cm towards the toe results in 15w of power gain. Or perhaps shifting towards the outer edge slightly results in increases. But we’re really not there yet today with guidance or analysis on how to process and take action on such data. No doubt it’ll come, it’s just not there today.
In general, there’s not yet a lot of great answers for normal day to day training or racing. However one area that a number of folks have found left/right power useful for is recovery from injury in a single leg. With historical data, one has a known established data point on where that leg used to reside power-wise, and this helps one folks on reaching that level again.
Further, with the ability to track left/right, you can see progress easily over time. Meaning that initially an injured leg first starting recovery may only contribute 15% left power, but a month later that could be 40% left power.
With all that background – let’s focus on how left/right power actually works technically. The unit measures and collections power at each pedal, for that leg. Meaning, left leg power gets measured by the left pedal, and right leg by the right pedal. That data is then sent to the pedal pods (the little things that hang off the cranks), via wired connection. From there, the secondary (slave) pedal pod transmits the data to the primary (master) pod, which is typically the left pod. The left pod then gathers the data from both units and transmits left/right power percentage, and total power.
The transmission from the master pedal to the head unit is done across Polar’s W.I.N.D. protocol. In fact, from a programming standpoint it was noted that the two companies split the work load. When I talked with them previously, they said that: “The axle software is very different to the pedal software. All communication between the pedal transmitter and the bike computer was made by Polar. Whereas the axle software was made by Look”.
Once the data is transmitted to the head unit, you’ll see left power percentage, right power percentage, and total power displayed on the unit. Below is an example of how it appears within the CS600X. You can see the middle two numbers are the power percentages (left and right), and the bottom number is the current wattage. The bottom right number is cadence. The top right is calories, based on the heart rate strap.
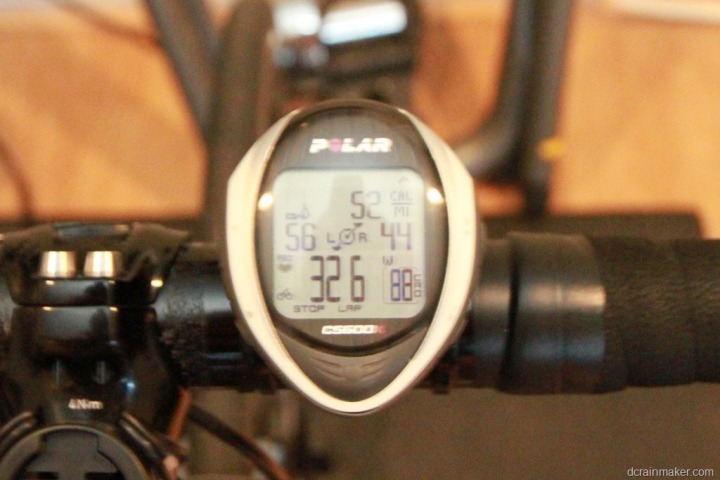
While using the pedals, I found that it picks up changing in left/right balance pretty easily. A very subtle shift in leg pressures makes it immediately obvious that you’re shifting your power output across legs. Further, if you go to one-leg pedaling, you’ll immediately see the drop in power.
Afterwards, when looking at the data, you can separate the two left/right channels and view them individually, or together on the same graph. Because the left/right data is always showed as a percentage (not wattage), the two legs are somewhat inverted mirror images of each other. But we’ll dive into this later on.
Keep in mind that many 3rd party sites don’t support left/right power today. I have found that TrainingPeaks does however, and if others find/know of others that do – drop a note in the comments and I’ll test it out with a few files and update here.
Cadence:
The Polar power system includes the ability to measure cycling cadence, via a magnet in the bottom pedal. This means that it is unnecessary to add a Polar WIND cadence sensor in order to gather cadence information.
Cadence is simply the measure of how often a given pedal rotates per minute. Expressed in RPM’s (Revolutions Per Minute), most cyclists tend to be around 90RPM (+/- about 10RPM), per leg. There’s tons of religious debate within the cycling community on the benefits (or lack thereof) of specific cadence values and/or ranges. At present, most folks tend to be the self-selected cadence typically ends up being the most efficient for cyclists. In other words, just ride.
From a measurement standpoint though, the magnet is at the bottom of the pedal, visible below:
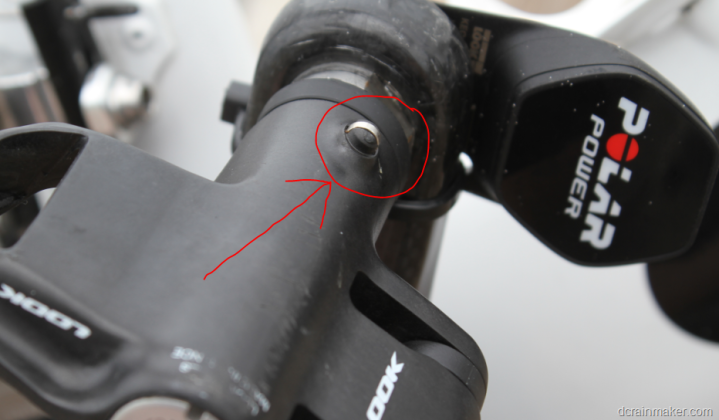
This magnet then trips a sensor in the axle that’s located within the pedal body. When it does so, it’ll transmit that via the pod to the head unit for display and/or recording. Pretty clean and straight forward.
Compatible head units (bike computers):
Without question, the biggest singular challenge with the Polar power system is the current selection of cycling head units. Head units are the bike computers that can read the data from the Polar power system, without compatible head units – you’ll neither see your data, nor be able to record it.
Within the rest of the industry, power meters primarily use the ANT+ protocol, which means that consumers can choose between head units from any company they’d like (Timex, Garmin, CycleOps, Magellan, etc…), or tons of apps across iPhone and Android platforms. But, the Polar power system doesn’t use ANT+, and instead, uses the proprietary Polar W.I.N.D. protocol – which is only compatible with Polar devices.
Given this limiting of selection, Polar only offers two devices at present that are compatible with the Polar power system, the CS500 and CS600X. Both of these units have been around the block a while, and previously supported Polar’s older chain based power meter. Interestingly their triathlon focused unit (the RCX5) does not support the power meter, nor does it have plans to be updated to support it (there were initially some statements last year that it would, but those were confirmed by Polar to have been misspoken).
Polar sent over both head units units to try out, which I did. The functionality related to power meter use and recording though on both devices is essentially identical. Most of my time was spent with the CS600x, merely because it’s a bit smaller and fit a bit better on my handlebars.
The challenge with both units though is that from a power meter standpoint, they both suck. I wish I could apply fairy dust and sugar coat that somehow – but there’s no getting around it. The power meter features offered are at best ‘barely functional’ for the task at hand.
The sum total of options related to power meters data fields you can view on the CS600X unit are as follows:
Power (instant, watts)
Power left (instant, percentage)
Power right (instant, percentage)
Yes, that’s it.
To emphasis how small this is compared to the larger market, here’s what the Joule offers, as well as the Garmin Edge 500:
CycleOps Joule 2.0 Data Fields:
![joule20_display[3] joule20_display[3]](https://www.reviewinhot.com/images/201706/polar-look-keo-power-system-pedal-based-power-meter-in-depth-review-87.png)
Garmin Edge 500 Power Fields:
– Balance (Instant)
– Balance – 3s Avg
– Balance – 10s Avg
– Balance – 30s Avg
– Balance – Avg
– Balance – Lap
– Power (Instant)
– Power – %FTP
– Power – 3s Avg
– Power – 10s Avg
– Power – 30s Avg
– Power – Avg.
– Power – IF
– Power – Lap
– Power – Last Lap
– Power – Max
– Power – Max Lap
– Power – NP
– Power – NP Lap
– Power – NP Last Lap
– Power – TSS
– Power – W/kg
– Power – kJ
– Power Zone
Out of everything perhaps the biggest drawback is the lack of power smoothing. It’s instant power, which naturally fluctuates rapidly. Most power meter head units these days allow you to smooth the power over a 3-10 second average, making it far easier to hold given wattages.
From a recording standpoint, the Polar units lag behind as well. While they can and do record at 1-second intervals (which is good!), they can’t do so for very long. In my experience, I only got about 6 hours of recording time before I had to move the ride data to my computer (or delete it). This is enough for a century ride for competitive riders, but only if you remember to have a clean slate beforehand. When you compare this to other units, which typically can record hundreds of hours of data, it’s easy to become pained with the Polar head unit selection.
In my opinion, the current head unit options are the single biggest item holding back the ability for the Polar/Look power system to be competitive.
However, there is some positive news coming down the pipe here. Polar has committed to supporting Bluetooth Low Energy (Bluetooth Smart), which is a competitor to the ANT+ protocol that the rest of the industry uses. Bluetooth Smart is quickly gaining adoption on smartphones via any device that supports Bluetooth 4.0 and above (which is most new phones coming onto the market these days, like the iPhone 4s).
In order for Polar to support Bluetooth Smart though they will have to offer a hardware upgrade kit for the transmitter pod (since it currently transmits on WIND). In my questions to the onsite resources at both Interbike 2011 and CES 2012 they have committed to offering this to existing customers. However, it’s not clear if this will cost something or be free. One must rewind to Interbike 2010 to remember that Polar had planned to introduce the Polar power meter system on Bluetooth Smart – but those plans were put on the backburner to focus on getting the product out the door on WIND.
Long-term, once on Bluetooth Smart you’ll start to see more head unit options and tons of phone options. But this path is going to be slow and painful. The lack of widespread and adopted device profiles means that it’ll be likely years of issues where devices aren’t quite working with each other like we see on ANT+ (we’re already seeing this in the Bluetooth Smart heart-rate strap arena). But, at least there is a future here.
Software Data Viewing/Download:
To download and view data from the Keo power system (via the Polar CS500 or CS600x) you’ll need the infrared USB stick and the Polar Pro Trainer desktop software:
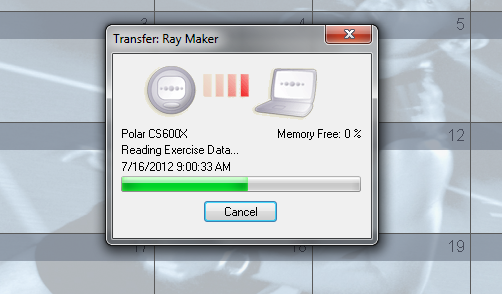
The desktop software is a wee bit dated, but has the fundamentals to get the data displayed (and then thankfully, exported to something more useful). Once downloaded, you’ll go ahead and crack open the the exercise (which is what Polar calls a given activity):

There are three core areas to look at when it comes to power specific data in the software. The first is the graph itself. The graph shows left and right balance in orange – with an even line split across the center of the graph:

The closer that mass of orange is to splitting across the line, the closer you are to having ‘even’ power distribution.
This is then displayed in text down below the graph, showing you the power balance of your left and right side (in my case below, 55% left, 45% right):

In addition to the graph page view, you can also pull up a listing view in a table format, which allows you to see per-second data for total power, as well as left/right power. Note that pedaling index is not a captured data field.

There is also per-lap information available. I often use lap information to segment training portions:
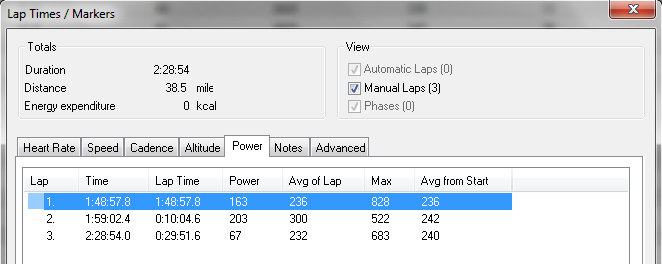
You can see above the total power information, though left/right information is not shown here.
Overall, the data displayed within the Protrainer software is fairly basic by most standards. To get more detailed (and useful) data analysis you’ll want to use another tool. I’ve been using TrainingPeaks (free and paid) with the Keo power system without issue – works pretty well.
Alternatively, you can also use Golden Cheetah (free) to do some pretty deep analysis. Those files work there too, though Golden Cheetah does not yet support left/right power:
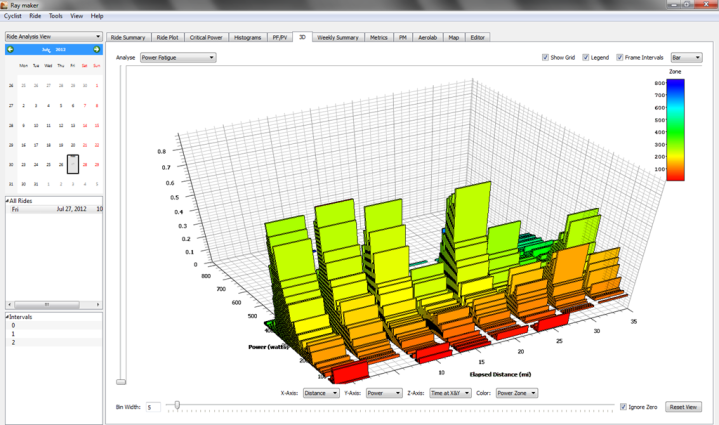
Power Meter Accuracy and Data Comparison:
I often note that there are few things I despise more than doing in-depth power meter accuracy tests. Primarily because it’s excruciatingly difficult to do correctly (especially in a non-lab environment), and because nobody is ever happy with how you executed the test. The reason being that you have to correlate multiple power meter files from multiple head units, which may (as is this case) be using non-compatible files. In fact, the proprietary nature of the Polar system end to end makes this a very time-consuming process, and also one that is fraught with error.
For example – are all units installed correctly? Are all units calibrated (correctly) at the start of the ride? Are they re-calibrated and/or zero offset updated at some point after the unit warms up? Are they all started at exactly the same time? Same recording rates? Do any units auto-pause (like the Joule) once started? If you stop mid-ride, are they all stopped at the same time? How is change in weather or temperature affecting it?
Hence you can see why virtually everyone that does detailed power meter comparison tests does so indoors and in a lab environment where the rider is typically given a set timeframe to ride and all devices can be monitored by a 3rd party concurrently.
In fact, one such test that recently came out on Polar’s site, and another (this time independent 3rd party test) is actually being presented this week at a conference in Belgium. I’ll add a link as soon as the full data set is published.
That said, I’ve done some basic comparisons. Over the past few months that I’ve had the Polar pedals on my bike, I’ve also had either a Quarq RED, Quarq Cinqo, or Power2Max (all ANT+) power meter on there as well, and in addition in some cases also a CycleOps PowerTap. These have provided me with a general barometer of data comparison while both outdoors and indoors. And while indoors, a variety of trainers (such as the CompuTrainer) that I use also measure power and allow me to capture and compare those metrics.
That disclaimer noted, I will share with you a handful of rides from the past bit of time. These are the same tests I published as part of the June Quarq Red 2012 in-depth review. So if you read them there, they won’t be of much surprise. I used the same data because the correlation of data just takes so much time.
Side note: I’m desperate for one thing in my product review life: An iPhone app that allows me to simply collect multiple ANT+ or BTLE power meter streams using the Wahoo Fitness dongle and dumps them to a CSV file. The ability to have an app that I can take with me and capture multiple ANT+ power meter streams, or Bluetooth Smart down the road, would vastly increase my willingness to do more and more accuracy tests. Today, the data just takes so long and is so painful to correlate, it’s one of the reasons I hate them. If you want to put something together for me (it doesn’t have to be pretty, just needs to collect data via Wahoo iPhone key and be exportable into CSV file) – I’d forever be grateful.
I was careful in all of these rides to exercise the specific calibration procedure recommended by each of the manufacturers for the three products I used in the test (Quarq RED 2012, CompuTrainer Pro, Polar/Look Power Meter).
As a baseline, I recorded the streams in three separate areas. The Quarq data was recorded with a Garmin Edge 800 (standard 1-second recording, all zero-inclusion), the CompuTrainer was actually recorded using TrainerRoad, since it made data collection far easier, and the Polar Pedals were recorded using the Polar CS600x. All of these units were recording at 1-second intervals.
From a calibration standpoint, I would first calibrate all three units upon initial turn-on. For the CompuTrainer that meant a ramp test, for the Quarq that meant backwards pedaling (technically a zero-offset – but realistic for what people would actually do in training/racing), and for the Polar that meant simply turning it on while still. At the 10-minute marker after warm-up, I would repeat the process again (minus the Polar unit, since it doesn’t have a calibration routine). Conditions for all indoor tests were simply at usually about 72-74*F.
Note that as of today it’s actually really darn difficult to compare power meter data from multiple head unit vendors. For example, inclusion of data from a Garmin head unit means that the data doesn’t just stream in one second after another, but rather is tied to GMT (time), so pauses/etc make life somewhat difficult when comparing to a more simplistic system such as the Polar units which have no concept of GMT-based time-points beyond a start time.
Trainer Scenario #1:
The first scenario is a simple trainer ride. This was about 70 minutes long, and inclusive of three higher wattage segments, with the second one being 20 minutes long and the 3rd being 10 minutes long. The second one was largely statically set after the first minute or so. Whereas the third one my wattage dropped a bit. All wattage was controlled via the CompuTrainer.
In the below example, the Quarq unit is in Green (recorded via Edge 800), the Polar in Yellow, and the CompuTrainer in Red. I really wish I had a better method for exporting these beyond screenshots, but that’s somewhat the limitation of WKO+’s file comparison tool. Which, is pretty much the only tool out there.

You’ll notice that around around the 10-minute marker things become slightly disjointed. That’s the whole timecode issue I noted with the way Garmin units record (not a bad thing, just a thing). Makes it look kinda 3D. But you can see that they largely track each other. Below, I’ve removed the Cinqo, just for clarification sake.

Here is the full time range totals and averages. Again, Cinqo = #3 Green, #2 = Polar, and #1 = CompuTrainer. There exists some slight variations depending on whether you’re looking at normalized or average. Depending on which one you consider correct – the largest gap is about 4%, though they are about 2% off of median – or well within the limits specified by the system.
You do see that the Cinqo does seem to record the highest max power surges, though that’s not consistent across all tests.

Trainer Scenario #2:
In this second scenario, we see much the same again. This time, the Quarq read a bit higher than the CompuTrainer and Polar pedals from an average and normalized power perspective, about 5%. Some of the difference between the Cinqo and the CompuTrainer is due to the location of measurement. The Cinqo is measuring closer to the actual output center (your leg), and thus there’s a tiny bit of loss (very very small) across the drive chain to the wheel and down to the CompuTrainer load generator. Interestingly though, the pedals would be upstream of the Cinqo, so that should have been higher. But, there’s no way of knowing which one was ‘more correct’.


Outdoor Scenario:
Note that in the outdoor tests I did NOT have any CompuTrainer present, thus it is only the Quarq against the Polar unit. This was an outdoor ride, actually part of a much longer ride – just shy of three hours. This is the first 45 minutes, as after that the Polar pedals dropped out for a short period of time (actually, you can see that above around the 30-minute marker), and then the Quarq unit dropped out mysteriously as well for a few minutes. Wasn’t a good day in that respect. Though, that was the only dropout I saw on the Quarq 2012. On the Polar side, it’s still unclear why I saw that, but in the nearly four months using them, I never saw that again.

Looking at the totals, you’ll see the Polar is a fair bit lower. This I suspect is for two reasons. First is that it’s flat-out missing data for a few minutes. Secondly though, you can see that it started lower from the very beginning. From a tracking standpoint, the two units tracked fairly closely as far as spikes go – but just didn’t align to each other on the baseline number. Again, in outdoor conditions it’s incredibly difficult to say with certainty which unit is ultimately correct.

The point I’ve attempted to make above is twofold. First, that’s it’s really darn difficult to get consistent data cross numerous units recording to different head data. Secondly, that by and large, the data is pretty consistent.
Durability:
If you were to merely be skimming through this post (which you probably are at this point), and were to see the below photo, you’d probably assume that the units aren’t durable. But, in my experience – that really isn’t the case. I’ve had them on my bike since early Spring, and travelled on numerous trips with them in my soft-shell bike case – without ever removing the pedals or pods, or protecting them. And everything turned out just fine.
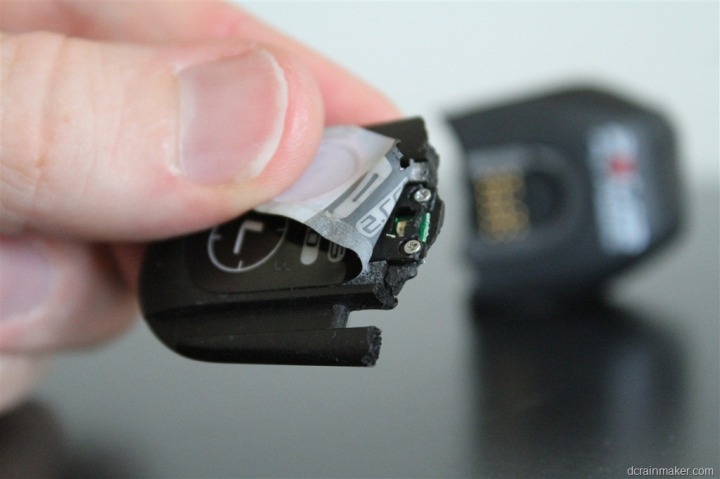
Well, except the above. But, the above isn’t the Polar’s fault. In fact, it would be only somewhat ironic that this was my last ride with them when it occurred. In an unexpected twist through absolutely no fault of the Polar unit’s, my left (non-drive side) crank fell off during a sprint, when that occurred, the pedal still attached to my shoe dropped low enough to hit the ground at 30MPH, which instantly removed the pedal, crank, and Polar transmitter from the list of items cycling with me. In doing so, the transmitter pod doubled in quantity, while reducing by half in size (also known as a two for the price of one sale):
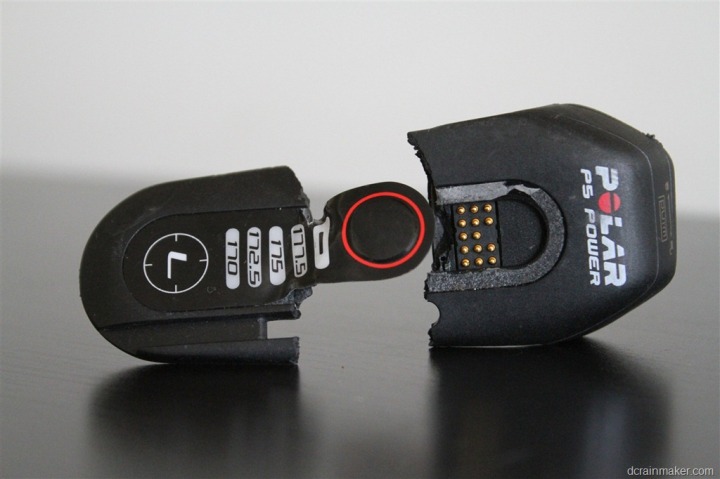
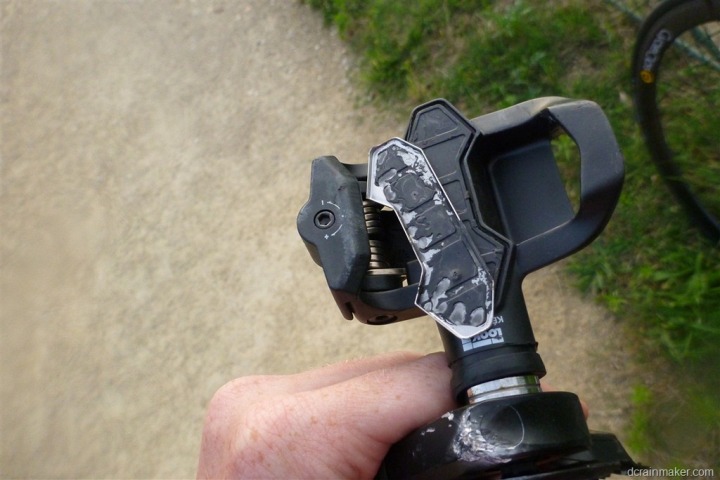
Additionally, the metal plate on the pedal separated from the pedal itself.
On the bright side, the Polar CS600X head unit immediately let me know that I should probably check out the situation in more detail:
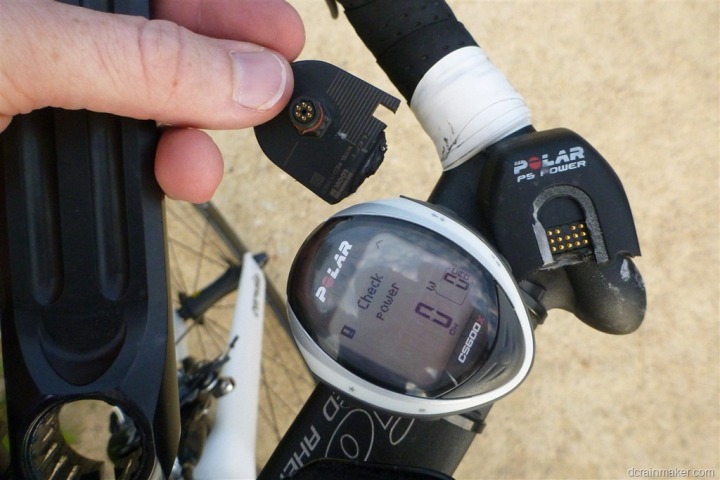
In the end though, this can’t be blamed on Polar. However, it does illustrate how the system works and what occurs when a break does happen.
Last fall I discussed this scenario with the Polar/Look Keo team. As they explained then, the unit does require both pods to be functional, specifically, the master pod which collects power from both pedals and transmits it to the head unit, which is the one with the button on it (left). Unfortunately, that’s the pod in my scenario that divided in two.
From a replacement scenario, shops are to offer four types of ‘accessories’ that customers can purchase (and should be on hand at the dealer/shop):
A) Radio Transmitter/Pod (that’s the little piece that hangs off the crank-arm)
B) Locknut on axle (which he said is slightly more susceptible to damage with frequent removal/installations)
C) Sealing o-rings for radio, and zip ties
D) Cleats
In this case, in theory only the radio transmitter/pod would have required replacement. Though, because the entire pedal whacked the ground at high speed, it’s probably worthwhile sending back to Polar to get checked and potentially recalibrated. It’s unclear what the costs would have been for either, though I’ll try and find out.
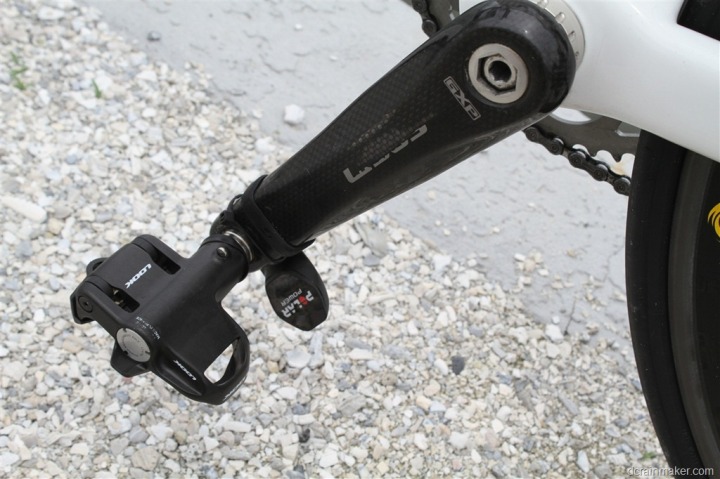
Finally, there continues to be lots of speculation on the idea that the transmitter pod could clip the ground on an angled turn. However, that’s somewhat of an optical illusion, and really darn difficult to do. As the crank arm rotates, the pedal body is effectively protected by the crank arm itself. Thus, at the bottom of the rotation, the pedal pod is actually no lower than the crank arm, and is protected behind it. Before the pedal were to hit anything, you already would have clipped it with your crank arm – likely resulting in a crash, but not because you hit the pedal pod first.
Comparison Chart:
I wanted to put together a very brief comparison chart on the major power meters in the market today, or ones that are incoming to the market shortly (click to expand).

Here are details (as much as I have) on some of the others PM’s listed above, either in the market or upcoming:
SRAM RED 2012 Quarq Power Meter Review
Everything you ever wanted to know about the Garmin Vector pedal based power meter
Hands-on with the Brim Brothers Zone cleat-based power meter
CycleOps Joule and PowerTap Wheelset In Depth Review
There are a handful of other upcoming power meters out there, but details about those remain incredibly slim. In short, I’ve only put up systems that I’ve actually pedaled on, even if only briefly. Perhaps that’s my new baseline for vaporware – ‘Have I ridden on it?’. Other systems that I suspect we’ll see within the next 12-18 months come from Pioneer, O-Synce, and likely a few others.
At the end of the day, the Polar units do remain the only true measured left/right power solution out there today on the market and available for purchase and delivery.
Summary:
Going into the Keo power system trial, I had assumed that accuracy might be an issue – but in reality, it really didn’t seem to be. Nor did stability, the unit was rock-solid day in and day out. In the end, the Keo power system did exactly what it advertised – it measured, displayed, and recorded left/right power via pedals.
However, it does this at a price – about $2,200 – one that’s quite a bit higher than many other power meters in the market, and without the industry compatibility that you see across the rest of the market. In my opinion, the lack of 3rd party compatibility is the single biggest issue I have with the Keo power system at this time. If Polar had a cycling computer with more power meter functionality, it might shift my thinking. But at present, the current power meter head unit options for Polar just aren’t up to par with a $2,200US power meter.
What I am excited about though is the potential for a retrofit/update with Bluetooth Smart and this platform. It’s clear that Polar recognizes the long term value of Bluetooth Smart (as I’ve been told numerous times across their different product groups). In doing so, it should open up products like this to enabling better integration with other power meters down the road, as well as apps on phones that can capture data. Once that happens, I think this product will be seen in a completely different light.
Finally, note that last fall I sat down with the Polar/Look Keo power system team and put together a post that was titled “Everything you ever wanted to know about the Polar/Look Keo Power pedal-based power meter”. While I’ve tried to re-capture as much of that content into this post as possible, there likely remains some Q&A in the post and comments section that’s still over there and worthwhile checking out.
Found this review useful? Or just wanna save 10%? Read on…

Hopefully you found this review useful. At the end of the day, I’m an athlete just like you looking for the most detail possible on a new purchase – so my review is written from the standpoint of how I used the device. The reviews generally take a lot of hours to put together, so it’s a fair bit of work (and labor of love). As you probably noticed by looking below, I also take time to answer all the questions posted in the comments – and there’s quite a bit of detail in there as well.
I’ve partnered with Clever Training to offer all DC Rainmaker readers an exclusive 10% discount across the board on all products (except clearance items). You can pickup the Polar/Look Pedals from Clever Training. Then receive 10% off of everything in your cart by adding code DCR10BTF at checkout. By doing so, you not only support the site (and all the work I do here) – but you also get a sweet discount. And, since this item is more than $75, you get free US shipping as well.
Thanks for reading! And as always, feel free to post comments or questions in the comments section below, I’ll be happy to try and answer them as quickly as possible. And lastly, if you felt this review was useful – I always appreciate feedback in the comments below. Thanks!Additionally, you can also use Amazon to purchase the unit (though, no discount). Or, anything else you pickup on Amazon helps support the site as well (socks, laundry detergent, cowbells). If you’re outside the US, I’ve got links to all of the major individual country Amazon stores on the sidebar towards the top. Though, Clever Training also ships there too and you get the 10% discount.
Finally, I’ve written up a ton of helpful guides around using most of the major fitness devices, which you may find useful in getting started with the devices. These guides are all listed on this page here.


