Verve Infocrank Power Meter In-Depth Review

Power meters tend to be products that I test for the longest duration prior to posting a review. This is often due to wanting to validate products across a wide range of weather and environmental conditions: Heat, humidity, cold, cobbles, indoors, outdoors, etc… However, my test of the Verve Infocrank might just take the cake for the longest. I’ve been using it on and off for roughly the past year, across huge range of conditions. I’ve brought the unit on my bike travelling with me to New Zealand, as well as the Alps of France, Switzerland, and Austria. Plus all of the rambling around my local hood for the last year in all four seasons.
At this point, I know more about the Infocrank than I ever ventured to know. I can tell you wonky things like which little stores in the Swiss alps sell the right batteries on a Saturday evening…as well as the many that don’t. I can also tell you how each of the different Garmin units reacts to the Infocrank, which turns out to be slightly different for different models. And of course – I can tell you boatloads about accuracy of the Infocrank.
So with that, let’s get cooking. Note that Verve sent a usual media loaner Infocrank for me to test. I’ll be handing that back to them when they swing through town in a few weeks. Otherwise, all other products seen are mine that I’ve bought.
Unboxing:
Now I’ve technically done two different unboxings of the Verve Infocrank. When I first started this whole review process they were using one set of boxes. However, given some time has gone by, they’re now using a different set of boxes. So in the interest of keeping things all current, they sent over another unit to be unboxed.
(Funny semi-unrelated story: Unboxing photos are usually among the least loved things I do. This evening, for a totally different product, The Girl mistakenly said she was bored. So I talked her into doing her first unboxing photo shoot of a new swim product. Turns out, it had one of those horrible plastic clamshell designs that’s both super-reflective, and a serious pain in the butt to open, let alone do so in a pretty non-bloody manner. Following that experience, she’s sworn off future unboxings for me.)
In any case, I’m going to walk through the new box shots, but also include a brief gallery of the old box shots. The reason I’m doing that is that they’re two slightly different bundles. The new one is just the crank arms, whereas the old one was with the chain rings and all sorts of other jazz. Let’s get started though:

The box is roughly like an oversized shoe box, except that it’s heavier and built to be tossed off a tall building.

That structural integrity is apparent once you crack it open:
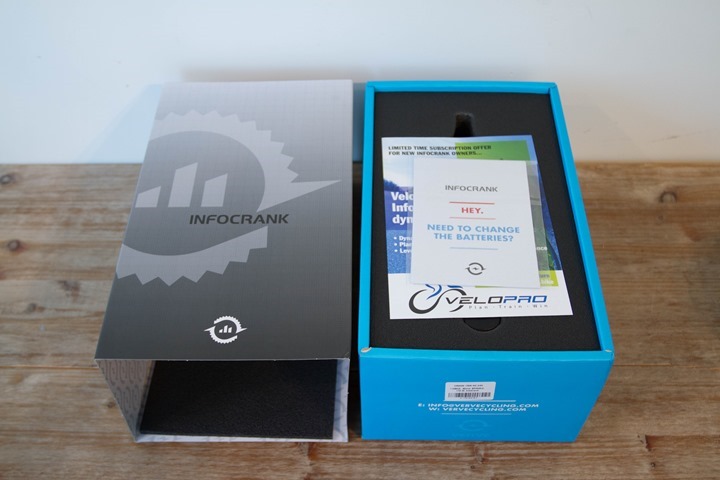
After we de-layer it, we’ll find the following. It’s sorta like looking at core samples:
Basically, we’ve got four things:
A) The drive-side crank arm/spider
B) The non-drive-side crank arm
C) Four batteries
D) A pile of manuals/paper
Here they all are:
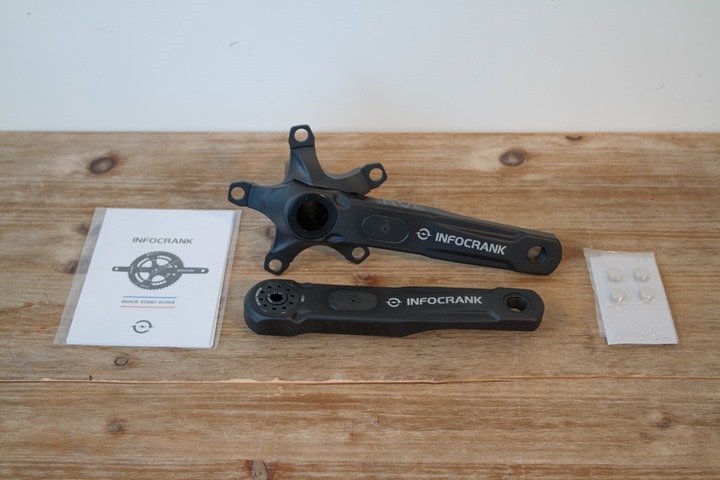
Now you’ll notice that in this case it did not include chain rings. Again, that totally depends on which unit/bundle you’ve purchased.
Here’s a closer look at the unboxed crank arms from all sorts of directions in a mini-gallery:
You will also likely have magnets in your box, which you’ll see in the below unboxing of my first box.
Next, as promised, here’s a gallery of the initial box, which includes chain rings and other goodness. It’s older of course, and not as stylish as the new box. Notably, the new box is designed in an incredibly ‘tight’ configuration. Meaning, everything is super-snug and doesn’t flop around. Whereas the old box sorta unfolded itself like a water balloon being punctured – stuff went everywhere.
With that, let’s get this puppy installed.
Installation/Configuration:

Now when it comes to installation, it’s actually a bit of a funny story. And by funny, I mean complex. Like most crank/spider based power meters you have to be somewhat aware of any compatibility issues with your bike (frame). In my case, I decided to install it on my Cervelo P3C as my first choice of steeds.
So I went quite a ways down that installation routine, as I usually do, without really thinking it through. As you can see below in my mini-gallery, I got all the way to the part of spinning the crank arms after tightening it, before I found an itty-bitty problem: It would hit my frame.
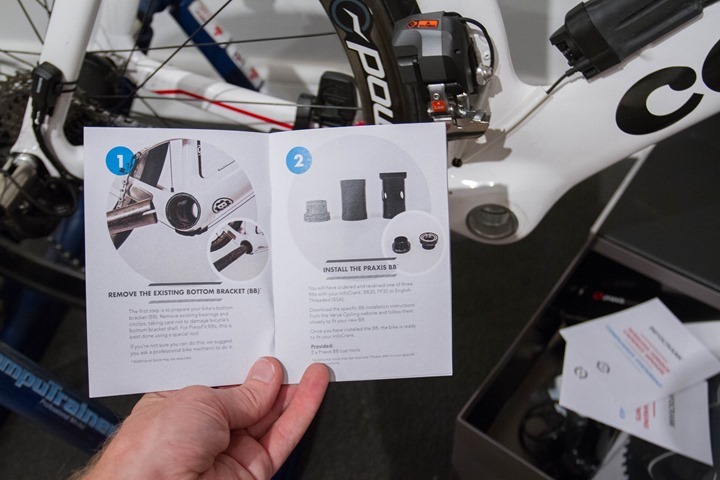
So, I circled back and consulted with the Verve folks, and we took a quick inventory of my bikes. My newest road bike that I purchased last fall would indeed fit the bill, provided they included a beta bottom bracket from Praxis (now long since available on the market). So we did that instead.
Assuming you’re somewhat handy with bike tools and brackets, this overall process isn’t too tough and in-line with other crank based power meters. Also note that the exact steps will vary depending on what package you bought. For example, in my latest unboxing photos you’ll notice it didn’t include chain rings, whereas the initial gallery did. So obviously you’ll have to install chain rings first regardless of the source (super-easy).
In any case, first up is to get rid of your existing crank, and if applicable – existing bottom bracket. So that’ll roughly leave here:
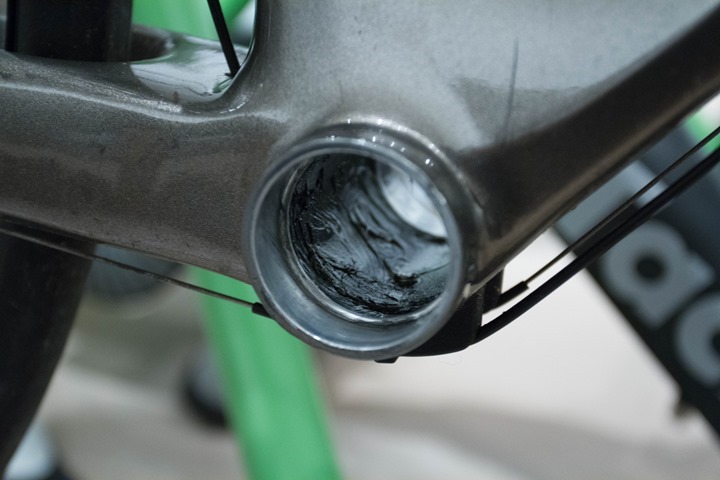
In my case, I first had to install a new bottom bracket, because I was swapping things out there:
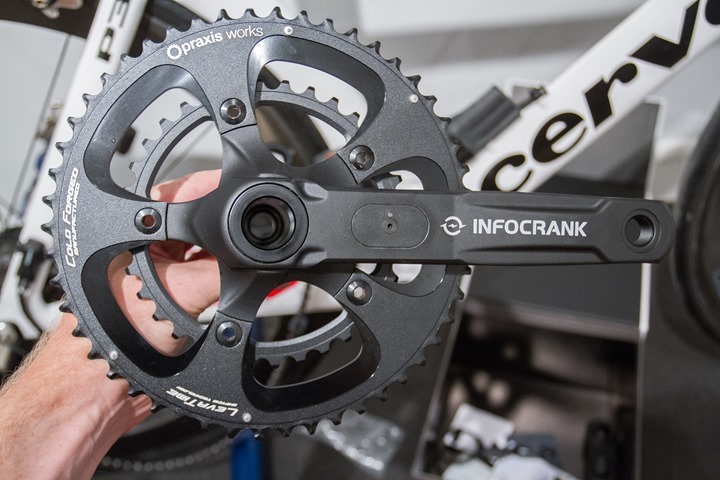
Then, it’s actually just a case of sliding through the drive-side crank set into the bottom bracket and through to the other side, where you’ll attach the non-drive side:
I don’t have a ton of photos here, because I took a ton of photos of the first attempt on my initial bike (that wasn’t compatible), but didn’t think to re-take them on the second bike.
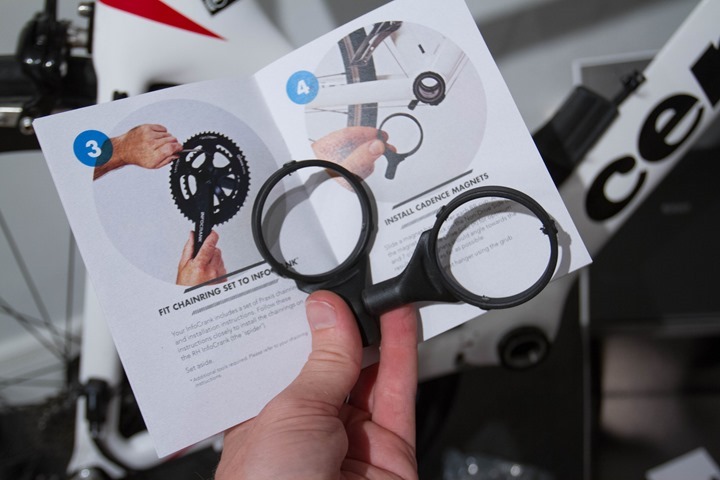
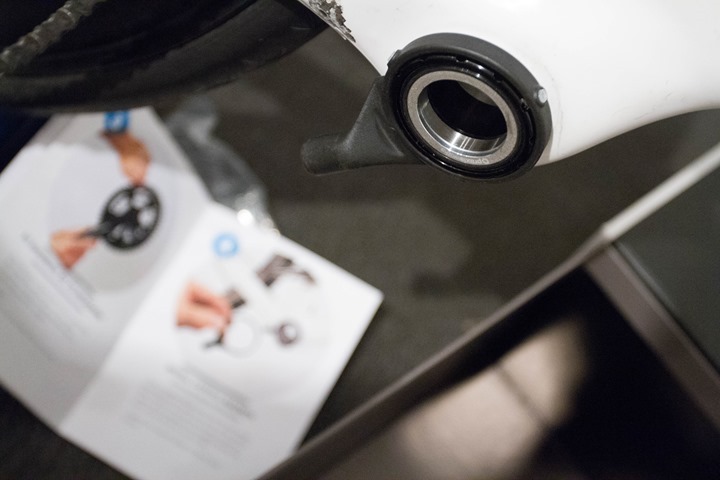
Now at the very end you’ve got installation of magnets (seen above). This is the part that takes you back to kindergarten arts and crafts day. You have to essentially trim the magnets using scissors to fit your frame area, and then you’ll install the magnets using the sticky stuff that’s on the magnet backing.
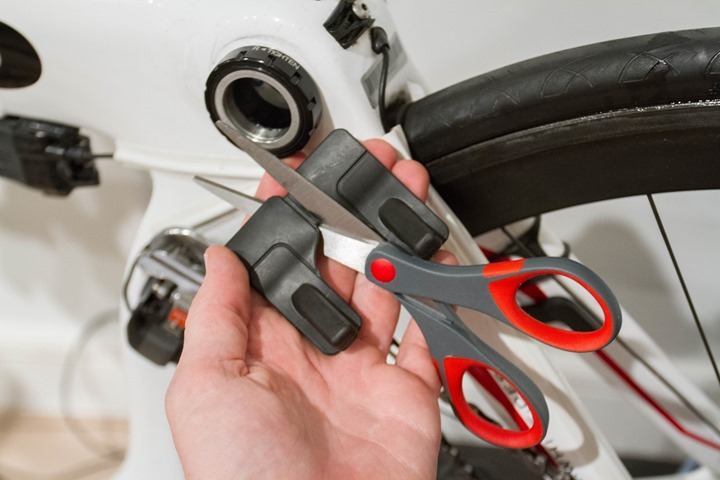
All while ensuring you don’t get the magnet to attract to the power meter itself in the process.
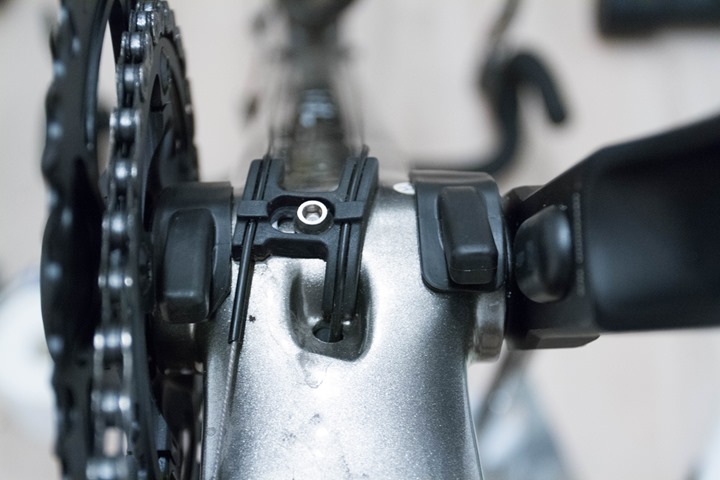
Alternatively, you can use the ring based magnets, but they had a horrible bolt design that made it easy to strip/break. Thankfully both have since been redesigned to be a bit better.
But even better than all of that is that coming early next year, they’ll release a firmware update which does away with needing magnets at all. You can still certainly use the magnets if you want, or if you plan to go into cadence ranges where it might be important (i.e. above 180-210RPM). But otherwise, they’re saying accuracy is just as good without them. You’ll remember that almost all other companies have gone the same direction as well (most using an accelerometer, though Infocrank is actually using just the strain gauges – more on that later), and we just haven’t seen issues on most of these products in the last few years.
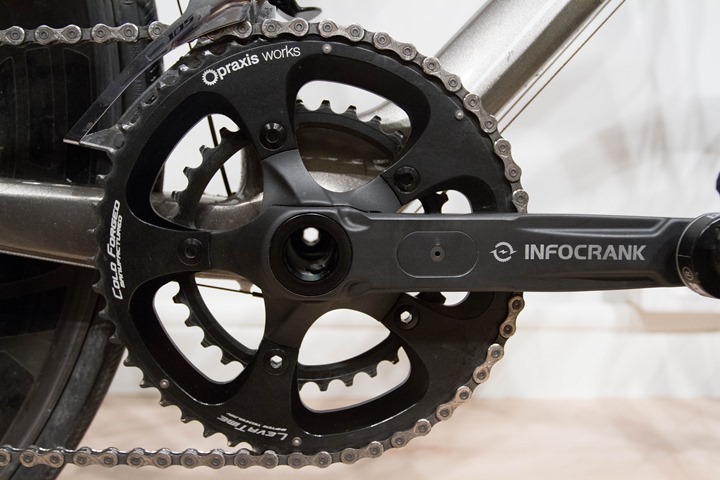
In any case, with that all setup, we’re ready to roll. Note that in my case I did find the magnets fiddly, and they fell off more than once (and then mated with the power meters due to magnet prowess). The solution I employed there was good ole super glue to my frame. Serious.
So obviously, I’m happy to hear they’re going magnetless soon.
General Use Overview:
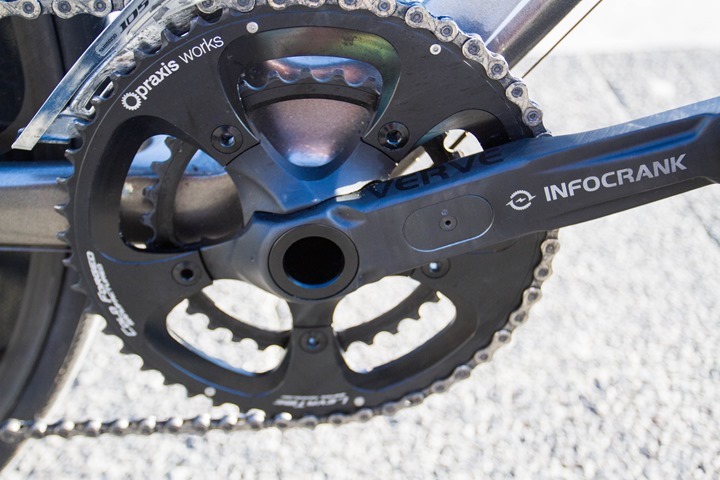
Now that you’ve got it all installed, it’s time to use it. I promise you, it’ll be easier/cleaner than the install was. The unit will automatically wake up when you turn the cranks, assuming the magnets are still where you left them. Like other magnet-requiring power meters, if the magnets do become dislodged, that’s usually the primary cause of the crank not waking up – since it doesn’t trigger the unit rotating (just as a troubleshooting tip).
Once you rotate the crank arms, it wakes up both sides of the power meter. While the power meter appears to you as a single unit, it’s actually two physically separate power meters, each measuring its own side. They communicate wirelessly via a private ANT channel between each other, but then broadcast as a single unit to your head unit.
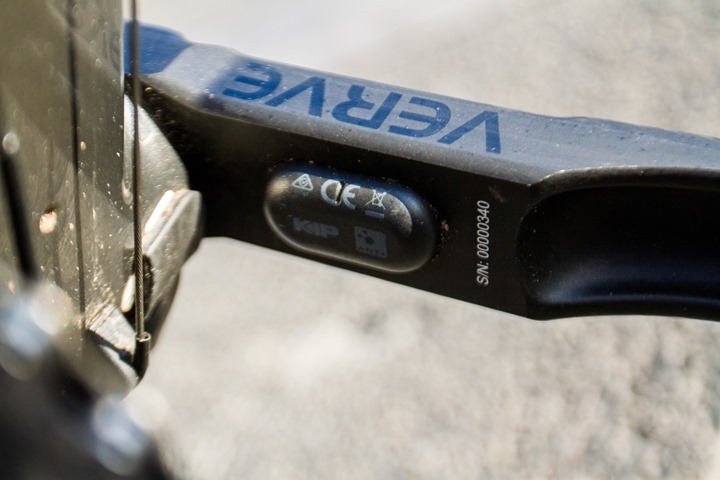
When it comes to compatibility, the Infocrank is compatible with all head units that support the ANT+ power meter device profile. It does NOT transmit Bluetooth Smart however, so it would not be compatible with non-ANT+ devices.
Examples of ANT+ power meter head units would be: O-Synce Navi2Coach, Garmin Edge series, Suunto Ambit2/2S, and PowerTap head units. Additionally, devices like the Recon Jet and apps like TrainerRoad or Zwift, that support power meters can be used with it.
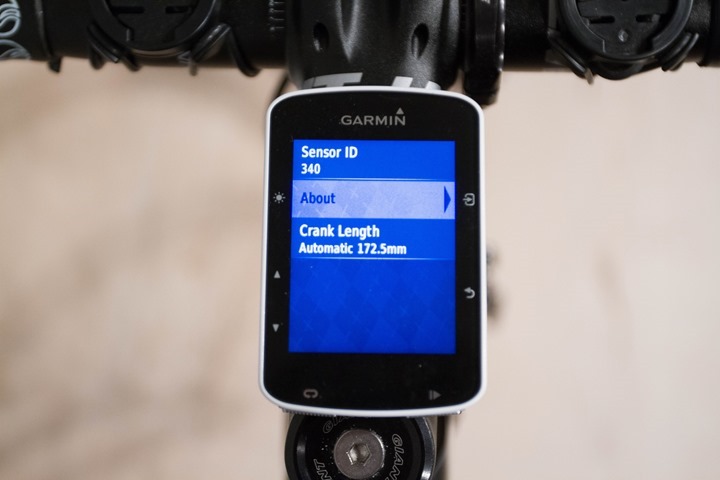
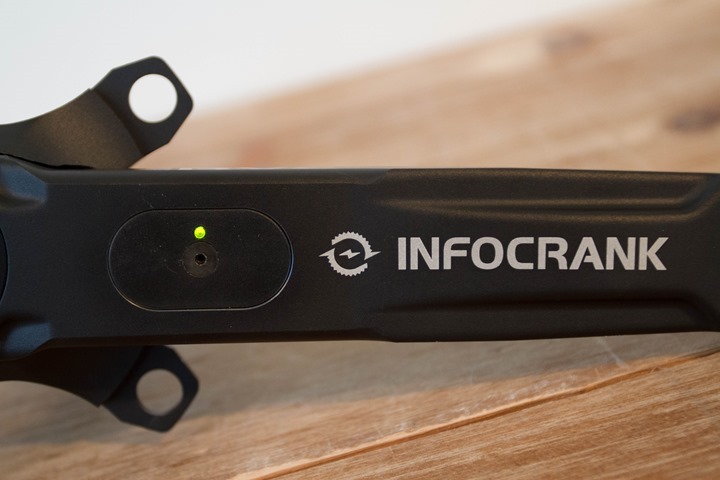
As with all ANT+ power meters sold these days, the Verve Infocrank has a single ANT+ ID. – typically a 5-6 digit number that identifies it to your head unit. This is no different than heart rate straps or cadence sensors. Now interestingly (totally random but kinda fun), the ANT+ ID on the Infocrank is the same as the serial number of the product. This ID number is printed just to the side of each of the two little bubbles that house the communications pod:
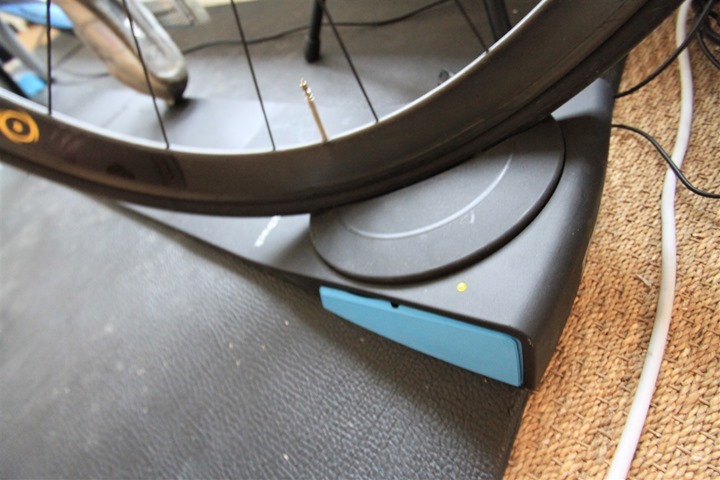
So in the above case, the ANT+ ID would be 842. Whereas the other crank set I had was #340, so the ANT+ ID was simply 340.
These ID’s are then displayed within most head units or applications, so you can ensure proper pairing if more than one person is around. Or, in my case, when you’ve got 4+ power meters on your bike.
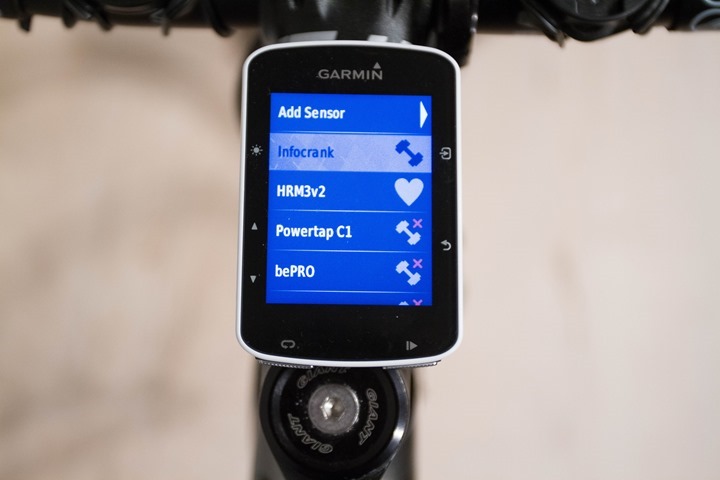
On the metrics side, the Verve Infocrank currently transmits total power, cadence, left/right power, pedal smoothness, and torque effectiveness (all via ANT+)
You can see all of these metrics within the head unit itself, as well as online after the fact on various training applications. For example, going with the simplest one here – we’ve got Garmin Connect, showing first the total power, then the left/right power balance.

Here’s a closer look at Left/Right balance:

Now do remember that there’s no specific study or even recommendation that says you want power to be 50% evenly left & right balanced. In fact, there’s a growing body of folks who are quite clear that when you try and artificially maintain balance, it detriments your total power. Instead, it’s best to just let your legs do their own things.
The area where power balance is useful however is injury recovery on a single leg, to be able to see improvements in wattage on the impacted leg.
Note that in the event the battery dies on a single arm (such as the right side), it’ll continue to broadcast out of the left arm, effectively acting as a single-sided power meter (à la Stages). It’ll simply double that power. I had this happen on one ride this past summer, and you can see the left/right balance disappears in that case – but total power (derived from the left leg) and cadence are still available.

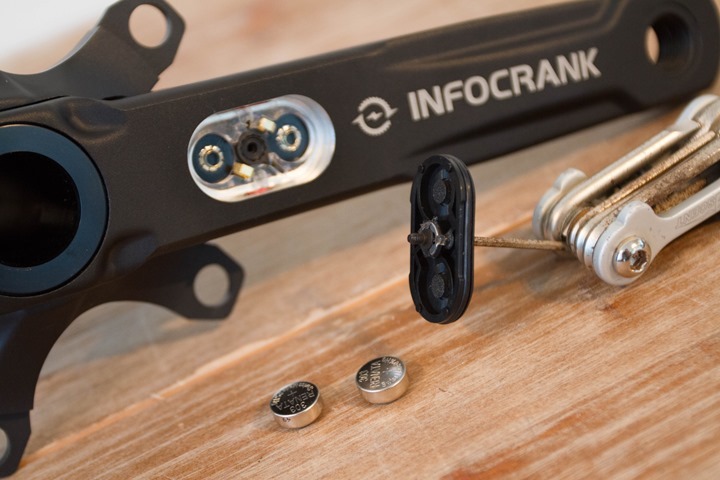
Speaking of batteries, this is really one of the few pain in the butt aspects of the Infocrank unit. See, almost everyone else in the power meter world uses CR2032 batteries these days, which makes them super-easy to find the world around. You can stop in any grocery store in pretty much any tiny town anywhere and find replacements for them. The Infocrank however uses SR44 silver oxide batteries (aka 357):
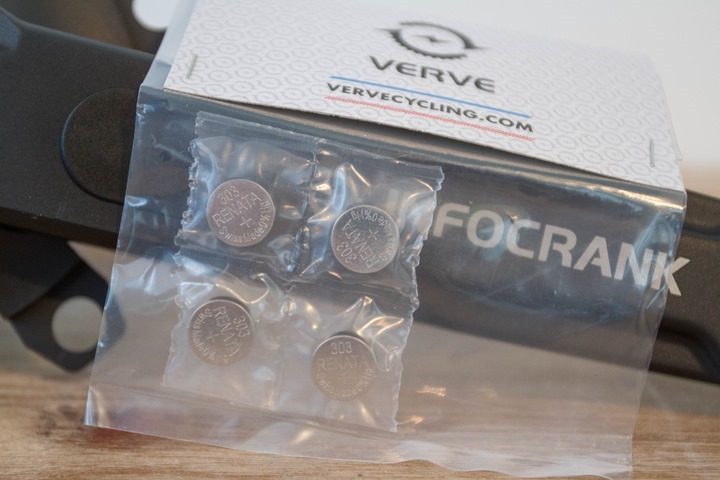
These are basically hearing aid batteries, and are far more difficult to find in smaller towns. The type of towns that luck will have it your batteries will run out on when on a trip. Trust me, mine did. In fact, they ran out twice while travelling. The first was on my second ride after having arrived in New Zealand – so one of my first duties then was trying to find replacements. And then again, this past summer while in the Swiss Alps…on a Saturday evening. For those in Europe, you’ll know that’s just about the worst time to find a new battery since everything closes earlier, and stays closed till Monday.
In my case, I found a non-perfect replacement at a grocery store in the final few minutes of closing (after checking 4-5 other stores). It worked because it was the same form factor, but it was the wrong type (alkaline) – so Verve doesn’t recommend it long term for best battery performance. Still, no negative impacts for the short term to get you through in a pinch (a few days as was my case).

The unit requires two batteries per crank arm side. So obviously it’s best to get a small pile of them and just stick them in your saddlebag or other location that always travels near your bike.
Finally, when it comes to performing a zero offset, the company maintains that you need not do so. A zero offset is technically different than calibration, though the terms are often used interchangeably on head units. I tested this theory a bit, especially on days where I was riding with significant temperature swings – or had just brought out the bike from a hot place to a cold place. Indeed, I saw no issues during any of these.
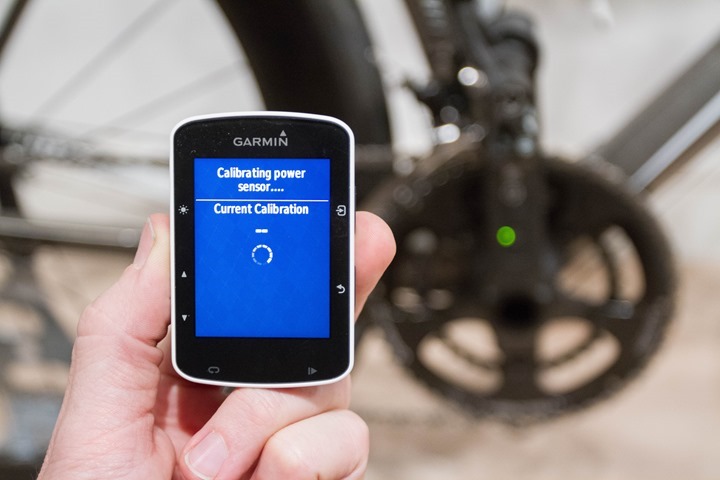
Of course, most power meters do have some form of temperature compensation (active or passive) built within them. In the case of the Infocrank, when you do a zero offset, it will report back to you a value. Note that you would want to follow their instructions, as if you had the cranks positioned horizontally during a calibration event, it could impact accuracy of the unit.
If you do go down that path, you can actually take these values and understand the impact of them in wattage, using a simple chart they’ve created. It’s pretty cool.
Power Meter Accuracy Test Results:
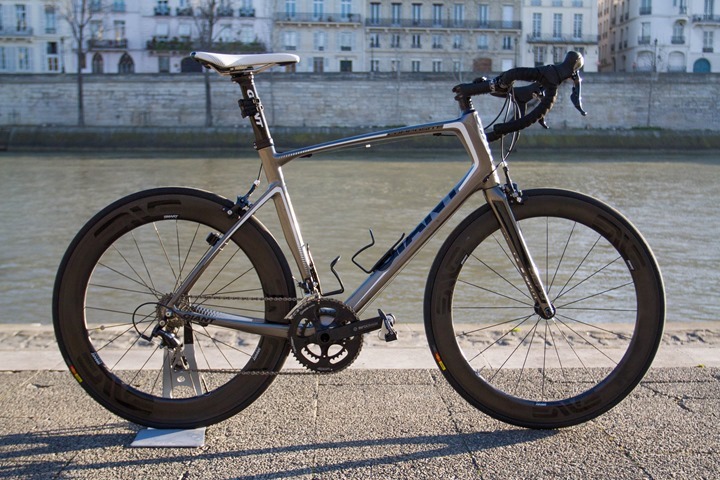
For my testing, the Verve Infocrank was tested on a single compatible road bike of mine, the Giant Defy. Though, all of my bikes I use for power meter testing are fairly similar in terms of ancillary power meters to compare against. Each has a rear PowerTap G3 wheel on it. And each has a different crank based power meter in test on it, in this case, the Infocrank. Additionally, for all tests I also had either a PowerTap P1 or Garmin Vector pedals on the bike. All in, I’d have no less than three power meters. For indoor tests, I’d place it onto a trainer that supported rear wheel usage (generally the CompuTrainer, so I could keep the PowerTap hub on the bike).
From a data collection standpoint, virtually all of the data used in the analysis was collected using Garmin Edge 510/520/810/1000 units. I also record some data with NPE WASP units, as well as other applications. Data analysis is largely done in a custom toolset I use to ferret out differences, while also using more widely available tools like Golden Cheetah, Excel and Training Peaks to validate the results.
With that, let’s dive into things. I’m going to pick a few random rides that talk to specific conditions (i.e. temperature changes), sprints, stable power, cobbles, etc… The goal being to ferret out any oddities that I might see. You can download all the ride data used in this review at the end of this section (plus a bunch of other random data I tossed in there now shown here in graphs).
First, here’s a ride out to Versailles I did last February. This is with Garmin Vector, the PowerTap G3, and the Infocrank. First up – the overview, smoothed at 30s to make it easy to read. Also, in this case I chopped off the first five minutes of the graph, where the Vector unit had something odd in one of the pods, so it was wonky values till I reset it. It was happy after that.

Now you can see quite clearly that there’s almost no divergence of any of the lines. Seriously, it’s like white on rice – they never leave each other.
Now, we’re going to dive into edge cases in a minute in other examples – but one of the charts that’s most useful for comparing power meters is the mean/max chart. It shows how different units handled over the course of the ride – by showing the max wattages for a given time period along the bottom. You’ll note these are scary-close to perfect. Seriously, check out that 4-second max value – within 1w of each other. Yes, in theory the PT should be lower, and the Vector a touch bit higher, but to have them all within a very close ballpark at those wattages is really ideal.

Next, we’ve got a nice 3hr ride I did in the Swiss Alps, this one with a significant 2,100ft elevation gain in the span of a single hour (while a storm front was moving through). This is notable because it allows you to look at temperature shifts on climbs – which I’ve seen in the past can be challenging for power meters due to lack of stopping to allow them to re-zero. So, I like these sorts of tests when possible. This test was on an Infocrank, bePRO, and PowerTap G3.
Here’s the quick overview with a 30s smoothing factor just to make it easier to see. The values you see are simple point in time values from wherever my mouse was highlighting. They are NOT averages.

That said, for averages (a very low and useless bar to use), they do align nicely. Specifically that the PowerTap is the lowest, then the Infocrank, and then the bePRO. That’s considered ‘proper’ ordering based on the highest being closest to your foot (output of power).

Next, we’ll dive into the climb portion a bit, to see if there’s any variance going on there:

What you’re looking for here is divergence of lines. Specifically if a given power meter slowly creeps up/down from the rest of the pack. In this case, all three units stay together. You see a tiny bit towards the last 2-3 minutes where the bePRO unit starts to offset, but I believe that’s actually because I had mostly popped out of my pedals at that point since I was on steep gravel (the road ended) and wanted a wee bit more flexibility in case I had to catch a fall. So basically, nothing to worry about.
Next, after I coasted downhill back to the base, you look at the first few minutes as I start riding again – are the units in lockstep? And the answer is again – yes. As is usually the case you’ll see each power meter react slightly differently in the first few seconds upon waking up/reacting to force, but then they track well together.

In fact, the bePRO and Verve Infocrank are so close together it’s really damn impressive. I rarely see that level of closeness (in case you’re wondering, the tools I use actually enumerate out the individual power meter serial numbers from each Garmin file, just to ensure I don’t mix anything up). The PowerTap is a bit lower – but that makes total sense given it’s ‘downstream’ after you consider drivetrain loss/etc…
Next, let’s look at a night last month where I was out doing a cross-town ride, then some loops around a popular cycling area, before waiting on the side of the road a bit for a package drop-off, and then my ride home down the pavé of the Champs-Élysées.

The first 25ish minutes is crossing town, so a fair bit of stop and go. Then from 25mins till 60mins is mostly loops in/around a group of cyclists. Diving in on that a second, we see all three units track well. I’d say that perhaps the bePRO is a tiny bit high in some sections where it diverges from the other two – but the Infocrank and G3 are very consistently glued to each other at the same offset.

Now if I take off the 30-second smoothing, and pull it back to a 3-second smoothing factor, we can take a look at one of the sprints I did here. This one was up a short climb where the Infocrank had me hit a max of 830w. Of course, with the 3-second smoothing applied below, that tops out at 781w. What we’re looking at here though is how quickly they track when you apply significant power, as well as how quickly the power disappears:

You’ll notice that the three units track very well in terms of going up, and down (with the bePRO appearing to register the zero-power stop slightly differently than the other two – it’s unclear who is right there).
For fun, I removed all smoothing (so 1s smoothing), and then re-loaded the chart. in this case, the PowerTap G3 and Infocrank were within 1w of each other for max power on that segment. While the bePRO was lower.

Note that in general I don’t put too much stock in 1s max power comparisons – because it’s honestly more about timing of signals/communications between the head unit and the power meter than anything else.
Ultimately, no matter how many graphs I create, I’m seeing the same thing over and over again – which is that the Infocrank just aligns to other power meters I’ve compared. I really can’t seem to find any cases where I think something went amiss. There’s a few more files that I analyzed with the Infocrank mixed in there as part of my bePRO review as well – for those interested. But again, they all show the same story – even in adverse conditions.
I love the fact that from an accuracy standpoint it’s very dependable ride in and ride out, with nothing to do on the end-user standpoint (for fun, a few of those days in the Alps I specifically DIDN’T do any zero offsets, to see how it might do – no issues).
For those curious, you can find a huge pile of my power meter data here in this zip folder. Generally speaking the naming conventions speak for themselves. I have more data I’ll try and add in here over the next few days, just digging out some of my older data to add to it. Newer data is categorized a bit better these days making it easier to enumerate.
Power Meter Recommendations:
Note that while this is a power meter review, I tend not to put purchasing recommendations/comparisons to the rest of the market in these. The reason being simply that I’ve created an entire post dedicated to that – with boat loads of information about all the options available on the market.
Now the only thing to consider when using that post as a buying guide is that, as I discuss elsewhere here, Verve is set to announce price changes shortly. Those price changes would definitely change the picture a bit. Now until those happen, my buyer’s guide stands as-is. However, once those are announced, I’ll go back and update the buyers guide with pricing as makes sense.
Also note some of the features discussed in the next section are not in the buyer’s guide, because again, they haven’t happened yet. The buyer’s guide tends to be a point in time snapshot of ‘what’s real’ versus future planned changes.
In any event – grab a cup of your favorite caffeinated beverage and swing on over to that guide for more than you ever wanted to know.
A Few Thoughts That Didn’t Fit Elsewhere:
There’s a lot of interesting points and counterpoints about the Verve Infocrank system that didn’t really fit elsewhere in this post, or that I wanted to specifically call out. So I’m doing these as partly a Q&A and partly an internal debate in my head. Some of these points came out from a discussion I recently had with the company, on why specifically they had done things a certain way. Thus it made sense to explain it in more detail by itself.
Magnetless Plans: Starting in January, they’ll roll out a firmware update that no longer requires the magnets. They aren’t using accelerometers, but rather are actually using the strain gauges and the ability to read the tangential load. They’ve validated RPM’s up to 180RM, but are working to hit 210RPM. This is huge news, especially because it gets away from one of the most finicky parts of the setup.
Installation Flexibility: Probably one of the biggest challenges for the company to date has been some of the limitations on bike, crank arms and chain ring support. Going into next year, they’ll be rolling out more sizes, which they say will cover: 24mm & 30mm spindles, 110 & 130BCD, as well as arm sizes of 155mm, 160mm, 165mm, 170mm, 172.5mm, and 175mm. They noted in my case the Cervelo limitation will go away because of the 24mm spindle and the doing away of magnets would solve my P3C challenges.
Pedal Stroke Analysis: In January, they’ll launch a firmware update that’ll allow you to use their torque analysis and pedal stroke analysis app. This will take readings at 256 times a second and also pipe that information into the pedal smoothness metrics. But folks will be able to look at the raw data within the software suite directly.
Bluetooth Support: Finally, longer term they noted that they recognize the need for Bluetooth, but that it’s not a short-term item, but probably more around the Eurobike next year timeframe. At present there isn’t a ton of Bluetooth-only head units that appeal to power meter folks, so they can probably get away with this until then.
Pricing: Up until this point, pricing is really the biggest challenge I’ve had with the Infocrank. It’s just priced too high ($1,750USD), no matter how you slice it. However, in my discussions with Verve over the last few days, they plan to announce a global price restructuring (read: getting cheaper) in the next few weeks. Given that, I’m optimistic /hopeful that they’ll address my main concerns here.
Summary:
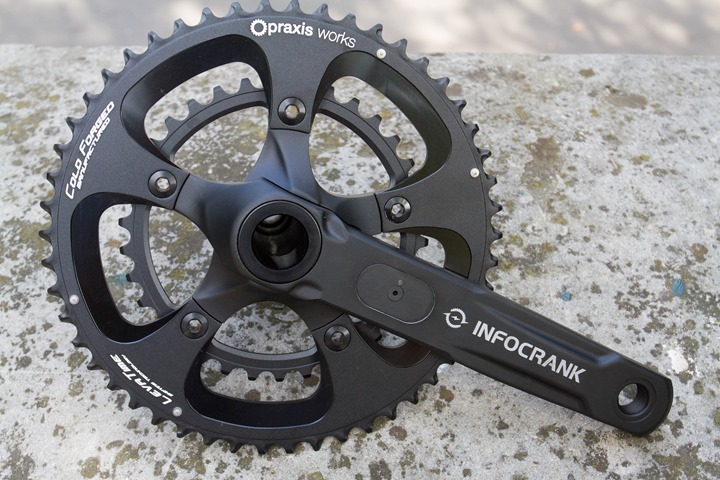
When I think of the Infocrank power meter, my brain re-words it as ‘Infotank’. The unit feels like it’s built like a tank, and in many ways operates like a tank. By that I mean that it’s really good at doing the core things right – measuring your power. I’ve had no issues on that front – it does that very well and is very reliable there. Yet, like a tank it tends to skip over some of the non-mission critical trimmings – such as dual ANT+/BLE support, crank arm flexibility, or easily found batteries. A luxury sedan this is not, and for some people – that’s OK.
The good news though is that this past summer I would have said that I didn’t think Infocrank as a company ‘got it’. I would have said (and did say) they were repeating the market mistakes of SRM, without the brand of SRM to carry them through those mistakes. However, my recent discussions with them shows that they ‘get it’. Their upcoming global pricing change should help considerably, as will their focus on adding functionality that is commonplace to most other power meters in the market – filling in what were previously gaps. If they can nail the pricing aspect (since that’s still unreleased), they could definitely be a very valid player for those wanting a dual-leg crank-based solution.
Like I said, accuracy isn’t an issue for me. While I place virtually no value on the certificate of accuracy certificate they have – I do place value on months and months of testing with the unit in all assortment of conditions. And in those tests, I simply don’t see any variance that’s of concern, or any situations where things went south.
With that – thanks for reading. Feel free to drop any questions below in the comments and I’d be happy to try and answer them, or sucker someone else into answering them.


