Mio Fuse Activity Tracker and Optical HR Sensor In-Depth Review
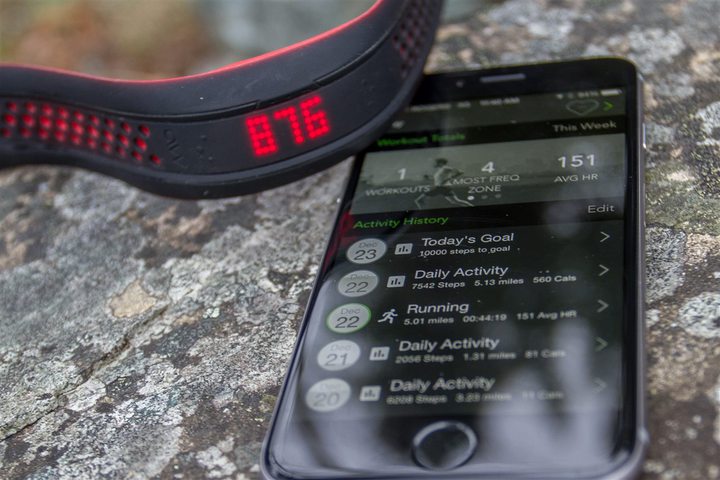
This past summer Mio announced two new products to their lineup – the Mio Fuse and the Mio Velo. These products just recently started shipping in the past few weeks, giving me an opportunity to use the final hardware and software. In the case of the Mio Fuse, they took their existing knowledge of the optical heart rate (HR) monitoring space using their Mio optical HR sensor and extended the device to add in daily activity tracking. This allowed them to gather metrics such as steps over the course of your day.
Beyond the Fuse, they also introduced the Mio Velo. This product is an ANT+ to Bluetooth Smart bridge, built on top of the Mio Link platform. I’ll be reviewing that product in a separate review, primarily due to my lowered level of cycling over the past few weeks because of significant work and personal travel.
To be clear, I’ve been using a Mio Fuse provided by Mio to test with (final production unit). Like always, I’ll be shipping that back to them in Vancouver in the next little bit and going out and getting my own via regular retail channels. That’s just the way I roll.
Lastly, at the end of the day keep in mind I’m just like any other regular athlete out there. I write these reviews because I’m inherently a curious person with a technology background, and thus I try and be as complete as I can. But, if I’ve missed something or if you spot something that doesn’t quite jive – just let me know and I’ll be happy to get it all sorted out. Also, because the technology world constantly changes, I try and go back and update these reviews as new features and functionality are added – or if bugs are fixed. So – with that intro, let’s get into things.
Unboxing:
To begin, the Mio Fuse comes in a reasonably small box that’s fairly similar to the other Mio products. It should be noted that the Fuse comes in a small-regular and large version. The small version (in aqua color) is for wrists 149-179mm / 5.9”-7”. Whereas the large (red) is designed for 156-208mm / 6.1”-8.2” in circumference.
Inside the box you’ll find three items of note: The Fuse band itself, the small USB charger, and then a little paper quick start guide.
The USB charger has a magnet within it that will pull the Fuse onto the two pins. Note that this is just a tiny bit different than the Mio Link charger which has four pins (which is the easiest way to tell them apart).
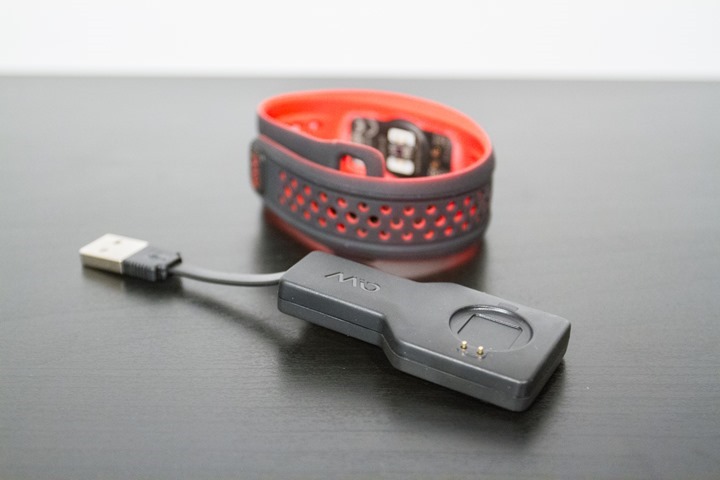
This USB charger can be plugged into any USB port found on the planet. Note that this charger does not transfer data to a computer, that can only be done wirelessly to your phone (with the Mio Go application). Alternatively some 3rd party computer applications can support the wireless ANT+ or Bluetooth Smart heart rate signal, such as Trainer Road or others.
The Mio Link simply snaps directly onto the charger, as one might expect:
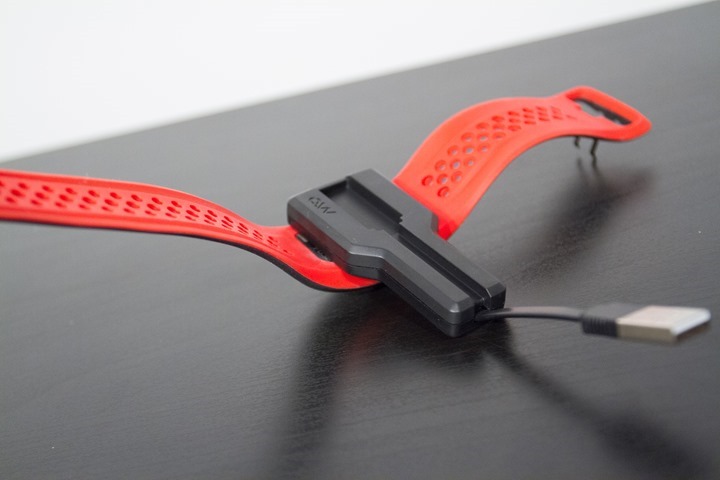
Which, of course, brings us to the Mio Link itself. The front of it features a LED screen along with two buttons, each to the left & right with brail-like bubbles on them, and another centered along the top edge (or, in the case of the below photo, flipped on the bottom).
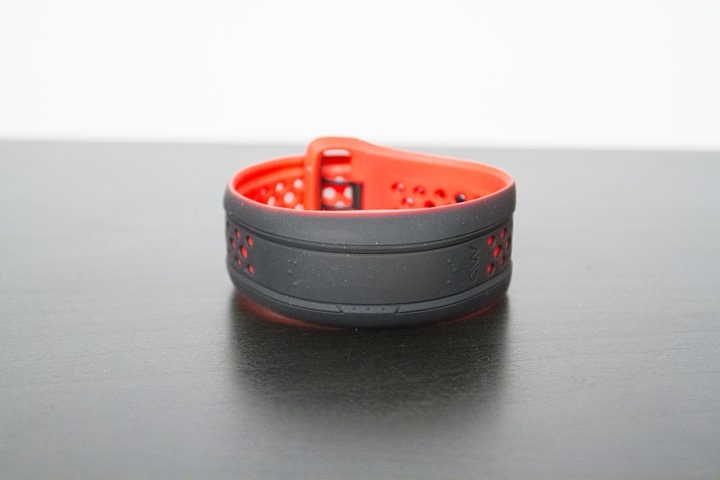
The band is physically molded to the sensor, another slight change from the Mio Link (where the sensor is removable). I personally don’t mind this, as I never really found much use in having the separation anyway.
That sensor you see along the bottom is the optical HR sensor, which will illuminate a green light when powered on during a workout. That green light illuminates the blood capillaries just under your skin, and allows the other portion of the sensor to read your heart rate.
The band itself is a rubber material that bends easily and attaches via two small knobs. It’s pretty adjustable in terms of sizes you can make it.
And finally, the third component in the box is the little quick start manual, which gives you some guidance on how to wear the band. I’d consider paying attention to this particular page – since it’ll directly result in how successful you are with the optical HR sensor during workouts.
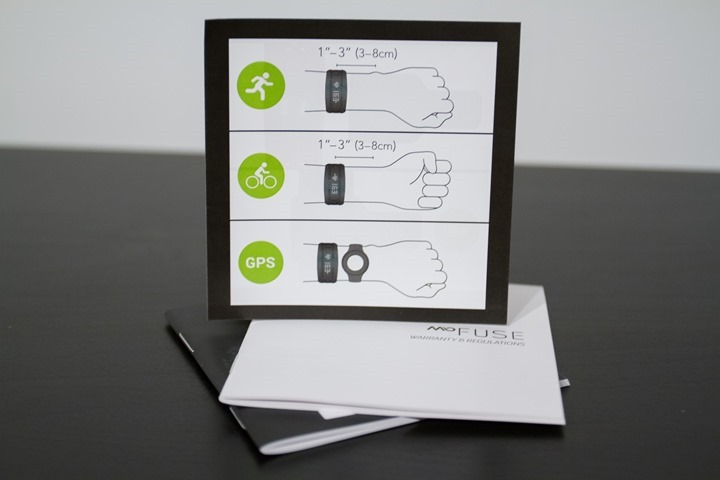
With that, let’s move onto some size comparisons.
Size Comparisons:
When you look at the Mio Fuse, you’ll notice it’s a bit chubbier than its older sibling, the Mio Link. This chubbiness is to accommodate the display screen.
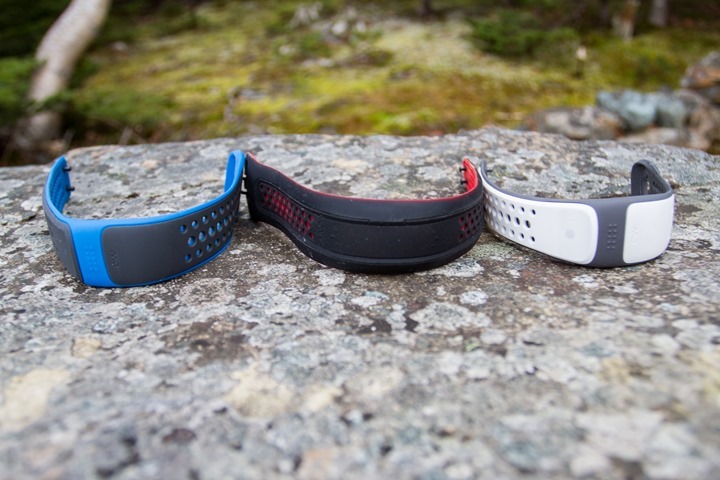
The optical HR sensor between both the Mio Link and the Mio Fuse is identical – there are no changes there. There are however changes to the antenna within the Mio Fuse to give it better strength than the Mio Link, in particular on ANT+ (though that’ll help on Bluetooth Smart too). Note that the Mio Velo retains the same form factor and internals as the Mio Link.
When you compare the Mio Fuse to other activity-only trackers on the market, it’s without question the plumpest of them all. But of course, that’s somewhat of an unfair comparison because very few of the others actually contain an optical sensor that accurately tracks HR.
Finally, in looking at the wrist and how it fits, here’s my wrist fit:
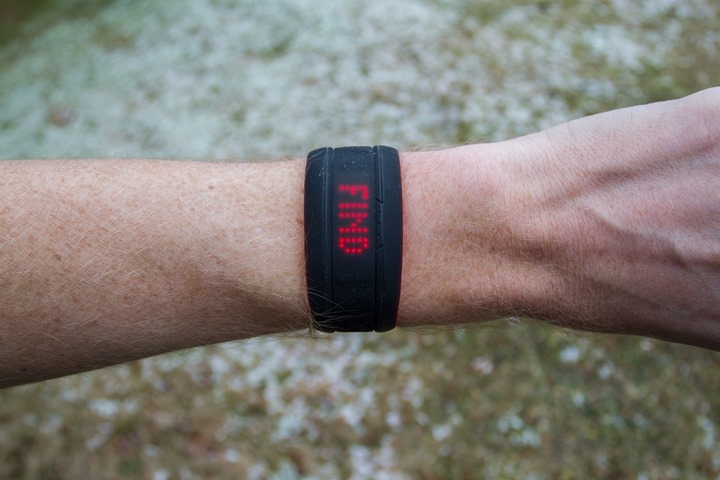
Ok, with all these quick size photos taken care of – let’s get onto using it!
Activity Tracker Functions:
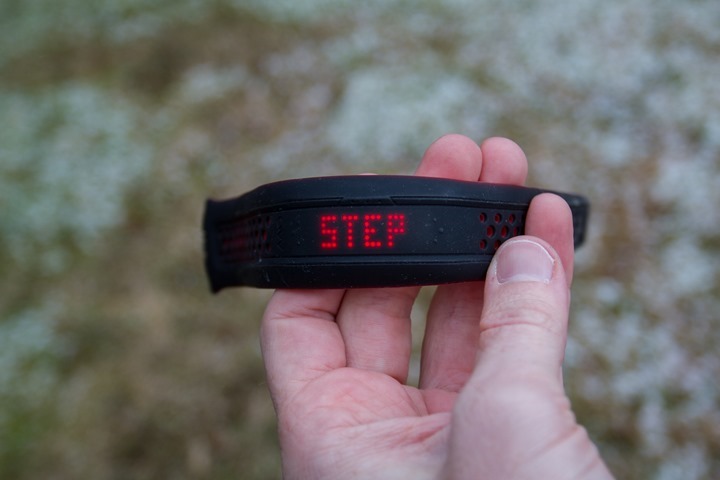
Of the two new features that Mio has added into the lineup that makes up the experience of the Fuse, activity tracking is one of them. This is similar to other activity trackers on the market in that it keeps track of steps, distance and those metrics against a total goal screen that can be shown as well. Additionally, you can get time and calories shown.
The activity tracking mode is enabled 24×7, and is always accessible by simply taping the screen on one of the two small sets of dots on the band. When you tap these, it’ll scroll left or right through the display pages. They’re working to enable an ‘always-on’ display option for regular activity tracking mode. Obviously, that’ll drain the battery more, but you can turn that on/off as you see fit.
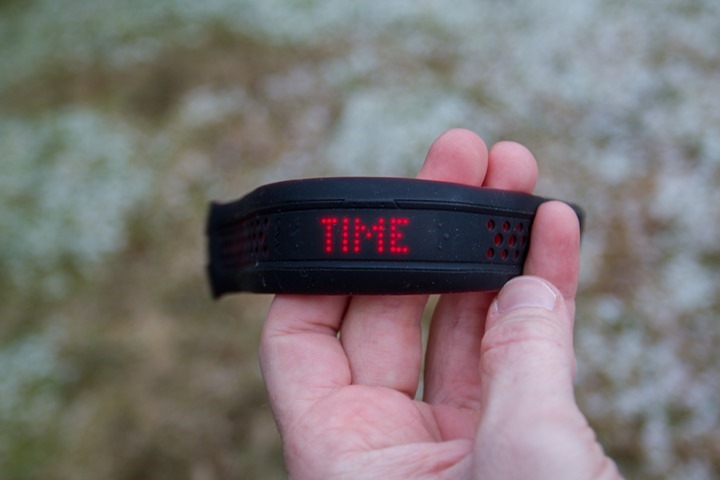
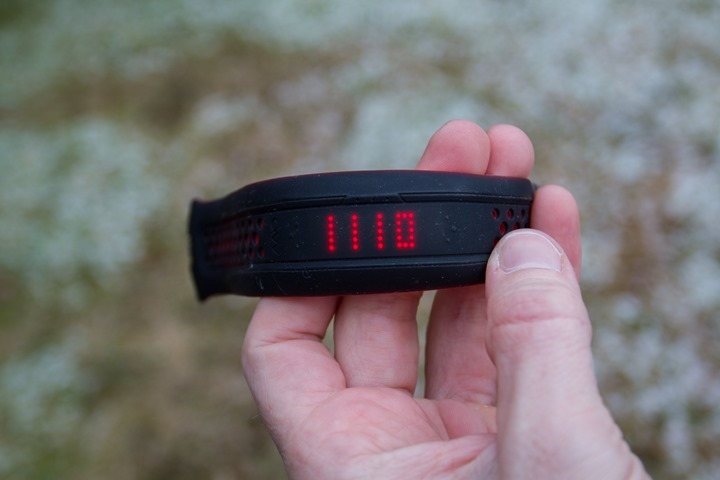
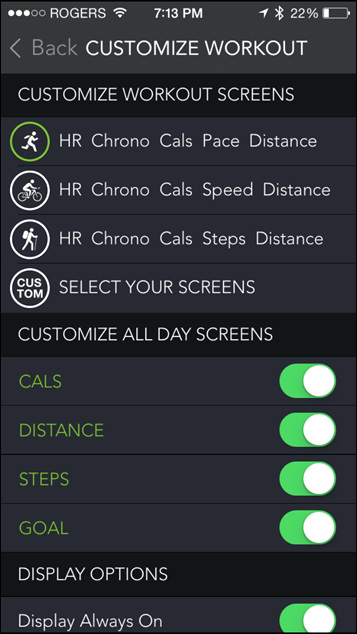
These activity tracking display pages can be customized within the Mio Go app on your smartphone, simply enabling or disabling different pages (this is also true of workout mode):
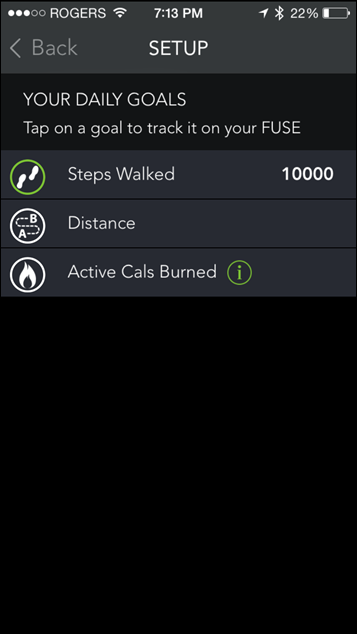
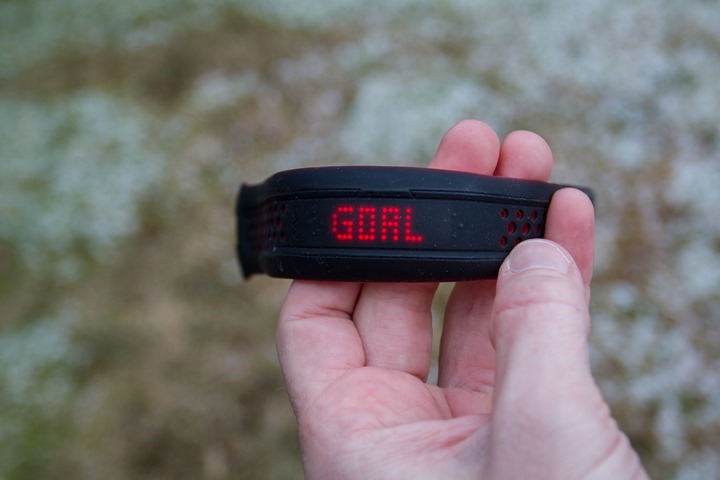
With respect to the daily goal, your progress is shown on a little bar against the total value that you’ve specified. By default, that’s 10,000 steps:
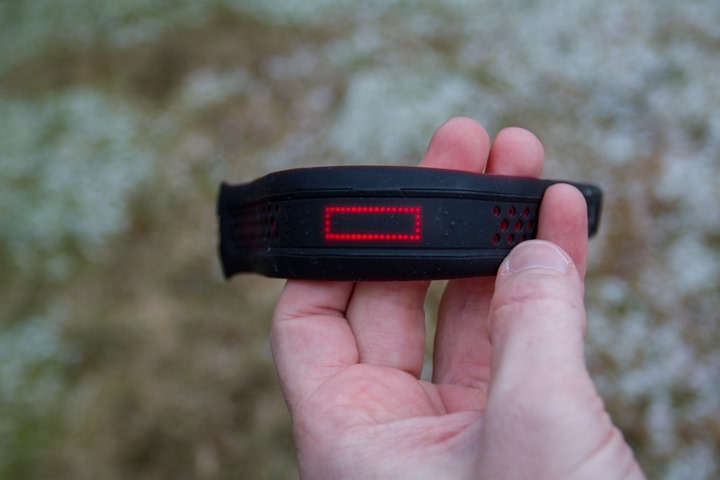
However, within the Mio Go app, you can customize that to be ‘Steps Walked’, ‘Distance’, and ‘Active calories burned’ (so calories from movement, not just BMR calories).
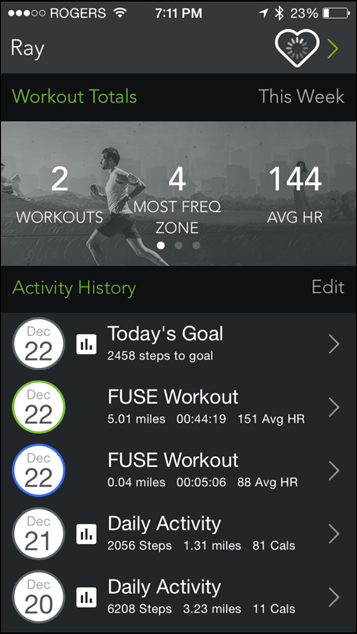
In addition to being shown on the screen, these steps are shown on the Mio Go app. First it’ll show them on the main app page as a line item for that day, but additionally in a more detailed ‘Daily Activity’ total that shows your steps, active calories, resting calories, and distance.
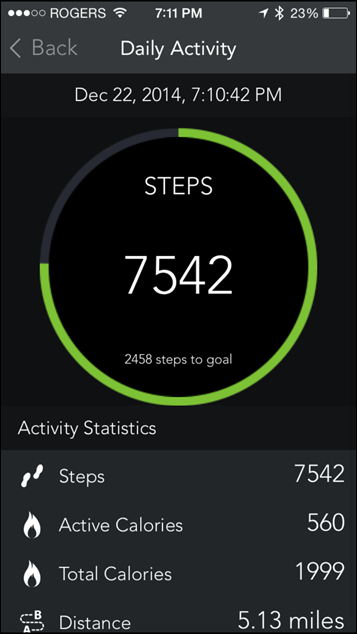
I’ve seen some inconsistencies with the active calories piece, where it doesn’t quite seem to be accurate for non-workout days involving only steps. My understanding is that’s a software issue that Mio is working on.
When looking at step counting accuracy, I do see a bit of a 10-15% reduction in steps compared to other devices. I asked Mio about this, and they noted it’s a bit of a purposeful decision to try and not overestimate steps. They believe that other counters overestimate steps – in part through false positives (such as during driving, showers, etc…), but also in just general overestimation.
Additionally, just as a note of clarity – the Mio Fuse does not keep the optical HR sensor on when in normal day to day activity tracking mode. The optical HR sensor is only enabled when in workout mode.
Finally, when it comes to sleep (found on some other activity trackers), the Mio Fuse does not at this time measure sleep.
Workout Mode Function:
The second major new function that previous Mio optical HR sensor devices lacked is a workout mode that stored/saved and uploaded the workouts. In the case of the Fuse, it adds this capability. This enables you to switch into a workout mode that will will record the workout separately. Within this mode you can also display heart rate (HR) zones, as well as leverage the optical HR sensor within it to display your heart rate.
To enter workout mode, you’ll hold down the center button on the unit for a few seconds:
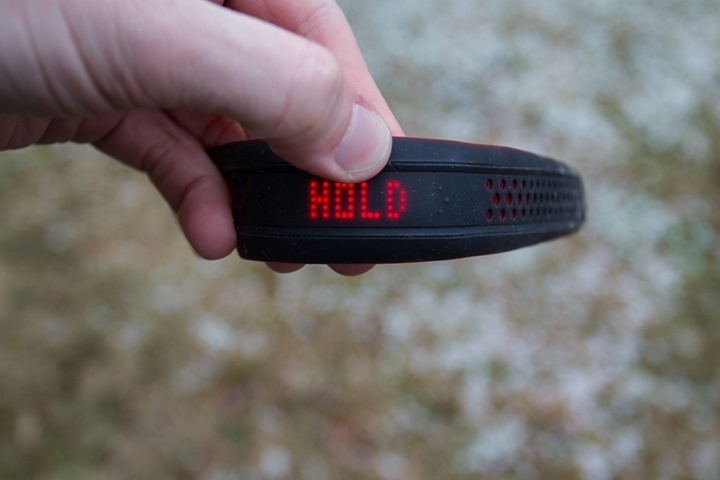
This will begin the search for your pulse, via the optical sensor. The sensor will illuminate green and usually takes about 10-20 seconds to find your pulse.
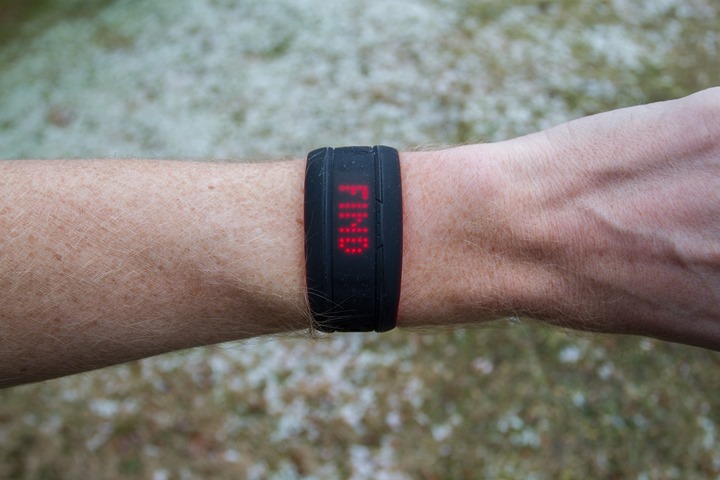
Once it does that it’ll be displayed on the wrist band:
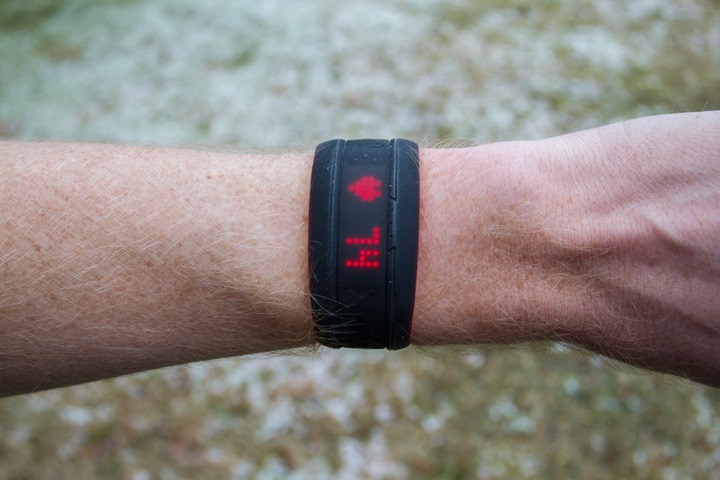
Note that at this point the unit is transmitting your pulse via both ANT+ and Bluetooth Smart. This allows both apps (like Strava or MapMyFitness) to pickup your heart rate, as well as allowing 3rd party devices like a Garmin watch to display your HR. But I’ll talk about that more in the next section.
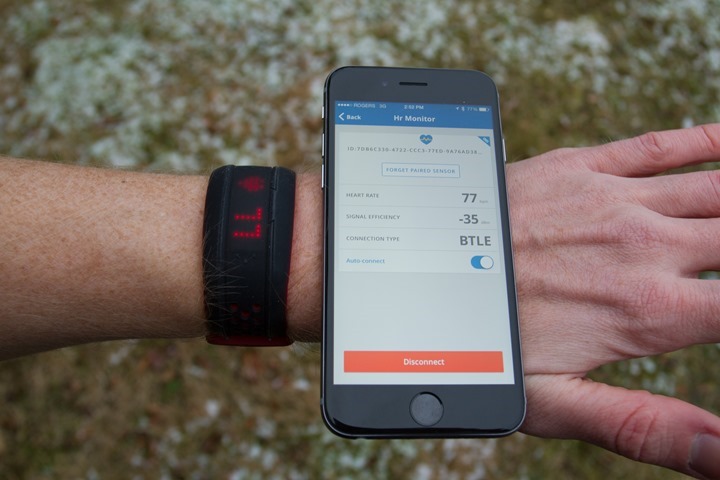
Now, at this point the unit isn’t yet actually recording your data as a workout. To do that you’ll need to tap the center button once more to trigger the workout to start. This is handy in that you can get heart rate acquired, and then press start once you’re ready.
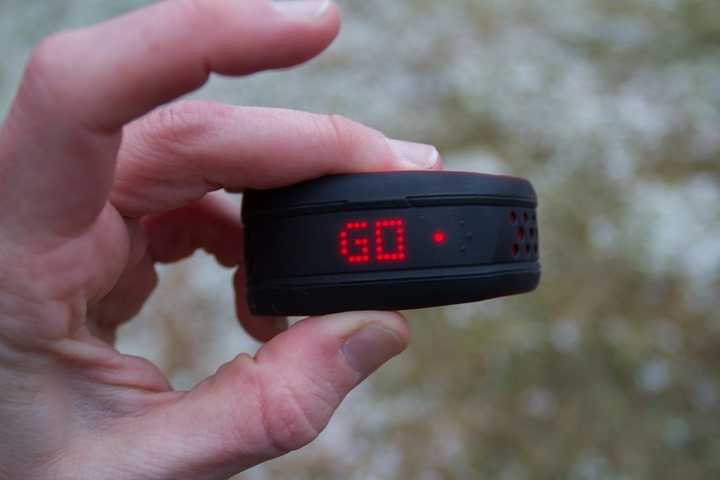
Once you’ve started the workout you’ll be able to see stats about the activity in much the same way as when using it during daily tracking mode. This includes seeing your heart rate, but also seeing the distance and time of the activity itself:
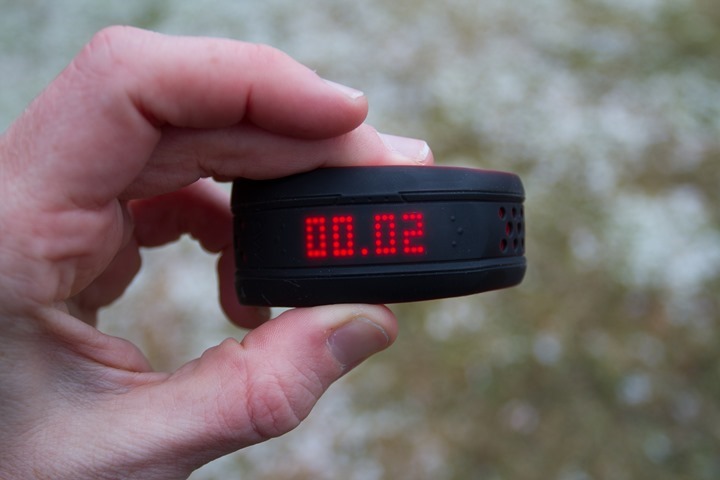
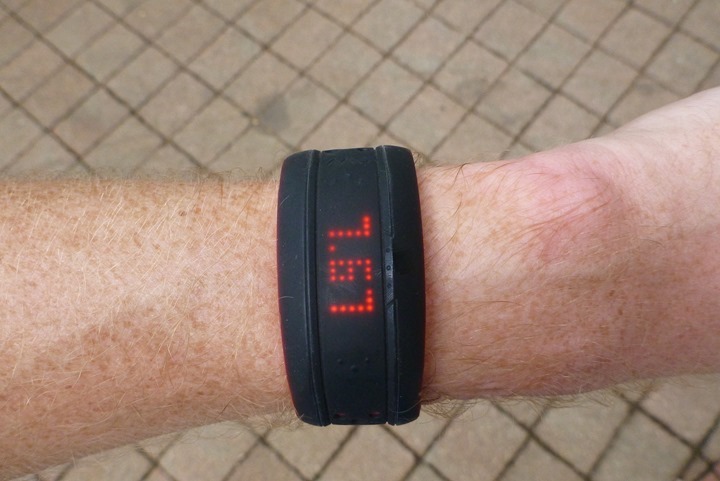
Just like normal, you can tap the little buttons to scroll left and right to the different data fields. If you want to pause the workout (such as to stop and eat a hot dog mid-run), you can tap the center button, which will pause the workout. You can then resume it again by just tapping the center button again.
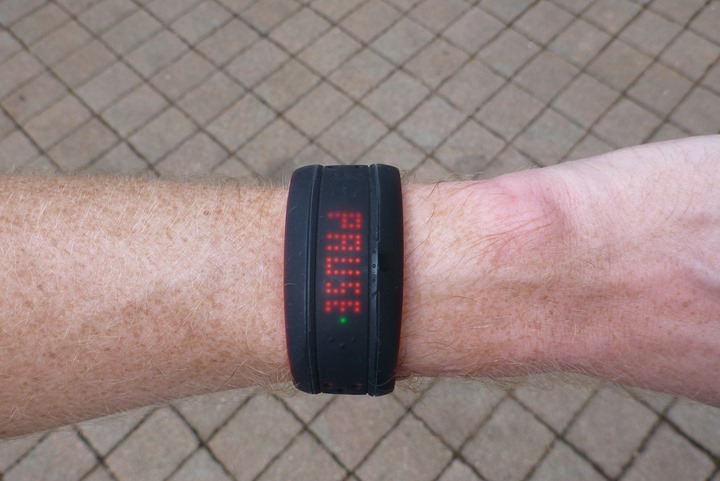
The unit contains a vibration motor, which will send vibration alerts as you go below and above your target zones. You can specify either a 3-zone or 5-zone setup. In addition to the vibration alerts, it’ll also display a small colored LED light so you know if you’re above or below the specified zone. In the below case, it’s green, as I’m right in my target zone.
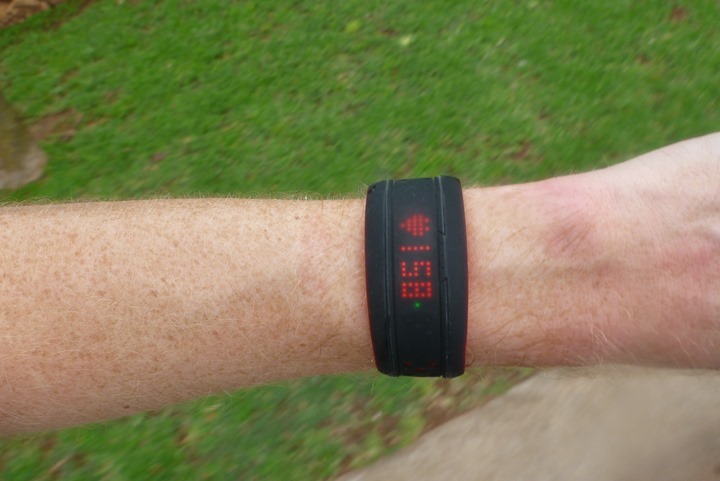
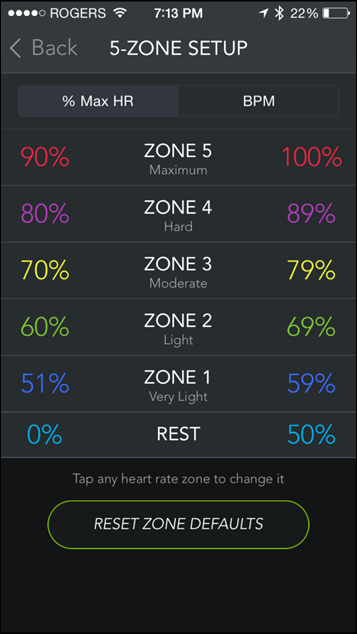
These zones can be configured within the Mio Go App:
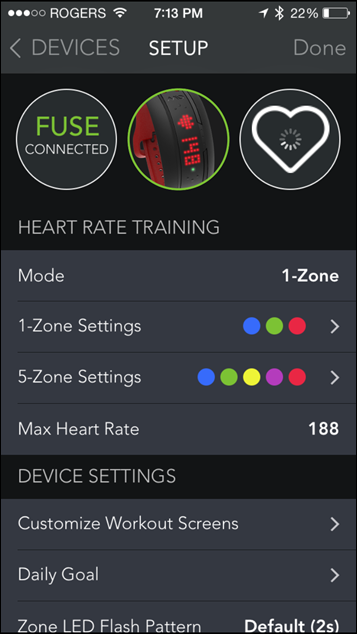
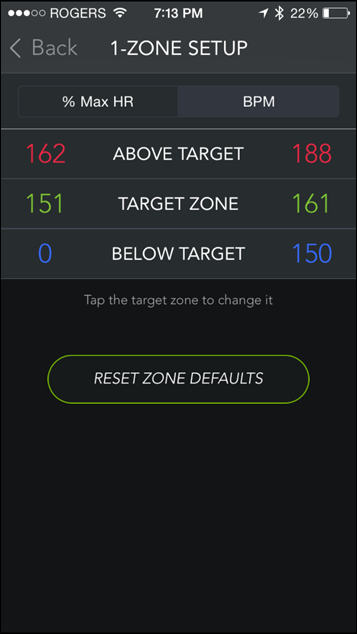
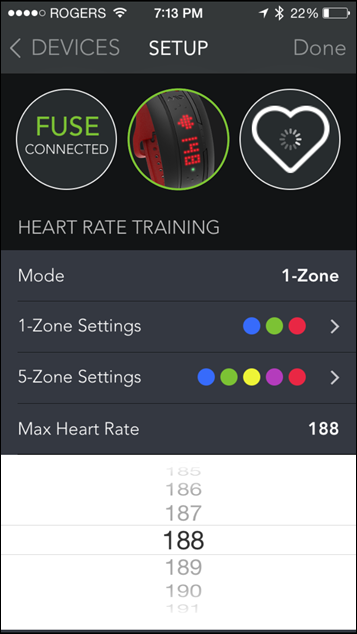
And the zones can be setup either as BPM or %MAX HR. The Max HR would be based on the setting for maximum heart rate within the app.
Finally, when your workout is complete, after pausing you’ll hold down the center button to save the workout. This workout will then be visible within the Mio Go app, first shown on the main page and then you can tap it to get more detailed workout information:
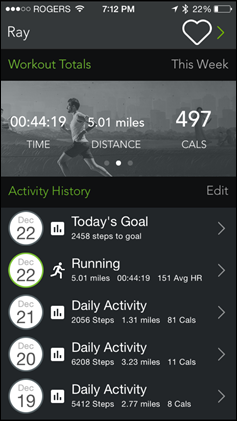
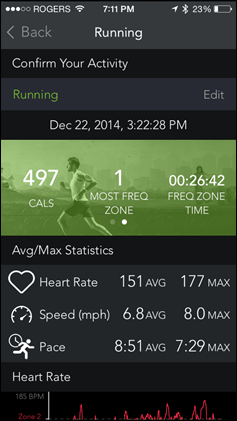
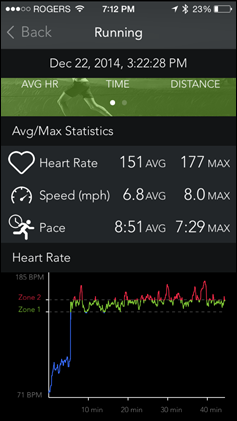
Now I’ll get to heart rate accuracy in a later section, but when it comes to overall use during a workout, the unit actually works fairly well and is pretty easy to use. Note that like the daily activity tracking, I do see about 10-15% reduction in distance while running though (compared to GPS) due to the underestimation of steps they’re doing. For me personally, this isn’t really a deal breaker since I’m using the GPS on most of my workouts through another app or device anyway.
Below, you can see how the Garmin had me at 8.78 miles, while the Mio Fuse was at 7.67 miles (additionally of interest is the blue light, indicating I’m below zone – since I’ve been standing a minute or two).
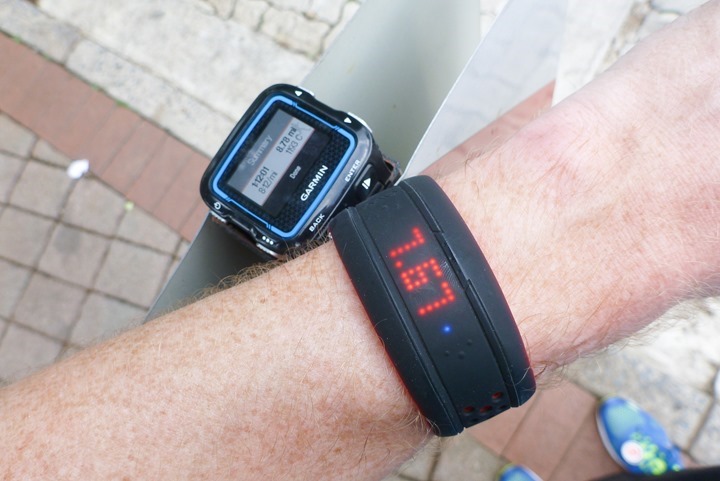
Lastly, the unit is waterproofed to 3ATM, which means it’s more than sufficient for showers, water and even some basic water activities. Many have used the Mio Link in the past to measure heart rate in a pool with a watch directly next to the Mio unit.
Connecting to 3rd party devices:
The Mio Fuse, like its predecessor the Mio Link broadcasts your heart rate during a workout on both ANT+ and Bluetooth Smart. This enables you to pair your various existing fitness devices with the Mio Fuse and use it just as you would a traditional heart rate strap.
All you have to do to enable this is to simply start the workout mode by holding down the center button, which begins broadcast shortly thereafter.
From there it’ll broadcast via ANT+ to compatible devices as long as they support the standard ANT+ Heart Rate device profile (basically, any ANT+ device out there). For example, below you can see me having it paired to the Garmin FR920XT:
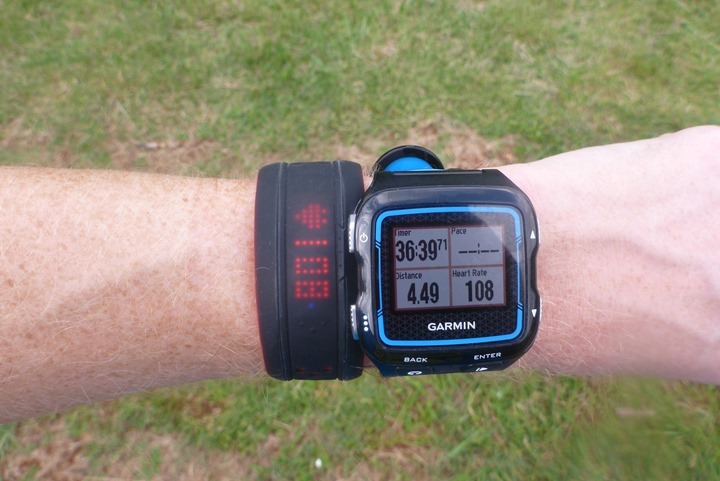
Or, you can do the same with an iPhone app such as Strava or MapMyFitness, using Bluetooth Smart. This will require a Bluetooth Smart capable device, so basically a phone with Bluetooth 4.0. On the iPhone side, that’s the iPhone 4s and newer. On Android phones it’s a bit more complex, but it’s roughly any phone in the last 18 months or so.
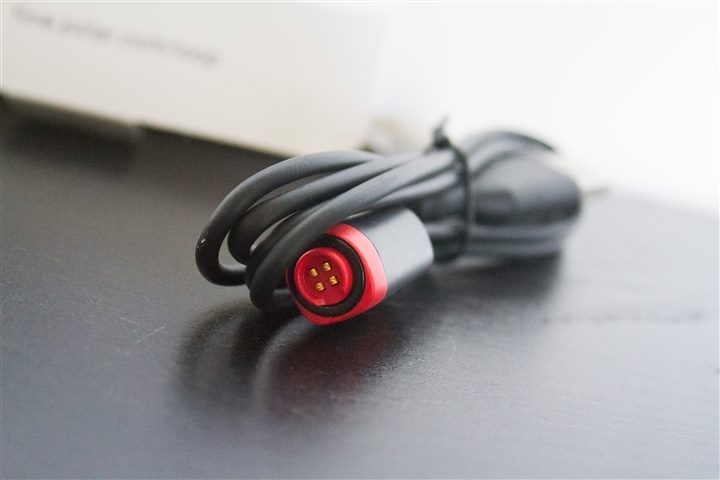
Note that with Bluetooth Smart you can only pair a single device concurrently to the Mio Fuse at once. This isn’t a Mio limitation, but a Bluetooth Smart limitation. For 99% of people, this won’t matter. But, worth noting. You can however use an ANT+ device concurrently with a Bluetooth Smart device, or, as many ANT+ devices as you’d like.
Lastly, when it comes to signal – I’m generally seeing good results. There were some small antenna changes on the Mio Fuse due to additional real estate within the unit, which should be an improvement over the Mio Link. In my testing I saw no problems when on the same wrist utilizing ANT+. On separate wrists (Mio Fuse on left, Garmin on right), most of my workouts were without issue – though I did see one workout where there were dropouts.
Optical Heart Rate Accuracy:
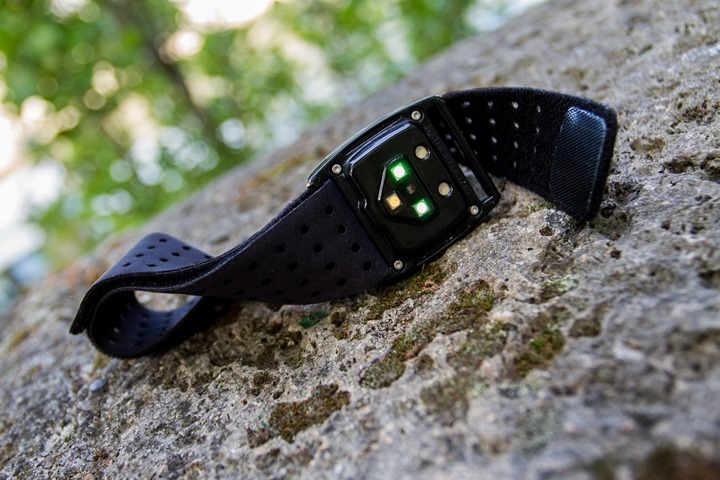
Probably the most important thing to understand about optical HR sensor accuracy is that it will vary from person to person, and from position to position within a person. For most people, it may take 2-4 activities until they find their ‘ideal’ spot to get the most accurate and consistent results.
For better or worse, I’m about the easiest person on earth to get good optical HR sensor data for. This is likely due to my rather fair skin, along with minimal forearm hair – making it easy for the optical sensor to determine my HR. Said differently: If a sensor doesn’t work on me, then the rest of you are hosed.
In the case of the Mio Fuse, it uses the exact same sensor as found in all Mio products – including the Mio Alpha, Mio Link, and Mio Velo. Further, it’s the same sensor found in 3rd party products that Mio licenses to them, including the Adidas Smart Run GPS and TomTom Cardio GPS line. This sensor has a long history of producing consistently accurate results for athletes.
Now, it’s really important to understand the difference between the optical sensor, and the transmission components. The sensor is what measures your HR, whereas the transmission is what gets your HR via ANT+ and Bluetooth Smart to 3rd party devices. In the case of the Fuse however, it can also store the data locally on the band – negating the need for transmission to 3rd parties. I note this because the Mio Link has had some turbulence on the transmission part, which some people misunderstand as HR recognition accuracy.
With that brief primer in mind, let’s look at a few samples of HR accuracy. In these cases, I’m comparing it against a conventional chest strap. Thankfully, I’ve been using HR sensors for about 8 years now on every workout I do (so basically, every day), so I have a pretty keen understanding of what my HR should be at a given effort level and can quickly determine false positives.
Sample 1: South Africa Run
The first example is a run I did last week in South Africa, I wrote about the non-technical aspects here in this post. Looking at the below though, you can see that the HR strap (a Garmin HRM-RUN) and the Mio Link tracked very well. You see a tiny bit of variance at one point a few minutes in, but it’s not 100% clear to me who is correct. Knowing my paces a bit there, I suspect the Mio Fuse is actually correct, but either way – this resultant is very acceptable.

As you might guess, weather wise this was a warm run. Not hot, just comfortably warm. Additionally, I had the watch directly next to the Mio Fuse via ANT+ and saw no dropouts.
Sample 2: NYC Cold Weather Run
Now, in this last sample you’ll see some issues. In this case the temperature was about 39°F (~4°C), and I had the strap situated just at the edge of a rather thin long sleeve shirt that just barely covered the Fuse. This meant that it wasn’t providing a whole lot of warmth to my wrist. What you notice happen is that during the first 10 minutes I got inaccurately low readings. This is an area that a few people have seen as well in the first little bit of an exercise when it’s rather cold out without any additional clothing keeping that area warm. This reduces the blood flow in that area, causing inaccuracies in the readings.

Now, what’s probably more interesting is this graph shows the tale of two wrongs. First is that my HR from the Garmin HRM-RUN strap was not in the 180bpm+ range, so that’s incorrect. At the same time, neither was it 80-100bpm.
So why didn’t I see this on the Mio Link in even colder weather? Well, the Link lacked a display. Which meant that I generally had it under a coat or other deeper clothing, thus keeping it warm. With the Fuse however, it had a display, so I wanted to be able to see said display – thus making it more exposed, and in turn exposing my skin to colder temperatures that took longer to warm up. I saw these same results occurring during a 10K run I did where it was even colder and I had even less coverage on the wrist – the data was inaccurate.
This of course makes for a bit of a pickle with the Fuse. On hand one, seeing the screen is ideal. On the other, with the vibration alerts for HR zones, it’s not as bad because you’re able to feel if you’re out of zone. Plus, if you’re using it with another watch, you can just keep that outside in the cold and keep the Mio in the warmth. And, just to be clear, it’s not about the watch being cold – it’s about your skin being cold.
One thing that seems to help slightly is to turn it to the inside of the wrist, I suspect there’s a bit more flesh below this – which probably keeps warmth a bit better. I’ve also found that by putting on the watch inside and getting the HR found before heading out helps to reduce cold weather issues too. Or, I suppose – just putting on some proper level of clothing might work.
Test 3: Treadmill Test:
Now in this case, I had recorded the multiple sensor streams on a different device…which, unfortunately had a file error in it – one that I didn’t realize until tonight. This meant that because the Mio Go app doesn’t yet allow exporting of data, I couldn’t overlay them like the above. No worries though, being that I watched the HR’s match in real-time during the test, as well as can see it in the screenshots below, it helps show the consistency there.
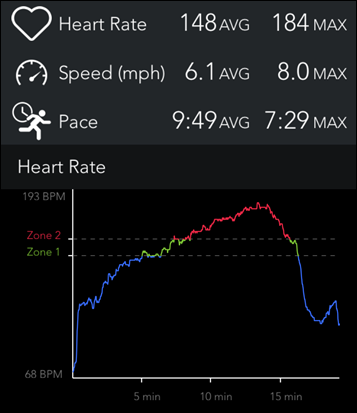

As you can see above, both tracks of these two did well – tracking near identically. This is actually an interesting test because my running cadence increases pretty significantly, as does my HR. This was a pyramid test that ended me running about as fast as I can run. I do this because many HR devices, when they have issues tracking, will actually match your running cadence (it picks up the pounding and misinterprets it as your heart rate). So by doing this – I can see if that occurs (it didn’t in this case).
Optical sensor caveats:
Finally, a few quick caveats on optical heart rate sensors. The first is that no optical HR sensors on the market today accurately measure heart rate variability (HRV/RR). This data is often used by watches (such as Garmin, Suunto and Polar) to estimate certain metrics – such as calories burned, VO2Max data, and recovery time. The technology in today’s optical sensors (regardless of brand) is simply unable to accurately gather this required data. Instead, optical sensor companies attempt to guesstimate these values.
In many cases, the resulting numbers actually work out just fine – and all is well for 3rd party watches. However, do keep in mind that results can vary. For me, I’ll get some runs where the recovery time compared to a traditional HR strap is virtually identical, and then yet other runs where it’s significantly different. This is normal for where the technology is today. Note this doesn’t impact the standard beats per minute (BPM) metric, but only the data used to feed into advanced analysis. This is true of virtually all devices that leverage this information, on both ANT+ and Bluetooth Smart, across a number of vendors including Garmin, Suunto, Polar, and others.
3rd Party Platform Integration:
When it comes to supporting sending activity tracker data to 3rd parties, things are a bit slim right now. However, they do have a pretty clear vision going forward.
– They’ll be enabling both Apple Health and Google Fit support soon: This will include both daily activity metrics as well as workout data.
– They’re already talking with 3rd party apps: For example, they’re discussing integration with RockMyRun which has music streaming to integrate functionality there. There are other 3rd party apps they’re discussing potential integration opportunities with.
– They’re working on a cloud and web portal, which will allow saving of history to their platform, as well as allow exporting to both .CSV and .FIT file formats (useful for uploading to any number of 3rd party sites.
It’s good to see a clear plan of action, even if the current data export options leave something to be desired. Of course, do keep in mind that they do already support both ANT+ and Bluetooth Smart broadcasting, so you can already use the device with hundreds of apps and devices as-is….which, is pretty significant.
Product Comparison Tool:
I’ve added the Mio Fuse into my product comparison tool, so you can compare it against both activity trackers, as well as heart rate sensors. For example, here’s the Mio Link against the Mio Fuse:
Copyright DC Rainmaker – Updated November 25th, 2016 @ 3:49 pmNew Window
Price$149$79
Product Announce DateAugust 8th, 2014Jan 6th, 2014
Product Availability DateDecember 1st, 2014Apr 11th, 2014
Measurement TypeOpticalOptical
Typical PlacementWrist StrapWrist Strap
Battery Life6-7 hrs8-10 hrs
Battery TypeUSB rechargeableUSB rechargeable
ANT+YesYes
Bluetooth SmartYesYes
Dual concurrent ANT+/BLEYesYes
Analog for gym equipmentNoNo
Usable HR data underwaterDepends: If on same wrist, YMMV.Depends: If on same wrist, YMMV.
Bridging ANT+ to Bluetooth SmartNoNo
Can record activity w/o 2nd deviceYesNo
Run PaceYesNo
Run CadenceNoNo
Run Economy/MetricsNoNo
Cycling Power Meter EstimationNoNo
Valid HRV/RR dataNoNo
Requires Bluetooth Smart Phone for ConfigurationYesYes (for HR zones)
Firmware UpdateableYesYes
Amazon LinkLinkLink
Clever Training Link (Save 10% with DCR10BTF)LinkLink
More InfoLinkLink
Of course, you can customize the product comparison tool here to show you any activity tracker on the market. Alternatively, you can do the same for heart rate sensors (since it falls into both product database sections).
Additionally, I know many of you are interested in how I find the Fitbit Charge HR and Surge GPS to compare to the Mio Fuse. My orders of those units just arrived in yesterday afternoon – and will be next on the docket within the activity tracker review queue.
Summary:
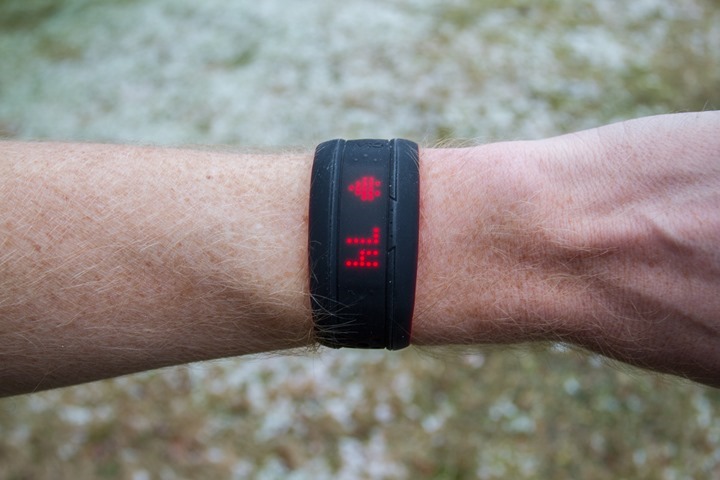
I’ll be honest, when I first saw the product in August, I was a bit concerned about how the app side of the activity tracking would fare. I was nervous that the result would be an ugly application that was clunky. However, to my surprise, the Mio Go app for the Fuse actually surpassed my expectations quite nicely.
They’ve done a good job of cleanly displaying information within the app – both daily activity tracking, as well as workout information. And, their roadmap of planned features is promising – including connectivity into both Apple Health and Google Fit, as well as their own cloud sync solution. Now, is the app the best activity tracker platform out there? No, not at all – it’s far from the social integration and daily life analytics that companies like Fitbit, Jawbone and Withings bring.
But, for most people, it’ll actually hit the core functionality just fine. And beyond that – the primary reason to look at the Fuse is for the top notch optical sensor designed for workouts contained within. If you’re not looking to accurately measure your HR while working out, then there are no doubt many cheaper options on the market. But, if you’re looking for that all in one activity tracker and optical HR sensor – it’s hard to beat the Fuse.
Thanks for reading!
Found this review useful? Or just wanna save some cash? Here’s how:
Hopefully you found this review useful. At the end of the day, I’m an athlete just like you looking for the most detail possible on a new purchase – so my review is written from the standpoint of how I used the device. The reviews generally take a lot of hours to put together, so it’s a fair bit of work (and labor of love). As you probably noticed by looking below, I also take time to answer all the questions posted in the comments – and there’s quite a bit of detail in there as well.

I’ve partnered with Clever Training to offer all DC Rainmaker readers exclusive benefits on all products purchased. You can read more about the benefits of this partnership here. You can pickup the Mio Fuse through Clever Training using the link below. By doing so, you not only support the site (and all the work I do here) – but you also get to enjoy the significant partnership benefits that are just for DC Rainmaker readers. And, since this item is more than $75, you get free US shipping as well.
Mio Fuse (select dropdown for color/size)
Additionally, you can also use Amazon to purchase the TomTom unit or accessories (though, no discount). Or, anything else you pickup on Amazon helps support the site as well (socks, laundry detergent, cowbells). If you’re outside the US, I’ve got links to all of the major individual country Amazon stores on the sidebar towards the top.
Thanks for reading! And as always, feel free to post comments or questions in the comments section below, I’ll be happy to try and answer them as quickly as possible.


