Garmin VIRB X XE Action Cam In-Depth Review

Every once in a while in the DCR Review Realm I go ahead and pull out a slightly longer review cycle. This would be one of those times. In this case, I’ve used the Garmin VIRB X & XE action cameras for a good solid 8-9 months now. Everything from desert conditions to tropical aquatic adventures to snow in the alps. I can’t think of more variation in a single one of my reviews.
But, here it is. Better late than never, right? Since I don’t expect a new VIRB unit in the immediate future, I figured this would still be valuable to folks. Plus, I’ve got about one gazillion photos and videos of and from the unit that otherwise have no purpose in life.
In the case of this review, I bought two VIRB units. One VIRB XE, and one VIRB X. Additionally, Garmin also sent over a VIRB XE to try out. That one will finally go back to them (a wee bit worse for wear), and I’ll keep the ones I bought.
With that – let’s dive into things!
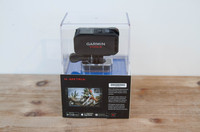
Unboxing:
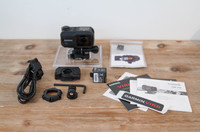
First up we’ll unbox the VIRB XE, and then I’ll give you a brief gallery of the VIRB X unboxing, since it’s pretty much the same.


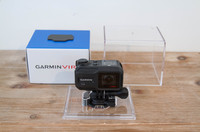
Inside we’ve got the camera affixed to some molded plastic, so you’ll start by getting rid of the top shell:


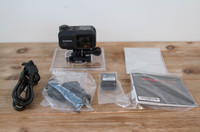
Then you’ll find a slew of components inside the box. I’ll talk through each one.

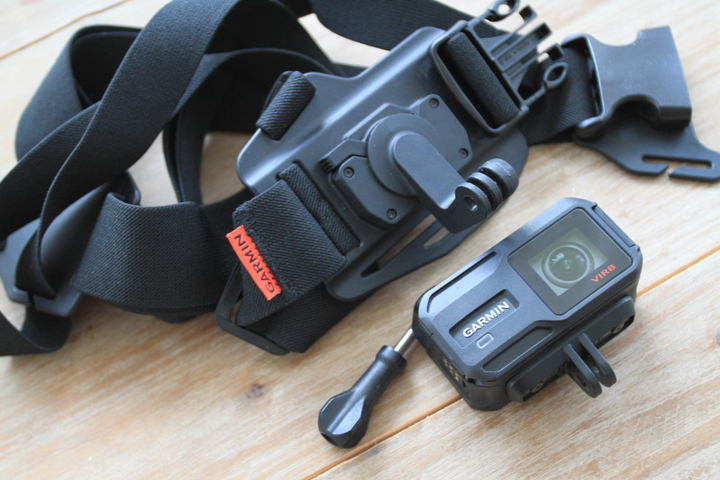
First up is a rounded helmet mount. You can see the slight curve on the bottom. The flat-mount is actually still within the plastic jail seen at the back. Then there are both a short and long screw, and a small hex wrench.

You’ll need that hex wrench for getting the unit out of the plastic cell thingy.

Next, we’ve got a small pile of mounts. These allow you to both change the direction of the camera, as well as use it with older Garmin VIRB mounts.


Then there’s the charging cable. But more on that later.

Then we’ve got some stickers to decorate random things around your friend’s house.

Next are some small moisture strips. These absorb moisture in the camera area to prevent fogging. On one hand this is appreciated, yet on the other, if they had designed the case so the lens wasn’t open to the elements when you change the battery – this wouldn’t be an issue.


Finally, the camera itself in more detail. Don’t worry, you’ll get up close and personal with it by the end of this review.
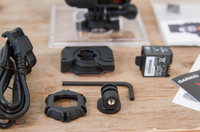
Now, rather than repeat all the steps to show you precisely the exact same thing, here’s the unboxing of the VIRB X (as opposed to the XE). The only difference here is that the VIRB X doesn’t come with the additional mounts to ‘rotate’ the unit sideways or extended slightly. Don’t worry, you can find generic GoPro versions of these on Amazon for a few dollars.

Got all that? Good – let’s compare some cams.
Size & Weight:
So how do things size up? Well first lets look at weight. The VIRB XE comes in at 154g:

Meanwhile, the VIRB X at 153g:

Note that I didn’t include mounting hardware, because that’ll vary by the type of mount you place it in. For example, I can use the GoPro Hero4 Silver without a case at 79g:

Or, make it waterproof and it comes to 142g (side note: I list all the weights of the GoPro combinations in my GoPro Hero4 Silver/Black in-depth review).
Hero4 Black with Underwater Case: 150.6g
Hero4 Silver with Underwater Case: 142.1g
Hero Base (2014) with Underwater Case: 111.1g
If I look at the older Garmin VIRB, it was 176g:

Meanwhile, from a size standpoint you’ll notice the unit is smaller than the original VIRB, albeit oriented differently:

And if I try and compare it to the GoPro Hero4 series, then you’ll find that it’s obviously much wider without a case:

But when you add a case it’s not too much wider actually:

In fact, in many ways it’s not much different once you add the case compared to the GoPro Hero4/Silver:


So it’ll depend on how you use it a bit. For me, I don’t often use a waterproof case with my GoPro (except near water), rather instead I’ll use a frame case (thinner), or just go hand-held without any case (running, using around a city as a tourist, etc…). Of course, both make it vulnerable to water whereas the VIRB X/XE is waterproofed to begin with.
The Basics:

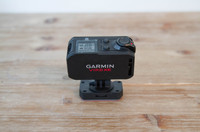
Before we get into all the details, let’s cover some of the basics on the differences between the VIRB X and the VIRB XE. While they look identical from the exterior (minus the little logo). Of course, it’s inside that matters. Here’s the specific features the VIRB XE has that the VIRB X doesn’t:
– Adds 1440p @ 30fps, 1080p @ 60/50/48fps, 960p @ 100/60/50fps, 720p @ 120/100fps, and 480p240fps modes
– Adds Pro Settings mode (for more control over camera)
– Adds Image Stabilization
– Higher photo burst options (up to 30FPS)
Next is that the unit is totally waterproofed without any additional case required. This waterproofing is good to a depth of 50m. This is different from the GoPro which requires an external case to be waterproofed. Now the downside to the VIRB’s waterproofing is that it adds bulk to the case, which is pretty evident in the previous section of size comparisons.
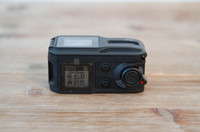
In order to get to the SD card or battery, you’ll use this little lever system on the side to open up the case. I never had any issues with it opening up unexpectedly – so that’s definitely good.

Once open the internal area is fairly unprotected there, which is a minor downside in terms of getting snow and water inside the unit, as it’s easy to then get moisture which leads to condensation. I really wish they had separated the battery changing area from the lens area.

To the side you see the battery and Micro-SD card slot. The VIRB X/XE supports a card size up to 128GB, which is better than the GoPro’s 64GB (most don’t work with the Hero4 cams).

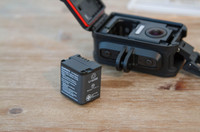
Meanwhile, the battery sits to the left of all that:

Next is that unlike the original VIRB/VIRB Elite, the VIRB X/XE doesn’t have a preview screen of what you’re filming. Instead, it just has a generic LCD screen. I thought the preview screen (no matter how limited the colors might have been) was great for quickly framing a shot. Unfortunately, that’s gone.

Given that GoPro has a beautiful color screen in their Hero4 Silver, it’s definitely a con of the VIRB XE.

As for the VIRB X/XE’s LCD screen, it shows you current configuration settings. And the crispness of the information is pretty good. You’ll see your current video and photo modes along the bottom, as well as the battery and SD card storage shown.

I’ll dive more into the menu system throughout the rest of the post.
To take a video with the VIRB X/XE, you’ll simply slide the toggle switch. This works great, and is awesome when you have a helmet or other mounted scenario where you can’t see the camera itself, so it allows you to validate by feel that the unit is recording (far better than a GoPro).

In the middle of that switch is a dedicated photo button. This is also awesome (and also not on the GoPro), because you can basically single-handedly shoot videos and photos without every looking at the camera to validate modes. Awesome sauce.

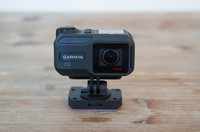
Lastly, the mount system. Garmin switched from a proprietary mounting system with the original VIRB to the GoPro mounting system with the new VIRB X/XE. You can see the bottom of the unit uses the familiar two-prong adapter:

This is great, because it dramatically increases compatibility with 3rd party mounts. I’ll show lots of mount options throughout the post, as well as later at the end.
When it comes to battery life, I’ve generally found the VIRB X/XE fairly disappointing. It’s spec’d at 2 hours (in a temperature range of -20°C to 45°C (-4°F to 113°F)), but in reality I almost never get above an hour, no matter which settings I use.

And it’s far worse in the event I get into the cold. During ski trips I was only getting a few minutes before the unit would shut off. Garmin says a recent firmware update fixed the issue, and in my fridge testing things do seem to be better than I saw skiing.
VIRB XE: 1hr 20mins 16secs
VIRB X: 1hr 20mins 19secs
Then in another test at room temperature:
VIRB XE: 1hr 18mins 30secs
These were all done at 1080p/60fps (and 1080p/30FPS for the regular VIRB).
Obviously cold weather impacts all batteries – so this is definitely much better than I saw previously. More impressive is that the battery drain profile was only 3 seconds apart before the units automatically shut down. Kinda nifty.

I wish I could say I was alone in this, as many others seem to be getting similar battery performance. Considering I’ve got three different units and extra batteries – and none seem any different, I’ve gotta believe that it’s more than just a single lemon.
Sensors & Data:

Likely the most differentiating feature of the VIRB series compared to other action cams is the ability to connect various sensors and display data overlays. Quite frankly, without that functionality there’s no point in buying this camera.
The VIRB X/XE units can both connect to a host of ANT+ sensor types, as well as certain Bluetooth sensor types. Additionally, they can connect to Bluetooth (audio) microphones.
On the ANT+ sensor types, most of these revolve around cycling and running, and specifically they support:
ANT+ Cycling Power Sensors
ANT+ Cycling Speed-only, Speed/Cadence combo, and Cadence-only Sensors
ANT+ Heart Rate Straps (including Running Dynamics support with Garmin straps)
ANT+ Tempe temperature sensors
For the most part, the above will satisfy pretty much any triathlete in terms of sensor data. About the only other area I’d love to see would be electronic shifting support (eTAP and/or Di2).
To pair up these sensors you’ll dive into the ANT+ sensor menu and you can search for various sensor types individually, or just anything nearby.

Like most recent products, the unit can save numerous sensors (even of the same type). I’ve got probably 10+ sensors saved in here, including numerous power meters and heart rate straps. Which means it’s easy to switch between bikes if you have multiple bikes each with multiple sensors.

This data is then recorded alongside the video. In fact, it’s actually a .FIT file no less, meaning you can technically upload it to sites like Garmin Connect or Strava. However, most will just let the VIRB Edit app overlay the data for you automatically. But more on that later.

The entire data recording process works beautifully, as does the rendering of the data later. I see no reason to mess with other software apps unless you really want the display layouts different than those available.
Note that you could technically use the VIRB X/XE as a unit to display some current metrics. The display atop the unit can be switched to show various metrics, including ANT+ data streams:

Though honestly – it’s not a great head unit otherwise – so I’d stick with your Edge for now.
But ANT+ data isn’t the only type. You can also connect to both marine and automotive data. For example, with the Bluetooth OBDII data connector pod, you can get vehicle metrics straight to the VIRB as well. While I’m far from an automotive person, it’s pretty darn cool.


Here’s a video I put together showing how this works during a recent car rental in Las Vegas.
Once installed (takes about 2.5 seconds), then it’s good to go and you don’t have to mess with it.
As you can see, most of my testing is with the ANT+ side of things, rather than the automotive or marine (nobody has given me a boat yet to use). However it should be noted that the VIRB series will NOT connect to Bluetooth Smart sensors (i.e. Bluetooth Smart HR straps or speed/cadence sensors). On the bright side, many Bluetooth Smart sensors are dual ANT+/Bluetooth Smart these days anyway. Though still, it’d be nice to see Garmin break out of the ANT+ protectionist side and support Bluetooth Smart sensors here.
Video Modes:
So let’s dive into the video modes and how that works, along with some sample footage. Note that everything you configure settings-wise you can do from either the camera or the phone app. I’ll just show them from the camera since that’s a bit more visual than the app.
As we talked about earlier, you can always see the current video mode in the lower left corner of the display screen. In most cases, with the VIRB XE I’m going to film in 1080p60.
To change that however, you just hold down the menu button for a second, and then select ‘Video’:

Next, we can choose one of four video settings:
Tall: Allowing: 1440p30, 1440p24 or 960p100, 960p60, 960p48. Note that this has a 4:3 aspect ratio, which is sorta old-school looking these days (like your old TV).
HD Video: Allowing: 1080p60, 1080p48, 1080p30, 1080p24 or 720p120, 720p60, 720p30. These are all standard 16:9 aspect ratios, more common.
Slow-Mo: Allowing 720p120, or 480p240
Timelapse: Recorded only in 1080p
Here’s their handy table as well of all of the modes of the two cameras (direct from the manual):

For the most part you’re going to stay in the HD Video category (unless you’re doing a timelapse). Since you can get to slow-mo style 720p120 from HD Video, just keep it somewhere in that range.
On the slow-mo front, don’t go lower than 720p. Remember, friends don’t let friends do 480p. That’s just gotta look fugly in your video. You’re better off recording at 720p120 and then slowing down just slightly if you have to. But more on that later.
Next, we’ve got the field of view. This controls how wide a shot you have. Think of it like a zoom on your action cam. You’ve got three options:
Wide: The widest possible shot, almost fish-eye like at the edges.
Zoom: A bit cropped, but feels more natural.
Ultra-zoom: Well, as the title implies, it’s more zoomed.
Here’s a handy chart with the actual degrees of field of view:
VIRB X/XE Field of View Angles
4:3 Wide94.6119.5141.24:3 Zoom72.894.2113.24:3 UltraZoom49.765.680.216:9 Wide70.3115.4128.216:9 Zoom53.690.9102.216:9 UltraZoom36.262.871.6
To demonstrate, below are three photos taken from the exact same point with the three zoom settings. Makes it super-easy to see the differences. And, I just made it an animated GIF, so it simply rotates through the three views.

Next we’ve got the Lens Correction settings. It’s a simple yes or no option, which will automatically reduce that fisheye perspective (but also crop a bit), as well as enable adjustment for low-light.
There’s also an image stabilizer option, which uses the internal gryo data to electronically stabilize the image. This is only available on the VIRB XE.
Next let’s talk about the VIRB XE Pro Mode (not available in the regular VIRB X). This is somewhat like GoPro’s advanced options. But also somewhat different. In the case of GoPro they have their ProTune mode, which enables higher bitrate recording that can be used later on during the editing process. Kinda like .RAW imagery with cameras.

Whereas with Garmin, it’s instead just allowing specification of camera settings. So here you can Specify: Color, White Balance, Sharpness, ISO Limit, and EV Bias and Lock.
All of which are super-useful if you’re shooting in lighting conditions that are changing. So this would allow you to maintain the same white balance profile over a longer period of filming. Or to ensure that the grain doesn’t get too high by limiting the ISO settings.

In my case, I’ve used this primarily when filming in low-light conditions, as well as when filming under artificial lights. Since I know the color temperature, I can specify that upfront with the Garmin VIRB XE, rather than hoping it gets it right.
Next, we’ve got the built-in timelapse mode. Garmin was actually the first to do this in the action camera world with the original VIRB. GoPro then followed a year ago. The idea is that instead of having your action camera take a gazillion still photos that you have to manually stitch together later on, the camera can do that internally and prepare a video automatically.
You only need to specify how often you want the unit to take a shot. Your options are: .5-seconds, 1-second, 2-seconds, 5-seconds, 10-seconds, 30-seconds, and 60-seconds.
After that’s done, it’ll go ahead and record the video and create a 1080p video once complete. Here’s a quick example of one I did at night, which demonstrates both the good and the bad. The good in that the functionality works, the bad in that even with the Pro settings you can’t get good quality night timelapses. Oh, and for those curious I did the rotation using this little rotating timer.
Here’s a bit easier one I did during daylight in a port in Croatia as our boats moored up for the evening.
The only downside here is that unlike GoPro or TomTom Bandit, Garmin has restricted the output to 1080p. In reality, they could have easily outputted 2.7K or 4K timelapse videos – which gives you far better resolution. That’s because the camera takes a much higher resolution picture than the video sensor does.
Photo Modes:
The VIRB X/XE has a dedicated photo button for taking photos, making it super-easy to take a shot of something, even while mid-video. To do so, you’d just tap that little camera button in the middle of the video lever:

However, you have more than just one photo mode. In fact, you have a bunch of them. Here’s what you’ve got to work with:
Singe: Wide (12PM), Zoom (7MP)
Burst: 3 shoots/1-second, 5s/1s, 10s/1s, 20s/1s, 30s/1s, 10s/2s, 20s/2s, 30s/2s, 30s/3s, 30s/6s
Timelapse: Anywhere from 1-second to 999-seconds between interval (Wide or Zoom)
Extended Timelapse: Allows you to do super-long timelapses by shutting off unit between shots
Now you might be asking what the difference is between the timelapse here in the photo section versus the video section? Well when doing a photo timelapse you get a big pile of JPG images on your camera, whereas when doing a video timelapse you’ll get the rendered timelapse video (more convenient for immediate use, but less flexible for advanced editing).
In addition to all those modes, you’ve also got some standard options like a Self-Timer (from 2s to 60s in various steps) for selfies, to lens correction and even a date stamp option (bringing you back to 1985 in one fell swoop).
Overall I find my experience with the photo modes on the VIRB mixed. In bright sunny conditions the unit does really well. Same goes for anything with ‘pretty’ colors (like vivid greens). Here’s a gallery of some better shots, totally untouched.


But at the same time, when it comes to lower light conditions, the unit struggles far more than the GoPro Hero4 Silver does (both in non-pro mode). Images often appear flat, or just lost detail or depth. Here’s another gallery of less awesome images. Again – it’s not about the subject/object of the shot – but that the camera hosed up the shot and didn’t get lighting or whatever right. Note in particular the back to back shot (taken as part of a photo timelapse) on the bike where 1-second apart the colors are dramatically different.


So on one hand it can take nice shots – but at the same time I just don’t find it super-great for day to day usage as a camera on trips (beyond sport usage, like just exploring a new city on foot).
Mobile App:

At roughly the same time that Garmin released the VIRB X/XE, they also revamped the Garmin VIRB mobile app. In doing so they added some key features – notably the ability to download photos and video. Yes, that sounds totally silly that the previous generation was missing them – but somehow it was. Either way, with that water under the bridge we find ourselves with the VIRB app today including many other new features.
For example, now it can also overlay data metrics – something the previous app couldn’t do. Meaning before you had to use the desktop app.
In any case, from a basics standpoint we’ll start with controlling the camera. In this case you can go ahead and modify any of the configuration settings for video or photos, as well as take such video or photos.


Now I’ve found there can be massive delays in the live feed from the camera. Sometimes it’s only a few seconds, but at one point tonight I had a 30 second delay. No kidding.
Additionally, I’ve found the app will often (very often) fail to load my library of images from the camera. Like below:


Remember, this is some 8 months after the app and camera came out – by now these things shouldn’t be happening.
In any case, when it does load, you can go ahead and pick out various photos or videos. I do very much appreciate the filter for showing just photos or just videos. Also, they’ll properly group timelapse/burst photos as a single photo session (so you don’t have thousands to sort through).


From here you can download these videos/photos onto your phone (except oddly timelapse videos, which won’t transfer). After downloading them you can overlay metrics as well as upload them to wherever you’d like through other 3rd party apps.


Overall I’d put the VIRB app in the ‘functional’ category – but definitely not something I love. And it’s not because it has any less features than GoPro’s app. It’s just that GoPro’s app actually works 95% of the time, whereas Garmin’s works maybe 60% of the time. Plus it fails on simple stuff, like if you change the screen during export (even for a split second) – it’ll kill the export.
Desktop App:
Without question the shining start of the VIRB ecosystem is the desktop app (both PC & Mac). Seriously – it’s one of the best pieces of software that the company has ever released in the fitness realm. Not only that, but over the years it sees both continual, and substantial updates.
While the mobile app can generate relatively straightforward video exports, it’s the desktop app that allows you to get more advanced in your edits, but also to deeply customize templates and gauges.
To begin, when you plug your VIRB X/XE unit in, it’ll offer to import the videos into your library. I usually do this for videos (but not photos), because I want it to import in all of the data/metrics information. Else, if I just copy/paste it from an SD card, then I’ve just got the video – but not the metrics (without it being a serious pain in the ass to match up files manually).

Once it’s imported in, you can start to slice and dice the recorded segments into a full-on video. It’s all pretty straight forward and like most video editors in that you can drag and drop them onto a timeline.

In general I find that the VIRB Edit suite is better than GoPro’s GoPro Studio when it comes to simplicity (though GoPro Studio has more functions at the higher end). If you look at GoPro’s newer suite they just released, it seems to mirror many VIRB Edit concepts and is very similar.
However, neither allows picture in picture, or dual-video options (which Sony allows). This is rather notable for folks that want to use multiple cameras at once, something that Garmin prominently demonstrates both in marketing videos and on their VIRB site in features and functionality.
In order to make the multi-cam functionality work you need to be 190% sure (yes, that much) that the GPS timestamps are perfectly lined up, as well as generally have some other device starting/stopping the units (or have them paired together). Otherwise you won’t get the magical text required below.

Or the new menu UI seen in the mid-left section of the screen:

From there you drag a single video onto the timeline and then you switch back and forth by selecting which camera angle you want. So basically you split up a single video into a bunch of chunks, and then change the view for each chunk.

On the mobile app side, you can connect to multiple cameras, but you can’t show multiple cameras at once, it instead allows you to toggle between them:

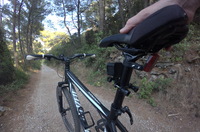
For example, here I’ve got both a forward and backwards facing view on my bike.

Again, really wish I could show front/back at once on one screen. Here’s some sample footage nonetheless:
When it comes to adding metrics, you can drag and drop pre-configured templates onto a screen, or drop individual gauges. Or, you can save and make your own templates. Or tweak an existing one and then save it. Tons of options.

You can also validate positions on a map too; handy for double-checking where in the activity various ‘action elements’ may have occurred.

One thing I wish there was a way to do is to have gauges properly ‘snap’ onto others. Right now if I want to swap out one gauge metric for a different one (i.e. cadence for elevation), I have to play a game of trying to get things to align, which is a pain in the butt. I eventually get it, but I spend a few minutes trying to get it perfect.

Once you do get that template right, you can just save it – so it’s yours forever no matter what happens next. Like an old Valentine’s Day card from the girl that dumped you.

After you’ve finished editing the video you can add music and titles, and tweak a number of other items. The app overall really has grown up a ton since it was introduced a few years back with the first VIRB action cameras.

After which, you can select an export folder and export quality level. In general, I find that the exporting takes approximately forever at the higher resolutions. Much more than GoPro studio or Windows Movie Maker does. But eventually it gets there. You can also select to push your video straight to YouTube/Facebook/Vimeo if you’d like. I personally prefer to keep a copy locally though and then manually upload it.
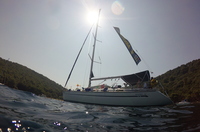
Here’s an example of a video I did using no additional ANT+ sensors, but instead using the various internal sensors, while sailing. In this case had the boat been equipped with additional marine sensors of the right type – I probably could have tied the VIRB into those as well.
Like I noted earlier, the VIRB Edit suite is awesome and pretty darn impressive. Aside from wishing it had picture in picture mode (or dual video mode), it’s definitely one of Garmin’s best apps out there. Not only that – but if you look at the Garmin Forums, it’s one of the few ones where product developers are incredibly active (daily) and actually incorporating feedback and suggestions in new software releases (usually monthly). So props to them.
Control via Garmin Devices:

A few years ago when the first VIRB came out, it was actually a big deal that the cameras could be controlled by your Garmin watch, wearable, or cycling device. Since then we’ve kinda forgot how handy that is – since virtually every Garmin device now supports it. From the Vivosmart series to the high-end Edge devices.

This allows you to either manually control the video (or taking a photo), or to simply set it up such that if your Edge (or other device) starts recording your activity that the camera should do the same.

I’ve used this a bunch while cycling, though I think it actually works better in other sports (simply because the VIRB X/XE’s battery doesn’t last long enough to capture most rides).

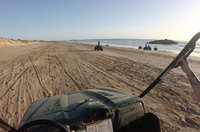
An example that worked well though is when I went off-road buggy driving recently. In this case I had a Garmin Fenix3 HR on my wrist and then paired it to the unit on my helmet (and also on the front dash area).

This was handy in that it allowed me to quickly take photos without taking my hands off the wheel, since I could just tap the photo button (or video sometimes).

Would also work well if I had mounted it elsewhere on the vehicle out of reach – which is really the main goal here. The below photo was taken just like that from the VIRB XE:

Note that this has no dependency on WiFi, but rather instead just uses ANT+ between the devices. In fact 3rd parties can actually control the devices too if they wanted to. Garmin also makes a small dedicated remote control for the unit as well.
Finally, for lack of anywhere else to put it – note that you can chain multiple VIRB units together so that one unit controls all units. I used this in one of the multi-view video segments you saw on the bike. You can then layer in something like a Garmin watch or Edge unit to control all of those at once.
Accessories:
There are a slew of accessories for the Garmin VIRB X/XE, and even more if you include the older original VIRB ones. But that gets a bit more complex.
See, the new VIRB X/XE uses the standard GoPro mount adapter system, so that means that for the most part anytime you see a GoPro compatible item – it’ll work with the VIRB X/XE. The one area that wouldn’t apply is things like gimbals or external cases, that are form-fit or weight specific.
But for selfie poles/sticks, mounts, harnesses, etc… – all of them are totally compatible with each other. Of course, you can use the Garmin VIRB X/XE chest harness, which I’ve used a bunch with both the GoPro and Garmin lineup – works great.
Also for sticky mounts you can use either GoPro or Garmin.
For batteries, I’ve got a few extra, because the VIRB often seems to burn through them like nobody’s business. Its about as bad as the GoPro Hero4 Black (roughly an hour), whereas the GoPro Hero4 Silver is closer to 2 hours. In my fridge testing I actually got more time than outside (usually an hour) – which makes me think that the effect of movement on accelerometers and such likely has a battery burn impact too.

When it comes to charging cables, the unit has its own special one, which is needed because it has a fully waterproofed external case. The one positive side to the crazy-thick cable of the VIRB X/XE is that it’s easy to find in a nest of wires in your bag: Just look for the thickest one.


Here’s a list of the accessories I tend to use most often with the VIRB X/Xe, from both Garmin and GoPro:
Copyright DC Rainmaker – Updated May 26th, 2016 @ 5:48 pm
Garmin VIRB X/XE Chest Harness$39LinkLinkN/A
Garmin VIRB X/XE Battery$19LinkLinkN/A
K-Edge GoPro Saddle Mount$39LinkN/AN/A
K-Edge Garmin/GoPro Combo Out-Front Mount (Cycling)$53LinkN/ALink
Wahoo Blue SCv2 – Bluetooth Smart/ANT+ Speed/Cadence Sensor$59LinkLinkN/A
GoPro 3-Way Grip/Arm/Tripod$69LinkLinkLink
GoPro Chest Mount Harness$24LinkLinkN/A
Garmin ANT+ Heart Rate Strap (Premium Soft-Strap) – HRM3$50LinkLinkLink
Keep in mind that you really don’t need to purchase branded GoPro or Garmin items for most accessories – especially things like sticky mounts. Just be sure to look for good (and high count) ratings on Amazon if you’re purchasing off-brand stuff, simply so you don’t lose a camera in a bad spot.
What’s Changed From Past:
I originally had this section in my preview post, but I think it’s actually fairly detailed for those who may already have an existing Garmin VIRB/VIRB Elite camera, and want to understand the core differences. So this is my bulleted run-down of the new stuff compared to old stuff, distilled from the marketing fluff:
– Both models now have WiFi, GPS, accelerometer, and full ANT+ sensor capabilities (previously only the higher end VIRB had it)
– Addition of gyroscope, increased sensor data collection at higher rate
– Slight resolution increase to 1440/30p for VIRB XE
– New slow-mo options: 240fps @ 480p, and 120fps @ 720p (XE only)
– Natively waterproofed to 50-meters (no external case required)
– Flat front glass/case that Garmin says will repel water droplets (it mostly does)
– Ability to connect to supported Bluetooth-enabled OBD sensors (automotive primarily)
– Ability to connect to Bluetooth 4.0 audio devices (i.e. microphones)
– New ‘Pro’ mode for adjusting white balance, sharpness, ISO limits, exposure bias, and color profile
– New auto image rotation option, which ensures photo/video is right-side up
– New continuous photo mode
– New photo burst to 10 frames per second for VIRB X (previously was 6 fps
– New photo burst to 30 frames per second for VIRB XE (previously was 6 fps)
– Ability to have camera ‘sleep’ in between long-interval timelapses (up to 120-seconds now)
– Dedicated photo-taking button (also automatically tags video highlight too)
– Ability to capture Garmin HRM-RUN Running Dynamics & Garmin Vector Cycling Dynamics data
– Improved microphone that isn’t blocked by rubber stopper, works underwater
– Ability to share videos/photos directly from Garmin VIRB mobile app (old units couldn’t)
– Ability to create gauge/dashboard overlays from the Garmin VIRB mobile app on videos
– Ability to control and stream up to 10 cameras from the Garmin VIRB mobile app
– Support for 128GB micro-SD cards (increased from 64GB)
– Uses standard GoPro mount on camera itself
There are also some things that were cut from the previous generation models, or are different enough to be worthwhile noting. They are:
– The unit itself no longer has a preview screen display (only has menu/settings information on display). Live preview requires mobile app.
– No more HDMI output port
– Reduced battery life, from “up to 3 hours” down to “up to 2 hours”
– New battery design isn’t compatible with old design
– Barometric altimeter has been removed, just GPS elevation data now
– Removal of Ski Mode, due to removal of barometric altimeter
– New mounts are sorta backwards compatible. They are compatible with the previous collared mounts, and a $10 adapter is available to fit other existing first generation VIRB mounts.
Phew – got all that? Good, let’s get to some final comparison charts before wrapping things up.
Comparison Charts:
I’ve added the Garmin VIRB X & XE into the product comparison charts for action cams. These are typically cams that I’ve released in-depth reviews on. So you wouldn’t find a review here for an unreleased cam (i.e. the Nikon 360° cam). Still, this allows you to compare all sorts of different features. Also, you can mix and match your own comparison chart using the full comparison calculator here.
Copyright DC Rainmaker – Updated October 3rd, 2016 @ 6:07 amNew Window
Price$299$399$299$399
AvailabilitySummer 2015Summer 2015GlobalGlobal
WiFi BuiltinYesYesYesYes
Bluetooth to PhoneYesYesNoYes
Recording LightYesYesYesYes
GPS builtinYesYesYesNo
Altimeter builtinNo (uses GPS elevation)No (uses GPS elevation)Yes – BarometricNo
Water Resistant50m50mIPX7 (1 meter for 30 mins), separate 50m dive case available40m with included case
AccellerometerYes (+Gyroscope)Yes (+ Gryoscope)YesNo
Video Preview ScreenNoNoBuiltinYes
Voice ControlNo
Recharges viaUSBUSBMini-USBMini-USB
Removable batteryYesYesYes / 2000 mAhYes / 1160 mAh
Recording Time2 Hours2 Hours3 hours2 Hours
Secondary attached batteryNoNoNoAccessory
Storage Card TypeMicro-SDMicro-SDMicro-SDMicro-SD
Maximum Card Size128GB128GB64 GB64GB
Records 360* VideoNoNoNoNo
4KNoNoNo12.5/15 fps
2.7KNoNoNo24/25/30 fps
1440pNo30 FPSNo24/25/30/48 fps
1080p25/30 FPS24/25/30/48/50/60 FPS30 fps24/25/30/48/50/60 fps
960p25/30 FPS50/60/100 FPS30/60 fps50/60/100 fps
720p25/30/50/60 FPS25/30/50/60/100/120 FPS30/60 fps35/50/60/100/120 fps
WVGA120 FPS240 FPS60/120 fps240 fps
Automatic Image RotationYesYesNoYes (Feb 2015 update)
Image StabilizationNo
Looping RecordingsYesYesYesYes
Timelapse Mode (constructs timelapse video)YesYEsYesYes (Feb 2015 update)
Travelapse ModeNo
Pro Settings ModeYes
Internal MicrophoneYesYesYesYes
Supports Bluetooth MicrophonesNo
Pro mode with seperate tracksNo
Megapixels12 MP12 MPUp to 16 MP (4664*3496)12 MP
Timelapse Mode (photos on interval)YesYes2,5,10,30,60s0.5,1,2,5,10,30,60s
Burst ModeUP TO 10 PHOTOS/SECONDUP TO 30 PHOTOS/SECONDUp to 6 photos/secondUp to 30 photos/second
Continuous Shooting ModeYesYesNoYes
Concurrent w/video modeYesYesYesYes
Records 360* PhotoNoNoNoNo
Pro Settings ModeYes
RAW photo creation supportNo
Skiing ModeNoNoYesNo
Control from sport computerYesYesYesNo
ANT+ Sensor ConnectivityYesYesYesNo
Bluetooth Sensor ConnectivityNo
ANT+ Profile TypesHEART RATE, SPEED, CADENCE, TEMPERATURE, POWER (+ Bluetooth OBD data)HEART RATE, SPEED, CADENCE, TEMPERATURE, POWER (+ Bluetooth OBD data)Heart Rate, Cadence, Temperature, PowerNo
Overlays sport data on recordingYes (via Garmin apps)Yes (via Garmin apps)Yes, via included desktop appsNo
App platforms availableiOS/Android/Windows PhoneiOS/Android/Windows PhoneIOS/ANDROID/WINDOWS PHONEiOS/Android/Windows Phone
Use as remote controlYesYesYesYes
Stream live video previewYesYEsYesYes
Record video from cameraYesYesNoYes
Multi-camera live control/previewUp to 10 camerasUp to 10 camerasNoNO
App for computerVIRB EditVIRB EditVIRB EditGoPro Studio
Remote control button/keyYesYesYesYes
Diving caseNo (unit already waterproofed to 50m)No (unit already waterproofed to 50m)Yes, up to 50mIncluded
Head StrapYesYesYesYes
Helmet StrapYEsYesYesYes
Handlebar/SeatpostYEsYesYesYes
TripodYesYesYesYes
Suction CupYesYesYesYes
Chest HarnessYEsYesYesYes
Wrist Strap/HousingYEsYesYesYes
Roll BarYesYesYesYes
SurfboardYesYesYesYes
Curved AdhesiveYesYesYesYes
Flat AdhesiveYesYesYesYes
Adjustable Mounting ArmsYEsYesYesYes
USB Connector TypeUSBUSBMini-USBMini-USB
Micro-HDMINoNoYesYes
Composite VideoAdapter AvailableAdapter AvailableAdapter AvailableAdapter Available
Audio 3.5mm Stereo MicADAPTER AVAILABLEAdapter AvailableAdapter availableAdapter Available
Amazon LinkLinkLinkLinkLink
Clever Training Link (Save 10% with DCR10BTF)LinkLinkLinkLink
Review LinkLinkLinkLinkLink
Remember again that you can make your own comparison chart using the full tool here.
My Advice:

So, which camera to get? My advice here hasn’t changed much over the past year. I think the VIRB X/XE makes for a fantastic camera for capturing data along with your video. However, it doesn’t make for a fantastic all around action cam. Here’s my breakdown:
All Around Action Cam – GoPro Hero4 Silver: I love my little Hero4 Silver. Seriously, you’re not taking it from me. It’s not just one thing that makes it awesome. It’s the quality of the lens/resolution I get on both photo and video, it’s the super-crisp touch screen on the back, it’s the fact that the mobile app is super-mature and easy to use (and far faster and more dependable than Garmin’s), plus the size makes it easy to carry around in my pocket without a case. I bring this everywhere; it’s always with me on every trip and the vast majority of runs and rides. Plus, when I want to shoot 2.7K, I can do that.
When you want data overlays – The VIRB X or XE: If you want to produce videos with various dashboard metrics overlaid on it – like power, speed, pace, acceleration, etc… For this, the Garmin VIRB X/XE rocks. They’ve taken all of the quirks of the original VIRB and really cleaned them up, and the desktop software is just super easy to use and produces really pretty videos (but I find the phone app flaky). Finally – the VIRB X/XE includes an incredible wind reduction microphone. You can see it in action on this particular video where it sounds like I’m actually wearing a normal mic, despite moving along at 20MPH. Whereas with the GoPro, all you’d hear would be wind.
So why not just use the GoPro combined with a Garmin wearable to record the data and mix after the fact? Well, it’s just one more thing to deal with. For me, I find the time savings worth it. So if I’m shooting something that I want to share that type of info (i.e. a ride or something else that would have data overlaid), I’m going to go for the VIRB X/XE. I do find that the photo performance in low-light lags far behind the Hero4 Silver, but in good sunny conditions it does quite well.
Oh, and on the differences between the VIRB X and XE? Well I think the main benefit is really the 1080p60 versus 1080p30. Sure, Pro mode is awesome if you’re going to use it. However, if you know enough to tweak with Pro mode, my guess is you’d really want the higher quality of the GoPro series. Just my two cents.
Summary:

If you’re looking for a camera (and associated software platform) that does data overlay –there’s simply no better option today. There’s no easier way to get data onto your videos than with the VIRB XE and VIRB apps. Period.
However, that data does come at the cost of video/photo quality, as well as battery life (compared to competitors). Priced the same as the Hero4 Silver at $399, the VIRB XE makes for a tough choice for athletes looking to add data to their videos. No doubt if you already have a Garmin you could simply import GoPro footage and then add your existing Garmin activity data using the free Garmin VIRB Edit software suite. That’s definitely valid. But it’s also more steps to take, versus VIRB Edit just doing it for you.
I also wish we’d see Garmin do more integration with 3rd parties, à la GoPro’s recent tie-in with Periscope. That’s allowed for some cool capabilities in action sports – but it’d be even cooler with data overlaid (i.e. streaming a race in real-time). Just yesterday another new entrant into that market is doing exactly that, and their main advertising pitch is showing live data overlays. Hopefully, adding similar live streaming via WiFi to an app for broadcast would be straightforward for Garmin.
As for the units themselves, the VIRB X (not XE) is really the sweet spot at $100 cheaper ($299USD). In fact, the majority of my time in testing I didn’t end up using the higher end VIRB XE features (Pro Mode or Image Stabilization), however I did often use 1080p60fps in videos. So that is a bit of a tradeoff, especially if your ‘action’ is fast moving. If it’s less fast moving, it likely won’t matter too much.
While the action camera market is certainly becoming more crowded, I don’t expect to see too many new entrants until fall – at least for traditional action cameras. For example, GoPro has come out and clearly stated their Hero5 action cam will arrive in Fall 2016. But at the same time, they’ve also said a new 360° action cam will arrive shortly (likely in April). But I don’t’ see 360° action cameras competing directly with regular action cams yet, instead I think that they’ll be somewhat different audiences – at least initially.
With that – thanks for reading!
Found this review useful? Or just want a good deal? Here’s how:

Hopefully you found this review useful. At the end of the day, I’m an athlete just like you looking for the most detail possible on a new purchase – so my review is written from the standpoint of how I used the device. The reviews generally take a lot of hours to put together, so it’s a fair bit of work (and labor of love). As you probably noticed by looking below, I also take time to answer all the questions posted in the comments – and there’s quite a bit of detail in there as well.
I’ve partnered with Clever Training to offer all DC Rainmaker readers exclusive benefits on all products purchased. By joining the Clever Training VIP Program, you will earn 10% points on this item and 10% off (instantly) on thousands of other fitness products and accessories. Points can be used on your very next purchase at Clever Training for anything site-wide. You can read more about the details here. By joining, you not only support the site (and all the work I do here) – but you also get to enjoy the significant partnership benefits that are just for DC Rainmaker readers. And, since this item is more than $75, you get free 3-day (or less) US shipping as well.
Garmin VIRB X (select from drop-down)
Garmin VIRB XE (select from drop-down)
Additionally, you can also use Amazon to purchase the unit or accessories (though, no discount). Or, anything else you pickup on Amazon helps support the site as well (socks, laundry detergent, cowbells). If you’re outside the US, I’ve got links to all of the major individual country Amazon stores on the sidebar towards the top.
Thanks for reading! And as always, feel free to post comments or questions in the comments section below, I’ll be happy to try and answer them as quickly as possible.