GoPro Hero4 Session In-Depth Review

It’s been about almost three months since GoPro announced their Hero4 Session action cam. The unit made headlines due to its small size compared to existing GoPro units. Yet this past Monday, they made the logical decision to drop the price to $299, so I figured I’d get around to clicking publish on my in-depth review taking into account that pricing change.
I’ve been testing it since release, and have a pretty good handle on how it works. I’ve taken it (well, them actually) on multiple trips (actual vacations!) and beat the crap out of it in every way I could think of. And the results might just surprise you (both good and bad).
As is always the case, I like to declare where I got devices. One device was sent over as a media eval from GoPro to check out. That one will be going back to them shortly, like usual. The other device was one I just bought myself (full price). I’ll be keeping that one to answer questions here on the post. If you find what you read here interesting, you can support the blog at the bottom.
With that – let’s dive into things!
Unboxing:

First up we’ll get this little nugget unboxed. It comes in a box design fairly similar to GoPro’s other higher end cameras.

The unit itself is attached within one of the frame cases, which is in turn attached to one of the standard GoPro mounts, which is finally attached to a solid baseplate that you can always save for later use (ideal for putting on a ledge/table/etc…).

Once you dig everything out of the box, here’s what you’ve got waiting for you:

First up is the manual and GoPro stickers:

Then we’ve got the sticky mounts and previously noted box plate mount. One sticky mount is flat, the other curved (for helmets).


Next are three different mount adapters. The one to the left is the most common one you’ve seen on past GoPro units. While the one in the middle is a new ball-joint mount that rotates around and locks in place. And finally to the far right is a new low-profile adapter for the Hero4 Session to keep it lower to a helmet.

Next are the frame ‘cases’, I’ll dive into these a bit more later – but essentially they’re brilliant.

Then we’ve got the USB cable that plugs into the unit. It’s just a standard micro-USB cable, like those used on non-Apple phones.

Finally, the GoPro Hero4 Session itself:


As may be obvious…it’s a perfect little square. But how does it size up? Let’s move onto the next section.
Size Comparisons:
Next up we’ll take a look at how the Hero4 Session compares to other GoPro units. There’s been a lot of attention here, but it’s probably important to debunk a few things as well.
First up, here’s the size of the unit next to GoPro Hero4 (Silver/Black are identical in size). You’ll see that obviously it’s a fair bit less wide:

But while it’s less wide, it’s also quite a bit deeper:

And from the back:

As you can see, it’s a smidge shorter, but not appreciably so.
But in many ways those two items are academic. Because for most situations you’ll be putting either of the two units in some sort of mount/case. While it’s true that I often just stick a GoPro in my pocket on vacation, both units fit fairly well – so there’s no real difference there.
So let’s start with the case/mount situation. In this configuration, the Hero4 Session would be waterproof of course, and with the case, so is the Hero4 Silver.


Oh, and just because a lot of people seem to compare it to the (really poor quality) Polaroid camera, here’s the size there:


As for weights, here’s a look at the difference between the various units on the market. First, in the ‘nude’ or sans-case mode (which varies by unit) – and then with a waterproof case:
-
- GoPro Hero4 Session
-
- GoPro Hero4 Session with Frame
-
- GoPro Hero4 Session with Frame/Mount
-
- GoProHero4 Silver
-
- GoPro Hero4 Silver in standard case
-
- Sony 1000V
-
- Garmin VIRB X/XE
-
- Garmin VIRB X/XE with mount
Phew!
Now, when it comes to sizing, here’s the thing – there are limited situations where the size will really matter. Which isn’t to say that those situations don’t exist, but just that they’re somewhat limited. Over the last almost two-months that I’ve been using it, I’ve tried to find those sort of scenarios – and there aren’t many.
Scenarios where it did work in places the Hero4 Silver/Black wouldn’t have worked well though would be onto the anchor of a boat (because it wouldn’t have fit through the hole correctly that the chain goes through), or mounted on the bike seat post facing forward without getting bonked.
But in almost every other situation, size or weight wasn’t really a factor. That said, the Hero4 Session is for whatever reasons less obvious – so it doesn’t stick out as much in many situations. So it ends up being a bit more ‘discreet’ than the wider profile Heor4 Silver/Black units.
The Basics:
Now that we’ve got it unboxed, you’ll want to get it charged up. It’ll likely have some charge already in it, but just in case, the charging port is located under the small secret door that’s on the side of the unit. This door opens when you slide the embedded button with your fingernail:

Inside you’ll find a standard micro-USB port, as well as a micro-SD card slot.

When you plug in the unit, it’ll show charging status on the top display as well.
Now remember the Hero4 Session does NOT have a removable battery. Meaning, you can’t simply swap the battery out mid-day while skiing. Instead, you’ve gotta re-charge it. But on the flip-side, the unit instantly goes into a power saving standby when you stop recording.
At first I was reasonably skeptical about the battery life – but I’d agree with others by now – I never ran out of battery during a day of using it. Recording two hours of pure video is a heck of a lot of video. Rather, you’re generally recording little snippets, in between which the camera is turning itself off each time – saving battery. As a result, it lasts a surprisingly long time.
Inversely though, it’s not ideal if you wanted to do some sort of long powered time-lapse shot, because you’ll have to leave that side-door open.
Once you’ve closed the hatch though we’ll power it up. There are essentially two ways to do this. One is if you’re going to immediately take a video or photo, and the other is if you want to toy with the settings. To take a video, you’ll simply tap the red button atop the unit, which will start recording in about 3.5 seconds:

It’ll record within whatever mode you’ve configured last using the mobile phone app. By default, that’s 1080p/60FPS. It’ll show this on the display as well, seen above.
If instead you want to take photos, you’ve got to hold down the button for a semi-confusing number of seconds. Usually 3-5 seconds works, but sometimes it doesn’t work and you’ll just end up with a video instead.
And when I say ‘take photos’, I mean it. Not just ‘take a photo’, but rather take a crapton of photos. That’s because the unit goes into a continuous photo mode that keeps taking 1 photo per second until you stop it again. The number at the bottom is the photo number in that sequence.

Finally, there’s the ability to press the button on the back of the unit to get into the (very basic) menu system.
(Update Oct 17th, 2015: With a firmware update last week, GoPro now allows you to change the video resolutions/modes and photos resolutions and timelapse settings, I’ve updated the review below accordingly.)
This menu system allows viewing of the following things:
A) How much storage space is left
B) How much battery is left
C) The current video quality mode
D) The current photo quality mode
By selecting to modify settings with that bottom button, it allows modification of the following things:
A) Video resolution
B) Video frame rate
C) Video field of view (wide or medium)
D) Photo resolution
E) Photo timelapse rate (i.e. 1s, 2s, etc…)
Note that for photos you cannot change to a different photo mode, just simply the rate at which it takes photos. Again, these modifications are an update to when the camera was first released and super-frustratingly you couldn’t change from regular video to high speed video without the phone. Now you can.
In addition, you can change the wireless connections. You can enable and disable the WiFi/Bluetooth Smart connectivity to remotes or the mobile phone app.

Now outside of the aforementioned setting change options, everything else will have to be done on the phone app. But at least with the update it hits the core scenarios.

In addition, you can also pair it to a GoPro remote. But beware that the GoPro remote when paired to the Session can only cycle through the pre-configured modes (Video/Photo/Burst). It cannot change the settings of those modes. (Update: A firmware update appears to have recently addressed this, I’ll double-check and update accordingly – if so, that’d be great.)

Update – the gist of the below are now addressed with the latest firmware update as of October 17th, 2015. Woot! I’d still like to see more options for configuration on the unit itself (such as changing photo modes), and honestly, I still think the button configuration is kinda wonky and inconsistent for use (especially taking photos). But the core of my gripe has now bee fixed.
And thus getting to my single biggest gripe about the camera: The buttons. Aside from being simple to use, they’re also frustratingly limiting. Two buttons has long been enough in GoPro history to change settings and configuration. Everything previous to the Hero4 cameras used merely two buttons to change and configure everything (the Hero3 had a dedicated WiFi button, but you didn’t have to use it to enable WiFi). Thus, there’s zero reason the same button configuration couldn’t have been kept here.
And while this may sound like a minor gripe, it’s actually really substantial when it comes to day to day use. I often want to switch between regular shooting mode and high speed mode. And many times when I’m doing ‘action sports’ (i.e. skiing, near/on the water/mountain biking/etc…), I don’t want to have my phone exposed to the elements. Instead, I want to do that with a device that’s already protected. But I can’t. Even with the remote I can’t (which you have to purchase extra). Despite the fact that said remote also has three buttons.
But don’t worry, I’m not alone in this thinking. Almost every other reviewer has noted the same – so hopefully GoPro will do something about it. I’d be happy with a simple software option enabled via the mobile app that changed the button modes to allow you to configure settings via the buttons on the unit (just like the old GoPro units). I’d suggest the following names for this mode: “Logical Mode”, “Usable Mode”, “Not Stupid Mode”, or perhaps even just “Expert Mode”.
Surely I’m not asking for too much, right?
The Frame Cases:
While GoPro lost significant points with the two buttons in my mind, they gain them back with the ‘frame’ cases. These new cases are exactly as the name implies – frames. They allow you to snap-in the GoPro into the case and then mount it using the standard GoPro adapter interface.

The frames accept the camera rotated in any orientation you’d like, giving you a fair bit of flexibility (in 90° chunks) on how you mount it.
They also allow you to mount the camera backwards or upside-down, a perfect way to store the camera while travelling so the button doesn’t get turned on, and the screen is a bit more protected.

There are actually two different frames, depending on the orientation you’re looking for. You can see the slight differences here:

In addition to the frames, there’s also the new ‘low profile’ mount, which would be ideal for situations where you want the camera slightly more aerodynamic (or, just less obvious):

You can see how that compares with the regular mount here:

The frames are in many ways one of the best pieces of the GoPro Session, at least currently. I say that with some hesitation because while they are super easy to use and snap nicely shut, I wonder if after 6-9 months of use the snap mechanism might become a bit worn. It’s too early to know for sure, but so far, so good.
Video Modes:

There’s been much made about the Hero4 Session’s video capabilities, or, as some might say – lack thereof. And that’s true – if you compare it against the Hero4 Silver or Hero4 Black, it will indeed lack in quality and depth. But – if you compare it against pretty much any other action cam on the market with equal specs, it’ll also be equal. Now obviously, when the Hero4 Silver & Hero4 Session were initially the same price ($399) – that made that proposition a bit weird. But now that the Hero4 Session is $100 cheaper ($299), it starts to make it much more compelling.
But, let’s not get too far ahead of ourselves. The Hero4 Session has the following video modes:
1440p: 30, 25fps
1080p: 60, 50, 48, 30, 25fps
960p: 60, 50, 30, 25fps
720p: 100, 60, 50, 30, 25fps
WVGA: 120, 100fps
Ok, yes, to the non-techies that’s a bunch of random numbers. The first portion of those numbers is the resolution – that’s essentially the quality. On YouTube for example, you’ll see those in the dropdown (err…drop-up) list for video quality. The higher the better. Keep in mind that there are higher resolutions than 1440p, for example 2.7K and 4K footage found on the GoPro Hero4 Silver & Black.
Next is the frames per second. This gets into how many frames are recorded every second of the video. For most things, simple 30FPS is usually perfectly fine. However, 60FPS is more appropriate if you’re talking really fast moving action – like downhill mountain biking through trees. That’s because the picture is changing very quickly with lots of shifts in detail. Most new action cameras these days are just defaulting on 1080p/60fps as the ‘standard’ resolution.
But what about slow-mo footage? Well, that’s at the top-end, and in this case the 100 & 120fps modes. Except the only real ‘usable’ mode here on the Hero4 Session is the 720p/100fps. That’s because most times you wouldn’t really want to use footage slower than that except in very rare scenarios that you simply needed the high speed footage – quality be damned.
So really, the WVGA/120FPS footage is sorta a throwaway option. Note, for comparison sake, the Hero4 Black shoots at 720p/240fps – so more than double the GoPro Hero4 Session. And the Hero4 Silver tops out at 120fps for 720p.
With all of that backstory – how does the footage actually look? Well, let’s start with something I shot entirely on the Hero4 Session, a trip to Corsica.
Overall, the footage isn’t too shabby (my editing skills aren’t exactly at their peak).
Again – if you didn’t know any better, you’d say the footage was perfectly acceptable and great looking. And I think that’s part of the challenge sometimes with tech blogs (which I love) – is that they take a pixel-peeping approach rather than a holistic approach of whether the end resultant is good. Which isn’t to say you shouldn’t strive for higher quality, but that instead to recognize it doesn’t necessarily matter to everyone. Now where it does matter is when you match quality with price – and that’s where things had initially gotten askew with the Hero4 Session when it was priced at $399. Now that it’s priced at $299 it’s more acceptable (though, I think the sweet-spot for the session is actually $249).
Moving along, the Hero4 Session does include auto-rotation. This ensures that the video is correctly rotated regardless of which way you mounted the camera. So if you mount it upside-down, it’ll correct itself and record it the right way. Note that once you start recording it won’t re-orient the camera, it’s only before you press the record button (so it won’t hose up backflips). Also note that you can easily change this setting in options.

In my testing I only had one case out of hundreds of clips where it didn’t auto-rotate correctly, while on a mountain bike. Not sure why.
Speaking of settings, the unit also includes the ProTune capability, allowing you to eek out a bit more out of the color quality and range. The only caveat here is that you’ll need to use GoPro’s desktop tools to really take advantage of this.
First up on the footage front is a short segment I shot dual while trying to get our not-so-capable rental mini-SUV out of a sticky off-road situation. This was about the 3rd or 4th attempt of trying to get it over this hill after we ventured down a road that turned out to be closed.
First up, the footage from the Hero4 Session:
And then the footage from the Hero4 Silver:
As you can see, you get a tiny bit more detail on the Silver than the Session – especially from some of the flying pebbles. But it’s not dramatically different either. This was shot using the GoPro suction cup mount with both cameras together on a dual GoPro mount.
Next up is another desert adventure, this one in Red Rocks National Park near Las Vegas. I was out mountain biking and shot some dual footage. The cameras were again using the dual mount, but this time attached using a K-Edge (metal) out-front mount.
First up, the Hero4 Session:
And next, the Hero4 Black – which I put in the same 1080p60 mode as the Session:
The most noticeable thing there is when the light changes and the dynamic range you get there.
Next I’ve got some random clips from the Hero4 Session that don’t have comparison clips – but are just interesting examples of footage. For example, here’s a shot I did while sailing in Croatia, this one turned out really nice – likely because it follows the unwritten Hero4 Session rule that says to film in sunny conditions with lots of colorful things (it does well there).
Next, we took our little dog, Lucy, up to the Swiss Alps and strapped a Hero4 Session on her using the GoPro dog harness.
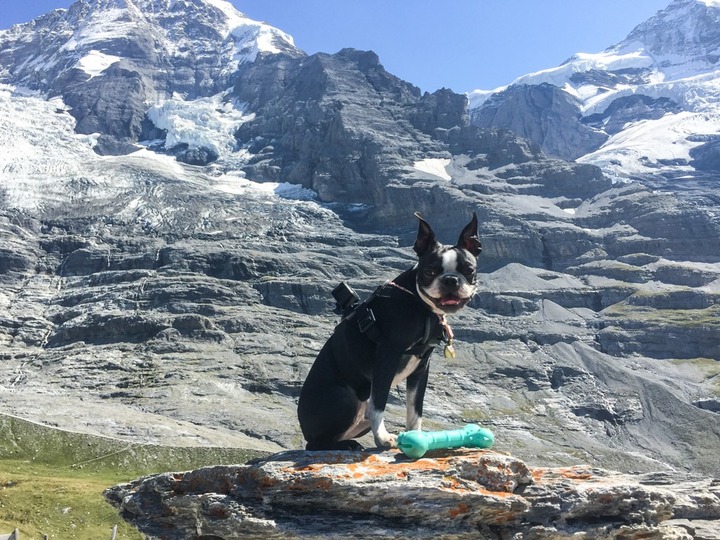
Then we let her roam free. Here’s her little montage:
Lastly, I did a bit of placement of the Hero4 Session with the Hero4 Silver around a rental convertible we randomly got upgraded to – so here’s a quick compilation of that – again, everything on the Session shot using various mounts.
So what about battery life while shooting? Well as I noted earlier – I just didn’t find it a problem due to the way the unit automatically turns off. That said, for fun I set out a GoPro Hero4 Session to simply record at 1080p/30fps to see when it’d die. The spec’d timeframe for this is 2:05. Here’s the resultant pile of files before the camera automatically turned off:

As you can see – a total of 2:10 (and 48 seconds), slightly above spec. And this was after about 45 days of usage on the camera.
Photo Modes:

Like the video modes, the unit has a variety of photo options, though you’ll really only ever use one of them: The default continuous photo mode.
In the default mode you’ll press and hold the round recording button down for about 3-5 seconds, when you do that it’ll start recording photos at once per second (1s) until you stop. This is sorta like the old-school time-lapse mode…just without the video part. This means when looking at photos later on, you get this:

Which is fine, because it makes it easier to get the shot you want. You can however change the photo modes if you’d like using the GoPro app. When you do that, you’ve go the following modes that can be triggered from the app or the remote. But the unit itself is always just continuous when the button is pressed.

Still, you’ll get rather good picture quality. Here’s a small gallery of photos I’ve taken over the last two months, all natively from the camera without any touching up in any application.
-
- DCIM105GOPRO
-
- DCIM100GOPRO
-
- DCIM105GOPRO
-
- DCIM100GOPRO
-
- DCIM105GOPRO
-
- DCIM100GOPRO
-
- DCIM100GOPRO
-
- DCIM105GOPRO
-
- DCIM105GOPRO
-
- DCIM105GOPRO
-
- DCIM105GOPRO
-
- DCIM105GOPRO
-
- DCIM105GOPRO
-
- DCIM100GOPRO
-
- DCIM105GOPRO
-
- DCIM105GOPRO
-
- DCIM105GOPRO
-
- DCIM105GOPRO
-
- DCIM105GOPRO
-
- DCIM105GOPRO
Of course the main reason you’d probably use the GoPro Hero4 Session as a camera instead of your phone is simply around weather or environmental conditions that aren’t ideal for phones (read: water or sand). Whereas the Hero4 Session is fine in those.
Finally, while probably somewhat obvious – the unit sits just fine on any flat surface and can take photos once started. This sounds silly-stupid to say, but after having used the Garmin VIRB & VIRB XE, you actually can’t do that. It only would work upside-down, due to the mounting system on the bottom making the camera fall over. All GoPro units can sit peacefully by themselves though.
Aquatic Adventures:

In many ways, I think the Hero4 Session shines the most in and around the water – more so than the other GoPro units. Why? Well, because of its built-in waterproofing.
For example, I used the Hero4 Session during a week-long sailing trip on a small sailboat. In that environment we were constantly in and out of the water. And of course surrounded by water (both in the sea as well as splaying up onto the deck). With a traditional GoPro out of the case I’d have to be cognizant of water, or, if in the case I’d have to continuously worry about water or wet hands when swapping batteries.
Whereas with the Hero4 Session, there’s nothing to think about – it’s just always protected.

The door is also near-impossible to open accidentally – so that’s of little concern (whereas it’s a little bit easier with something like the Sony action cams).
The unit will sink though by itself, so unless you can see the bottom clearly (i.e. a pool), you may want to consider putting some sort of flotation device on it. Or, at least stick it on a pole so it doesn’t fall easily out of grasp:

One option is GoPro’s little orange life jacket for it. This works reasonably well, though is kinda a pain in the butt to take the unit in/out if you secure it using the small strap (which I do).

Still, it’s better than losing the unit altogether. In the event you do happen to lose it though, I’ve found it’s surprisingly resilient. I may or may not have kerplunked mine twice to the bottom of the sea, each in depths of about 10-13m. The first time on accident (we dove down and got it). And the second time on purpose when I attached it to an anchor at 13m deep. That second time I also dove down and got it because I was a bit concerned it’d rub off on the way up dragging along the sand. Here’s a video of that:
Neither time did the camera suffer any damage, despite only being rated at 10m (33ft) deep. Of course, that’s not good enough for scuba diving – but it’s fine for snorkeling, and pretty much anything most people are going to be able to hold their breath to depth-wise.
Finally, image quality is generally quite good underwater. Obviously a large portion of underwater image quality is dependent on the water visibility/clearness. You’ll find more aquatic pictures in the gallery up a bit earlier.

Also, if you’re doing a lot of stuff where the camera is going back and forth between being wet and dry, you can simply lick the front of the GoPro lens and then dunk it back in the water. That’ll keep the droplets from forming for a while.
Accessories:
The GoPro Hero4 Session accepts almost any GoPro accessory out there. That’s because the mount point is the same piece. Where an accessory wouldn’t be compatible is if it’s something that attaches directly to the camera (for example, my favorite gimbal). That said, here’s what I’ve been using this summer with the Session.
First up is the GoPro 3-way pole. Still my favorite for any action cam, heck, I even use it with other brands action cams now. And in fact yesterday I just permanently epoxied one into a water bottle for some neat shots off the back of my triathlon bike. But, more than that, it’s just a good way to get a selfie-stick without calling it a selfie-stick.

The pole can fully extend out and bend at each joint, as well as quickly tighten and lock. I use it in virtually every sport I can think of – from cycling to skiing to even running and swimming.

The only downside to the 3-way pole is that while the tripod thingy that pulls out of the bottom is awesome, it’s also silly-easy to lose without realizing it. I’ve lost..umm…three of them now. In fact, I lost one in the very shot above when I pulled it from the sand and didn’t notice the base tripod spike was left behind until two days later. Sad panda (now it’s epoxied into a water bottle).
Next we’ve got my second favorite item this summer, the clamp mount. I used this a ton on my sailing trip, because it was easy to mount to anything and then rotate the camera around appropriately.

Next is the smart remote. This is mostly important if you have two or more GoPro cameras. I wouldn’t generally buy it for just one camera. It allowed me to trigger shots in cases where I wasn’t near the camera – such as some shots during sailing in high winds where getting to the front of the boat would have been tricky.

Finally, we’ve got just the suction cup mount. I put this everywhere from the side of the boat to the back of our convertible rental. No problems at any speed, highway, waterway, or otherwise.


And of course I use a small pile of sticky mounts, for example I stuck them on the stand up paddleboard:

They stay put pretty well as long as you let them ‘dry’ for a few hours before starting.
Of course, there are some things that don’t work. As noted earlier, it’s not compatible with the handheld gimbal, nor any of the gimbals found on the DJI Phantom series lineup (though, you can use it with the non-moving mount there but sans-gimbal it’s kinda lame). And of course if you have any older GoPro cases, like the blackout cases, those aren’t compatible either since the camera shape is different. But then again, I’m not really sure why you’d stick it in a full case anyway.
Product Comparison Tool:
I’ve added the Hero4 Session into the product comparison database. This allows you to mix and match and compare it against all other action cams I’ve reviewed. For the purposes of below, I just stuck in the current lineup of GoPro action cams. But, you can also compare it against past cams as well as cameras from other companies using the main product comparison tool here.
Copyright DC Rainmaker – Updated February 5th, 2017 @ 5:41 pmNew Window
Price$199$129$299$399$499
AvailabilityJuly 13th, 2015GlobalJune 7th, 2015GlobalGlobal
WiFi BuiltinYesNoYesYesYes
Bluetooth to PhoneYesNoYesYesYes
Recording LightYesYesYesYesYes
GPS builtinNoNoNoNoNo
Altimeter builtinNoNoNoNoNo
Water Resistant10M with integrated case40m with included case40m with included case40m with included case40m with included case
AccellerometerNoNoNoNoNo
Video Preview ScreenNoNoYesYesAccessory
Voice ControlNoNoNo
Recharges viaMicro-USBMini-USBMini-USBMini-USBMini-USB
Removable batteryNo1180 mAh (non-removable)NoYes / 1160 mAhYes / 1160 mAh
Recording Time2 hoursUp to 2.5 hours2.5 Hours2 HoursUp to 1hr 50min, 65min at 4K
Secondary attached batteryNoNoNoAccessoryAccessory
Storage Card TypeMicro-SDMicroSD CardMicroSDMicro-SDMicroSD Card
Maximum Card Size64GB32GB64GB64GB64GB
Records 360* VideoNoNoNoNoNo
4KNoNoNo12.5/15 fps24/25/30 fps
2.7KNoNoNo24/25/30 fps24/25/30/48/50/60 fps
1440p25/30 FPSNoNo24/25/30/48 fps24/25/30/48/50/60/80 fps
1080p25/30/48/50/60 FPS30 fps25/30/50/60 fps24/25/30/48/50/60 fps24/25/30/48/50/60/80/90/120 fps
960p25/30/50/60 FPSNoNo50/60/100 fps50/60/120 fps
720p25/30/50/60/100 FPS60 fps50/60 fps35/50/60/100/120 fps25/30/50/60/120/240 fps
WVGA100/120 FPSNoNo240 fps240 fps
Automatic Image RotationYesNoNoYes (Feb 2015 update)Yes (Feb 2015 update)
Image StabilizationNoNoNo
Looping RecordingsYesYesYesYes
Timelapse Mode (constructs timelapse video)NO (REQUIRES DESKTOP SOFTWARE)No (requires desktop software)No (requires desktop software)Yes (Feb 2015 update)Yes (Feb 2015 update)
Travelapse ModeNoNoNo
Pro Settings ModeYesYes
Internal MicrophoneYesYesYesYesYes
Supports Bluetooth MicrophonesNoNoNo
Pro mode with seperate tracksNoNoNo
Megapixels8 MP5MP8MP12 MP12 MP
Timelapse Mode (photos on interval)0.5,1,2,5,10,30,60S0.50.5,1,2,5,10,30,60s0.5,1,2,5,10,30,60s0.5,1,2,5,10,30,60s
Burst ModeUP TO 10 PHOTOS/SECONDUp to 5 photos/secondUp to 5 photos/secondUp to 30 photos/secondUp to 30 photos/second
Continuous Shooting ModeYesNoNoYesYes
Concurrent w/video modeNoNoNoYesYes
Records 360* PhotoNoNoNoNoNo
Pro Settings ModeYesYes
RAW photo creation supportNoNoNo
Skiing ModeNoNoNoNoNo
Control from sport computerNoNoNoNoNo
ANT+ Sensor ConnectivityNoNoNoNoNo
Bluetooth Sensor ConnectivityNoNoNo
ANT+ Profile TypesNoNoNoNoNo
Overlays sport data on recordingNoNoNoNoNo
App platforms availableIOS/ANDROID/WINDOWS PHONENot compatibleiOS/Android/Windows PhoneiOS/Android/Windows PhoneiOS/Android/Windows Phone
Use as remote controlYesNoYesYesYes
Stream live video previewYesNoYesYesYes
Record video from cameraYesNoYesYesYes
Multi-camera live control/previewNoNoNoNONo
App for computerGoPro StudioGoPro StudioGoPro StudioGoPro StudioGoPro Studio
Remote control button/keyYesNot compatibleYesYesYes
Diving caseSnorkeling onlyIncludedIncludedIncludedIncluded
Head StrapYEsYesYesYesYes
Helmet StrapYesYesYesYesYes
Handlebar/SeatpostYEsYesYEsYesYes
TripodYEsYesYEsYesYes
Suction CupYesYesYEsYesYes
Chest HarnessYesYesYEsYesYes
Wrist Strap/HousingYEsYesYEsYesYes
Roll BarYEsYesYEsYesYes
SurfboardYesYesYEsYesYes
Curved AdhesiveYesYesYesYesYes
Flat AdhesiveYesYesYesYesYes
Adjustable Mounting ArmsYesYesYesYesYes
USB Connector TypeMicro-USBMini-USBMini-USBMini-USBMini-USB
Micro-HDMINoNoNoYesYes
Composite VideoNoNoNoAdapter AvailableAdapter Available
Audio 3.5mm Stereo MicNoNoNoAdapter AvailableAdapter Available
Amazon LinkLinkLinkLinkLinkLink
Clever Training Link (Save 10% with DCR10BTF)LinkN/ALinkLinkLink
Review LinkLinkLinkLinkLinkLink
Again, remember you can mix and match and compare against other action cams that aren’t shown above using the product comparison tool here.
My Advice:

So, which camera to choose? No doubt, it’s tricky. A lot of it depends on what you’re looking to use the camera for. And to a lesser extent how much you want to extract in terms of quality and features.
Ultimately when it comes to deciding between the Hero4 Silver (at $399) and the Hero4 Session (at $299), it’s really going to go down to quality and somewhat size. But, it’s not quite as easy as that. For example, if you want metrics like speed/distance/g-forces, then really the Garmin VIRB X/XE lineup is a better bet. Alternatively, if you want to monitor a bunch of cameras at once, then the Sony action cam lineup with the live view remote is a better bet. So here’s a bit of a primer:
All Arounder: For this, go with the Hero4 Silver. It’s what I recommend to my close circle of friends here, and everyone is thrilled with it. It’ll do everything you want at any quality level that you’re realistically going to use. The touchscreen on the back of the unit is brilliantly crisp & clear, and easy to use. The Girl also loves this one.
Budget Option: The GoPro Hero base is your best bet here at $129US, seriously, you won’t beat that deal. But there’s a bunch of limitations, most notably the lack of ability to connect to your mobile phone for easy sharing (though the newest Hero+ that was just announced at $199 sorta solves those limitations). But you still can’t swap the battery (though you can buy some really cool 3rd party battery packs that go super long). There was a time when Garmin was selling their base VIRB for roughly the same price – that was brilliant and the best deal out there. They’ve since discontinued that model though unfortunately.
4K Super-High Quality Footage: In this case, I’d look at the GoPro Hero4 Black. The Silver only shoots 4K at a reduced frame rate, so it’s kinda useless there. And while the Sony action cams also shoot 4K footage (that looks brilliant), I find them super finicky compared to the GoPro series (user interface, apps, battery life consistency). In other words, they’re beautiful…but high maintenance. Sorta like a fashion model.
Data Metrics: Like past recommendations – if you want a one-stop shop in terms of putting data metrics on your videos like Speed, Distance, Elevation and others, then the Garmin VIRB X/XE is a better bet. That said, note that if you already have a Garmin device (like a Garmin Edge or GPS running watch), then you can use that data in conjunction with VIRB Edit and most GoPro footage directly. So it’s really just a case of simplifying it (and Garmin does a fantastic job in the latest versions of making it instant and easy to use). This particular category is probably most applicable to cyclists, especially if you’re looking to use the footage in race situations (or something exciting). If you’re instead aiming to use it for re-creating outdoor rides indoors on a trainer, then it doesn’t matter as much. So for example, you’ll often see me shoot sporty footage with metrics using the VIRB XE, simply because it’s super-easy to get that data on the screen with no fuss (even from the mobile phone). Whereas for just taking pretty pictures while out doing activities, I tend to use the GoPro Silver since it’s smaller & easier to handle.
Finally, there are no doubt other action cams out there. But my experience is largely with current generation GoPro, Garmin, TomTom, and Sony models. Though I’ve also had hands-on time with many others like Shimano, JVC, ION, and others – a whole drawer full of them in fact. The challenge I generally find with most other brands is that they’ve outsourced much of the software side to 3rd party companies entirely. This usually results in a very crappy software experience that ultimately lessens the ease of use in getting footage/photos off of the camera and out to your friends (or yourself).
Summary:

Phew – you made it! Or, you just skipped past all the pretty pictures till the last picture you found. Either way, you’re looking for my final thoughts. I’d encourage you to slide up one chunk to the ‘My Advice’ section, as I think I capture it fairly well. Still, I can’t help but think the form factor that you see the Hero4 Session in today, will be the future GoPro form factor. They could likely add a screen in there over time (other cameras have small screens in that size of space, such as the original VIRB screen), and ultimately imaging quality will improve as well. And, they might even fix the buttons (Update: Kinda done!).
I think the Hero4 Session is a solid attempt though at this form factor, and the flexibility of both the frames combined with the traditional GoPro mounts make it just about the most versatile action camera out there placement-wise. Up until Monday’s pricing change, I would have strongly encouraged folks to look at the Hero4 Silver instead (since the price was the same). But now with the Session being $100 cheaper, it’s more appealing to a wider audience. Of course, for that same price you can get the Hero+ LCD, which is basically the same resolution specs as the Hero4 Session, but with the LCD screen and size of the Hero4 Silver. Really depends on what you value.
Ultimately, GoPro has made a pretty diverse lineup from $129 up to $499 with options depending on what matters to you most. If it’s size and an internally waterproofed action camera (especially if you spend a lot of time on the water) – then the Session is where it’s at. Whereas if it’s quality then go for the Silver or Black. And if it’s budget, nothing beats the Hero base at $129.
Found this review useful? Or just want to save 10%? Here’s how:

Hopefully you found this review useful. At the end of the day, I’m an athlete just like you looking for the most detail possible on a new purchase – so my review is written from the standpoint of how I used the device. The reviews generally take a lot of hours to put together, so it’s a fair bit of work (and labor of love). As you probably noticed by looking below, I also take time to answer all the questions posted in the comments – and there’s quite a bit of detail in there as well.
I’ve partnered with Clever Training to offer all DC Rainmaker readers exclusive benefits on all products purchased. You can read more about the benefits of this partnership here. You can pickup the GoPro units through Clever Training using the links below. By doing so, you not only support the site (and all the work I do here) – but you also get to enjoy the significant partnership benefits that are just for DC Rainmaker readers. And, since this item is more than $75, you get free US shipping as well.
GoPro Hero4 Session
Additionally, you can also use Amazon to purchase the GoPro units or accessories (though, no discount). Or, anything else you pickup on Amazon helps support the site as well (socks, laundry detergent, cowbells). If you’re outside the US, I’ve got links to all of the major individual country Amazon stores on the sidebar towards the top.
Thanks for reading! And as always, feel free to post comments or questions in the comments section below, I’ll be happy to try and answer them as quickly as possible.