CycleOps Joule GPS In-Depth Review

A bit over a year ago CycleOps announced their latest devices – and with it, their first GPS integrated cycling computer: The Joule GPS. CycleOps has a long history of power meter head units (and power meters), an area they’ve been at the forefront of for years. With their jumping into the GPS-enabled bike computer arena, how does the unit fare both by itself, as well as against the competition?
Like all my reviews, they tend to be pretty in depth (perhaps overly so) – but that’s just my trademark DC Rainmaker way of doing things. Think of them more like reference guides than quick and easy summaries. I try and cover every conceivable thing you might do with the device and then poke at it a bit more. My goal is to leave no stone unturned – both the good and the bad.
Because I want to be transparent about my reviews, CycleOps sent me out the Joule GPS to try out. Once I’ve completed with the review, I send the whole unit back to the folks in Wisconsin. Simple as that. Sorta like hiking in wilderness trails – leave only footprints. If you find my review useful, you can use any of the Amazon or Clever links from this page to help support future reviews.
Lastly, at the end of the day keep in mind I’m just like any other regular triathlete out there. I write these reviews because I’m inherently a curious person with a technology background (my day job), and thus I try and be as complete as I can. But, if I’ve missed something or if you spot something that doesn’t quite jive – just let me know and I’ll be happy to get it all sorted out. Also, because the technology world constantly changes, I try and go back and update these reviews as new features and functionality are added – or if bugs are fixed.
Unit Externals:
In my case, the unit was delivered to me without any of the fancy box material – mostly because it was delivered ahead of the final release. Though this review is written with the final released and publically available firmware on it.
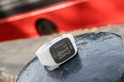
You can see on the front of the unit it contains a single button for the intervals (INT), which you tap to trigger a new lap/interval/set.

On the left side, you have a single button, which acts as a ‘down’ arrow.

The right side contains two buttons. The upper one acts as a ‘Enter’ button, while the lower one compliments the left side and acts as a ‘up’ arrow.

That enter button can be held for about three seconds to trigger switching into the menu system, or going back to the Dashboard.
The button arrangement of the Joule has been like this for some time, since the previous Joule, and then before that the LYC (Little Yellow Computer – aka PowerTap head unit). And while I do understand it, I’ve never found it terribly easy to get used to. Personally, I prefer simple start and stop buttons (of which there are none), as well up/down buttons on the same side of the unit. As I routinely find myself pressing ‘enter’ when I meant to press ‘Up’, because the enter button is above the ‘down’ button.
You’ll eventually sorta get used to it, but it’s really unlike any other time/distance keeping watch-like device made on the planet with that button configuration.
Size Comparisons:
It’s best to express size comparisons in photographs. Typically for watches I place them on a rolling pin, which approximates a wrist. In this case though, I went with placing them in front of the rolling pin. All units were placed as vertical as possible resting on their own bases, thus providing for an easy way to compare heights/widths (click to zoom in):

(Above, from left to right: Mio GPS, Joule 3.0, Joule 2.0, Garmin Edge 800, Joule GPS, Joule (new), Garmin Edge 500, Timex Road Trainer GPS, Bontrager Node 2)

Note above that while the Joule GPS is larger than the Edge 500, the screen size is also slightly larger – making for an easier to read display.
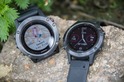
And finally, the two units that compete head to head the most – the Garmin Edge 500 and the Joule GPS.

You can see they’re fairly similar when it comes to depth, though the Edge 500 is a touch bit smaller when it comes to length, as it’s not quite as tall when stacked directly on top:

No matter, you likely won’t notice a terrible difference between the two units once it’s on your bike.
Mounting Options:
The Joule GPS comes with two mounts, which is kinda nice. Most companies only give you one.

The first is a traditional mount that can be placed on any bar surface – such as handlebars or even aerobars:


The second mount is a forward and/or aerobar mount (depending on how you use it). You could use this mount to place the unit forward of your handlebars, or you could do as I did below, and use it to place your unit either to the side or within your aerobars:


In my case, my aerobar setup is a bit too close together to accommodate the unit within the bars – though many of you might be able to fit it inside. So I had it arranged to the outside.
The one thing I did note is that while the unit is plenty strong to keep it on there for all the rides I did (since July), I do wish the plastic was a bit stronger. It flexes a bit – heck, even inside on the trainer it flexes a bit.
Nonetheless, the second mount option is rather appreciated. Especially given I just posted yesterday that mounts similar to these are selling for $40 a pop!
Speaking of which, it’s important to note that the Joule GPS 1/8th turn mounting system is NOT compatible with the Garmin 1/4th-turn mounting system. Thus, none of those mounts and/or accessories or 3rd party products will work.

The Joule GPS mount on the back of the unit is a bit wider than the Garmin one, hence the breakpoint there.

The Joule GPS and non-GPS new Joule do share the same mount system however – so in the unlikely scenario that you’ve bought both units, you could swap them back and forth. I say unlikely, because the Joule GPS can do everything the non-GPS Joule can do, so it would seem silly to buy that one if you already have a Joule GPS – unless you really really really wanted the user replaceable battery that the non-GPS unit offers.
Configuration and Pairing:
The unit supports a fairly impressive customizable array of bikes and associated sensors that you can create and pair. This is nice if you have a single bike with more than one power meter (i.e. different wheel sets), or simply have different heart rate straps. It’s flexible, and flexibility is good. Most units allow only one sensor per sensor type per bike. In the Joule, you can add additional ones that you can quickly swap between.
You’ve got two options for configuring the Joule GPS. First, you can use the most common method – which is on the device itself. This is convenient if you’re sitting on the side of the road and just need to make quick modifications.
To start with, you’ll want to be sure to start with setting your biographic information such as birthdate, weight and height. This helps with kilojoules (kJ) burn:

Next, you’ll want to set your power and heart rate zones. This is used within both active as well as historical data fields.

If you don’t know your zones, you can do a power test and it’ll help you determine those values.
Once you’ve got the ‘you’ part nailed down, you’ll want to focus on getting your bike all paired up. I’m going to assume that if you’ve bought a $250 bike computer, you’re probably going to pair it to any number of ANT+ sensors such as a power meter, heart rate strap, and speed and/or cadence sensors. To do so, you’ll dive into the bikes menu and select a default bike, or create a new one.

You can name the bikes anything you’d like. From the default “Bike 1”, to “Cervelo P3C”, to “Fluffy”. It’s your call.

From there you’ll see the options for sensors for that bike. Each sensor type you can dive into and then complete a pairing attempt to find sensors, upon which you can name the sensors. This is a godsend for me, as I’ve often got multiple sensor types around (and you might have them on multiple bikes nearby), so it’s quick and easy to know which ANT+ ID goes to which sensor. Sometimes, it’s the little things.

Or, you can simply just hit the ‘Pair All’ option and it’ll pair all sensor types it finds nearby. Ideal if you’re solo and just want to pair your speed/cadence sensor, power meter and HR strap all in one shot. Again, the little things that are nice.
Once you’re sensors are setup, it’s pretty much time to go. Note that you only have to pair once, it’ll remember it for future rides.
Of course, I noted earlier that there’s actually two ways to configure all this information. The second option is to actually use the PowerAgent software. It’s from here that you can configure all the same stuff as above – but do it a HECK of a lot quicker. In fact, for the few of you that read this little paragraph before buying your unit, you’ll save yourself a lot of time as it’s way faster to type in values on a keyboard than on the little Joule GPS.


As you can see, you can easily cruise through the menus and set all the same information. I love this. So simple, and so much quicker.

If only I had known about the online configuration before I started using the unit. Instead, I found it about 2 days ago. Sigh… My loss, your gain.
Day to Day Use:

Before diving deep into all the sections, let’s just spend a quick second to give you a high level overview of the unit. Then from there we’ll go into all the components.
Upon turning on the unit by pressing any of the buttons, it’ll immediately start searching for satellites (I’ll talk more about this in a few sections lower down). Once that’s complete, the unit is effectively ready for your ride to begin.
It starts the recording as soon as your front wheel moves (or motion is detected). Alternatively, you can configure this to start based on HR. Personally, I hate both options, as there are many cases where I just want to control starting or stopping of the data recording. Instead, those are outside of my control. This was no different than the previous Joule versions – and I disliked it then too.
Nonetheless, once you’re going – you’re going. The until will pause the recording if you pause (effectively an auto-pause functionality). So if you stop at a light, it’ll automatically stop recording. And then once the light is green and movement is detected, it’ll resume recording.

While riding you’ll be using the four buttons for the following functions:
Interval (big one on front): Set/create an interval/lap marker
Left button: To scroll up through the dashboard page
Lower Right button: To scroll down through the dashboard page
Upper right button: To change dashboard pages (i.e. interval > map > Dashboard View #3)
While the buttons are generally easy to handle without gloves, the right side ones are a bit harder with gloves (as I’ve been wearing lately). This is primarily because there’s no easy to feel separation between the two right buttons with gloves. The little notch isn’t easily picked up on. It’s not a huge deal, and definitely not a deal breaker, but worthy of note. The front and left buttons are easy, since they’re solo.

If you need to switch into the main menu for any reason, you can do so by holding the top-right button. The unit will remain recording your ride while you’re wandering in the menus (unless you stop riding, in which case auto-pause kicks in).
When you’ve completed your ride, it’ll automatically pause as normal. After that’s complete you’ll want to hold the upper right button to get into the dashboard, at which point you’ll go into the Ride sub-menu and select ‘End Ride’ to save the ride. This is another scenario where I wished I just had a ‘stop’ button.
Take for example my street. I’ll complete my ride when I get back to my house. But due to the 3-4 lanes of traffic (it varies, no lane markers), I sometimes can’t cross from the bike lane to my house easily. Thus, I’ll do another lap around the one-way streets to get back to my side of the street. But I don’t want that recorded, since it’s usually cool-down type fluff (or post-cool-down). With the Joule, I have no choice, I’d have to wrestle through the menu’s and buttons to stop/save the ride (while riding along), and then seconds later it’d start recording a new file again. Again, that’s why god created the stop/start button on every other electronic device since the 1920’s.
Joule GPS Display Fields:
The Joule GPS unit carries over with it virtually all of the power meter fields of the previous Joule units (2.0 and 3.0). And in much the same format. Below is a simple table from the official manual of all of the display fields available in the Joule.

On the Joule, all metrics are arranged in a trio. The first metric is the one shown in the upper portion of the unit (upper portion of the dashboard), while the second two metrics are shown along the bottom only one the primary metric is highlighted. These lower two metrics are ‘paired’ to the upper one. Sorta like brother and sister. Above, you can see I’ve highlighted ‘CAD’ (Cadence), and on the bottom it shows my average cadence (left) and max cadence (right).
You can of course swap them around.


Note that you can configure these displays manually on the device itself, or you can utilize the software to configure your dashboard views (much easier):

You have a total of three customizable dashboard views, plus the bar graph along the bottom (which displays your current metric level against the max level. For example, a small notch will appear about halfway if you’re putting out 200w, and your max for that ride was 400w.
Additional screens are shown for both the GPS map and interval (shows you core lap information for each interval).
GPS, Mapping & Routing:
Probably the most important new feature to the Joule GPS is the GPS itself. This is the first CycleOps product to have an integrated GPS within it. In doing so, it puts it on a level playing field with the Garmin Edge 500 unit.

When you first power on the unit it’ll start searching for GPS signal. You’ll see this at the top with a blinking directional arrow. When the arrow stops blinking, it’s found signal.
While I appreciate the visual queue – I do wish it was more obvious. Most other GPS units on the market have a much larger symbol that obscures the screen prior to acquisition of signal. They do this for a reason: To remind you it’s not yet ready. Departing before it’s ready only makes things worse. First, it’ll record random points – like mine the other day showing a plot across town. And second, it’ll only serve to delay finding satellites. Of course, this issue is compounded because the Joule GPS is set to automatically start recording when the wheel moves. So the simple action of moving your bike from one side of the car to the other starts the timer.
On average, it seems to find satellites within a minute or two. It doesn’t seem to the fastest turtle on the block, but generally it does find the signal within that timeframe. Obviously, the more you do to remove obstructions from view (trees/buildings/giraffes)– the better.

In the event it doesn’t find signal within a reasonable amount of time, it’ll prompt you asking if you’re indoors. If you are, it’ll turn off GPS and go ahead and utilize ANT+ sensors for speed and cadence.
Once it has found GPS signal though, it’ll use that data for speed and distance, as well as providing you a compass of where you came from. Further, it’ll provide you with a map of your route to date:

This map is a breadcrumb style trail that shows you where you’ve been, but doesn’t show any other terrain or typical map features such as roads or lakes.
Again, this is akin to what the Edge 500 offers, and differs from those products that offer full blown mapping on them – like the Edge 800 or the Mio GPS units (Europe).
The one notable difference between the Joule GPS and the Edge 500 though with respect to breadcrumb trail is that on the Edge 500 the breadcrumb trail is only shown while in a course/route mode. Meaning, you can’t see where you’ve been unless you’re in that mode. But on the Joule GPS you can see this at any time, no route/course required.
You can zoom into the map by using the + and – (on left/right) to get a better view of your track file to date.

(Zoomed in – above, zoomed out – below)

In addition to showing you where you are at any given point in time, the unit can also provide basic navigational support. It does this through it’s magnetic compass (yup, seriously, magnetic compass – sweet!). In fact, you can even configure the magnetic compass (a good thing):

Navigation falls into one of two categories. The first is via waypoints. Essentially point to point routes. In other words – go from Point A to Point B. It’s sorta up to you as to how to make that happen. The unit will provide a basic compass and directional support with distance remaining.

But it won’t provide a ‘turn left on Maple Street’ type functionality. It does provide left/right style functionality if the file specifies it. You can do this through some editors, but it won’t happen automatically.
The closets it comes to that is via the ‘Routes’ functionality. In that function, the unit follows a preset list of waypoints. Again, like the direct to waypoint functionality, you’re only getting point to point information, which may not be terribly useful in real-world routing.
You can get these waypoints onto the device using the CycleOps PowerAgent software. You’ll primarily do this by taking an existing activity and then creating a route from it that can be downloaded back to the unit. You can’t specify waypoints at free will in the software.
[Updated] You can however import a file from GPX or TCX, which is done via File > Import > Route. This will then allow you to import those files into the Joule GPS. You can use common sites like MapMyRide or even Garmin Connect to quickly spin out routes to download to the unit.
On doing so, you’ll also gain a ‘Virtual Racer’ style functionality, whereby you can go ahead and pace against a previous time/pace. For example, if you grabbed your file from past years (again, even a Garmin .TCX file), then you could pace against that performance.

Additionally of note is that if you have a PowerBeam and the CycleOps Virtual Training software, you can export out the route with the slope of the route. I haven’t had a chance yet to try this, though it will be included in the upcoming CycleOps Virtual Training software review.

Altimeter and Temperature Data:
The unit includes a barometric altimeter to record elevation. Typically a barometric altimeter allows for greater accuracy over GPS-based elevation data. The unit allows for you to configure a current elevation, effectively allowing for calibration to a known altitude.
Determining accuracy of altimeter data is almost as much fun as cleaning toilets with toothbrushes. Unless you live in the mountains with clearly marked (and quadruple checked) elevation markers, it’s hard to ultimately determine which unit or marker is truly correct.
Regrettably, I don’t live near any mountains, and thus have to make due with little hills here and there in my area.
Looking at this past weekends ride, I was able to compare data amongst three different GPS units with barometric sensors. All three were turned on and stayed on for the duration of the ride. They reported the following total ascent values values:
Joule GPS: 652.8ft
Garmin Edge 800: 528ft
Garmin FR910XT: 1,214ft
Garmin Connect Elevation Correction Estimate: 744ft
The last one is a computed value that Garmin Connect offers for a given route based on NASA data around elevations at any point on earth. It’s a good barometer of elevation data, but since it’s measured using lasers that bounce off the earth back to satellites, it can be occasionally incorrect in scenarios such as bridges or overpasses. Nonetheless, I figured some might find it interesting.
I don’t have any usable insight into which number is most correct, though it’s fairly obvious which number is least correct.
In addition to a barometric altimeter, the unit also includes a temperature sensor. The temperature sensor is actually a byproduct of having the barometric altimeter. In the case of the Joule GPS – they display the temperature at the top of the unit at all times.

While there’s not much of a specific training value to this, it can be useful long term in training logs when it comes time to understand why on a given ride you might have performed at a given level. For example, a sweltering hot 102*F summer day, or a chilly winter ride. This data is then shown within the PowerAgent software in a given activity file (white line is temp, also see white text on right side inbox, and scale outer box):

You can also configure the temperature to be displayed on the dashboard fields. It’s in this same area you can go ahead and set the sunrise and sunset times to be displayed – helping you to know exactly how much time you’ve got left till the sunset. This data is automatically determined based on your known GPS position.
Night Use/Display Backlight:
The unit includes a rather bright backlight – similar to the previous Joule unit. It’s plenty bright enough to rock intervals late at night in a dark place…you know, like your living room. Or the street. You can see below the backlight on in these photos, taken at dusk. Not too shabby.
The unit allows you to specify a backlight level (brightness) as well as set a timeframe for how long the backlight stays on. You can choose ‘Never on’, 10-seconds, 20-seconds, 30-seconds, 1-minute, or ‘Always on’.

If you’re training at night, I’d go with ‘Always on’, as there’s nothing more annoying than the display turning black and having to fumble around and find the button.
But if you’re primarily a creature of day, then just leave the default of ‘10-seconds’ – which should work for the odd scenario where you find yourself in the dark with the unit alone.
Additionally, you can just use the ‘Smart Backlight’ option (default). When this is enabled, if it’s dark out, it’ll simply keep the light on. Where when it’s light out, it’ll turn off the display. It’s like those cars where the wipers automatically turn on in the rain. Sorta.
It works well though, so give it a whirl.
History:
One of the major marketing pushes of the Joule series has been the ability to dive into your historical statistics without the requirement that a computer be available to you.

It can display daily, weekly, monthly, heck – even 6-month totals.

Not just totals, but stuff like power averages, maximums, and power zone allocation, TSS and IF:

A bunch of even cooler stuff like surges, and displaying your power surges in watts/kilogram (the great equalizer of power numbers):


Ultimately, the history screen is pretty cool.
Well, it could be cool.
Instead, it suffers from two problems:
1) The totals fields don’t reflect any rides that you’ve taken since you’ve last connected to your computer. In effect, those totals are done with the PowerAgent software and downloaded back to the unit. For example, in the above images, it’s missing the ride I just completed minutes prior. You can view the ‘last ride’ within the ‘last ride’ views, but it won’t show up in any of the cooler views seen above (like ‘2 weeks’, ‘4 weeks’, etc…).
2) In general, I haven’t found the totals to be terribly accurate. There are rides that don’t seem to be factored in for reasons I’m not clear on. It’s as if they don’t exist – even when they do – and post-download/upload/sync.
Given #1, but especially #2 – it means that as cool as the feature could be, it’s never accurate. And since it’s never accurate, it’s not ideal
Trainer Use:
The Joule GPS easily supports indoor trainer use – something I’ve been spending a lot of time on recently as I work on upcoming trainer reviews.

When out of reach of satellites the unit will prompt you if you’re indoors, at which point you’re offered the choice of disabling the GPS receiver.
The Joule GPS works inside as long as there’s an additional ANT+ sensor of some sort present. That will trigger the unit to start recording your data while on a trainer.

Speed will be captured using a separate ANT+ speed sensor (or, the PowerTap hub), while cadence will be captured using a separate ANT+ cadence sensor (or again, the PowerTap hub). And power will be captured using your ANT+ power meter of choice. Same goes for ANT+ heart rate.
The data will look the same indoors as outdoors, largely in part because the Cycleops PowerAgent software doesn’t really have any mapping tools available to it – so all data pretty much looks the same.
Compatibility with Power Meters:

While this is probably clear to most, I did want to ensure it was clear to all. The Joule GPS supports any ANT+ power meter on the market today. For example, it’ll of course support their house-brand PowerTap lineup, but it’ll also support competitive units such as the SRAM Quarq Cinqo, Power2Max, SRM, and more.

Additionally, it’ll support quasi-power meter such as the PowerCal (also made by CycleOps).

I’ve been using it with an array of power meters over the past few months, from a Quarq to a PowerTap to a Power2Max to the PowerCal.
Down the road, it’ll also be compatible with upcoming ANT+ power meter device profile products such as the Wahoo KICKR, Stages StageOne, the ROTOR power meter, Garmin Vector, and the Brim Brothers Zone.
Note however, it will not, nor is, compatible with the Kinetic inRide system, or the Velocomputer system, which both rely on Bluetooth Smart. Nor is it compatible with the Polar/Look Keo Power System, which relies on Polar W.I.N.D.
[Update] The unit supports both auto-zero and manual-zero. Auto-zero can be enabled or disabled on a per paired power meter basis. Manual-zero can then be initiated on a given power meter. It’ll display back the raw torque value, as well as the offset.

Phew, hopefully that’s clear now.
Support of left/right power (pedal balance):
The unit supports left/right power, via the ANT+ Pedal Balance metric. This metric enables you to display left/right power information from power meters that support the metric.
Those power meters are divided into two particular camps:
1) Power meters that actually record separate left/right channels: In the next few months (or 18 or so months), these units will independently measure left/right power. This is typically done at either the cleat, the pedal, or the crank itself. There are currently none of these units available for purchase on the market today. Instead, they have availability timeframes from January 2013 until TBD dates. I’d expect we’ll see most of these in the spring/summer of 2013. Companies and products in this category include the Garmin Vector, Brim Brothers Zone, and the Rotor power meter.
2) Those power meters that fake it: For this category, it’s becoming popular to offer an estimated pedal balance by splitting the right-side measurement into the front and back portion of the stroke, therefor driving an assumption that if you’re pulling up, it’s the opposite leg driving the equation. Power meters that today do this are the new SRAM Quarq Cinqo units (2012), and the new September 2012 and beyond Power2Max units.
In any scenario, these are all support on the Joule GPS. At present, I don’t have a unit that supports left/right power (well, I do, but it’s not on the bike due to some technical issues). So instead I was able to do some basic validation using the ANT+ simulator to show you what it looks like on the Joule and validate the data looks correct.
Below, in the CycleOps PowerAgent software suite, you can see the pedal balance data carries through there as well.

As more of these units hit the market, expect to see this data become more mainstream. Today however, there’s actually very little this data can be used for. And there’s still significant debate within power meter circles on the value (if any) of this data. While it may seem obvious that one could focus on leg work to strengthen the less-dominant leg, in reality, it’s been found that overall power tends to fall when one attempts to correct for imbalances.
The one area that left/right power has been valuable in though is injury recovery – as it can help one better track recovery of a given leg back to a normal state.
Software & Downloading:
Getting the data:
The first step is getting the data off the unit. To do so, you’ll use the included micro-USB cable (same as your cell phone cable, unless you have an Apple device) – and you’ll plug it into your computer. The USB port is protected by a small rubber cover, though the port itself is internally waterproofed in case water seeps in. You may remember when I did submersion tests with the previous generation Joule unit.
While the unit will show up as a USB mass storage drive (like a thumb drive), the data itself is encapsulated in a binary blob of sorts that requires specific software to grab the files. This is somewhat unfortunate because it would greatly open up the 3rd party software world if the files could be plucked straight off the device.
Once you’ve got it all connected you’ll open up the PowerAgent software to download your workouts.

After each download session is complete, it’ll offer to wipe your workouts off the unit. Personally, I want them on there until I need the space – since it reduces the amount of loss. Unfortunately, the result of that is that it takes forever download new workouts – since the unit downloads everything, every time…and it takes a while.
[Update] I’ve been told an update has been made that should make this quicker in the next version. Today I’m on the latest downloadable version – 7.5.6.13. So versions post-that.

A result of my choices I suppose, but ultimately I wish it wouldn’t take so long (no other unit I know of takes this long). By ‘long’, I mean that I grabbed the above screenshot before I started writing this whole section from the bolded text two paragraphs above the screenshot. I’m still waiting.
With the workouts downloaded, you’ll get the option to move them to a bunch of popular online services. This does minimize the need for the files themselves to simply sit on the Joule openly, since the most popular services area available here – including TrainingPeaks and others.

Or, you can simply click to save the files locally into the PowerAgent database, where you’ll be able to dig through them with the PowerAgent software.

Which, we’ll do now.
Software – CycleOps PowerAgent (Provided/Free):
PowerAgent is the free analysis suite that CycleOps provides for splicing an dicing your ride files afterwards. The software has been around for a number of years and is primarily focused on the data side of the ride, rather than any of the mapping aspects introduced as part of the Joule GPS.
Once you’ve pulled your data into PowerAgent, you’ll be at a main screen showing your current activity, as well as past activities on the left side:

You can switch views into the ‘Details’ tab of the activity to show a graph of your activity with your sensor data (speed/cadence/heart rate/power) plotted on it:

Within a given activity, you can dive down into more information about that specific ride- sorted by either intervals (i.e. laps), or the entire ride itself:

For example, you can dive into surges – with catalogues any significant instantaneous efforts on your behalf:

Additionally, within the graph you can highlight given sections to get more detail about that specific section, and zoon in.

By doing so, you can effectively create virtual intervals/splits/laps to analyze. Information about the segment in question will be displayed down below:

The obvious hole in the software is the lack of mapping. There’s no mapping functionality nor any references to it. Given the core portion of the Joule GPS is the…GPS (it makes up 50% of the name). It seems odd to not even provide a basic map as part of the core application.
Software – CycleOps Website –Training Camp (Provided/Free)
In addition to the desktop software, CycleOps also offers a web based version which is aimed more at sharing rides than deep analysis. This is called ‘Training Camp’, and is one of the services listed within the PowerAgent software that you can automatically push a workout to upon download from your Joule GPS.

Unfortunately for me, my attempts to upload to this service appear futile. I’d upload from within the PowerAgent software, and the workout files while saying successfully uploaded, would go into the ether. Never making it to the ‘other side’ on the Training Camp software.
Hopefully I’ll be able to revisit this in the future once the bugs are sorted out.
Software – Golden Cheetah 3.0 (3rd party/Free):
In addition to the CycleOps options, Golden Cheetah has introduced direct download from the Joule GPS in their latest 3.0 beta builds. While Golden Cheetah 3.0 isn’t quite here today in its final form – it does offer a solid alternative, and is becoming highly popular amongst cyclists looking to do advanced power meter analysis. Note that you don’t need version 3.0 to use the Joule GPS, you can simply export the files from the PowerAgent first. But what version 3.0 does do is to remove that middle-man step and allow you to download straight from the unit to Golden Cheetah.

Like download from within PowerAgent, this takes a heck of a long time if you have lots of files on there, as it also has to iterate through each file.

Once that’s done, it’ll display all your rides on the left hand side. From there you can click on a ride to enumerate the high level details on the right side in the summary pane:

After which, you’ll have the full suite of Golden Cheetah analysis tools available at your disposal. For example, below, the Critical Power Plot.

You can add any number of different charts or pods by right clicking in the menu bar.

For example, the Aerolab by Robert Chung (aka Chung Method or Chung Analysis):

Look for more detail on Golden Cheetah in the future as I’ll likely discuss it within my Mac software post (it’s available on Mac as well as Windows).
Supported Accessories:
Here’s a quick run through of the accessories and sensor types that the unit supports today, as of November 8th, 2012.
ANT+ Speed/Cadence Combination Sensors:

The Joule GPS supports ANT+ Speed/Cadence combo sensors. This combo sensor measures wheel speed using a spoke magnet and then measures cadence (RPM) using a magnet on the crank. The most common of these is the Garmin GSC-10 sensor, which runs about $30 these days.
ANT+ Speed-only & Cadence-only sensors:

In addition to supporting the combo sensors, the unit also supports speed-only and cadence-only sensors. While generally less used than the combo sensors, some cyclists use these on bikes where the single combo sensor can’t reach both wheel spoke and crank magnets at the same time. The most common example being recumbent bikes.
These are available from a handful of vendors, including CycleOps themselves. Typically they’re marketed as “ANT+ Speed Sensor” or “ANT+ Cadence Sensor”, as opposed to saying “Speed/Cadence” sensor.
ANT+ Heart Rate Strap:
")
The ANT+ heart rate strap is likely the most common ANT+ sensor on the planet. Virtually every ANT+ alliance member that makes sports equipment makes a variation of this strap (in fact, almost all of them are made in the same factory, and just relabeled). CycleOps both has one of their own (one of which comes with some versions of the Joule GPS). Additionally, if you have a different ANT+ strap (from Garmin, Timex, etc…), you can use that as well. In general the strap range from about $30-$45 depending on where you buy it.
ANT+ Power Meter:

As noted above in the power meter section, the Joule GPS supports ANT+ power meters. Check out that section for more details on the specific units it supports, as well as the upcoming ones it also supports.
3rd Party Power Charges:
Lacking anywhere else to put this, I did want to note that the unit does support charging while operating. Meaning that you can plug it in (even to a computer), and still gather data (such as on a trainer) while charging. This is useful for those doing longer cross-country routes that may need to connect it to a solar charger or similar.
Comparison Table:
Here’s a straight forward comparison table of the features offered on the Joule GPS, with other mainstream bike computers available on the market today:
Copyright DC Rainmaker – Updated May 19th, 2017 @ 6:13 pmNew Window
Price$220$249$369$149-$299 (Features Vary)$249
Product Announcement DateJun 15, 2011Mar 14th, 2017Sept 7th, 2016Sept 1st, 2016Feb 19th, 2016
Actual Availability/Shipping DateJun 2012Mar 14th, 2017Sept 16th, 2016Sept 8th, 2016Q2 2016
GPS Recording FunctionalityYesYesYesYesYes
Data TransferUSBBluetooth Smart, WiFi, USBBluetooth SmartUSB/Bluetooth SmartUSB, BLUETOOTH SMART
WaterproofingIPX7IPX750m50m50 meters
Battery Life (GPS)17 Hours15 hours5hrs GPS on time (24-48hrs standby)Up to 11 hours (varies)13 hours GPS on
Recording Interval1-second1-secondVaries1sSmart Recording
Satellite Pre-Loading via ComputerNoYesYes3 daysYes
Quick Satellite ReceptionGoodYesGreatYesYes
AlertsYesSound/Visual/LED’sVibration/Audio/VisualVIBRATE/SOUND/VISUALVibrate/Visual
Backlight GreatnessGreatGreatGreatGreatGood
Ability to download custom apps to unit/deviceNoNoYesNoYes
Acts as daily activity monitor (steps, etc…)NoNoYesYesYes
Can control phone musicNoYesNoYes
Has music storage and playbackNoYesYesNo
Bluetooth Legacy (pre-4.0) to PhoneNoNoNoNoNo
Bluetooth Smart (4.0+) to Phone UploadingNoYesYesYesYes
Phone Notifications to unit (i.e. texts/calls/etc…)NoYesYesYesYes
Live Tracking (streaming location to website)NoYesNoNoYes
Group trackingYesNoNoNo
Emergency/SOS Message Notification (from watch to contacts)NoNoNoNoNo
Built-in cellular chip (no phone required)NoNoNoNoNo
Designed for cyclingYesYesSortaYesYes
Power Meter CapableYesYesNoNoWith some Connect IQ apps (but cannot record data)
Power Meter Configuration/Calibration OptionsYesYesN/AN/AN/A
Power Meter TSS/NP/IFYesYesN/AN/AN/A
Speed/Cadence Sensor CapableYesYesN/AYesYes
Strava segments live on deviceYesWith Strava appNoNo
Crash detectionNoNoNoNo
Designed for runningNoNoYesyesYes
Footpod Capable (For treadmills)N/AN/ANo (can use accellerometer though)No (Can use internal accelerometer)YES (Also has INTERNAL ACCELEROMETER)
Running Dynamics (vertical oscillation, ground contact time, etc…)N/AN/ANoNoNo
VO2Max EstimationN/AN/ANonONo
Race PredictorN/AN/AnonONo
Recovery AdvisorN/AN/ANonoNo
Run/Walk ModeN/AN/ANonoYes
Designed for swimmingNoNoYesYesYes
Openwater swimming modeN/AN/AYesNoNo
Lap/Indoor Distance TrackingN/AN/AYesNoYes
Record HR underwaterN/AN/AYesNO (NOT ENABLED IN SWIM MODE)No
Openwater Metrics (Stroke/etc.)N/AN/ABasic stryoke type onlyNoNo
Indoor Metrics (Stroke/etc.)N/AN/ABasic stryoke type onlyYesYes
Indoor Drill ModeN/AN/ANoNoNo
Indoor auto-pause featureN/AN/ANoNoNo
Change pool sizeN/AN/AYes15m-50mYes
Indoor Min/Max Pool LengthsN/AN/A1y/m to 1,500y/m+Yes17M/18Y TO 150Y/M
Ability to customize data fieldsN/AN/AVery limitedYesYes
Can change yards to metersN/AN/AYesYesYes
Captures per length data – indoorsN/AN/ANoYesYes
Indoor AlertsN/AN/AYes (goals)Goals OnlyYes
Designed for triathlonNoNoNoSortaNo
Multisport modeN/AN/ANoNoNo
Create/Follow custom workoutsYesPlanned Fall 2017NoNoNo
On-unit interval FeatureYesNoNoYesNo
Training Calendar FunctionalityNoNoNoNoNo
Auto Start/StopYesYesYesNoYes
Virtual Partner FeatureNoNoNoYesNo
Virtual Racer FeatureNoNoNoYesNo
Records PR’s – Personal Records (diff than history)NoNoYesNoYes
Day to day watch abilityN/ANoYesYesYes
Hunting/Fishing/Ocean DataNoNoNoNoNo
Tidal Tables (Tide Information)NoNoNoNoNo
Jumpmaster mode (Parachuting)NoNoNoNoNo
GeocachingNoNoNoNoNo
Weather Display (live data)NoNoYesNoYes
Follow GPS Track (Courses/Waypoints)YesYesNoYesNo
Markers/Waypoint DirectionYesNoNoSortaYes (to pre-saved spots)
Routable/Visual Maps (like car GPS)NoYesNoNoNo
Back to startYesYesNoYesYes
Impromptu Round Trip Route CreationNoNoNoNoNo
Download courses/routes from phone to unitNoYesNoNoNo
Altimeter TypeBarometricBarometricBarometric altimeterDepends on modelBarometric
Compass TypeMagneticMagneticN/ADepends on modelMagnetic
Optical Heart Rate Sensor internallyNoYesYesYes
Heart Rate Strap CompatibleYesYesYesYesYes – CONTAINS OPTICAL HR SENSOR
ANT+ Heart Rate Strap CapableYesYesNoNoYes
ANT+ Speed/Cadence CapableYesYesNoNoYes
ANT+ Footpod CapableNoNoNoNoYes
ANT+ Power Meter CapableYesYesNoNoNo
ANT+ Weight Scale CapableNoNoNoNoNo
ANT+ Fitness Equipment (Gym)NoNoNoNoNo
ANT+ Lighting ControlNoNoNoYes
ANT+ Bike Radar IntegrationNoNoNoYes
ANT+ Trainer Control (FE-C)KICKR/KICKR Snap Only (FE-C Fall 2017)NoNoNo
ANT+ Remote ControlNoNoNoNoYES FOR GARMIN VIRB
ANT+ eBike CompatibilityNoNoNoNoNo
ANT+ Muscle Oxygen (i.e. Moxy/BSX)YesNoNoNo
ANT+ Gear Shifting (i.e. SRAM ETAP)YesNoNoNo
Shimano Di2 ShiftingNoYesNoNoNo
Bluetooth Smart HR Strap CapableNoYesYesYesNo
Bluetooth Smart Speed/Cadence CapableNoYesNoYesnO
Bluetooth Smart Footpod CapableNoYEsNoNo, has internal accelerometerNo
Bluetooth Smart Power Meter CapableNoYesNoNoNo
Temp Recording (internal sensor)YesYesNoNoSorta (Available only in Skiing/SUP)
Temp Recording (external sensor)NoNoNoNoYes
Compatible with Firstbeat HR toolsNo-NoNoNo
PC ApplicationPowerAgentN/ANoneMySports ConnectGarmin Express – Windows/Mac
Web ApplicationTraining CampN/ANoneTomTom MySportsGarmin Connect
Phone Appvia MapMyRideiOS/AndroidiOSiOS/AndroidiOS/Android/Windows Phone
Ability to Export SettingsNoNoNoNoNo
Amazon LinkLinkN/AN/ALinkLink
Clever Training – Save a bunch with Clever Training VIP programLinkLinkN/ALinkLink
Review LinkLinkLinkLinkLinkLink
Pros and Cons:
I recognize that it’s tough to read through the 7,034 words above, so here’s the few key/core things that stuck out to me – both good and bad.
Pros
– GPS functionality
– Deep power meter display metrics
– Magnetic compass
– Cool history functionality (when it works)
– Can easily change/pair/assign sensors and bikes – lots of flexibility
– Uses standard micro-USB, no funky cables
Cons:
– I really hate the automatic activity starting (no choice, either HR or speed driven)
– GPS initial satellite reception can be finicky, fine once started
– No mapping with base application on PC
Summary:
The Joule GPS represents a competitive leap forward for CycleOps. Their Joule GPS hardware is largely on-par with the most widely used unit in the space – the Edge 500. There are minor differences that exist between the two units, both pros and cons.
The Joule GPS for example has a richer history dataset and offers more information around historical power related efforts, while the Edge 500 offers more customization of the display and its data fields – as well as more compatibility natively with 3rd party applications and mapping integration. The CycleOps PowerAgent software can however export out the workouts to the same format that Garmin uses (.TCX), as well as standard .CSV files (both easily consumable by tons of other applications). It just adds another step.
In general, I’m finding that the CycleOps software side of things lags behind competitively when looking at the Joule GPS as a whole package – it’s as if the ‘GPS’ part of it became an afterthought (evidenced by the lack of simple mapping within the PowerAgent software). I’m sure in time these can be solved. And for many, the winter is a time of trainers, more than scenic outdoor rides.
So while the Joule GPS as a package does have a handful of strange quirks in it, the hardware unit itself is pretty solid. I don’t have crashes in the hardware – something I can’t always say about competitive units. Thus, the Joule GPS easily finds itself in the category of a quite functional and buyable sub-$250 GPS enabled bike computer.
Found this review useful? Here’s how you can help support future reviews with just a single click! Read on…
Hopefully you found this review useful. At the end of the day, I’m an athlete just like you looking for the most detail possible on a new purchase – so my review is written from the standpoint of how I used the device. The reviews generally take a lot of hours to put together, so it’s a fair bit of work (and labor of love). As you probably noticed by looking below, I also take time to answer all the questions posted in the comments – and there’s quite a bit of detail in there as well.

I’ve partnered with Clever Training to offer all DC Rainmaker readers an exclusive 10% discount across the board on all products (except clearance items). You can pickup the Joule GPS below. Then receive 10% off of everything in your cart by adding code DCR10BTF at checkout. By doing so, you not only support the site (and all the work I do here) – but you also get a sweet discount. And, since this item is more than $75, you get free US shipping as well.
Joule GPS – without HR strap
Joule GPS – with HR strap
Extra Joule mount pack
Additionally, you can also use Amazon to purchase the unit or accessories (though, no discount on either from Amazon). Or, anything else you pickup on Amazon helps support the site as well (socks, laundry detergent, cowbells). If you’re outside the US, I’ve got links to all of the major individual country Amazon stores on the sidebar towards the top. Though, Clever Training also ships most places too and you get the 10% discount.
Thanks for reading! And as always, feel free to post comments or questions in the comments section below, I’ll be happy to try and answer them as quickly as possible. And lastly, if you felt this review was useful – I always appreciate feedback in the comments below. Thanks!
Finally, I’ve written up a ton of helpful guides around using most of the major fitness devices, which you may find useful in getting started with the devices. These guides are all listed on this page here.