Withings WiFi Scale In Depth Review
I’m just gonna say it upfront – this is perhaps the most well put together and thought out device and set of services I’ve reviewed yet. I know, it sounds funny given it’s ‘just a scale’, but – it’s a really well thought through scale. But before we get to the deets, let’s talk about exactly what product I’m referring to.The Withings WiFi Scale is a scale that measures your body weight and body fat %, and then wirelessly transmits it via standard WiFi to a website that allows you to track and record your weight. But more importantly than than their website, it transmits data to a massive ecosystem of health, training and sports websites and software. Including popular applications like Training Peaks, Sport Tracks, RunKeeper and even Twitter.
Like all my reviews, they tend to be pretty in depth (perhaps overly so) – but that’s just my trademark DC Rainmaker way of doing things. Think of them more like reference guides than quick and easy summaries. I try and cover every conceivable thing you might do with the device and then poke at it a bit more. My goal is to leave no stone unturned – both the good and the bad.
Because I want to be transparent about my reviews, Withings sent me the scale for a few months to play with as a trial unit. Once that period has elapsed, I send the whole messed up box back to the folks at Withings. Simple as that. Sorta like hiking in wilderness trails – leave only footprints. If you find my review useful, you can use any of the Amazon links from this page to help support future reviews.
Lastly, at the end of the day keep in mind I’m just like any other regular athlete out there. I write these reviews because I’m inherently a curious person with a technology background (my day job), and thus I try and be as complete as I can. But, if I’ve missed something or if you spot something that doesn’t quite jive – just let me know and I’ll be happy to get it all sorted out. Also, because the technology world constantly changes, I try and go back and update these reviews as new features and functionality are added – or if bugs are fixed.
So with that…let’s get onto the action!
Unpacking
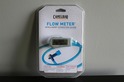
The scale comes in a rather compact box, with the dressings not unlike that of an Apple product. Stark white accented by clean, simplistic imagery.

Once you crack open the box, it’s layered with soft anti-scratch paper to ensure the glossy top of the scale isn’t scuffed up.

After pealing all that back, you finally get to the scale itself:

Upon getting all the pieces out of the box, you’re left with a small pile of components in addition to the scale.

These components include:
1) Four little rubber feet
2) One scale
3) Two sets of batteries
4) One small tape measure
5) A stack of papers
6) A USB cable
You’ll now flip the scale over on it’s back to get to the battery compartment and USB port:

You may now be asking why we’d need a USB port on a WiFi scale. Well, the scale doesn’t have any input panel on it, so in order to configure your wireless network, you need to connect it to a computer for the first couple minutes – then it’s home free and onto wireless.

And for those curious techies out there, this is also where the MAC address of the device is listed as well:

With everything all connected to a computer, it’s time to run the quick setup program.
Setup
As you may have noticed in the pictures above, the scale has a bright clear sticker on it instructing you to go to start.withings.com, which is where you’ll create a simple account to link the scale too.

Once you’ve done that (it only takes a second), then you’ll go ahead and start the new scale process:

From there the site will have you download a small application to run on your computer, which will allow you to connect to the scale using the USB cable.

Once the application is downloaded, you’ll go through a quick setup process, which only takes a few minutes:


It’s during this process that your cable-bound scale finally gets its wireless freedom, and is allowed to leave the nest once and for all:


Once you’ve completed the process and signed back into the Withings website, you’ll be notified of your successful scale association:

Once we’re at this point, we just need to configure a simple user account on the site. We’ll talk more about the site later on – but for now, we’ll just create a single user account (though it supports multiple users).

As you can see, you’re able to select the persons gender, height, and even set an initial starting weight. By setting this weight, the scale can ‘guess’ as to which user of the scale is using the account – for those cases where multiple users are using the scale. In addition, by setting height, the scale can determine your BMI ranking.
And finally, you’ll notice there’s a ‘Body Composition Model’ dropdown. This allows you to choose between a standard body comp model, or one geared towards an athlete. For me, if I use the standard numbers, the scale incorrectly determines my body fast percentage. But when I choose the Athlete version, it more accurately reflects my body fat % (relative to other devices which can understand the difference).
So with everything configured…let’s get onto actually using the scale!
Using the scale
When it comes to electronic devices, sometimes less is more. And in the case of the Withings Scale – having no real buttonary (aside from the initial ones on the bottom under the battery cover), means things are gonna be pretty easy from the get-go. By default, the scale is off unless stepped on.

To use the scale…you simple step on it. I know, pretty crazy ehh? But, once you’ve graced it with your presence, it’ll go ahead and start weighing you.

In most cases it’ll just take a few seconds to get the initial measurement. If you happen to try and do a little jig while on it, small arrows will appear in the LCD telling to you basically stand still and shift your weight a bit for an even reading.

After a few seconds a small progress bar will appear, which is when the scale is taking your body fat composition, or essentially, when it’s measuring how much fat you have. That data is recorded in pounds, but also displayed as a percentage using simple division.


Once you’re done, you just step off the scale and it’ll shut back off within a second or so. You can rinse and repeat as many times as you’d like and it’ll keep reading, transmitting and recording data points.
It’s during the time that you’re on the scale that it goes ahead and sends it to the website, and any extra 3rd party sites that may be receiving your data. I found that in most cases data was visible within 10-20 seconds on the website, and in the case of the iPhone, it buzzed an alert to tell me within about 20 seconds of stepping off the scale.

Now that we’ve got the data recorded, let’s get to the website to dig into our data.
The Withings Website
Once you’ve done a little dance on the scale, it’s time to head off to the website to check out how the long-range picture is looking. The Withings folks have done a good job at making a single site that has simple interface to get access to your core information, and then a ton of little options accessible from various fly-out menu’s.
First up, the main dashboard. Once logged in, this is what the view looks like:

You’ll notice the two graphs, one showing on top is showing my weight, while the lower one is showing body fat. You can customize these a bit if you’d like to display only one graph, or the items shown on that graph.
Down in the lower right corner you’ll see information about the latest data point entered. You can change to different data points using the left/right arrows, or just by clicking on any item on the graph. It’s also here where you can manually add a data point that you may have recorded elsewhere. For example, if you went on vacation and they had a scale in the bathroom to gather your weight.

You can also set objectives here. These are goals you’re trying to hit, which will then show you how far from your objective you are:

Down along the bottom of the screen you can change the range of the graph, either reducing it or increasing it. Heck, you can even set it to show hourly changes in weight if you stepped on the scale that often.

And finally, on the left hand side you can change the user that’s being shown – if you are recording multiple people on your account. You can also have one scale, with two people, and two fully separated accounts. You can basically create any imaginable combination of different peoples, scales, and accounts. And you can have up to eight users on a given scale.

Now that we’ve walked through the basics of the site, let’s dig into some of the more advanced features a little bit.
Advanced Scale/Web Options
Scale Options Control Panel:
Within the scale options control panel you can view a number of different useful parameters – such as the current battery level and even firmware level. You can also enable advanced debugging here should troubleshooting need to occur. In addition, it’s from this control panel that you can add new scales, or disassociate old scales.

One of the options you’ll note is to ‘Zero’ at each weigh in. What this means is that the scale calibrates an empty weight first, and then has you step on the scale. This is useful to control calibration drift over time.

Multiple Scales:
In the event that you have a really big house and you want to have multiple scales all tied to the same account (with different users) you can even do that two. You’d use the scale control panel to add a secondary scale, just like the first scale:

Once that’s done, you’ll see both scales listed:

From there you can go back and forth between the two scales and weigh yourself on each one. And, I’d suspect if you placed them far enough apart, and put enough effort into it, eventually you’d see you’re weight decrease.


Alternatively, you could set them up in a high availability configuration. For example, you could do a clustered configuration where one was active, and one passive.
")
Or you could also go to a fully active/active configuration – or even a load balanced configuration.
")
(Don’t worry, if you didn’t get the above jokes…it’s alright, some of you will, and for those that do, it’ll be funny. For the rest of you…moving on…)
User Options Control Panel:
From the user options control panel you can set up e-mails to be sent to you letting you know how you’re progressing against your weight objectives.

In addition, you can import and export data into your Withings account. This is super-cool for a number of reasons, but primarily if you have a vast amount of data already stored somewhere else. And since as you’ll see later on, the Withings site will push data to tons of partners, it’s a handy automated way of getting data into other systems. Very cool.

Publish on the web:
In addition to sharing data with various partnered (outlined below), you can create a simple web-page that you can link to to share data on. You can create this page here in the sharing control panel:

From there, it’ll create a URL that you can use with a simple page to access the data:

And with that, I think I’ve covered almost every button within the website, let’s get onto some mobile accessing of the data and then the 3rd party options.
The Withings iPhone app
As you’ve probably been noticing throughout this review, the goal of the Withings scale is to get your information into as many forms as possible – trying to make it easy for you to access. Before we get into all the ways they integrate with 3rd parties, I wanted to briefly talk about the iPhone app they have, which allows you to access and receive updates from the scale.
The iPhone app is free, and installs easily just like any app in the Apple App Store. Once installed, you’ll go ahead and walk through entering in your Withings Account information from which to pull data:


Once the account is logged into, it’ll go ahead and allow you to choose which user within that account you want to display by default:

In the event you want to change any of the basic default settings/configuration, you can do so within the configuration menu:

Now that everything is configured, you’ll receive updates directly from the scale about 20 seconds after you step on the scale and it records a weight. These will then show within the app. You can use the slider button at the bottom to change to different readings from the scale:

You can also simply rotate the screen (just by tilting the iPhone) to show your weight in a pretty graph:

And lastly, when new weight measurements come in from the scale, it’ll automatically show a small number on top of the Withings Scale app from within the menu, letting you know a new data point is available – sorta like new e-mail coming in.

All in all the Withings iPhone app is a nice added benefit that allows you to easily access your data without having to navigate through a website.
And for those curious, an Android app should be available the end of the summer, no word on a Windows Mobile/Windows Phone app yet.
Integration with 3rd parties:
The folks from Withings have been busy being ‘players’. They’re integrating with anybody and everybody. And that’s frankly pretty freakin’ awesome. But you know what’s honestly even cooler? Everyone I’ve been talking to (developer-wise) at these other companies has said the same thing over and over again: The Withings folks are just so easy to work with and so quick. It’s been a broken record. To me, that’s the sign of a company that wants to succeed at this game. And just look at the huge list of web sites and software applications they integrate with:


And while I’d love to show off all of them to you, I’m going to focus on the ones I’m most familiar with – the ones I use day to day. But first, let’s talk about how you enable sharing. To do so, you’ll just go to the Withings website and log into your account. From there, you can select which sites are allowed to access your data – and you can shut off access at any time with the flip of a switch.

Once you’ve done that though, we’re onto using it with other sites and software. First up…the one app I log into every single day – Training Peaks.
Training Peaks
Training Peaks is a site that allows you to track and analyze in depth your workouts and health. In my case, my primary use is uploading workouts to my coach, who then reviews them and comments back to me. But in addition to my daily workouts, I also am required to upload daily metrics – stuff like hours slept, resting heart rate…and weight.
Now with the Withings scale, it does the weight and body fat % for me automatically. To configure Training Peaks and Withings integration, you simply login to your Withings account and enter in your Training Peaks username and password:

The cool part here is that you can have multiple people all using the same scale, yet the data gets correctly sent to the right Training Peaks accounts. Very well thought out.
Now you simply login to Training Peaks and go to the Calendar View (or Dashboard View), we’ll start with Calendar view. On the date you’ll notice a little dot. If the dot is black, than information has been transmitted for that day, of it’s grey, then there’s no data for that day.

Once you click on the dot, it’ll allow you to bring-up more detailed data on that day, including your body weight and body fat % automatically transmitted by the Withings Scale:

Finally, in dashboard view you can add the Daily Metrics pod and select any number of daily metrics to show, including weight and body fat %. In my example, I’ve included weight and sleep, which is shown in the pod to the right.

Using the Withings scale with TP is super easy, and makes for a great way to quickly get key daily metrics into your training account.
Sport Tracks
I’ve long said Sport Tracks is my favorite application out there – and it still holds true to that, primarily due to the vast number of cool plug-ins and ways to slice and dice your data. If you’re not familiar with this free application, check out my ‘Top 10 Plug-ins’ post to start feeling the Sport Tracks love.
Before we install the plug-in, we need to enable the setting allowing applications to access data from the Withings site (it still requires a password though), this is done in the sharing menu:

To use Sport Tracks within Withings, you’ll need to download a tiny (and free) plug-in, which is available here. Once installed, you’ll simply go into the settings menu to start the configuration process:

Unlike some of the other online services noted here where data is pushed from Withings to the site, in this case Sport Tracks pulls from the Withings site. So you’ll go ahead and enter in your Withings account information:

After which, you’ll be able to choose which user within the account you want to link:

Next up you’ll be able to configure which data points are pulled, and how those data points should be processed:

What’s cool here is that if you have multiple data points for a given day, you can choose exactly which data point set to choose. Obviously…I’m choosing ‘Lowest’. ?

After that, you’re all set and the initial data set is imported in:

From there, you’ll go ahead and utilize the Athlete view mode to look at details of your data, which is displayed both in a graph, but also in a simple table:

Using the Withings plug-in with Sport Tracks is dead-simple, it’ll automatically gather your data for you when you open Sport Tracks, and then import it into your Sport Tracks logbook. Can’t get much easier than that!
RunKeeper
A quickly growing site out there for users of iPhone and Android devices is RunKeeper. RunKeeper allows you to record your workouts like a Garmin GPS fitness device would. They even allow you to track friends and family in real time over the internet. Very cool.

Here’s what the main dashboard for a given activity looks like:

But, in addition to activity tracking, they also allow some basic health management as well. So let’s dig into that a bit. Off of the settings tab, we’ll go ahead and click on Body Measurements.

From there you’ll arrive at the main weight page showing your current weight, as well as information about the scale that you’ve connected to.

And from there you can dig into all your weight measurements to see the exact numbers from past encounters with the scale.

This is pretty cool, and I like how I can update individual measurements if I need to – very useful in situations where a given data point isn’t necessarily accurate (for example, immediately after a long run in the heat where weight is inaccurately low due to lack of hydration). I do wish though there was some sort of graphing functionality here, as I’m more of a picture person than a straight list of numbers person.
But, I do greatly appreciate the integration here, and look forward to future expansion with RunKeeper!
Microsoft Health Vault
Microsoft Health Vault – like Google Health (below) allows you to control and manage all your medical data in one single (digital) location. Some major organizations are starting to get onboard these efforts, as well as smaller companies like Withings. From within the Withings website, you can link together your scale and Microsoft Health Vault – allowing you to record your body composition data and make it available to medical professionals (or simply yourself) as you see fit.
To set this up, login to the Withings site and go into the sharing area:

From there you’ll be taken to a page to login to your Health Vault account (free, btw) and approve the linking:

It takes only a second, and you’re cooking!
Now, from within Microsoft Health Vault, you can navigate to your health record information to see the links to Body Composition (which shows body fat), and Weight:

Once you drill into those menu’s, you’ll be able to see the default view of a large table of data values:

But, since I’m more of a pretty-picture kinda person, I switch to graph view:

I’m really only just touching the surface of what Health Vault can do, and there’s tons of settings around what you do or do not show to various medical organizations – so go forth and poke and prod by setting up a free account.
Google Health:
Google Health offers many of the same functionality and features that you see in Microsoft Health Vault. The goal is to allow you to track your medical records and share them as applicable with people you trust (doctors).
To setup Google Health, you’ll go into the Withings Website and enable Sharing within Google Health. To do so, simply click on the “Link with Google Health”:

If you haven’t setup a Google Health account, it only takes about 2 seconds to do if you have an existing Google account of any sort (i.e. GMail account) – and is free. After which, you’ll be brought to a Google confirmation page where you’ll agree to link the two accounts together.

And with that…you’re done. From there, go ahead and login to your Google Health account and the default dashboard will appear. You’ll notice the updates from the Withings Scale are automatically displayed in three separate locations on the screen. First on the left side is notices of new data, and on the right screen is your most current information. And finally, done towards the bottom there is additional information about the account sharing.

If you click on that information at the bottom, you’ll be given more detail on where the measurements are coming from.

And finally, if you expand ‘Test Results’ on the right side, you’ll be brought to a page which has some pretty cool expandable graphs that you can drill into:
If you use providers that leverage Google Health, then having this integration with the Withings Scale could be pretty useful to you – especially if weight and body composition readings are of relevance to your medical records.
When the Withings Scale first came out, the one feature it touted the most, and was most well known for – was it’s direct integration with Twitter. The thinking there was that through the beauty of peer pressure, the scale would automatically post your weight and hopefully give you incentive to keep it at a healthy weight.
While losing weight may be difficult, setting up the integration with Twitter is pretty easy. As is the pattern with setting up sharing with 3rd parties, you’ll go into the Withings site sharing menu and expand out the Twitter section.

Once in there you’ll notice you can also add a custom message to be tweeted along with your weight. I went ahead and filled it in with something relevant to me. I then filled out the username and password from my Twitter account and soon everything was all set.

From there, I just simply step on the scale as normal. Seconds after I do that, it’ll go ahead and Tweet my weight out for the whole internet to see:

Pretty simple…and probably pretty effective for many folks trying to lose weight. Though, I’ll save ya’ll from tweeting any weight data in the future. You can thank me later.
Summary
To wrap things up – I rarely get to use a product that seems so well thought through and supported end to end. While the scale is a bit more than you might spend on your average bathroom scale, it integrates so well with so many different services – all without any charges or subscription fees.
Since some will ask how it compares to the Tanita BC-1000 ANT+ Scale I reviewed a few months back, you have to look at the feature sets a bit. While the BC-1000 scale does measure more data points (such as hydration levels), it costs over $100 more, and only integrates with one service – Garmin Connect. And while they are looking to release a WiFi connector, it does today also require a Garmin FR60 or 310XT to get that integration with Garmin Connect.
In short, without a doubt I’d recommend this scale to anyone interested in tracking their weight and having it automatically update a variety of services. As I mentioned, the unit I received was a 60-day loaner unit, and I like the scale enough that I’ll be ordering one here in the next day or so with my own money. It just works, and is seamless – and to me that is one of the key things to look for in both a consumer electronics device, and a athletic-focused device.

Withings WiFi Scale Gallery
VIEW SLIDE SHOW DOWNLOAD ALL
Along the way I took about 197 pictures, of which I’ve boiled them down to a smaller set that you may find useful if you’re in a picture-mood. So I’ve posted them all in the above gallery.
Found this review useful? Here’s how you can help support future reviews with just a single click! Read on…

Hopefully you found this review useful. At the end of the day, I’m an athlete just like you looking for the most detail possible on a new purchase – so my review is written from the standpoint of how I used the device. The reviews generally take a lot of hours to put together, so it’s a fair bit of work (and labor of love). As you probably noticed by looking below, I also take time to answer all the questions posted in the comments – and there’s quite a bit of detail in there as well.
I’ve partnered with Clever Training to offer all DC Rainmaker readers an exclusive 10% discount across the board on all products (except clearance items). You can pickup the Withings WiFi Scale here from Clever Training. Then receive 10% off of everything in your cart by adding code DCR10BTF at checkout. By doing so, you not only support the site (and all the work I do here) – but you also get a sweet discount. And, since this item is more than $75, you get free US shipping as well.
Thanks for reading! And as always, feel free to post comments or questions in the comments section below, I’ll be happy to try and answer them as quickly as possible. And lastly, if you felt this review was useful – I always appreciate feedback in the comments below. Thanks!Additionally, you can also use Amazon to purchase the unit (though, no discount). Or, anything else you pickup on Amazon helps support the site as well (socks, laundry detergent, cowbells). If you’re outside the US, I’ve got links to all of the major individual country Amazon stores on the sidebar towards the top. Though, Clever Training also ships there too and you get the 10% discount.
Finally, I’ve written up a ton of helpful guides around using most of the major fitness devices, which you may find useful in getting started with the devices. These guides are all listed on this page here.