Profile Design Aero HC Aerobottle + Bike Computer Mount Review
As a general rule, I don’t review things that are bike components (in the traditional bike component aspect). Instead, as you’ve seen to date, I focus on sports technology products. However, the Aero HC was somewhat of an interesting duck – it was part aerobottle (for triathletes), and part bike computer holder. And it’s that bike computer piece that really interested me in trying it out.
With my trip to LA a couple weeks ago, I met up with the Profile Design crew at Panera Bread and got handed off one of their new and almost available Aero HC systems to try out.
Unlike most gadgets, a water bottle system isn’t something that takes a terribly long time to form an opinion of. So in the last couple weeks and a bunch of rides – I’ve got a pretty clear idea of what I like and don’t like. Because I want to be transparent about my reviews, once I finish up with the system (here after clicking publish on this review), I send it back to them in the Long Beach. Simple as that. Sorta like hiking in wilderness trails – leave only footprints.
Lastly, at the end of the day keep in mind I’m just like any other regular triathlete out there. I write these reviews because I’m inherently a curious person with a technology background (my day job), and thus I try and be as complete as I can. But, if I’ve missed something or if you spot something that doesn’t quite jive – just let me know and I’ll be happy to get it all sorted out. Also, because the technology world constantly changes, I try and go back and update these reviews as new features and functionality are added – or if bugs are fixed.
Unboxing:
This may be the fastest and least unboxing ever seen here in an in-depth review. Minimalism has its benefits.
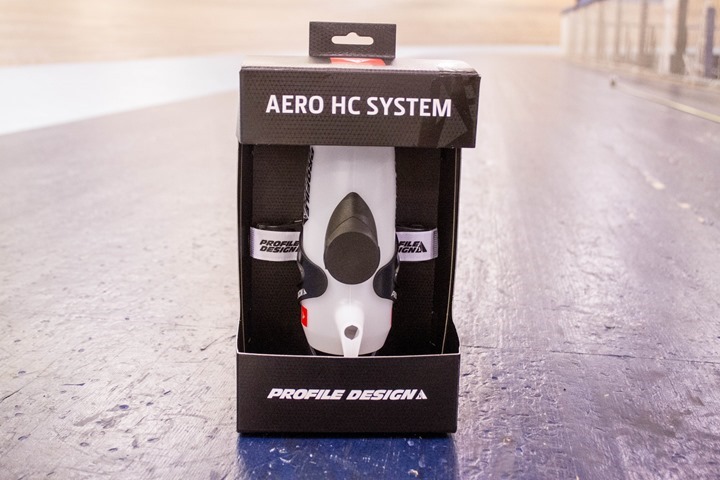
Here’s the box, it’s cleverly designed such that the bottle stands upright using zip ties. I assure you, once you snip these zip ties, it’s impossible to ever make it look so pretty again.
After getting rid of the external shell, you’re left with the below. You’ll see the bottle sits within the holder, and the strap is external to it. There’s also some paper junk. Though honestly, if I needed the paper junk we’d probably have other issues.
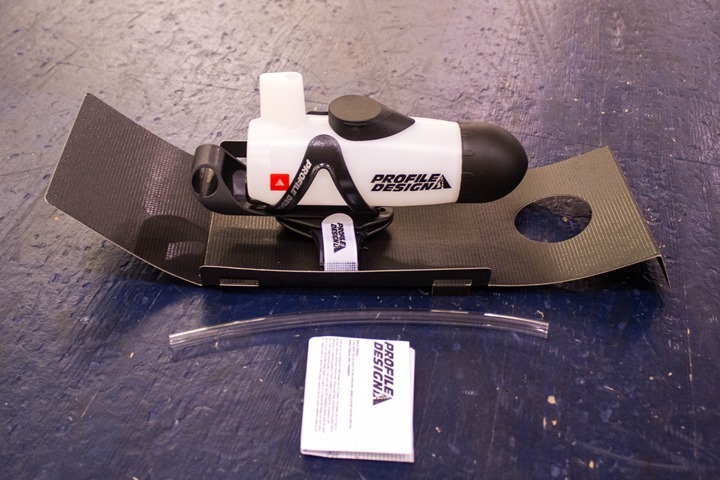
With that, our unboxing is complete.
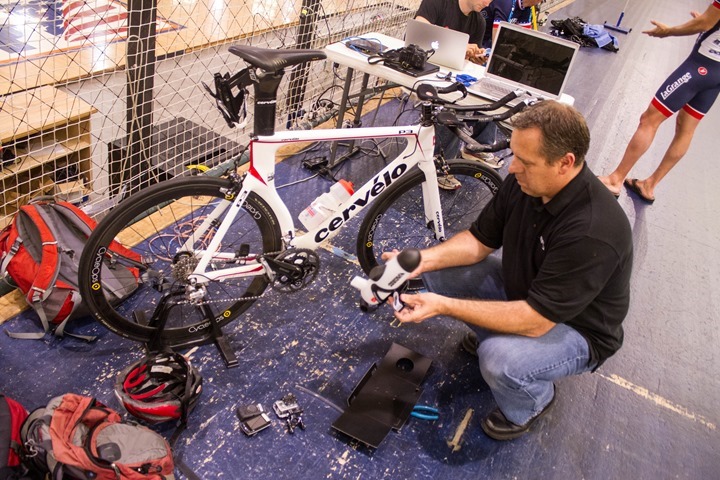
You’ll notice that the unit was actually unboxed at the velodrome (where we did aerodynamic testing). Just happened to work out that way, and way easier than bringing the box back home on a slew of flights.
That said, I did take some component shots later on once back home – just to make things a bit clearer.
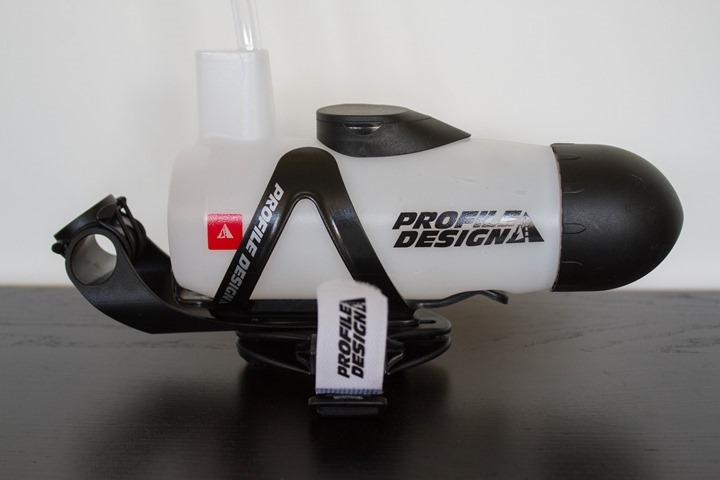
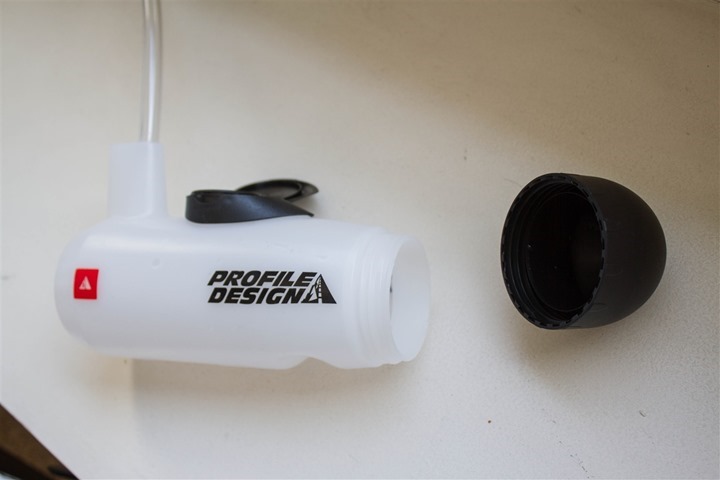
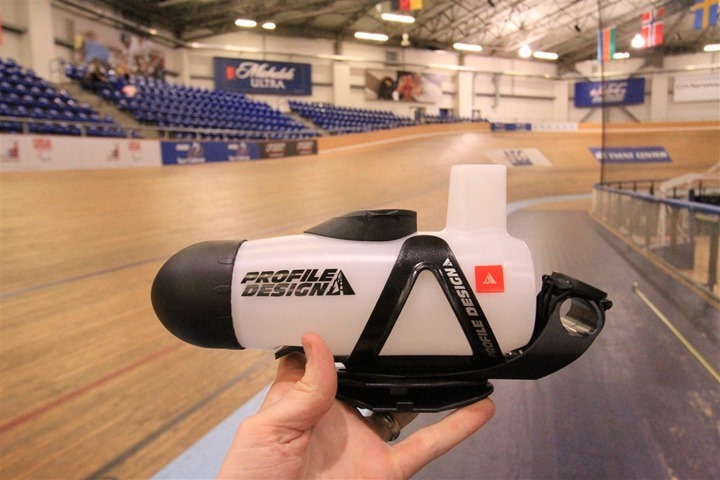
Here’s the bottle itself:
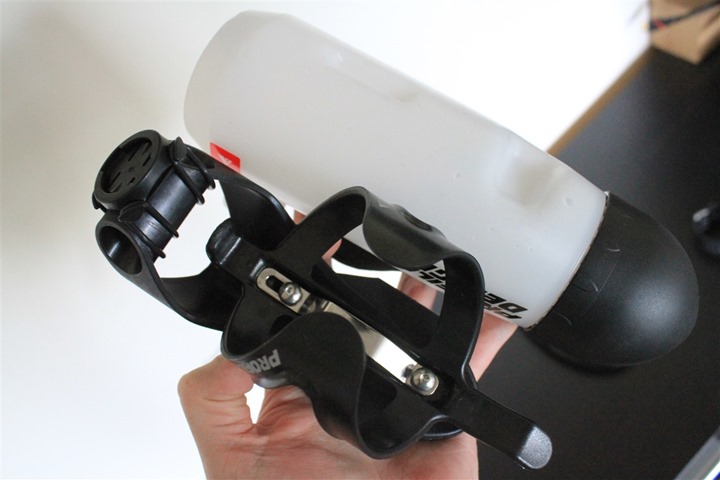
Here’s the bracket system:
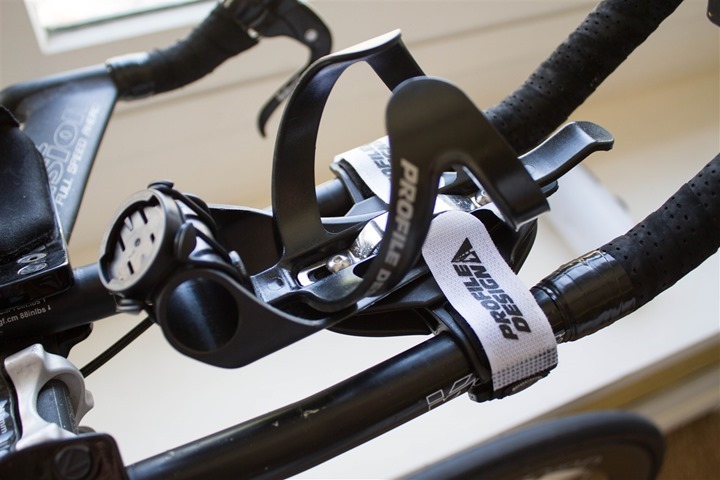
And a closer look at the bike computer mount. Note (PLEASE!) that the Edge quarter-turn mount is something I’ve added on top of it. You’ll have to add your own mount to it.
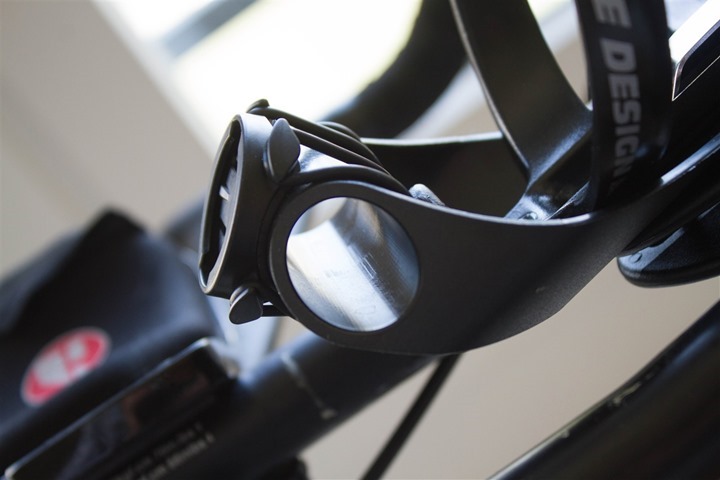
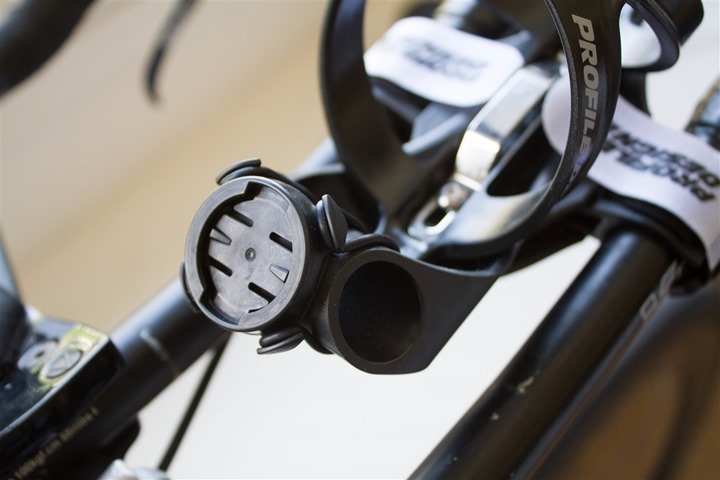
And finally, the whole thing just sitting there:
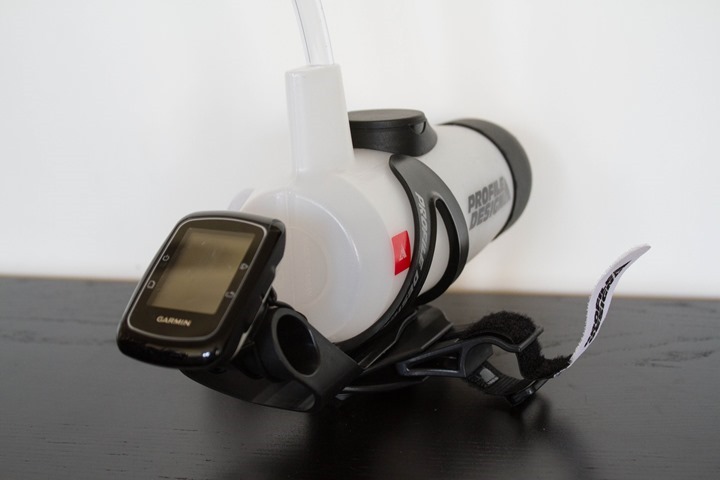
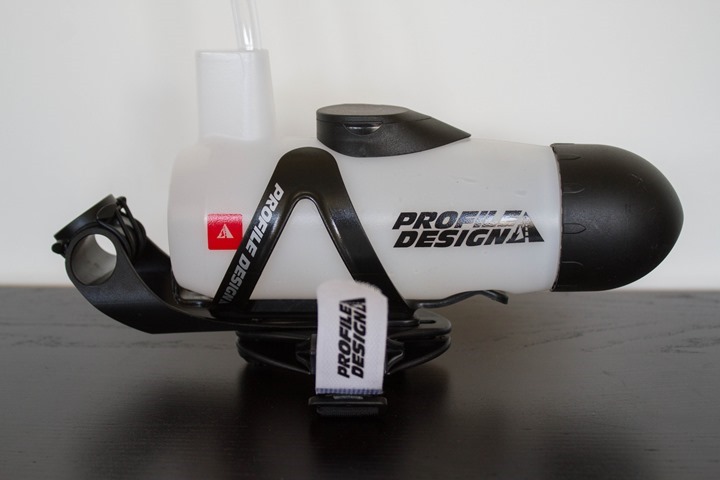
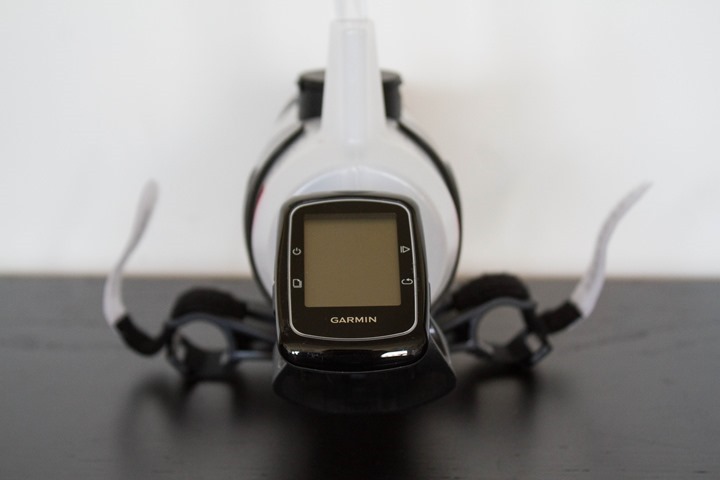
With that, let’s get onto installation.
Installation & Configuration to bike:
Installing the unit is pretty straight forward. First up, you’ll need a hex wrench. Given you have a bicycle, you likely have a hex wrench.
With that, there’s two bolts of note, or rather – two bolts in total. They control two different items. First is the front/back sliding of the computer mount. And second is the width of the wings that clamp onto the bars.
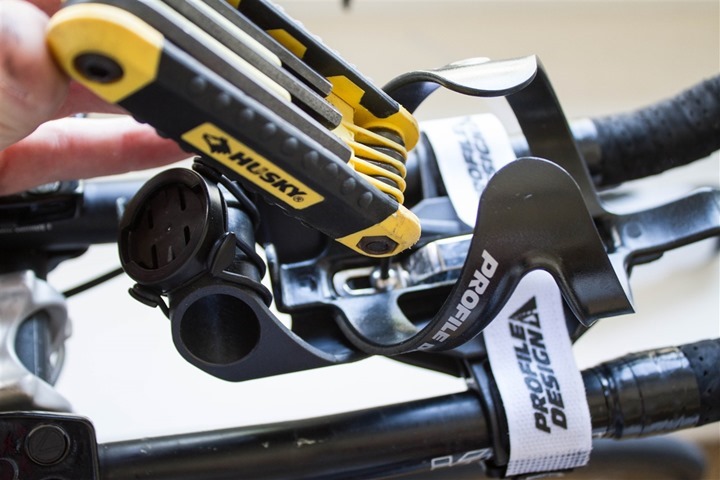
You’ll go ahead and hook the wings onto your aerobars. This is done using simple Velcro on the wings. And this works fairly well:
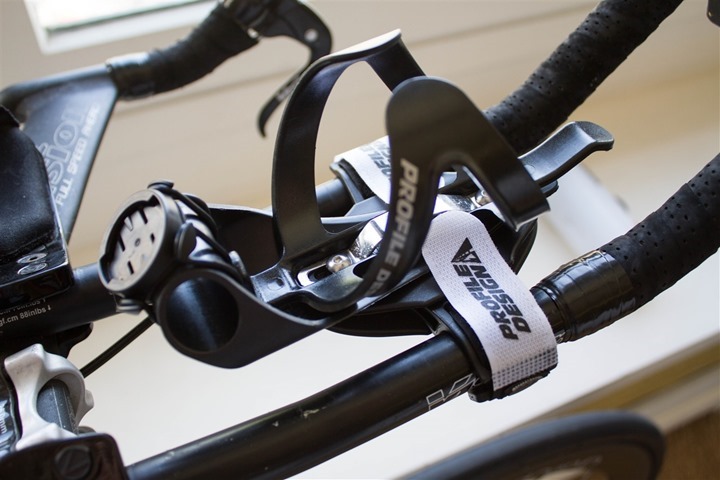
The challenge I ran into here though was that the wings have a minimum width – and my bars were configured in a more aggressive position (read: tighter together). As such, they didn’t fit at first. This required me/us to increase the width of my aerobars – which ultimately would have an impact on aerodynamics (more on that later).
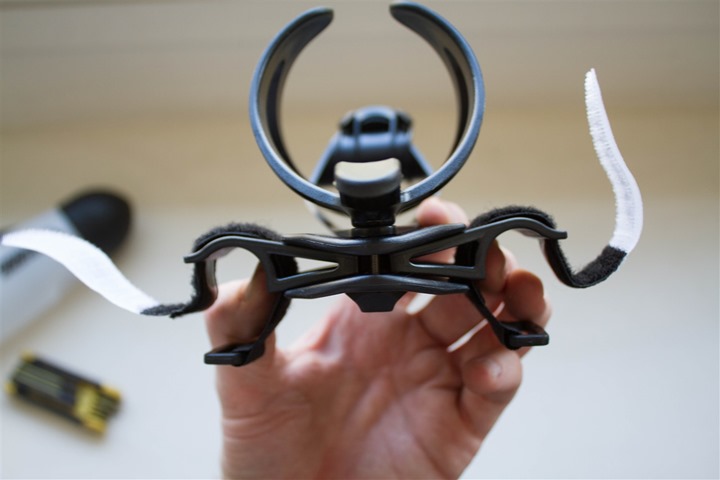
Here’s the minimum they go:
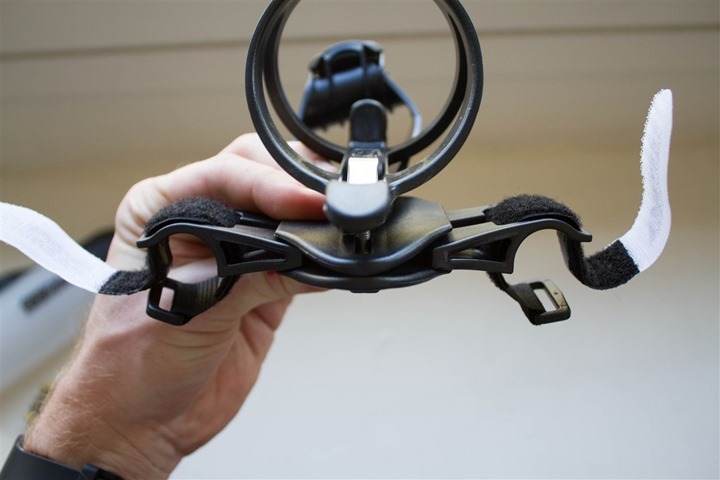
And the maximum they go:
Once you’ve got the bracket in there, you’ll simply tighten up the two bolts to lock everything in place.
One item worthwhile noting is that you’ll see a small silver strip. This strip pops up into the aerobottle, which has a notch on the underside. This helps to keep the aerobottle sitting upright and straight, versus potentially rotating around. Note however that any water bottle can fit into this slot, as then the little metal piece simply presses up against the bottle helping to keep it in place.
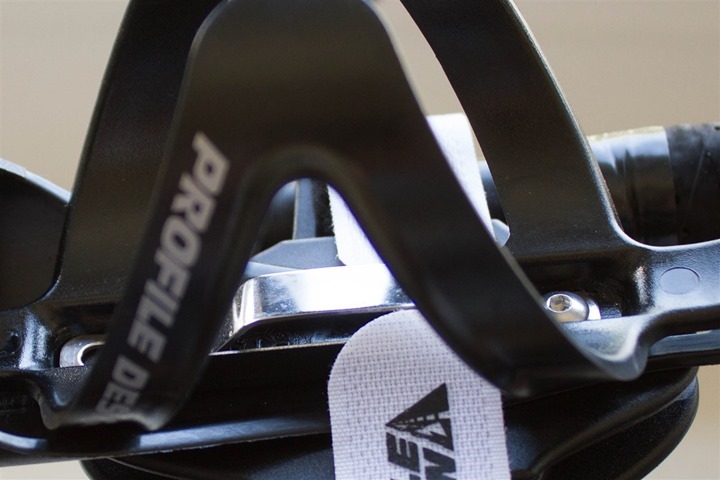
And you can see that bottle cut-out below:
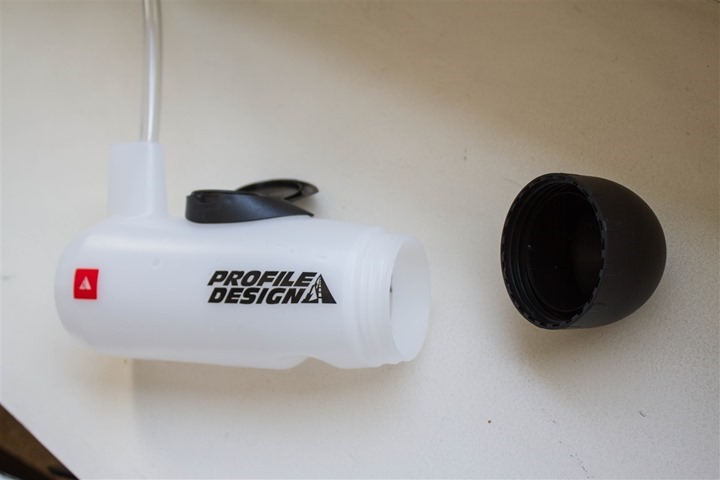
Now that we’ve got everything in place, let’s take a look at usage.
On-Bike Usage and Notes:
Once you’re up and riding, the first thing you’ll likely want to do is drink from the unit. The handy dandy straw is your friend here. As noted above, the straw given to me wasn’t the final production straw – but pretty close. The final production straw will be just a touch more rigid.
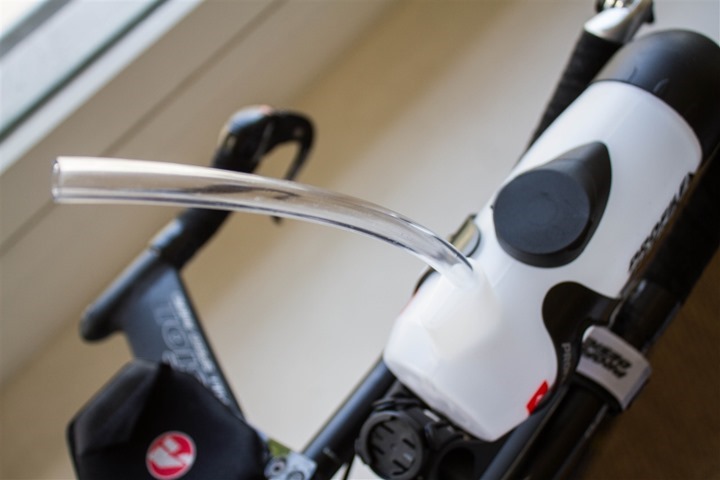
The straw doesn’t bend too much within the bottle, so it just goes down to the base (some straws will bend and lie flat). That’s fine though, I had no issues getting out virtually all of the liquid in the bottle.
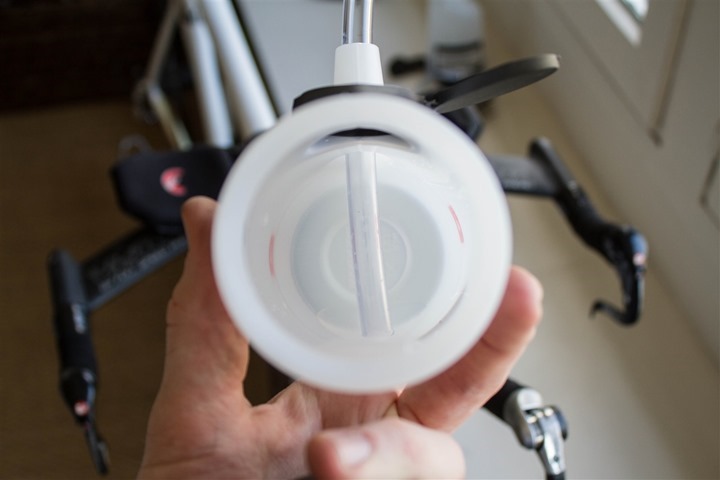
When it comes time to refill the bottle, you simply pop-open the little cap on top and pour it in from your source bottle.
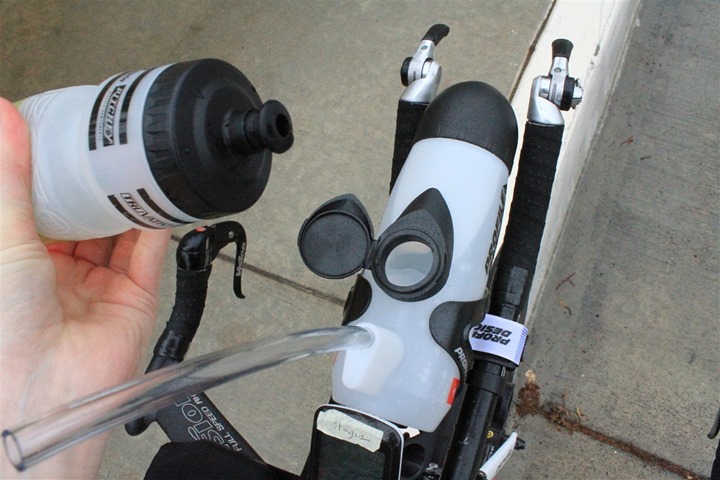
The hole is pretty big, so there’s no issues in missing. But it’s not overly large that liquid sloshes out while you’re doing this if you hit bumps. The bottle holds 28oz, which is about as big as any water bottle you’ll find (most are 24-28oz, with 28oz being the absolute max).
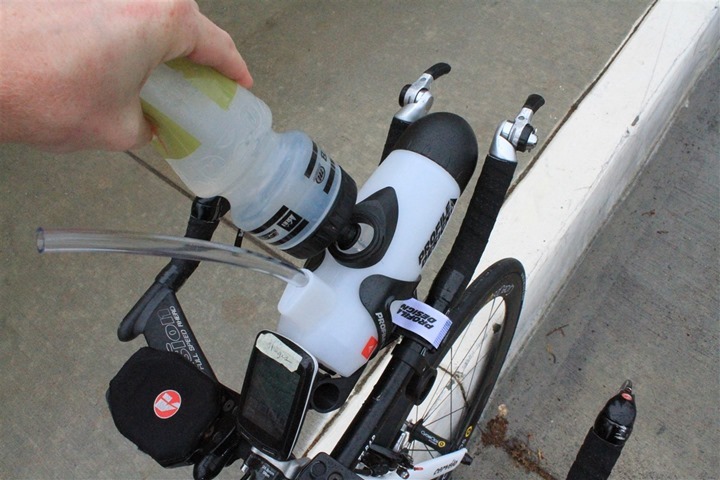
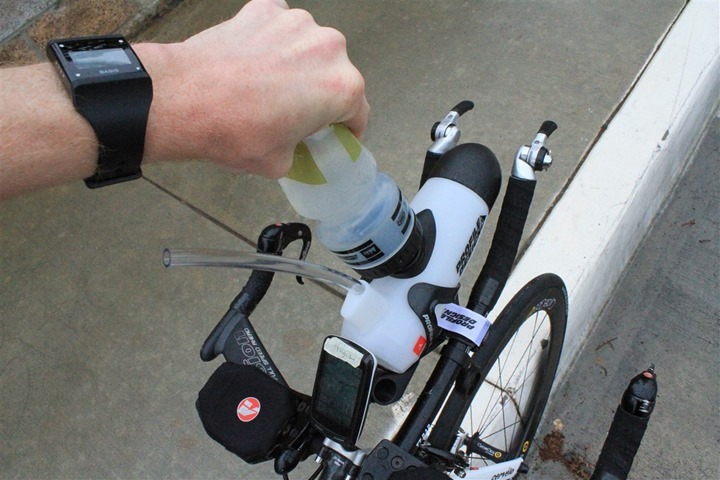
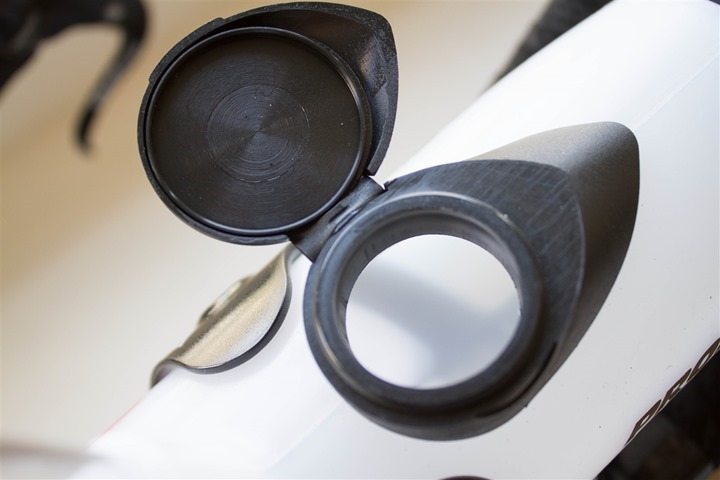
The cap itself is sturdier than it looks. The Profile Design team noted that some folks have expressed concerns about the cap and potentially breaking off. They said in their testing with real-life triathletes acting as beta testers, they haven’t seen any issues. Obviously, time will tell on that one – but it does seem sturdier than it looks. The little rubber hinge is actually fairly firm and thick rubber:
Next, the most important piece for why I’d be writing about it here: The bike computer mount. We’ve already covered the actual install/configuration piece, so now it really just comes down to usage.
And that’s where everything kinda falls apart.
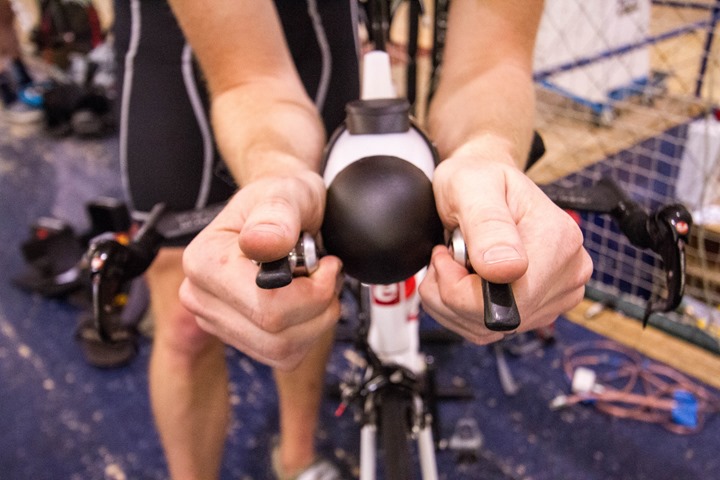
See, while it’s a great holder, I can’t actually see the computer screen from where I am. In aero position, even with the bottle slid fully forward, the bike computer simply isn’t visible without completely ducking your head down and pulling slightly back. You can kinda understand this relationship below. This is inside on a trainer, because it was easiest to get good photos of.
In this configuration, the bottle and bike computer mount is as absolutely far forward it would go.
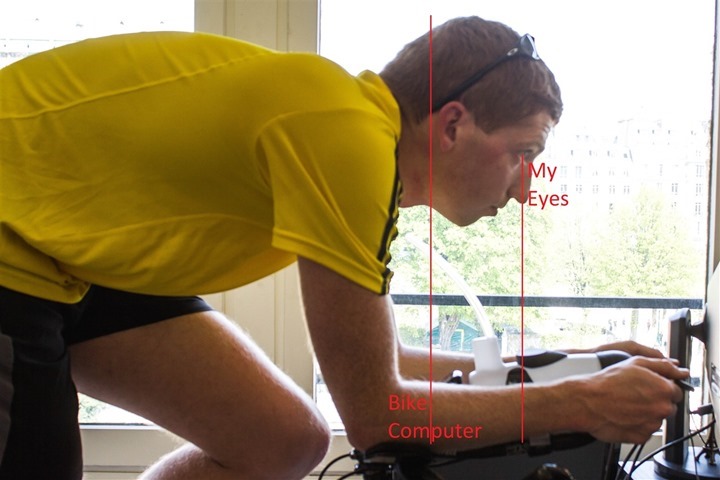
As you can see, my head is forward of the unit already. If I place my head down and look back towards myself, I can see it. Otherwise, no love. And doing that frequently means my aero-helmet is going straight up in the air.
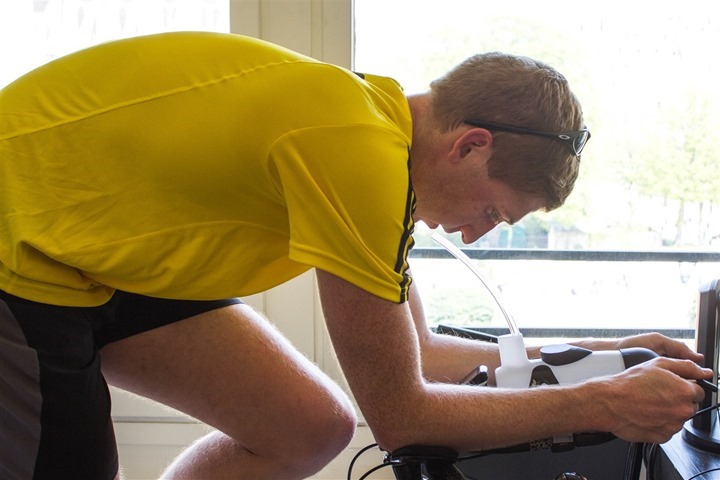
Again, yes, the unit is adjustable forward and back – but your limiter here is the bottle pushing up against the aerobars. In other words, you can only put it so far forward. Here’s the difference between the furthest forward and furthest back it goes:
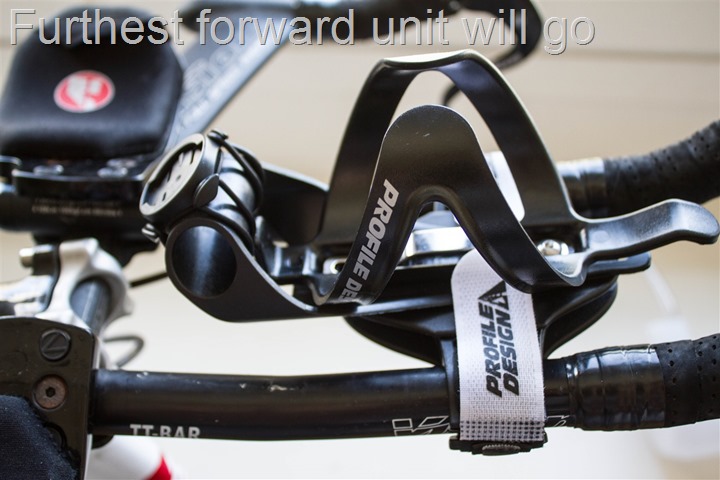
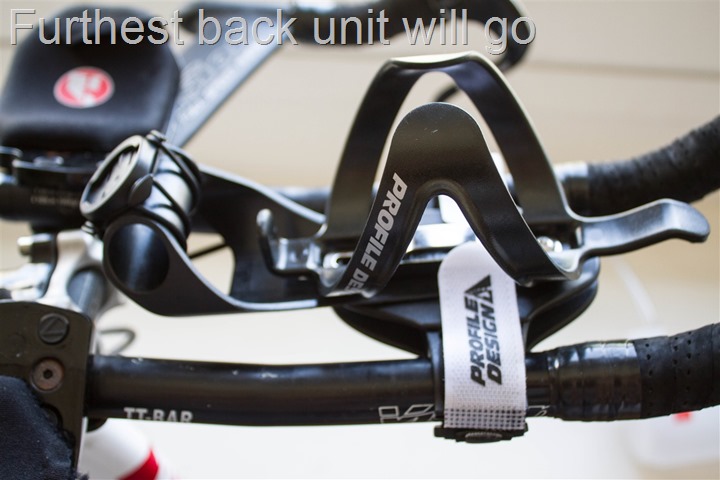
So while I love the idea in theory, in execution it just doesn’t really work unless you’re sitting up. And of course, that sorta defeats the entire purpose of aerodynamics.
Finally, the unit is dishwasher safe. That’s just a simple requirement for just about any food related item in our household.
Aerodynamic Testing:
This is the first time in a review that I’ve had a section on aerodynamics. And before I get into it, I do want to point out something important: Aerodynamics only matter if you don’t bonk first. Meaning, in a long distance race such as a half-Ironman or Ironman your first priority should always be nutrition over aerodynamics. Because quite frankly if you don’t get in nutrition, you’ll burn off more time limping along than any fast bike components will help you.
Thus, whenever you look at triathlon focused nutrition accessories, you have to understand that most do come with a penalty. But the question is, how does that penalty compare with other offerings – and how does that penalty compare with not remembering to take nutrition because it’s ‘out of sight, out of mind’?
With that…
The second item of note is that this is not only the first time I’ve included aerodynamics in a review, but also the first time that I’m including MY OWN aerodynamics testing in addition to the manufacturer supplied testing. Yup, I did aerodynamic testing of the unit while riding with it. A small preview of that experience here.
As I noted previously, it’s INCREDIBLY important to note that in aerodynamic testing the results really are highly personal. As we showed on the track with other products, for some people they work great, and for others not at all. Your body, your bike, and a lot of other factors impact that. I know that the vast majority of folks will probably still ignore everything I’ve written in this section – but I feel at least compelled to note it.
My Aerodynamic Testing:
As I noted in the initial configuration, we had to open up my aero position (read: increase the width between my aerobars). As a result, we ended up doing additional re-baseline passes of my aero position. This was to be able to compare the pre-position change, then post-position change, and then the difference when adding in the water bottle. Note that because the straw wasn’t final, we actually left it out in the testing. It’s well known the straw would have made the situation worse, so keep that in mind.
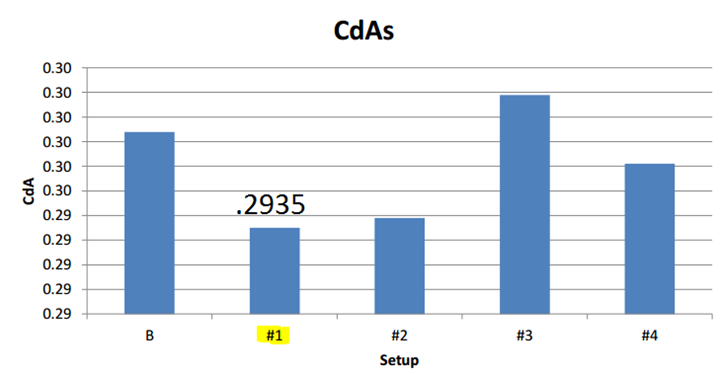
First up, the numbers prior to changing my position to accommodate the aerobars, they’re in column #1 (not B). In case you’re wondering ‘B’ was a run with just a regular non-aero helmet.
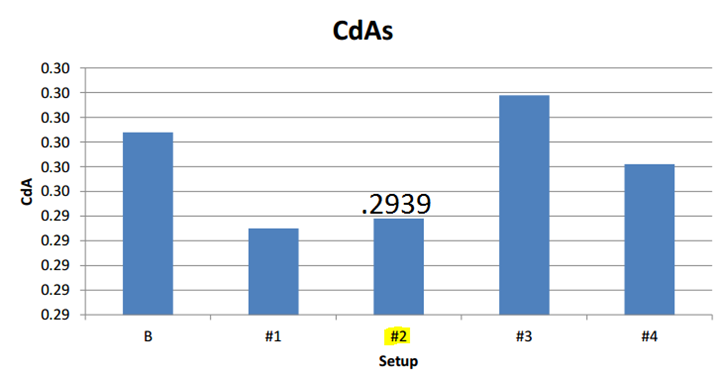
Now, here’s how things looked once we changed the aerobar separation width to accommodate the bracket system.
I should point out that these numbers are actually the average across the median subset of 13 laps that I did with each setup:
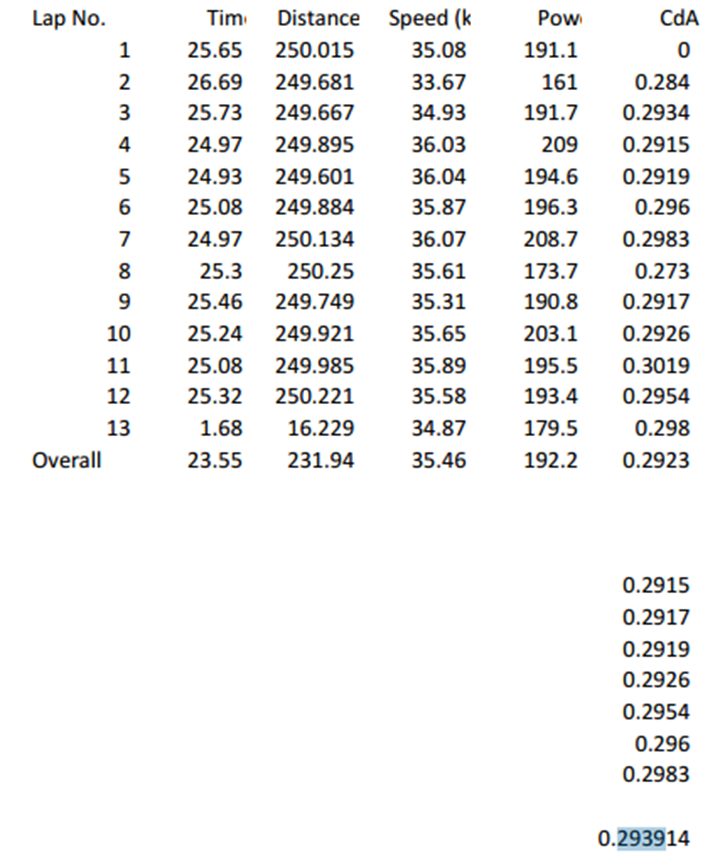
Each test set is done the same way. They all start off with calibration laps, and then they get into the normal laps.
The reason we did 10+ laps each is simply that I’m human. As such I’m not a robot and it’s plausible that no matter how hard I try there may be tiny variations lap over lap in my body position – despite my attempts at making things look exactly the same.
Next, we’ll add in the Profile Design Aero HC system, as we did that, here’s what the numbers looked like:
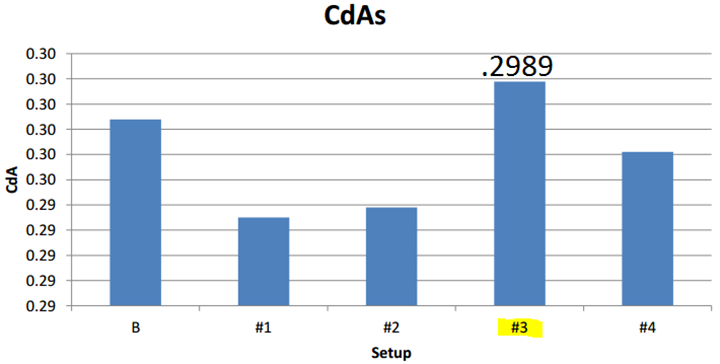
This was the biggest jump of the day – pretty significant actually.
Again, we see an increase in drag of 0.005. Of course, in most cases anytime you add something to the bike you’re going to see a jump on drag. There are exceptions of course, but in general – the more things for wind to hit against, the more it’s going to impact your performance.
Next was the question of was it the bottle or the bracket causing the drag. So, we swapped out the bottle for a standard water bottle that was just sitting on the sidelines.
And then ran the test again:
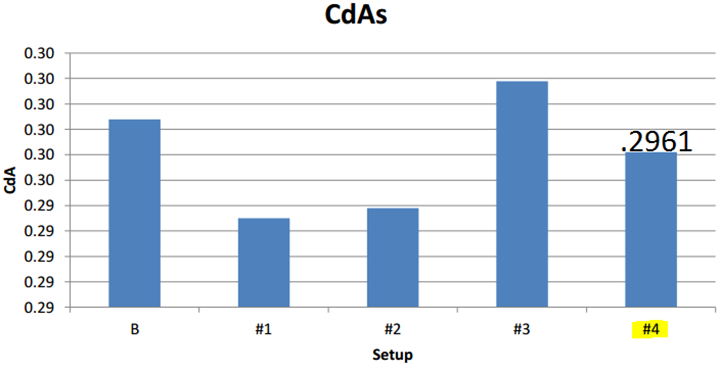
Very interesting. The bracket definitely causes drag – but so does the bottle. About half of it comes from the bottle, and half from the bracket.
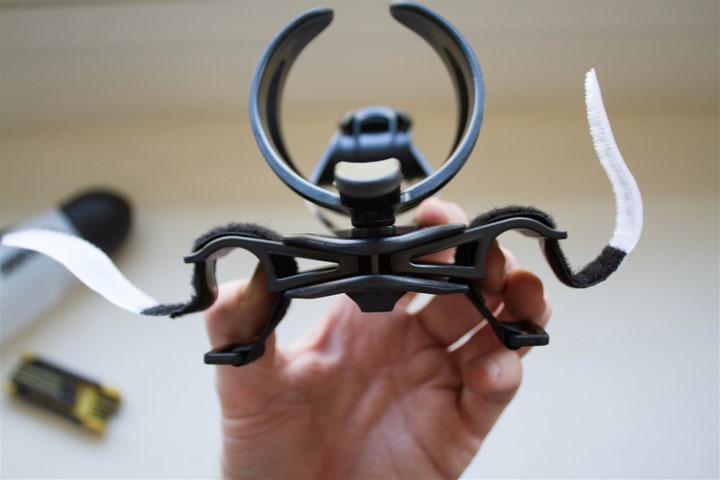
Looking at the bracket, you can fairly easily see why. The front edge of the bracket is hardly aero. In fact, it’s a bit of a thick compilation that looks more like a cheeseburger than a wing. This is due to the semi-complex interlocking plate system that’s used to lock everything onto your aerobars. In talking with the guys helping me with the aerodynamics testing, this is a pretty big drop in aerodynamics. Not exactly ideal.
Now what does this really all mean in actual performance? Well, here’s some numbers that were run:
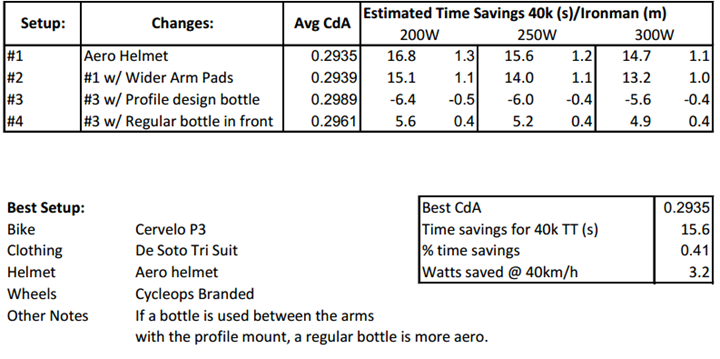
As you can see, the fastest setup was a barebones time trial bike. By increasing the width of my aerobars to accommodate the bottle, I took a hit. Then I took another hit when using the whole setup. I reduced my ‘disadvantage’ though by swapping out the bottle for a standard water bottle.
If you look at the time savings, you’ll see that in an Ironman we’re talking a fairly small amount though – roughly about a 1.5 minute hit to have the nutrition up there in this particular configuration (again, I only tested this setup). A minute is nothing in an Ironman – even for the top Kona pros. What is far greater is the impact of not taking nutrition, which can in the blink of an eye go from one minute to tens of minutes or even hours in an outright bonk situation.
Of course, as I noted above, this is just a test of me on my bike. There are many things tested on a bike where the individual rider greatly impacts the aerodynamics (i.e. a helmet) of the entire situation. However, for the most part, this is almost exclusively forward of the rider, thus there’s very little that’s likely to change person to person in this case. Bike to bike may change however, but this particular component is forward of almost the entire bike as well.
Manufacturer Supplied Testing:
Next up is the Profile Design supplied wind tunnel testing. This testing compares the Aero HC system to other systems made by Profile Designs line. Below, you can see their results.
Test Results Part A: Aero HC, Aerodrink, BB Brckt/KA1

For clarity, these are the systems being compared. The key difference between the Aero Drink and the BB/KA1 is the base bracket system vs just rubber bands.

Looking at these first results, we see that the fastest setup is no hydration at all on the front bars. The slowest option would be the old-school Aerodrink system. The Aero HC sits roughly in the middle of those two. Neither fastest or slowest.
Test Results Part B: Aero HC, HC Mount/KA1, BB Bracket/KA1

And again, the systems being compared for visual reference:

Like before, there’s more drag with the Aero HC than no hydration system at all. And the Aero HC in this case was on par with the HC Mount system.
Now, what these tests (neither mine nor theirs) tell you is how it compares to other products. I didn’t test other products that day unfortunately, nor did Profile Designs supply testing against competitor products. Within the Profile Designs supplied tests, a Scott Plasma bike with Profile Design Armada 24 wheels and a Profile Design Aeria bar was used. Note that no rider was used (just the bike by itself).
Summary:
The Aero HC is one of those products that I really wanted to like. It seemed like the perfect idea to solve two problems: Aerodynamic water bottle placement on aerobars, and bike computer mounting.
Yet, it sorta failed to do either. In all honesty, I can somewhat get past the idea of it being less ideal aerodynamically – because at least I would be getting in both nutrition, as well as being able to cleanly pace via power or some other metric for long distance racing (both critical to success at long course triathlon). And in fact, it’s probably the easiest aero-bottle I’ve drank from or refilled (as well as the cleanest system). But since I can’t even see the bike computer, that pretty much kills the benefit of it.
Now, do keep in mind that everything here is heavily applicable to my fit – and my be different for yours. This is an excellent example of a time to support your local bike shop and go there with your bike and ask to see how it fits with you. If it does fit and you can see your bike computer – than perfect!
Ultimately, I don’t really have any good suggestions on how to address the issues with my fit. Flipping it around would solve the readability issue, but make the aerodynamics issue probably far worse. It’s almost like the bottle needed to simply have a quarter-turn mount built right onto it and then inset a bit – so it could accept the Garmin Edge and Forerunner 310XT/910XT quick release units. That would likely have fixed the readability issues (though increased compatibility issues). In talking with the Profile Design folks – they did actually consider this, but were concerned about compatibility issues of both the system as a whole, as well as the flexibility of the system.
As always, if you’ve got any questions – feel free to drop me a note below in the comments and I’d be happy to try and answer them.
Thanks for reading!
