A look at CompuTrainer ANT+ integration via ctANT+
On Wednesday an application developer jumped onto the scene with what is probably the coolest new completed CompuTrainer development in years: The ability to use ANT+ sensors directly with CompuTrainer. This replaces much of the cabling that is typically required when setting up your bike. I say ‘completed CompuTrainer development’, because while RacerMate One might also fall into the ‘development’…it’s still not yet completed – a year after it was first announced. So let’s focus on the ctANT+ application, which allows you to connect those ANT+ heart rate straps, cadence sensors and even power meters. But why would you want to do this you might ask? Well, for many users of the CompuTrainer, they likely have cadence sensors that are already on their bikes, and probably ANT+ ones at that. The challenge is that each time I want to use the CompuTrainer I have to finagle the wired CompuTrainer cadence sensors (with those 10’ long wires) onto the frame, moving my other normal ANT+ cadence sensor out of the way (the one I use outdoors). While this isn’t exactly a show-stopper, it is one of the biggest gripes for most CT users. Add to that the heart rate strap reliability issues for many users. And while the latest HR cable that does address some of those issues, this removes the HR cabling altogether. Finally, for users and operators of multi-user CompuTrainer centers (the ones where you go to a location and ride against others), this allows them a much easier setup and pairing process – allowing them to save and setup ANT+ accessories wirelessly. But we’ll get into that more in a bit. First, let’s get this puppy installed! To do so, you simply download the application from their site. You can download a free fully functional trial version that works for 5 minutes before exiting – to test everything out. Or you can pay for the non-time limited version. For the purposes of this post, I just used the free trial version. After downloading, just walk through the steps to install, it takes about 2 minutes:  During the install it’ll make an educated guess at your COM port configuration. For most of you, this will be automagic, but for others (like me) it might take a bit of poking to get it all settled out. Once I realized the trick was to change the two ports it wanted to use initially to something that the CT wasn’t already using (I ultimately selected 15/16) then life was perfect!
  Now’s a good time to mention that this application leverages the usual ANT+ stick that comes with almost all of the more advanced Garmin Forerunner watches (FR310XT/FR610/FR405/FR410). If you don’t have the stick, no worries, you can pick one up for about $30 off of Amazon.
  With that all set, we’ll go ahead and get the ctANT+ application all started up. Once you’ve done that, you’ll be brought to the main screen, which looks like below:
  From here we’ll want to get everything all configured, so I’ll head into preferences:
  This is where I can manually add sensors (though you can also do automatic ANT+ pairing), and adjust settings. It’s in here that you’ll want to change the last dropdown box listed to be that of the CompuTrainer’s normal COM port. Essentially your tricking the CompuTrainer software into thinking that the application is the CompuTrainer handlebar unit. In turn, when you go into the CompuTrainer software (be it Coaching Mode, 3D Mode, Real Courses, etc…) you simply tell it to use the port number listed in the 1st of three port boxes below (15 in my case):
  When it comes to sensors, you can either manually add them if you know the sensor ID, or you can do automatic pairing just like on a normal Garmin head unit. Since I was in a room with my fiancée as well and her bike and HR sensors were around, I simply added the ANT+ ID’s in manually, which worked great. I just read these off of my Garmin unit, which lists sensor ID’s. You’ll note that I can name the sensors whatever I want, that way later on if I have different rides with different bikes/sensors I can simply use the drop-down boxes in the application to change the data streams.
 With all my sensors added, I’m pretty much ready to roll. In my case I also added my ANT+ power meter into the mix. There’s really no specific power related reason to do this as the CT itself measures power. In my case though, I let it use the cadence provided by my power meter (Quarq Cinqo) instead of using a dedicated cadence or cadence combo sensor, such as the GSC-10. The application supports both dedicated ANT+ cadence sensors, as well as ANT+ combo speed/cadence sensors. The GSC-10 is considered a combo sensor, as is the Bontrager DuoTrap that works in Trek bikes.
  Note that speed won’t be used from the GSC-10 though, and instead it’ll use the CompuTrainer speed via the resistance unit. Which makes sense, since that’d be more accurate and absolute anyway. Now that we’re ready, let’s press the Active button to get things cooking – you’ll immediately see my ANT+ data streamed into the application, per below.
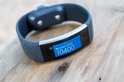
  Look ma, no cadence or HR wires!
(Only the handlebar to PC wire and the trainer wire is connected)
Now that we’ve ctANT+ working, we simply launch the CompuTrainer application that you want to use. Typically, I hang out in Coaching Mode – so I launched that. For the purposes of this screen shot I placed the ctANT+ application onto the Coaching Software application, normally it’s hidden.  You can see above that the HR (left pink) on the CS application (in background) matches that of my ANT+ driven HR in the ctANT+ application. Same goes for cadence (left yellow number) and power (upper left green). The lower green power (180) is the load the CT was generating at that exact second – basically what I set via the handlebar unit. Btw, the handlebar unit functions work just like normal (Stop/Start, Increase/Decrease, etc…). Finally, along the bottom you’ll notice a little pop-up that shows the ANT+ data values as well. You can turn this on or off if you’d like. I like it as it’s a nice little reminder that everything is happy.
  If you happen to use other apps – like the 3D application (chasing the little man!) or the Real Course Videos, it works flawlessly as well:
  Essentially the ctANT+ works by simply putting itself in between the handlebar unit and the standard CompuTrainer software acting as a middleman (which btw, also works with Erg Videos). So it feeds in the ANT+ data in a way that makes the CompuTrainer software application believe that it’s just regular sensor data. The developer has also noted that once RacerMate One comes out, if it requires any changes, they’ll release an update for free. All in all this is a sweet application. Though to be frank, it’s also functionality that I’ve long since said that RacerMate should have added quite some time ago. Also note that one caveat is that Spinscan won’t work with the application, though I suspect that’s probably not a huge deal for most users. Outside of that, everything else works just as normal. As for the future of the application – I think there’s lots of cool potential. In talking with the developer, he notes that he’s working on a variant that will work with larger CompuTrainer multirider setups for large facilities, allowing you to do an all ANT+ configuration and avoid the messiness of cadence and HR sensor wires.
  If you want to give it a whirl you can download the free trial version, steal a neighbors USB ANT+ stick (if you don’t have one), and be up in running in a few minutes. Once you validate it works, it’ll cost you $50 to buy the application long term. A bit pricey, though compared to the cost of the CompuTrainer at $1,400+, somewhat a drop in the (big) bucket. For me though, I’m happy to pay the $50 for this functionality (and just did after writing all this up) – just wish I had it years ago! Enjoy, and thanks for reading!